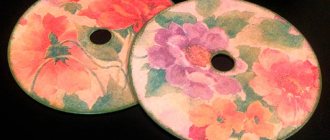
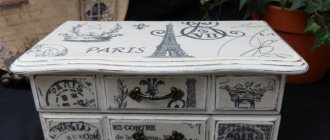
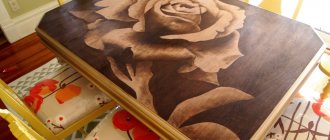
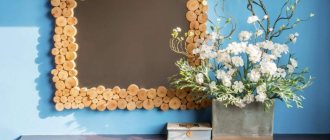
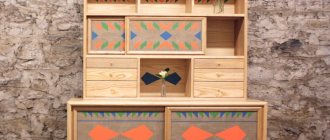
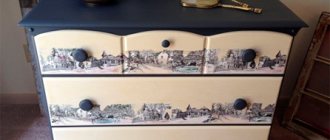
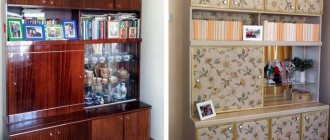
How to easily and inexpensively update already very boring furniture with your own hands - decoupage it. This article will tell you how to make design masterpieces from grandma's chests of drawers and country chairs in a few hours.
If a typical and outdated set remains from Soviet reality, there is a simple and inexpensive way to give the old “wall” a new life - furniture decoupage.
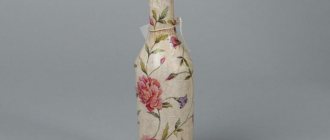
Interesting: the word “decoupage” itself comes from the French découpage, which means cutting. This word refers to the technique of decorating various objects (not just furniture) by attaching a carved ornament or design to the object, and then coating the resulting composition with varnish (for safety and durability).
Varieties of decoupage techniques
To give the furniture elements a new effect, various decorative elements are attached to the surface of the objects with your own hands. There are several types of decoupage techniques.
- Standard. When performing decoupage using this technique, cut out pictures are used. All you have to do is glue them to the base using glue. After the picture has dried, a colorless varnish is applied to the surface.
- Reverse. Most often, this technique is used when decorating glass.
- Artistic. It is based on cutting and gluing an image with mandatory manual drawing of shadow effects.
- "Decopatch". You can often hear about it “torn edge.” This technique involves manually tearing various materials and gluing them to a base.
- Volumetric. Using this technique, the effect of a real painting is created using images cut out from napkins.
Kinds
To list all the varieties of decoupage, perhaps there are not enough fingers on both hands. The following design styles are popular:
- shabby chic - with floral patterns and a worn effect in light colors;
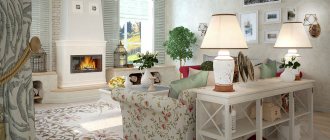
- Provence - creates the effect of French antiquity;
- in vintage style - the main technique here is artificial aging;
- in ethnic styles - ornaments characteristic of a particular country are created;
- Simple City - here products are decorated with improvised means: newspapers, children's drawings, and so on;
- in country style - this creates rustic comfort in the house;
- in Victorian style - in the spirit of timeless English classics.
This is about styles. There are also a lot of technicians. There are many master classes on furniture decoupage, including videos. So, if you wish, you can master all the styles and techniques of decoupage. Next, let's get acquainted with each decoupage technique in a little more detail.
Classical
This is the founder of the entire trend, as well as the simplest technique of decoupage on furniture and other objects. A picture or ornament is cut out from a napkin, rice paper or a printed image. Decoupage cards are also used. The surface for decoupage furniture is pre-prepared. Can be cleaned, degreased, primed or painted.
An image is applied to the dried surface and coated with a PVA glue or acrylic brush. In this case, you need to properly level the paper. With classic decoupage, the picture is not applied to the glue, but is impregnated with it on top. That is why types of paper that absorb glue well are used for decoration.
The pattern fits ideally on furniture made of chipboard or solid wood. We also carry out decoupage of doll furniture made from plywood or plastic.
After gluing, the image must be dried and then varnished in two layers. Between layers, it is better to resort to a polishing procedure to ensure that the finished product is smooth. The classic technique is suitable for beginners due to its simplicity.
Back
Suitable for decorating transparent objects. Unlike the classical method, the ornament is attached to the back of the object. A good way to decoupage kitchen furniture with your own hands is if the cabinet doors have glass inserts. This way you can decorate a glass table.
Here everything happens in reverse order. Here's what it looks like step by step:
- the picture is glued;
- a background is applied to it - after all, the image will be visible from the back of the object;
- varnishing is carried out over the background.
If any additional decor is used, it is glued at the beginning of the process, before the picture or simultaneously with it. The details of the picture can be drawn with a thin brush for clarity of the picture.
Do-it-yourself reverse decoupage is no more difficult than classic decoupage. In addition, with its help you can not only refresh glass furniture, but also disguise its minor defects.
Art
Here, complete images are created that imitate painting. In this way, you can make both decoupage on furniture and other interior items, as well as independent paintings for home decoration.
Artistic decoupage is the most difficult of all. Before starting it, it is better to get your hands on classical and other, simpler techniques.
The picture is pasted here in the same way as in the previous techniques. Decoupage cards and napkins are used. The difference is that the details of the image are drawn and completed so that it merges with the background and becomes a single whole.
Often used when the cut out element is too small for the surface to be decorated. Therefore, you have to fill in the missing details, and so that they look like a single whole with the element cut out of paper. To achieve this effect, you need to have artistic skills and be good with paints and brushes.
Decopatch
In this case, small pieces of special paper are used for decoration. This paper is thin and usually has multi-colored ornaments and patterns. The method is good for updating old furniture, because scraps of colorful paper can cover all the defects.
Decopatch is compared to a patchwork quilt, only made of paper. This technique is suitable not only for making decoupage of old furniture with your own hands, but also for making cute figurines in an ethnic style. For example, animal figurines. An interesting option is when newspapers and magazines are torn into pieces.
A type of deco patch is lamination, or laminate. In this case, pieces of paper or fabric, dry leaves and other decorative elements are impregnated with acrylic varnish and glued to the object. After drying, you can obtain a smooth, shiny laminated surface. The strength and water resistance of the coating allows this technique to be used on polished furniture.
Casting shadows
This technique is used to create a three-dimensional effect in a picture. In this style, decoupage turns out to be very interesting from an artistic point of view. Shadows are created with acrylic paints. To do this, light shading is done around the glued motif using a dry sponge or semi-dry brush. This haze is created by paint of a darker shade than the color of the picture. You should pick up just a little bit of paint onto the sponge.
The picture must dry thoroughly before adding shadows. In order to reduce the risk of errors, it is better to cover the motif with a matte protective varnish. In this case, if the varnished surface gets stained with paint, it will be easy to wash off.
Shade paint doesn't have to be gray or black. Interesting options are when it is the same shade as the color of the picture, only darker. For example, a dark blue shadow for a light blue vase. Using this technique, you can make even the simplest ideas interesting.
Craquelure
Eggshell furniture decoupage can turn ordinary items into vintage ones. The shells create a cracking effect. This technique is called craquelure. Chicken egg shells are glued in small pieces onto the painted surface. It is better to choose a dark background so that the space between these pieces is more noticeable.
Here are the step-by-step instructions:
- paint the surface with acrylic paint and dry it;
- Use glue to attach the shell pieces. The gaps can be made barely noticeable, or they can be wide, at your discretion;
- stick napkins or decoupage cards on top;
- if necessary, draw, cast shadows, and so on;
- Cover the dried motif with varnish.
Egg craquelure is the best way to restore old furniture. The shell covers the surface with a dense layer, reliably hiding all defects. There are also special craquelure varnishes that, when dry, form a network of cracks in the picture.
Volumetric decoupage
Volumetric decoupage is the most interesting way of decorating. Lots of ideas here. This is decoupage of furniture with lace, when openwork motifs are glued. Using decoupage furniture with fabric allows you to give surfaces an unusual rough texture. In addition, other volumetric elements can be used.
If napkins or decoupage cards are used, the motif is cut out in several copies to add volume. These pieces are glued on top of each other so that the resulting image protrudes above the surface to be decorated.
Decoupage with fabric can transform both large pieces of furniture and small interior details. The fabric is laid in folds, which are fixed “tightly” with glue. Just like craquelure, this is an excellent restoration of old furniture without much expense and a way to transform the interior of your home. In this way, it is even possible to decoupage a polished, peeled surface.
Provence
This style came to us from France. It implies a snow-white background with pastel images applied.
Modern designers often dilute it with floral motifs.
A little history
Decoupage (decoupaqe - cut out) is one of the unusual decorative techniques. Its essence lies in cutting out all kinds of images from various materials (paper, fabric, napkins, leather, etc.) and gluing them onto the surface to be decorated (wood, glass, dishes, etc.).
For safety and durability, all this beauty is covered with acrylic varnish in several layers.
The origins of decoupage lie in the Middle Ages. It was first recognized as an art form in Germany in the 15th century, where carved images were used to decorate furniture.
Fascinating decoupage of cabinets using the crackle technique
Decoupage became especially popular in the 17th century in magical Venice. Then furniture decorated with inlays (patterns of colored stones, wood, marble, metal, etc.) in Japanese and Chinese styles came into fashion. Venetian craftsmen skillfully cut out pictures and decorated furniture with them - this is how they imitated expensive oriental inlays. The price for such products was much cheaper, and the demand was very high.
Towards the middle of the 19th century, decoupage fell in love with the people of almost all countries, but in Russia interest in it awoke only at the beginning of the 21st century. Now a variety of materials and computer innovations have been added to traditional technology, which has opened up limitless scope for creativity.
French vintage
It involves applying black and white images to objects.
Surface preparation
Before decorating, the base of any item must be properly prepared. Each material has its own individual cleaning method:
- Glass products must be degreased. To do this, the surface is washed, dried and wiped with lint-free wipes. Then degrease with glass cleaner without using dyes.
- Tin surfaces are treated with a prepared water-acetic solution. The components are mixed one to one. After treatment, the surface is cleaned with a metal brush to remove the top layer of the old coating.
- Wooden surfaces are sanded with sandpaper.
Pros and cons of modification
The advantages of the decoupage technique are as follows:
- there are no large expenses to completely transform the product;
- the work does not require special skills, a good result can be achieved the first time;
- independent decision on color and ornament allows you to realize any wishes;
- there are no irreversible consequences; if desired, the furniture can be modified again.
There are also disadvantages:
- furniture becomes unstable to mechanical damage and intensive use;
- work (especially the first times) can take a lot of time and effort;
- the decorated surface should not be rubbed with hard sponges or treated with strong household chemicals;
- the result depends on the quality of workmanship and materials.
Restoring a table with wallpaper
We will decorate the table in a modern style.
Step 1. Prepare the base of the table: clean, sand, replace faulty fittings.
Step 2. Apply white primer to the entire surface of the table and drawers.
Step 3. Sand and apply a layer of gray paint.
We recommend reading:
- DIY table: review of the finished drawing, assembly diagram, choice of material and dimensions (98 photo ideas)
Do-it-yourself upholstery of upholstered furniture: photos of ready-made options and examples of modern design
- Do-it-yourself upholstery (upholstery) of chairs: 100 photos of ready-made options and unusual designs
Step 4. According to the size of the facades, we cut out rectangular parts from wallpaper with a dense texture. Glue it.
Step 5. After the glue has dried, cover the entire surface with dark-colored varnish.
Simple City
Laconic and light, this style allows you to use newspaper clippings, geographical maps, and photographs in furniture design.
Note!
- Do-it-yourself wardrobe: a review of ways and methods on how to build a stylish and original wardrobe (video and 145 photos)
Do-it-yourself furniture restoration - removing chips and scratches, restoring surfaces. Instructions with photos and video tips
- DIY ottoman: how to make it at home. The best ideas, master classes. Photo + video review of beautiful ottomans
We transform the interior door into an “old fashioned” one
Step 1. Prepare the surface: sand with sandpaper and remove old paint. When decorating MDF surfaces, there is no need to prepare the surface.
Step 2. Prime the door in 2 layers using a dark primer.
Step 3. Paint the prepared door with white acrylic paint. You can choose a different color. White as a base looks ideal as a background for any images on it.
Step 4. After the acrylic has dried, go over it with sandpaper.
Step 5. Cut out the required pattern for application in advance. Glue the image, removing any remaining glue.
Step 6. After everything has dried, the door can be coated with several layers of colorless varnish.
Master class for beginners
Now let's look at a more labor-intensive project - a bedside table with drawers:
The decoration in our case will be beautiful wallpaper with notes, an old letter and a contrasting rose. The last two elements are cut from pictures found on the Internet:
1. First you need to fix the base picture on the outer surface of the bedside table (if desired, you can also paste over the side surfaces of the drawers). As with the high chair, place the wet sheet on the glue-coated surface and gently smooth it out from the center to the edges.
2. Let the base dry, then work the corners, cutting and folding the paper where necessary. Cover the entire covered surface with varnish. The result should look something like this:
3. Place and secure additional decoupage details on the paper base. As can be seen in the photograph, the letter was cut into strips of the appropriate size, which were then glued to the front surface of the boxes and also varnished:
4. Insert the dried boxes into place and glue on the last detail - the rose. It needs to be moistened with water (see above) and glued directly on top of the closed boxes, and then varnished. When the varnish is almost dry, you need to cut slits around the perimeter of the drawers. To avoid tearing the paper, it is better to use a very sharp knife or a sharp thin blade:
5. After waiting for the composition to dry completely, remove all the drawers and make sure that the edges of the paper and folds are well taped. The drawer handles can be replaced with ones more suitable in style or also treated with paper and glued in place.
Now you know the general principles of furniture decoupage, which can be implemented on any item. And at the end, some ideas for inspiration.
Decorating the nightstand
Step 1. Prepare your chosen images, glue, varnish composition and brushes in advance.
Step 2. Prepare the surface.
Step 3. Paint with white acrylic.
Step 4. Take away the top layer of the napkin and glue the design in the right place. Remove excess glue.
Step 5. Add decorative elements if necessary.Step 6. After the glue has completely dried, coat it with clear varnish.
The technique of decorating objects is constantly being improved. Currently, designers are showing us new ideas and master classes in the decoupage technique. Once you try to change a piece of furniture, you will definitely want to do it again! Perhaps in the future this will become your favorite activity or hobby.Modern housewives are increasingly trying to throw away tired and boring furniture. However, do not rush to do this. Try to give a piece of furniture that zest that you are missing. And you will see that even old furniture can add mood and emphasize the new style of your interior.
How to decorate a chest of drawers
The instructions for decoupaging a chest of drawers with your own hands are similar to working on a table. But there are also differences:
- all drawers are first taken out, processed separately and pushed into the chest of drawers already processed;
- most often the emphasis is placed either on the drawers or on the countertop; intensive decoration of all surfaces of the chest of drawers can look tasteless;
- the old fittings may not fit the updated chest of drawers; the issue of replacing it (selection, new fastenings) should be decided in advance.
