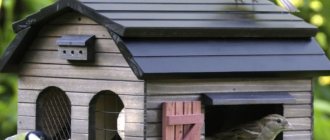
With the onset of cold weather, it becomes more difficult for birds to find food and wait out bad weather. The idea arises to do a good deed and build them a small feeding house - a birdhouse.
The article describes how to make a birdhouse with your own hands, with step-by-step instructions that will simplify this task.
General recommendations
As with any construction, it is recommended to follow safety precautions:
- it is necessary to work with gloves;
- preferably clothing that covers arms and legs;
- check all electrical appliances for serviceability;
- use safety glasses when cutting;
- sharpen a knife or saw teeth;
- work carefully with nails and screws.
If you are working with children, you should keep them away from the workplace while working with devices.
Important! For the birdhouse, use odorless paint and a color that does not attract attention. For example, brown, gray or burgundy.
How to color
Having completed the drawings and assembly, a new idea arises on how to decorate, here all hope is at the discretion of the master and his wild imagination.
Giving a fantastic and unusual appearance does not matter to birds; the main thing for them is that it is warm, dry and cozy in the nest. But for a person, this is a reason for pride and decoration of his site.
You can do the work in the image of a traditional Russian hut, with carvings and bright, sunny shades. Such an original birdhouse will become an asset not only to the house itself, but also to the entire village.
An interesting idea for multi-apartment housing for feathered families, it will take much more time, but the work process will bring real pleasure to the creator. And it will be more interesting for the birds to live together. Protecting their nesting site from predators through joint efforts.
Well, we can talk about shapes forever: diamond-shaped, round, rectangular, square and many others. But in pursuit of creativity, one should not forget about the convenience of its inhabitants.
Material used
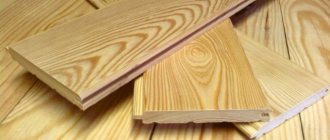
The choice of material for a birdhouse must be approached very carefully.
Recommended:
- aspen;
- oak;
- birch;
- wood fiber boards; wood chips;
- plywood.
Cardboard can be used, but the shelf life of such a product will be reduced to several months, but deciduous trees are the best option.
Not recommended:
- pine;
- Christmas tree, pine needles.
On this basis, the entire birdhouse will be covered in sticky resin, so coniferous trees will harm the birds more than they will benefit.
If you only have such boards, then before work you need to dry them and let them sit for several weeks.
Additional material:
- nails 4 cm;
- water-based paint;
- hacksaw (jigsaw);
- ruler or tape measure;
- hammer;
- a simple pencil or marker;
- drill (mill - 5 cm);
- brush.
Is it possible and how, what color to paint a birdhouse with gouache, what to draw on it?
If you want birds to live in your birdhouse, do not paint or decorate it with colorful decorations. Feathered friends do not care about beauty; for them, protection comes first. A bright birdhouse will attract cats.
A decorative birdhouse serves primarily for beauty. Therefore, when creating it, it is appropriate to use all kinds of decorations and paint.
For painting you can use acrylic paints, gouache, and oil paints based on drying oil. Gouache is very easy to use as it dries quickly.
In order for gouache paint to lay flat on the surface, you need to follow a certain sequence:
- First, use sandpaper to sand the surface on which you will apply the paint.
- Then apply the base - white acrylic paint. Wait until completely dry.
- The next stage is drawing a sketch of the drawing and painting with gouache.
- Wait for the gouache to dry completely, and then open the drawing with varnish.
- It is advisable to apply the varnish a couple of times.
If you don't know how to draw, you can use stencils. Simply transfer the pre-prepared templates onto the birdhouse using a pencil, and then paint with a brush.
What can you draw on a birdhouse? Everything your imagination tells you - birds, flowers, patterns, butterflies, grass and trees, abstract patterns. There is no limit to perfection. You can see examples of drawings on birdhouses in the photo below.
Birdhouse with drawings
How to paint a birdhouse with gouache
Painted birdhouses
Dimensions
The design parameters are selected based on who will live in it or fly in for a while. It is necessary to know approximately the inhabitants of the nearest area in order to build exactly the right and suitable house. The comfort that needs to be provided to the inhabitants is created through certain parameters.
Main sizes of birdhouses:
Taphole diameters
- Starling: 5 cm
- Tit, sparrow: 3-3.5 cm
- Flycatcher: 4 cm
If you cut the diameter larger, there is a possibility of large birds or predators settling in.
Height and bottom of the house
Starling:
- height=35 cm;
- bottom = 15x15 cm.
- Tit, sparrow:
- height=25 cm;
- bottom=14x14 cm.
- Flycatcher:
- height= 20 cm;
- bottom = 12x12 cm.
Approximate board thickness: 20 mm
We use a plastic bottle
Birds can make a beautiful nest in a two-liter bottle. Rain will not wet such a birdhouse craft, so the chicks will be dry and warm. It is best to use a wide two-liter container. To prevent predators from seeing the little chicks, you need to paint the bottle with acrylic paint. It is applied with a brush from the outside. It's safer for kids.
The hole should not be made too low so that the chicks do not fall out of the nest, because the starling also places a lot of twigs and dry grass at the bottom. To make the craft look nice on the site, the top of the bottle is shaped like a house - they make a “tiled” roof and draw a window. The roof covering is cut out from another plastic bottle with scissors and, after unscrewing the cap, is placed layer by layer on the neck of the container. Hang the bottle on a branch with a rope, tying it near the top.
Instructions
Having studied the sizes for birds, and having prepared all the necessary materials and tools for a birdhouse made of wood with your own hands, you can safely proceed to the next steps, namely making a house.
- Mark the boards with a pencil and tape measure.
- Use a hacksaw to cut the resulting boards.
Important! The roof should extend beyond the base of the birdhouse to prevent precipitation from getting inside.
- Use a drill or jigsaw to cut a hole (entrance for birds).
- Outside (at the joints) it is necessary to drive nails.
- Place a bird perch under the hole.
After making sure that all the parts are present, you can begin to fully assemble the house.
How to make a birdhouse from newspaper tubes: drawing with dimensions, step-by-step instructions, photo
Another material for decorating birdhouses is newspaper tubes. You can find out how to make them in this article.
Wicker bird houses
Tube weaving
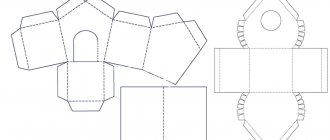
Drawings for birdhouses
For a more accurate and visual example, below are various variations of drawings and sizes of a do-it-yourself birdhouse:
- Gable roof of a birdhouse
- Birdhouse shed roof
- Birdhouse with slope
When choosing, you should pay attention to the available sizes in one version or another and to the complexity of the design.
What beautiful and unusual do-it-yourself birdhouses are there: possible birdhouse options, photos
You can find original birdhouses that are so unusual that you won’t immediately understand that this is a house for birds. In the shape of animals, with colorful stones, painted, in a rustic style.
Summer residents decorate their plots with birdhouses to the delight of themselves and their neighbors, but they are no less active in decorating parks. You can find entire towns made of birdhouses.
We have collected a selection of original birdhouses for your inspiration.
Tree house
Bird town
Birdhouse with an unusual entrance
Birdhouse decorated with stones
Birdhouse design
Assembling a birdhouse
- We screw the side walls to the front wall using self-tapping screws from the edge to the center of the birdhouse.
- To round the corners of the bottom, you can nail a glazing bead.
- We attach the bottom and roof to the foundations, based on the chosen design.
- The roof must be removable to allow washing and changing feed.
- To join the planks and make the roof look beautiful, nail a corner of approximately 30x30 cm on top.
Important! Do not forget to fasten each part with a self-tapping screw or nail, so the house will not fall apart during any interaction with it.
Plywood craft
To create such a beautiful craft as in the photo below, you need to draw a drawing of a hexagon for the bottom, square sides. You need to cut an inlet hole in the front panel. If the craft will serve for beauty and will be located in a classroom or in a corner of nature for a kindergarten group, then the conical roof can be rolled up from a sheet of thick cardboard. If the house will be suspended for nesting birds on the street, then it will be necessary to construct a roof from triangular plywood sectors.
The external decoration of the birdhouse craft looks interesting. For the roof we used pine cone flakes attached with a glue gun. The sides of the house are covered with corks from wine bottles, laid out both horizontally and vertically. To land, the birds attached a plastic bottle cap in front of the entrance hole. This craft looks original, so it will decorate any room.
Attaching the birdhouse
Having chosen a place to secure the birdhouse, which could be poles, trees or the roof of a house, you need to secure it correctly. Please note the following recommendations:
- It is important to attach the birdhouse 3 meters above the ground to prevent predators;
- to prevent moisture accumulation, it should be secured with a forward tilt;
- fastening to a tree is done using a rope, tightly pressing the body of the structure to it;
- fastening to a pole or other surface can be done with nails;
- the structure should be placed out of direct sunlight to avoid overheating and against the wind to preserve heat;
Important! If several birdhouses are made, they should be installed at a distance from each other, since proximity is unacceptable for many birds.
How to make a birdhouse from a juice or milk carton: step-by-step instructions, photos
You can very quickly and easily make an analogue of a birdhouse from a package that contained juice or milk. To do this, you will need an empty juice or milk carton, scissors, rope or wire for fastening.
Step-by-step production:
- Cut two holes in the box. Two holes are made so that the bird can quickly fly away if it is in danger.
- Make small holes for the rope or wire and thread the rope through.
- Secure the tree house.
If you apply diligence and use your imagination, you can make a bright, colorful, original house. Ideas in the photo below.
A milk carton feeder that even kids can make
Decorative birdhouses made from juice boxes
Birdhouse decor
In addition to paint, you can decorate and decorate a birdhouse with available materials. You will need wine corks and glue.
- It is necessary to place the corks horizontally on the sides on top of the base, and vertically on the front side.
- Cutting corks into circles will help give the roof the appearance of a real house. It turns out to look like tiles and looks very interesting.
Exclusive birdhouses can be decorated with waterproof paints. Together with your children, you can come up with a special stylish and unusual painting. For example, draw windows, flowers, the sun, and everything that your fanaticism is capable of.
The vine is gaining popularity, from which very cute and neat birdhouses are made. Such decorative houses very stylishly decorate the interior and trees in the garden.
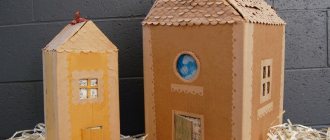
Old shoes and plastic bottles are suitable for seasonal housing for birds. Temporary shelter will save them from cold and hunger. Therefore, you should not rush to throw away these things, but try to make a house. Such material will not take up much of your time, and with your imagination, you can truly create masterpieces.
Dried pumpkins and cardboard boxes are also options for interesting decor. The paper should be covered with varnish, protecting it from precipitation.
Thus, creating a birdhouse with your own hands is very interesting and exciting. Once you select the right parameters and decide on the type of birdhouse, you can easily do this. It’s a great idea to use it as a creative activity with your children. This creates your own exclusive birdhouse.
The main thing that must be observed are the parameters, the fastening of the structure and the material itself, from which it is better to make a durable birdhouse. This creates maximum comfort for the inhabitants. And then the birds will immediately master their new home and will delight every day.
Varieties of houses for different birds
To attract certain birds or even several species of birds to the site, it is necessary to create comfortable, familiar conditions for them. Due to the fact that birds have different sizes, differ in flight speed and peculiarities of movement on a hard surface, the parameters of the “living space” intended for them will also vary.
Types of birds that willingly settle in birdhouses
Birdhouses according to their design can be divided into two types - prefabricated and “nesthouses”.
- Prefabricated bird houses, of course, are assembled from parts cut to specific sizes from boards.
“Duplyanka” made from birch logs
- A “duplyanka” is a piece of log (log) from which the inner layers of wood have been removed. Walls with a thickness of 15–20 mm are left, depending on the diameter of the log.
When choosing the size and type of birdhouse, it is also necessary to take into account the fact that some birds prefer a certain shape of “house”.
Birdhouse prices
birdhouse
A house well suited for a wagtail
For example, if you plan to attract and house wagtails on your property, then you will have to make a house for them, which will be significantly different from the birdhouse that is familiar to everyone. The height of such a dwelling will be 140÷150 mm, width 150 mm, depth 350÷400 mm including the landing area. In this design it is made in the form of a rather large board measuring 150x100 mm. Thanks to this entrance and narrow entrance, the bird can enter the house on foot.
Some birds prefer to live in semi-open homes
For redstarts, flycatchers, and white wagtails, a house that resembles a feeder is suitable, since they are reluctant to settle in closed birdhouses. Due to the fact that such dwellings become poorly protected from predators, for safety reasons they must be raised to a height of 2–6 meters, positioned so that there are no thick branches nearby that a cat can use to get to the nest.
The width of the house is 120÷140 mm, the height of the rear wall is 140÷150 mm, the front wall is 80÷90 mm, the depth is 120÷140 mm. The roof of such a house has dimensions of 160x200 mm. Since the entrance clearance is large, the roof must reliably cover it from rain and snow.
House for pied flycatcher
The pied flycatcher is a small bird belonging to the tit family. She prefers a more secure home, so it is recommended to make a hole for entering it on the side of the front panel. The depth of the house can vary from 150 to 200 mm, the width - 150 mm, the height of the structure is from 150 to 25 mm, the entrance hole, as a rule, has a square shape and its size can be 35x35 or 40x40 mm.
Swifts and a house for them
Another species of bird that is an excellent fighter against garden pests is swifts. These birds prefer to live in boxes fixed under the eaves of the house; sometimes they do not have a front wall at all, sometimes they resemble an ordinary birdhouse, but turned to a horizontal position. The entrance openings - tapholes - are also different; they are not round, but elliptical in shape. Other birds do not settle in such nests, since everything is designed for swift nesting. The height of the house is 180, width 550, length 225 mm, entrance hole size 32x60 mm.
Open shearers
Another housing option for swifts is a box divided into several compartments and reliably protected from precipitation. Having chosen one of the compartments, swifts arrange a nest in it, bringing various natural materials for this. This version of the shearer can be called “multi-apartment”. And living in entire “colonies” for swifts is a common thing.
A traditional birdhouse of simple shape - this design is perhaps the most popular
The traditional birdhouse is loved not only by starlings, but also by many other birds. This design can have different dimensional parameters.
The house shown in the illustration above has the following dimensions - width 180 mm, depth 200 mm, height 350÷400 mm. The dimensions of the bottom are 160×180, and the roof is 200×200 mm, the diameter of the inlet is 50÷60 mm, the perch (sixth) has a length of 50 mm and a diameter of 10 mm.
Multi-story birdhouse
Starlings, and sparrows too, get along well in “multi-apartment” birdhouses, which are installed on a metal stand embedded in the ground. The height of such a house must be at least 1500÷2000 mm. Next to the photograph is a drawing of a two-story birdhouse with five compartments, that is, five feathered families can live in it at once. The only thing that would not hurt to add to this design is landing areas on each floor of the building, such as shown in the illustration.
To make such a birdhouse, first internal compartments-apartments are created from prepared parts, which will become a reliable frame for the external façade cladding. In the external panel for each of the “apartments” there is one round taphole with a diameter of 50 mm.
Houses are a favorite place for many birds to live.
Hollows are a natural habitat for birds in the wild; most bird species live in them, from sparrows to owls and even ducks. Therefore, a birdhouse made from logs will appeal to many feathered inhabitants, as it is made without the use of paints, glues and varnishes. You can always select a log with the required parameters and create comfortable, close to natural living conditions inside it.
The core is removed from the log, a tap hole is drilled into its walls, a bottom panel is fixed at the bottom, and a roof at the top. However, it is necessary to take into account that not only birds, but also various parasites feel comfortable in a hollow. Therefore, after the core is removed from the log, it is recommended to dry it and then treat it with a weak solution of potassium permanganate.
