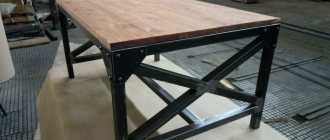
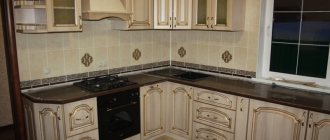
Do-it-yourself decoupage of old furniture is a decorative method of finishing material, wooden objects and other surfaces.
Pictures from a napkin are cut out using scissors and glued (attached) to the tabletop or facade.
Furniture decoupage dates back to the Middle Ages, but is becoming increasingly popular today among people who love handmade items. Without being a craftsman, it is easy to create a beautiful appearance for the surrounding things.
A large selection of materials in stores allows you to work with almost any surface, be it ceramics, wax (paraffin), fabric, wood.
First, it is worth replacing the fittings on the item, treating the entire area, preparing it for decoration. If you cannot disassemble the set, then you need to contact a specialist.
There is room for imagination in the variety of techniques used in this applied art (gilding, three-dimensional gluing, craquelure, etc.)
Types of decoupage techniques
To decorate furniture with your own hands, images are attached to the facades in various ways.
- Standard furniture decoupage technique.
Pictures are cut out from napkins or images printed on paper. The resulting element is applied to the object, and glue is applied to it. After drying, this area is varnished with a colorless composition.
If necessary, we add the necessary details ourselves (the pictures take on a three-dimensional appearance) or “age” the resulting image.
- Reverse furniture decoupage technique. They are made to decorate glass and sometimes objects.
A picture cut out of a napkin is glued to the back side; after it has dried, the necessary elements of the image are drawn in for three-dimensionality.
- The artistic technique of decoupage is cutting and gluing.
Effect: a single image on a plane with shadows drawn and shading manually.
It is not expensive, does not require special skills, is quite fast and very beautiful!
- "Decopatch".
This is the use of various materials from which the necessary components are torn out by hand, for example, silky designer paper, material with the effect of plastic or glass surface, napkins.
In decoupage, this is a torn edge and a frank demonstration of the decoupage technique itself.
- Volumetric decoupage technique.
It is based on an imitation of a painting created on a decorated plane using images cut out of a napkin.
You don’t have to be an experienced craftsman to create such works with your own hands.
Restoring a table with wallpaper
We will decorate the table in a modern style.
Step 1. Prepare the base of the table: clean, sand, replace faulty fittings.
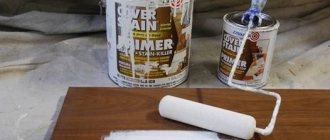
Step 2. Apply white primer to the entire surface of the table and drawers.
Step 3. Sand and apply a layer of gray paint.
We recommend reading:
DIY table: review of the finished drawing, assembly diagram, choice of material and dimensions (98 photo ideas)
- Do-it-yourself upholstery of upholstered furniture: photos of ready-made options and examples of modern design
- Do-it-yourself upholstery (upholstery) of chairs: 100 photos of ready-made options and unusual designs
Step 4. According to the size of the facades, we cut out rectangular parts from wallpaper with a dense texture. Glue it.
Step 5. After the glue has dried, cover the entire surface with dark-colored varnish.
Stylistic directions of decoupage
Furniture decoupage is performed in different styles. The following are widely used.
- Provence.
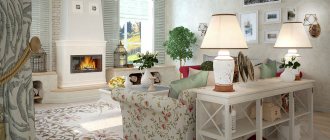
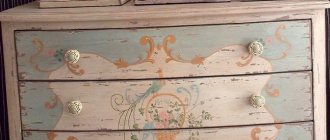
A design style that came from France. It is characterized by a whitewashed background and an image in pastel colors. Often craftsmen complement it with craquelure and floral print.
Simple rectangular furniture made by local artisans is often decorated with discreet bouquets or single wildflowers inscribed in a square arrangement.
- Simple City.
It is done using the decopatch technique. Use newspaper clippings with torn edges or old photographs.
This is the most current style of the people of the big city, which emphasizes its immediacy and democracy.
- French vintage.
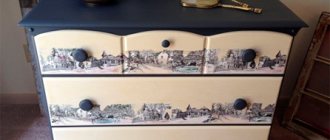
Features: decoration in two colors (white and black, less often pastel colors are included). Can be used for dresser, table top and other items.
This is a variation of the simple city style, which is influenced by minimalism.
- Shabby chic.
This is decoupage, making the surface look like an antique item. Features: blurred borders, frayed edges.
The craftsman is recommended to make prints with roses and angels on the item.
- Victorianism.
To decorate in this style you need to have a number of skills. Characteristic features: combination of gold, blue, green paint. Topics: still lifes, hunting, bouquets of flowers, wildlife.
This style combined old English traditions and the luxury of the south-eastern English colonies.
Advice from professionals
Implementing creative ideas for your home using the decoupage technique is fashionable, beautiful, cheap and acceptable in any interior. If you decide to update furniture in this way, you need to take into account the advice of experienced craftswomen.
PVA glue is quite thick, so it is diluted with water or a special decoupage agent is used. If furniture is painted with acrylic paints, water-based varnish is not used. It will not withstand high air humidity.
You need to align the napkin from the center to the edges. If the image is large, it is better to divide it into separate pieces and glue it in stages. The outline should be completed or the drawing should be colored after the first layer of varnish has been applied. This will allow you to remove the paint without damaging the paper layer.
A flat surface decorated using the decoupage technique looks very beautiful. This is ensured by a varnish coating. The layers should be thin, and the time between their application should be maintained. If roughness and bubbles have formed, it is better to sand them.
Recommendations for surface preparation
- Glass products are degreased. To do this, wash the glass well, dry it and wipe it with a lint-free cloth. After this, it is degreased with dye-free dishwashing detergent.
- Before decorating tin surfaces, they should be treated with a solution based on water and vinegar. To do this, the ingredients are diluted in a ratio of 1 to 1. After washing in vinegar water, it is passed with a metal brush. After removing dirt with a brush, the top layer is removed.
- Before working with wood or chipboard, they are sanded with fine-grain sandpaper to smooth out any unevenness.
Before decorating the surface, it should be treated.
Provence
This style came to us from France. It implies a snow-white background with pastel images applied.
Modern designers often dilute it with floral motifs.
Decorating an old coffee table
First you need to prepare the surface of the furniture for work. The plastic is degreased. The wooden table is disassembled and sanded with fine-grained sandpaper to remove the layer of paint and varnish.
The table is reassembled, all cracks and defects are puttied, and its entire area is primed.
After the primer has dried well, apply several layers of paint. For the effect of additional cracking, craquelure varnish is used. It is applied, then, until it dries, painted with white acrylic. After the acrylic has dried, we glue the motif (if we are not using craquelure) and cover it with colorless varnish. Can be varnished using spray varnish. This will make the application more even.
Each layer of paint must dry well so that the paint composition does not crack and stains do not form on the surface.
After the varnish has dried, you need to “pass” it with fine-grained sandpaper. This ensures stronger adhesion to the surface. Prepare napkins for gluing: cut out the desired image with nail scissors, soak in water for 15 minutes, place on a paper towel to remove excess moisture.
Decoupage occurs in one of three ways: hot (a motif cut from a napkin is glued and passed through with a hot iron without steam), dry (the motif is glued and the remaining glue is removed with a cotton swab), wet (the motif is soaked in diluted glue or varnish, applied to a multi-forum and carefully re-glue it onto the surface).
After gluing the image from the napkin, we bring it to its logical conclusion (finish drawing, add a shadow, tint, etc.) and leave it to dry.
Varnish in two layers. To obtain a smoother texture after varnishing, pour water into a container and smooth out the traces of brush lint with a wet finger while the varnish is still wet.
Trying our hand at creating a vintage style
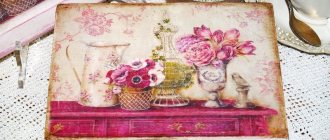
By definition, vintage is a winemaking term that literally means “aged wine.” From winemaking, the term has become fashionable, and is understood as an original thing of the previous generation. Things that are older than 30 years are already vintage. Age is not yet a basis for classifying an item as vintage. Vintage items should be original pieces of art, as in the photo above, and fully express the fashion trends of their time. To decoupage furniture in vintage style and give an aging effect, you can use craquelure varnish. As this varnish dries, it forms cracks of various textures - this depends on the thickness of the applied layer. Then oil paint is rubbed into the cracks; it remains only in the recesses. Thanks to decoupage of furniture in vintage style, it acquires a noble antique look.
Decoupage of kitchen furniture
To decorate old furniture, you can paste it with scraps of newspapers, magazines, special or your own kitchen napkins, and wallpaper.
For a smooth surface, almost any materials with pictures or original texture are taken. They lay easily on the surface without wrinkles or creases.
The reverse technique is well suited for working with glass. Smoky design can easily replace artistic painting, but it lends itself better to the hand of a master. Materials with fruits, vegetables, and dishes are perfect for decorating old furniture in the kitchen. Decorating with rice, mulberry, and banana textured paper looks good.
For vertical surfaces, a good choice is the volumetric technique.
PVA is well suited for gluing; for artificial “aging”, acrylic paints, bitumen and paste with metal effects are used.
What tools and materials will be needed?
Decoupage of furniture with napkins involves the use of a number of tools, as well as the acquisition of the necessary materials. The list of the latter includes:
- paper napkins . In this case, the choice can be made in favor of ordinary dining rooms or you can buy ones specially designed for decoupage. Paper handkerchiefs will also work;
- Pore filling agent - necessary for sealing cracks and crevices on old furniture, helps to make the surface perfectly smooth;
- sandpaper - for sanding;
- decoupage glue or PVA (it is better to use a special one, PVA leaves marks);
- acrylic varnish for wood , matte or glossy - optional;
- applications – images used for this technique.
DIY furniture decoupage – 50 photo ideas:
PreviousFurnitureDesign of children's furniture for a small room
Next
Furniture Be careful: white furniture in the interior!
Classical
It is considered a fairly popular type of decor. The essence of this method lies in the use of a new composition.
It is pre-distributed along the plane of the product. After this, the plane is embroidered in any shade. Next, glue any image. The final stage will be applying the finishing coat.
Create a sketch of your future work
Of course, inspiration is important in the decorating process. But in the case of furniture decoupage, the laboriousness of the work can tire you, and creative impulses can fade away due to banal fatigue. Therefore, we recommend recording ideas on a sheet of thick paper, the dimensions of which are similar to the dimensions of the furniture surface. Try different options, think about them and only then get to work. Using the same sketch, you can test your skills, for example, in carefully gluing a napkin.
Prepare your workplace
It is better to cover the floor under the furniture that will be decorated with newspapers or plastic wrap. This way you will be able to save a lot of time on washing stains from drops of varnish or paint.
It is advisable to decorate furniture indoors with free access of air, but not on the balcony or in the open air. Otherwise, adhering dust particles and small leaves brought by the wind can spoil the uniformity of the coating.
All tools that are used in the decoupage process should be washed promptly and not allowed to dry out dirty. Take the example of artists who dip their brushes into a glass of water.
Traditional way
Updating furniture using this method involves gluing pictures for decoupage - for example, cut-out fragments from newspapers, decorative napkins or colored paper. To secure the design on top, it is coated with varnish.
The missing details on furniture decorated in this way can be completed manually to obtain a more voluminous and vibrant image.
How to choose a primer?
There are several criteria by which it is possible to choose the right primer composition. They include:
Before you go shopping, you need to carefully examine the surface of the furniture. If it is made of natural wood, the primer is selected based on the structure of this material.
Plastic elements in the structure require preliminary cleaning with sandpaper. This manipulation will remove the protective layer from the surface of the product. Alcohol-based impregnations can be used as a primer.
If glass is present in the structure of furniture paraphernalia, then in this case you will need a universal composition of the primer mixture.
Common mistakes
When taking on the task of transforming elements of your home, the main thing is not to make mistakes, especially for beginners. Decorating is no easier than renovation, and sometimes even more difficult. Even though decoupage is one of the simplest methods. The most common mistakes are:
- poor surface preparation - if the furniture is made of wood or chipboard, it is important to sand it thoroughly. If rough edges remain, the picture will not lie flat. It is important to degrease objects made of plastic or glass, otherwise the paper will peel off;
- lack of primer - there must be a layer of primer between the surface and the picture. If you neglect it, then over time fungus or mold may appear, especially if the place of the item is the kitchen or bathroom, where it is humid and warm;
- pasting motifs without thinking through. Before gluing pictures, they should be laid out on the surface and the optimal location should be selected. If you start gluing right away, you may end up with something completely different from what you imagined;
- uneven gluing of motifs - during decoupage, it is important to carefully level the paper with a brush, expelling the air. If folds form, they must be removed immediately;
- poor-quality varnish - it is better to put less varnish on the brush rather than more. Otherwise, sagging and drips may form, which then cannot be removed with anything.
Generally speaking, it is important to do decoupage slowly, slowly and thoughtfully. Just like any other decoration work. This type of creativity is a great way to transform tired furniture, restore it using simple methods and bring a fresh vibe to the interior, especially when you know how to decoupage furniture.
Back
It is used to decorate transparent types of products. The decorated surface is made of thick plastic or tempered glass.
Decoupage with plain paper - 125 photos and a detailed video description of how to make decoupage with your own hands- Decoupage of boxes - 125 photos of beautiful and original options for decorating boxes with your own hands
- Volumetric decoupage - projects, ideas and descriptions of do-it-yourself decoupage techniques (135 photos and videos)
The process is carried out using the same technique as the classical method. A beautiful design is glued with the front part and secured with a finishing layer.
