For a simple model we need:
- timber with a cross section of 2.5-7 cm
- wooden furniture boards, plywood, fiberboard, OSB, MDF or other similar sheet material depending on the intended design, slats
- we use filler (foam rubber, spring blocks, polyurethane, holofiber, padding polyester, latex, batting, felt) both separately and in combination
- self-tapping screws, wood screws, corner plates and curved connectors
- fittings (legs, sliding mechanisms, etc.)
- varnish, stain, paint for processing wooden elements
- glue
- upholstery material
Selection of furniture for the veranda
Before choosing the type of furniture for the veranda, you should highlight the aspects that this issue has.
So, let's start with the design features of furniture. It can be stationary or foldable, which is very mobile and can be placed anywhere. Folding furniture is perfect for open verandas or terraces.
It can always be removed in case of bad weather or cold weather. In addition, when assembled, such tables and chairs will not take up much space in the house or closet. Stationary furniture is designed to serve constantly, without moving.
If the owners come to the dacha infrequently, but only on weekends or during vacations, and in winter they don’t visit at all, then folding furniture will be an ideal option for temporary use. For the veranda, you can make folding tables and chairs, as well as a couch, which will become an ideal place to relax instead of the usual bed.
Beautiful examples
Do you already have an idea of what the recreation area in your garden should look like? Whether it will be a cozy corner in the shade of trees or a large area with a platform and a long garden sofa - it all depends only on your imagination and desire. The examples below can serve as a starting point for you and become a source of inspiration for future transformations.
Proper placement of all the necessary pieces of furniture on the site will create the right atmosphere and help you spend time with loved ones comfortably. Making furniture with your own hands requires a lot of effort and time, but as a result you get unique pieces of the size and shape you need, which you will be proud of for a very long time.
The process of assembling a country sofa
How to make a sofa for the veranda? Assembling materials does not require any special skills, and even a novice master can handle it.
If you have the skills to work with tools, you can create durable and comfortable furniture that will decorate your home for many years to come. The manufacturing process is carried out in several steps:
- The frame is being made. You can use timber for it; the frame size will be 70x210 cm.
A rectangular frame is assembled from timber, which is installed on wooden legs made of the same timber. The frame is fastened with 4 transverse bars, which will increase its strength and rigidity.
- The back frame of the selected size is made from the same material; it must be rigidly attached to the seat using metal corners.
- A metal frame with a spring mesh from the bed is attached to the wooden base using staples. This is the base of the sofa seat that will support the weight of a person.
- Two mattresses are made from foam rubber; their thickness should be 15 cm. After this, the mattresses are covered with a woven cover made of tapestry or other material. The seat and back are sewn together.
- The mattresses are attached to the back and to the seat, after which you can safely use the sofa. Foam rubber scraps can be used as filling for pillows that can be made from the same fabric.
Another option is to assemble a “sofa box” based on a frame made of timber and ready-made wooden panels. Such a sofa will not spring, but soft mattresses made of foam rubber or padding polyester will make it quite comfortable for use.
The frame can be painted in any color; if you have the skills to work with wood, you can cut out shaped legs and a back frame. Furniture can be very beautiful; individual design will create a unique environment.
The color of the sofa can be any. It depends on the color design of the veranda room itself and the chosen style. For a cover, you can, for example, choose blue and white fabric with a striped pattern if you are going to decorate your veranda in a marine style.
The swing sofa is assembled in a similar way, but then metal cables need to be attached to the armrests at 4 corner points, after which the cables are attached to the ceiling beams. It is important to take care of the maximum strength of the fastening and base so that they can withstand not only the weight of the sofa itself, but also the weight of the people sitting on it. Such furniture will look beautiful and will become one of your favorite items in the house.
The final stage is decoration
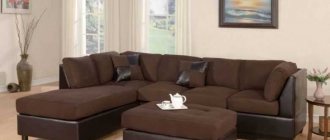
Corner sofa to order
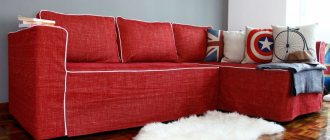
The sofa is decorated with bright or matching upholstery pillows. This is the easiest way. If you make several sets of several covers, you can change them according to your mood and season - faux fur is suitable for winter decor, cotton and linen are suitable for summer decor. Sometimes one side of the pillow is decorated with embroidery, appliqués, bright prints, small plush toys, lace, knitted elements, while the other side remains plain. The patchwork technique is also acceptable, and sometimes a removable cover is made. Regardless of the size of the sofa, no more than five pillows should be used. It is better that they are of different shapes, sizes, textures.
The sofa cover fits into the interior: it should go well with other textiles in the room: curtains, rugs, chair covers, etc.
The material most often used for this is:
- leather – natural or artificial, creates unique comfort;
- acrylic – very durable, non-allergenic;
- towel – available in all possible colors;
- tapestry - suitable for a classic “rich” interior;
- silk, satin - look luxurious and expensive.
Blankets for decorating upholstered furniture are made from bamboo, fleece, viscose, acrylic, cotton and silk. You can also make a sofa cover or buy it yourself in a store; It’s convenient because it doesn’t slip and is easy to wash, but store-bought ones are quite expensive. The homemade product is sewn on a machine according to patterns made to fit the frame.
Simple making of a white sofa
See how quickly and easily you can make a sofa with your own hands, which will find a place in the garden, on the veranda and even in a cozy house.
This pleasure will be affordable even for a family with little income. Wooden lumber is quite inexpensive, and soft pillows can be bought ready-made. Or, if you know how to sew, make them yourself from suitable textiles and thick foam rubber. The soft parts that cover the seat have dimensions of 24 x 26.5 x 6 inches (60.96 x 67.31 x 15.24 cm), products with dimensions of 24 x 18 x 6 inches (60.96 x 45.72 x 15.24 cm) are suitable for the backrest.
Preparing for work
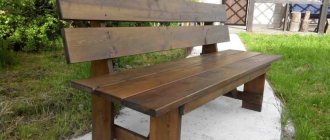
The main material of manufacture is wooden planks. Choose good quality boards. The smoother they are, the better the furniture will turn out; you will spend less effort on additional processing. The parts of the sofa for the garden should be made of wood. This work can be done with your own hands, using a tape measure and a circular saw, or at the place where you purchased the planks, you can order them to be cut according to the dimensions provided:
Definition with construction
Before you start creating garden furniture with your own hands, you need to have a clear idea of the final appearance of the entire structure. Even a small sketch is enough to roughly calculate the required amount of material.
Garden furniture is made fairly quickly, the main thing is to use high-quality material for these purposes.
Most often they make it with their own hands:
- tables
- chairs
- beds or loungers
- storage racks and shelves
How to make a terrace from construction pallets (pallets)
The idea is to make a boardwalk out of pallets at the dacha, it’s cool and most importantly, easy to implement. To make a country flooring from pallets you will need:
- place pallets on the plot of land where it is planned to build a terrace;
- rearrange the pallets in places to get the best result and shape, you need to adjust the parts to each other so that they fit together better;
- after you find a pallet placement scheme that suits you, you need to make markings along the outer edge (dig a small groove around the perimeter with a shovel);
- mark and number the location of each pallet and take a photograph to remember what is where;
- remove the pallets and remove all turf from the site, clear the earthen surface, using a level, make the most level area for the terrace and compact it;
- arrange the pallets in their places, connecting them to each other and leveling them in height;
- sand the surface of the terrace and saturate the area with an antiseptic - the floor of the open terrace for a private house or cottage is ready! You can arrange furniture and drink tea.
How to do it?
Having prepared the tools and materials, you can begin to work.
Preparing pallets for the terrace
Before making a sofa into a gazebo from pallets you will need:
Find quality materials. They can be ordered online, purchased in a warehouse or at any hardware store. The main thing is that they are not rotten or deformed .- Drive in all the nails. To avoid injury while assembling the sofa, all nails must be firmly driven into the material.
- Sand and clean surfaces. When using used pallets, they will need to be cleaned of dust and dirt and sanded.
- Paint the material. When using furniture outdoors, it is recommended to use moisture-resistant paints and varnishes, which are applied in several layers.
Manufacturing and assembly
Assembling a sofa from pallets is simple:
First, we knock off the supports from the pallets, cut out the board to the required size and assemble the base of the sofa.- Raise the base to the required height. To do this, you can use several pallets or attach legs to the product.
- Next, we construct the back of the sofa from the second pallet.
- We fasten the seat and back with self-tapping screws. For structural strength we additionally use wood glue .
- We attach the armrests.
That's the whole simple process of making a durable and creative sofa into a gazebo yourself.
Finishing
As for finishing, it consists of sanding and coating the lumber with varnish or waterproof enamel.
For ease of use and to add aesthetics to the product, fabric covers or pillows are sewn onto the sofa . For these purposes, wear-resistant and practical fabric is selected (tapestry, jacquard, microfiber, corduroy).
You can sew covers and pillows using a sewing machine, or, if you don’t have one, by hand. Here it is important to make patterns in advance and accurately select the sizes of future pillows.
Examples of decorating the resulting sofa can be seen in the following photos:
Material
What materials to make a sofa into a gazebo from is your personal choice. The main thing is that they are:
- resistant to high moisture;
- resistant to sudden temperature changes;
- durable;
- durable;
- attractive in appearance.
Suitable for making a frame:
Plastic (including PVC pipes).
Plastic products are wear-resistant, easy to use and simple to manufacture. To give your furniture an attractive appearance after winter, just wash it with a regular detergent.The original designs of plastic sofas fit harmoniously into various designs of gazebos.
- Natural array. Such products are environmentally friendly and noble. If the sofa will be used in an open summer gazebo, you should give preference to hard wood: beech or oak . They are able to withstand sudden temperature changes and high humidity. Wooden furniture in the gazebo will create a favorable, homely atmosphere of warmth. To protect the product from damage and rotting, the wood is treated with antiseptics and special impregnations.
- Metal. For these purposes, artistic forging can be used. Such models are distinguished by their openwork and lightness. The presence of forged decor makes them exclusive and original. The metal itself is wear-resistant, durable, and resistant to negative factors. To extend the life of metal furniture, the frame of the product is periodically coated with anti-corrosion paint.
Pallets.
Such furniture attracts people with its exclusivity and ease of assembly. The most difficult thing in making a sofa is preparing the lumber. Pallets must be cleaned, sanded, treated with special compounds and varnished or painted. Furniture made from pallets will harmoniously fit into eco-style, loft, and minimalism .- Rattan or wicker. Wicker sofas fit harmoniously into garden gazebos. They do not fade under direct sunlight or ultraviolet rays, and are not afraid of low temperatures and moisture.
- Beam. Before making a piece of furniture, the material must be coated with an antiseptic composition and several layers of varnish. The seat and back of the product are made soft using foam rubber and upholstery material. Sofas made of timber will harmoniously fit into classic rustic styles, such as country or Provence or eco-style.
Sofa made of pallets
Stage 1: Materials and Tools
List of materials
- 25 pallets (pallets): 10 euros and 15 others, without cracks (gaps) between adjacent boards. Please note that they turned out to be different sizes. As you can see, the euro pallets are very used, which is why they were so cheap, but for our purpose they were quite suitable
- varnishes, paints, antiseptics (your choice here) to protect wood and give an aesthetic appearance
- fastener
Tool list
- Cordless screwdriver
- Grinding wheel
- Brush or spray gun (spray)
- Level
- Saw
- Cable
- Gardening tools: shovel, rake, ... (depending on where you will build)
Stage 2: Landscaping
We use an antiseptic- Place the pallets in place to see what the terrace will look like.
- Rearranges pallets to obtain the required shape and fit them together.
- When you find a pallet installation scheme that suits you
- Make a mark on the ground along the outer edge of the pallets. We used a shovel that we stuck into the turf.
- remember the location of each pallet, you can number them. We took pictures to remember.
- Remove the pallets and remove all turf from the marked area.
- Using a shovel, rake and maybe a hoe, level the surface and compact it. Use the level to control.
- Laying out the pallets
- We lay out the pallets one by one, carefully leveling them in height
- we twist the pallets together
- It's better to do this with an assistant
- We use a grinding wheel to clean the resulting surface. To check, you can walk barefoot, of course, if you are sure that you have cleaned everything thoroughly and will not get a splinter
- We saturate everything with an antiseptic; if you wish, you can paint it (after the antiseptic has dried)
So we have finished the floor of our terrace. It took all day and I got sunburned, but it was worth it.
Stage 3: Pallet frame
Each Euro pallet measures 120cm x 80cm.
Our country sofa consists of three sections. Each section consists of two pallets (stacked on top of each other) as a seat and one pallet as the back of the sofa.
Thus, from 10 euro pallets we can make a corner sofa 200 cm x 240 cm. Three sections of 3 pallets + one pallet for the back in the corner (see sketch).
We twist the pallets together, but do not assemble the sections into one whole; we will do this when we move our sofa to the terrace.
We painted our sofa with spray paint. This gave it a nice worn and antique effect. In addition, painting from a spray can is much more convenient; you can reach hard-to-reach places and adjust the amount of paint.
Stage 4: Installing the sofa on the terrace
We installed the sofa sections onto the deck and secured it all together.
We're left with three small pallets that we can stack on top of each other to make a great table.
The photos show that the sofa is not fully painted and there are no pillows on it. The fact is that we have run out of paint, and the mattresses have not yet been purchased. But after two days of work, we so wanted to try our pallet sofa, which we made with our own hands, that we collected our pillows and mattresses from home and laid them out on the sofa. It was very cozy in the evening with candles and lamps.
Stage 5: Finished sofa on the terrace
After a few days, we painted everything else and bought ready-made seat cushions, which are usually used for lawn chairs. They sat beautifully on our pallets.
Preparation of the drawing
Designing a sofa should begin with measurements of the room or area where it will be installed. The finished product should not interfere with the passage; at the same time, there should be no gaps that will spoil the overall appearance. Then you need to make several sketches , decide on the type, design and decor. And only then start making diagrams and drawings.
You should carefully consider the parameters of each part, since the ease of use of the sofa depends on this.
It is recommended to adhere to the following criteria:
- Seat height. The optimal option is 30-40 cm. This way the feet will stand firmly on the floor, which is convenient and does not interfere with normal blood circulation in the legs.
- Length. If in the future you plan to use the object as a sleeping place, you need at least 200 cm so that an adult can feel comfortable lying down.
- Bench width. For sitting, the standard is 50 cm. The calculation is that the popliteal hollows will be 5 cm from the edge. For sleeping, such a bed is somewhat narrow, but if there is no other choice, you can rest well on this.
- Height and backrest angle. The upper edge is made at shoulder level, which corresponds to 45-55 cm. For greater convenience, you can consider a bolster as a headrest. The slope is selected individually experimentally. Usually it is 10-20 degrees.
- Armrests. The width should be at least 20 cm, or more, so that, if necessary, you can put a tray, plate, mug, book or other thing. The height from the seat is 18-22 cm. This way the forearm does not ride up and hang.
All data is given taking into account the installation of mattresses and pillows on the body. Their dimensions can vary significantly; in addition, you need to take into account the depth of subsidence of the soft filler under the weight of a person.
Do-it-yourself country veranda made of wood
After we have carried out the procedure for designing and decorating the veranda, you should clearly already know what kind of foundation you will be making. For lightweight wooden structures, pile, screw, and column foundations are used, which are not designed for heavy loads. Here it is, as your heart desires. We will make a regular, reliable columnar foundation. From this we will begin to make a veranda at the dacha with our own hands.
STEP 1: preparation. A columnar foundation is a structure made of concrete and bricks or some other concrete blocks. We will use blocks 20 x 20 x 40 cm. First you need to dig a hole 1.3 meters deep and 50 meters wide. Finish the edges of the hole to create a square shape. For this we will need a bayonet shovel, but we can start with a drill. When you have dug and processed all the holes, move on to the next step.
STEP 2: pillow . To make a reliable country veranda with your own hands, you need to make a drainage pad under the foundation. For this we need sand and crushed stone. We pour 20 cm of crushed stone at the bottom of the hole, tamp it, then pour 10 cm of sand, and tamp it again. Thus, we have a good base for pouring a reliable foundation for the veranda.
STEP 3: concrete pillar . Next, we move on to the main, load-bearing part of the entire foundation of the veranda with our own hands, namely the production of a concrete pillar. First you need to do waterproofing. We arrange the roofing material according to the shape of the hole (preferably in two layers). You need to smooth it out thoroughly so that it takes the shape of a hole and holds securely on its walls.
We make armored belts from reinforcement with a cross-section of 8 – 10 mm. The dimensions of the armored belt for the foundation of a wooden veranda with your own hands should not be larger than the foundation itself. A structure with a diameter of 30 cm and a height of 90 cm is well suited here. The reinforcement is tied with knitting wire, and the finished structure is installed in the center of the pit with waterproofing.
Making a concrete solution. The composition is standard: water, cement, sand and gravel/crushed stone. Mix it all in the correct proportion (cement - 1, sand - 3, gravel - 5, water - 0.5). We throw all the components into a concrete mixer and wait for it to cook. The foundation for a wooden veranda with your own hands must be reliable, so you need to approach the preparation of the solution responsibly. Pour the entire solution into the hole. If you pour the entire solution in one fell swoop, it is possible that there will be air somewhere. To displace air from the foundation, you need to take a metal rod and poke it thoroughly into the solution. Thus, all the air that was in the solution will come out and the foundation will be strong and monolithic. The solution must be poured to the ground level, or a few centimeters below the level.
STEP 4: blocks . After the foundation of the wooden veranda has completely dried with our own hands, we continue to finish it. We move on to installing concrete blocks. Again you need to make a small amount of adhesive solution. We smear all the necessary sides of the blocks and lay them on the frozen foundation (two along, two across). We build the blocks to the required height. For some, 2 blocks will be enough, and for others, 4.
We repeat this procedure with all the pillars. Then, in the middle of each pillar, you need to mount a pin to secure the grillage. We drill a hole, insert a pin, and concrete it so that 10 cm of thread remains. Now you are one step closer to your dream. The foundation hardening time is about 3 days. After this, you can begin installing the grillage, erecting walls or the frame of a wooden veranda. We will definitely tell you about all this, and more, further in our article.
There is already an article on the construction of a columnar foundation for a veranda on our website, and it is called “ Types of foundations for a veranda .” There you will find the entire process of making a columnar foundation and step-by-step photographs. Enjoy your acquaintance, and we continue further.
Original do-it-yourself sofa made from pallets
One of the most popular ideas today is to create a sofa from pallets with your own hands. These pallets are also called pallets. They are inexpensive and easy to get at any hardware supermarket. Pallets consist of several boards, which are very convenient to disassemble and can then be reassembled into any design convenient for you. All that remains is to paint them in the desired color and make pillows for the sofa. See the photo below for examples of homemade sofas made from pallets:
Important: if you decide to make a sofa from pallets, then when purchasing them you need to pay attention to the condition of the wood - there should be no damage or obvious signs of dryness and old age. In any case, to create a high-quality sofa with your own hands, the pallets should be sanded and a protective coating applied, for example, using a special wood impregnation or varnish. Euro pallets have standard dimensions of 800×1200 mm, so you can easily calculate the required frame size.
Tools
To assemble a sofa from pallets you will need to prepare the following tools:
grinding machine;- screwdriver or drill;
- axe;
- hammer;
- tape measure and pencil;
- nails, self-tapping screws and screws;
- sandpaper;
- wood glue.
The only materials you need to prepare are:
- stain;
- paints and varnishes.
- two pallets, measuring 120 cm by 80 cm.
