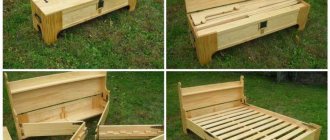
A lot in his life and everyday life depends on how a child’s room is arranged. It is important that the organization of space in the nursery is aimed at creating the most favorable conditions for the growth, development and comfortable existence of the baby. Usually his room is a mess, things and toys are scattered throughout its entire area, but if you install a functional, spacious closet there, in which there is a place for all the children's property, then the problem will be partly solved. And if you make it yourself, you can generally get a lot of benefits.
What is needed for this
The market is filled with all sorts of materials, so the question of how to make a cabinet and get the necessary components is not as difficult as it seems.
Some of them will be:
Multilayer plywood is very durable and wear-resistant; it does not contain chemical compounds harmful to humans. Treat environmentally friendly design components.
Wood chip boards are the most popular today. The price makes them accessible to many people, but the quality does not suffer.
Wooden boards can be cut from different species, sizes are adjusted to an exclusive order.
Cabinet plans often include: pine, birch or oak. Such types are characterized by high strength and resistance to temperature changes, and water resistance.
If the furniture is made for more than one year, then the choice must be approached with special care.
Children's furniture standards
Furniture factories always adhere to certain standards when manufacturing their products. When making furniture with your own hands, it is important to adhere to these standards and requirements that furniture intended for children must meet.
- Safety is the main criterion when making furniture for children. All corners of furniture must be rounded to prevent the child from getting hurt while playing. Furniture elements should not contain small elements that can easily be torn off. Particular attention should be paid to the fittings, which must be securely attached. It is advisable to cover the edges of furniture with protective film.
- Environmentally friendly. Children's furniture must be made from natural materials. Wood, plywood or cardboard are best. Varnishes and paints applied to furniture must be non-toxic. This photo shows homemade original children's furniture made of cardboard.
- Simplicity and strength. Make the simplest pieces of furniture, without unnecessary details. Children's furniture should be strong and durable. Nails cannot be used as fastenings, as this is not safe for the child.
- Design. The children's play area can be decorated in bright colors. For example, red, yellow, orange are perfect for this purpose. Accordingly, furniture can be painted in bright colors or pasted over with a variety of pictures. A corner for passive activities (drawing, modeling, learning the alphabet) should be decorated in light blue or blue tones, as this color scheme promotes brain function and concentration.
- Functionality. To rationally use the space in the children's room, the furniture can be equipped with drawers in which toys and children's things will be stored.
Tool
The selected material option must be purchased and transported instead of assembly; a do-it-yourself cabinet diagram is drawn up taking into account the available equipment.
To complete the work you will need:
- Saw on wood.
- Surface grinding machine.
- Square.
- Tape measure or other measuring device.
- Fastening systems.
- Metal corners.
- Carpenter's saw.
- Sealing mastics.
Note!
Dark sofa: advantages and disadvantages of dark sofas. Features of choosing dark shades of a sofa for different styles (photo + video)
Chest of drawers for the bedroom: TOP-170 photos and videos of chest of drawers for the bedroom. Choosing the shape, size, color and material of the chest of drawers
- Light sofa: TOP-130 photos and videos of light sofa options for different rooms. Varieties of upholstery materials and colors
To make the cabinet look perfect in the interior, you need to choose a shade; it can be applied using water-based acrylic paint.
Tools and materials that will be needed for work
All materials, fittings and missing tools can be very easily found among the assortment of modern construction hypermarkets:
- laminated chipboard size 280x207 cm - 2 pcs;
- Fiberboard size 275x170 cm - 1 piece;
- special edge for gluing the ends;
- mirror size 110x55 cm – 1 piece;
- profiles for fastening boxes – 4 pcs;
- door handles – 6 pcs;
- door hinges – 10 pcs;
- crossbar for hangers 1 m. – 1 piece;
- retractable hanger – 1 piece;
- self-tapping screws 5x40 – packaging;
- European screws;
- mirror fasteners – 4 pcs;
- scotch;
- drill with a screwdriver attachment;
- a set of Phillips screwdrivers of different sizes;
- three metal drills – 2m, 3mm, 10mm;
- Forstner drill;
- wood hacksaw;
- tape measure, building level, square.
Hull view
Many design ideas are beneficial because the owners themselves complement the design with various elements. This option is no exception; you need to take into account that the parts must be combined with each other and with the body, respectively.
Assembly involves making the roof, bottom, rear and side walls. It wouldn’t hurt to think through and implement a retractable wardrobe for seasonal shoes into the furniture.
Step-by-step instructions for making a paper cabinet
You can make a cabinet with your own hands from paper by first preparing all the necessary components. We have completed the entire process in a few simple steps. Further details in the algorithm below:
- We took a square sheet of light green paper (take into account the dimensions yourself, depending on how big the craft is needed). Our square is 15x15 cm.
Source mycrafts.com
- Fold it in half, clearly combining the edges. Then we unfolded the sheet and did the same with the opposite side.
- Next, they unfolded the square, which, thanks to the bends, was divided into four smaller squares. Each corner of the sheet was folded towards the center. At this stage, the accuracy of hems and smoothing is very important. All corners that come to the center must connect at one point.
- Now the lower part of the square is bent towards the center, precisely to the point of contact of the corners. It turns out that the lower part is folded in half. We did the same with the opposite side. You should end up with an elongated rectangle.
- The next step is to open the last two folds, unfold the square and do the same actions with the other two sides of the sheet. Now unfold the two sides of the square completely until the corners open. They should be on top and bottom. We don't touch the sides.
- Next, we took a glue stick, coated the small upper triangle on the inside, and then folded it down along the bend line and glued it together. The same steps were performed for the opposite small triangle.
- Afterwards, without unfolding our workpiece, we tucked the two side parts of the product towards the center. We turned the craft around and found the central square along the curves. We turned the craft back over.
- Along this line, internal bends were made so that walls began to form, then they took glue and fixed the resulting two triangles on both sides of the workpiece. The edges where the folds occurred should remain free when gluing. At this stage, it is important to monitor the accuracy of the closures. They should be as close to each other as possible.
- Then, on the same part where the fragments were fixed, we find two lower adjacent squares, they are divided in the center by a bending line, and therefore triangles are formed. They were glued together. If the assembly is carried out correctly, you will already have three walls of the future box.
Source wixstatic.com
- Then exactly the same manipulations were carried out on the opposite side. We also made sure that the gluing is reliable, I recommend that you do this too, since the folds tend to dry out.
- Next, the remaining rectangles were carefully folded to form a covered box. The last folds will serve as cabinet doors.
- The next step was to make the second part of the cabinet. To do this, take a second square sheet of paper of the same color, fold it in half, closing the outer edges of the sheet as much as possible.
- Next, we unfolded the sheet and folded the opposite side of the square in half. The square, similar to the first blank, was divided into four smaller squares. We unfolded the workpiece and folded each corner to the inner center in the same way.
- Fold the workpiece in half on the inside on two opposite sides to form a rectangle. We repeated the same with the free sides, having first unfolded the square. Then they unfolded and completely released the two upper sides so that the triangles remained free.
- Glued small horizontal triangles that meet in the center (side). We folded the long sides towards the center and unfolded them; in the area of the fold of the glued triangles, we glued two adjacent sides, bending the small triangles. We did the same with the second parallel corner.
- The upper free part was coated with glue and wrapped inside the workpiece to the edge of the box. On the opposite side, we glued the two lower triangles on both sides to form a narrow box.
Next, we made the same narrow box using a similar principle, but only from a sheet with sides 1 cm smaller. This blank will serve as a drawer. At the end, we glued the two parts together and decorated them beautifully. You can even come up with interesting pens. To make the product stronger, you can make a cabinet out of cardboard with your own hands. A regular stationery set will do.
Built-in model
For work of this kind, you can use improvised materials; this is very convenient if you suddenly run out of boards, and the nearest store is an hour away.
In addition, rational use of existing funds will help preserve the family budget.
The built-in closet cannot be moved or moved; when deciding on this assembly option, the owner must understand this.
Note!
Small sofas: TOP-140 photos of small sofa models. Pros and cons of small sofas, choice of shape and upholstery
Sofas from IKEA: features of models from the manufacturer. Varieties of sizes, shapes and designs. 120 photos + video reviews
U-shaped sofa: TOP-160 photos and videos of design ideas with a U-shaped sofa. Pros and cons of the design, choice of upholstery and color of the sofa
How to make a cabinet with legs
If desired, more substantial furniture of this type can be made for a child, but at the same time a fairly simple design. In this case, you will need boxes to assemble a doll cabinet with your own hands:
- narrow long (for example, from shoes);
- three small ones, the total width of which should be equal to the length of the large box.
You need to remove the lid from the shoe box and cut off the short sides. Also, this element should be shortened by a third. The long box itself needs to be placed on the table and two small ones glued inside it so that they touch the walls. The remaining part of the lid should be cut in half. The resulting doors need to be glued back into the box above the two compartments made at the previous stage so that 1/3 of the cabinet remains free.
Next, the finished toy should be placed vertically on the table. Then you need to insert the third small box, bottom down, into the bottom of the cabinet, without using glue. The result is a large drawer.
Swinging doors
This is a fairly popular type of construction; the location of the sashes will depend on the presence of sections inside.
Loops are made in the following varieties:
- Detachable fasteners are installed on the inside.
- Universal ones are used regardless of the sides of the furniture; they are attached to the doors and the product at the same time.
The screwing order is as follows: first of all, the system is fixed to the frame, and then the doors are hung on it.
Making a tree table
Step 1. With a little effort and imagination, you can make an original but simple table in the shape of a tree for your child. Its tabletop It will be made, like the chair in the instructions above, from plywood. First of all, you need to draw a blank “crown” tabletop on a sheet of plywood and cut it out with a jigsaw.
Cutting out the “crown” of the tabletop
Finished countertop
Step 2. After this, the edges of the tabletop need to be sanded.
Sanding the edges of the tabletop
Step 3. Next you need to draw two trunk legs on the plywood. They will be the same in size, but in the finished version they will be connected to each other by means of a sawn lock. That is, on one of them the drink will be made from below, and on the other - from above. So you need to mark the middle of each workpiece in height.
Legs painted on plywood
Step 4. Next, you need to use the jigsaw again and cut out the legs, and then sand them with sandpaper.
Legs are cut out
Sanding the cut out legs
Step 5. Then on the countertop you need to mark the locations of future holes for self-tapping screws, and then drill these same holes. They are necessary for attaching the legs to the tabletop.
The locations of future holes are marked
Drilling holes
Step 6. Both parts of the legs need to be connected using a saw lock on the elements, and then in the end upper part, mark and drill holes that coincide with the holes in the tabletop.
Leg connection
Holes are drilled in the legs
Step 7. Now you should first prime and then paint the surfaces of the table parts. It is important to dry each layer before continuing work.
First you need to apply primer
Painting table parts
Step 8. All that remains is to assemble all the elements of the table together, and you can install it in the children's room to the delight of the baby.
Assembled table for children's room
Video - Do-it-yourself bed-house
Video - DIY crib
Video - Making a chair and table
As can be seen from everything written above, making children's furniture with your own hands provides enormous opportunities to bring any child's wishes to life. At the same time, if parents treat the production with full responsibility, it will be possible to realize all the ideas of adults from the point of view of caring for the health of the child. The main thing is to choose the right materials, and also decide what type of future children's furniture should have. And remember that there is nothing more environmentally friendly and better than wood for making interior items in a nursery.
Coupe
In this option, during opening, one sash overlaps the other, creating a sliding structure. To install this type of installation you need to have certain knowledge or experience.
Note!
Gray sofa - TOP 180 photos and video designs with a gray sofa. Advantages and disadvantages of furniture in gray tones. Gray sofa upholstery options
- Bookcase - the need to use a bookcase. Varieties of designs, sizes and shapes. Bookcase materials (photo + video)
- Leather sofas: advantages and disadvantages of leather sofas. Color options in leather upholstery. Combination of a sofa in the interior (photo + video)
The accessories are sold as a set and include:
- Wheels for the box.
- Guide structure for the web.
- Special installation cassettes.
- To facilitate opening, locks and a closer are provided.
The cabinet structure should have a threshold; this is the most suitable option for such furniture.
Idea for storing soft toys: transforming an old closet
Over time, soft toys accumulate in such a quantity that placing them on shelves or in baskets is no longer possible. In this case, an aviary-shaped cabinet would be an excellent solution. The non-standard design will not take up much space, but will allow you to accommodate a large number of toys.
If you don’t have the funds to buy new furniture to store toys, then you can creatively and originally transform an old cabinet
As a basis, you can take an old narrow cabinet, which was previously used to store books or clothes. All filling must be removed, leaving only one shelf dividing the space into two parts. The original design can be made in two ways.
The first option is to cut the PVC pipes into the required lengths and attach them to each section on both sides. You will get a kind of vertical lattice that will not allow toys to fall out of the closet. However, this installation option is not the most reliable: over time, the pipes may become loose.
To make a cabinet using the second method you will need:
- Metal pipe with a diameter of 2.5 cm;
- Console mounts;
- Corners;
- Tools.
The shelf is additionally attached to the wall using corners. The pipe is cut into several parts according to the section size, and consoles are put on each of them. The blanks are inserted into the cabinet and attached to the bases with self-tapping screws. The “aviary” for soft toys is ready!
What to pay attention to
Before starting all work, it is necessary to take measurements of the room and draw up a drawing of the future structure. These steps will help reduce assembly time and avoid possible errors in the process.
The width and height are calculated using a tape measure; special attention should be paid to the distance to the baseboard, window sill and sockets.
Well-thought-out nuances will help to avoid problems with the accessibility and convenience of most things during operation or opening doors.
A cabinet made of boxes: what is the difference from a cardboard one?
A do-it-yourself cabinet made from boxes is simple; just attach a few parts with strong glue or a stapler, and a convenient niche for storing small items will be ready. Only this type of headset is more suitable for light objects, since too heavy objects can deform the structure.
Source berkem.ru
Often such organizers are made not so much for toy purposes, but for storing and distributing drawers of main furniture into zones. Can be used to bring order to the school desk.
Source comoorganizarlacasa.com
This video shows in more detail each step of making a doll cabinet using the origami technique:
Preparation
You can draw a drawing for the product yourself or create it in a CAD program. The computer system is very efficient but difficult to use.
For the first option, you need to purchase a sheet of paper and stationery in advance. It is important not to forget about the thickness of the material used and mark the door fasteners.
The side view is compiled taking into account the depth of the furniture, the fastening of doors and the rounding of shelves.
To ensure that the shelves do not create problems during installation, they should be placed at a distance of 10-15 cm from the front wall. The drawing must also include the dimensions of all filling elements of the structure.
Preparation of the drawing, creation of cutting and cutting of parts
In order to independently design a children's wardrobe, a drawing is required. In order to create it, it is necessary to draw separately all the components of the structure. But it will be much easier to use one of the many computer programs that can help with this.
If you decide to use software, then after creating the drawing you will need to transfer it to the cutting program. Upon completion of this stage, on the cutting diagram printed on paper, you need to mark with a pencil all the ends to which the edge will be glued.
As mentioned above, it is extremely difficult to cut the material we have chosen carefully without damaging the edges of the decorative coating, and it is unlikely that you have special devices for this. Therefore, it is better to entrust this to professionals in the nearest carpentry workshop that provides the appropriate services. By the way, to cut a mirror of the required size, you also need to contact the craftsmen. There are special organizations involved in cutting glass.
Once all the components of the future cabinet are ready, all that remains is to purchase the fittings.
Details
After the preparatory work, you can begin manufacturing the components of the cabinet. The dimensions must be transferred to a wooden base using a pencil and a meter ruler
The next stage is sawing and direct assembly.
Cabinet assembly sequence
- First of all, glue the edge to the ends of the parts that you should have marked on the drawing. It is necessary to ensure that the edges of the wood board do not crumble or chip. The edge tape is covered on one side with a sticky layer, which must be applied to the surface and ironed with a hot iron. While working, you need to remember that if you sharply bend the edge at the corner of the part, it will break. To prevent this from happening, before bending it, it is advisable to warm it up a little in this place. After waiting for it to cool, you can remove excess using a sharp knife. If the edge is not very smooth, you can smooth out this defect with zero sandpaper.
- The component parts must be divided into groups, and the assembly order must be observed, based on the design diagram with all the necessary dimensions. This diagram will serve you instead of instructions.
- Next, you should mark with a pencil all the holes for fasteners and door hinges.
- Once the markings are done, you can start drilling holes using a drill and a drill of a suitable diameter. All holes must be symmetrical, otherwise the appearance of the cabinet will be ruined.
- Taking a screwdriver, assemble the housing using European screws and self-tapping screws.
- Take a drill and use a special bit to drill holes for the hinges in the doors. Then fasten them with self-tapping screws.
- In the places where shelves and drawers are fixed, mark the locations of the holes for fasteners, and during work, remain extremely careful, otherwise, if the holes are not strictly opposite each other, the shelves may be skewed.
- Next, drill all the holes according to the markings and screw in the fasteners for the shelves and drawers.
- Once the assembly is complete, as a final touch, you can put decorative plugs on the European screws, unless, of course, you forgot to purchase them.
When assembling a children's wardrobe, you need to pay attention to the following points:
- it is imperative to strictly monitor the perpendicularity of the cabinet components;
- when attaching doors, the hinges are first attached, and then the doors are leaned against the cabinet and markings are made on its inner wall;
- For greater reliability, in addition to the fasteners, the mirror should be attached with double-sided tape.
Photos of do-it-yourself cabinets
Legs and handles for doors
This technology can be considered a very good answer to the question of how to make a doll cabinet out of a box. However, if desired, such a design can also be improved by attaching additional parts to it.
From one of the short sides of the lid of a long box cut off at the first stage, you can, for example, roll up a tube, glue it and subsequently separate several short sections from it. These elements are subsequently glued to the bottom of the cabinet as legs. Handles for the doors of such a craft will be easy to make from pieces of wire if desired. To do this you need:
- cut two short pieces from the wire;
- make two holes in the doors at the same height;
- insert the wire into the holes so that handles are formed on the front plane and screw it on the back side of the doors.
How to choose material?
The safest materials for a child's room are presented in the following list.
- Wood massif
- Fine particle board
- Premium plywood
- Fabrics and fillers must be natural, confirmed by quality certificates
Do not use paints and varnishes with a strong odor, as they are very toxic. It is better to choose a fabric that is easy to clean from stains and is as wear-resistant as possible.

