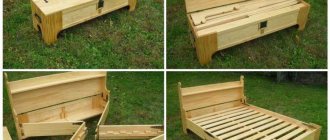
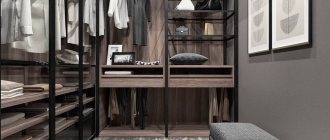
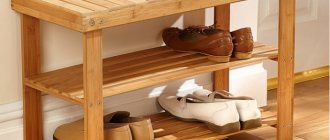
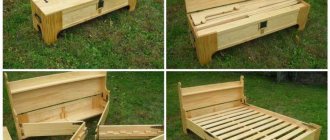
Currently, many rural residents cannot afford to purchase new furniture for their home. And city apartments do not always have a large area where it would be possible to place household items. But, despite this, people still learned to cope with these problems on their own. To do this, you can make a wooden cabinet with your own hands, without the services of specialists. Carrying out such a design at home is not particularly difficult, but in order for the furniture to have a long service life, it is necessary to become familiar with the sequence and nuances of the work in advance.
What is needed for this
The market is filled with all sorts of materials, so the question of how to make a cabinet and get the necessary components is not as difficult as it seems.
Some of them will be:
Multilayer plywood is very durable and wear-resistant; it does not contain chemical compounds harmful to humans. Treat environmentally friendly design components.
Wood chip boards are the most popular today. The price makes them accessible to many people, but the quality does not suffer.
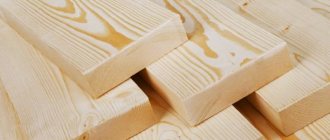
Wooden boards can be cut from different species, sizes are adjusted to an exclusive order.
Cabinet plans often include: pine, birch or oak. Such types are characterized by high strength and resistance to temperature changes, and water resistance.
If the furniture is made for more than one year, then the choice must be approached with special care.
Material selection
Give preference to natural wood or its derivatives. These are chipboard, fiberboard and MDF. Plates covered with a layer of laminated plastic allow you to choose any color, structure and texture of future facades.
Wood and its derivatives are the optimal material for cabinets.
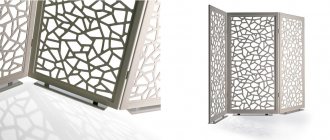
Please order sliding compartment doors separately. Glass facades look beautiful, on which patterns are applied using laser, chemical or sandblasting engraving.
A cabinet with patterns on glass looks very beautiful.
Glossy photo wallpapers also fit harmoniously. They are made on glass surfaces, which has a beneficial effect on washing and cleaning.
Photo wallpaper on the closet will add a special chic to your room.
If you have experience as a master carpenter, make facades from natural wood. Here are some breeds that will come in handy:
- ash;
- beech;
- oak;
- hornbeam;
- exotic wood species (black, mahogany).
Natural wood cabinets look great.
In terms of cost, labor costs and production time, cabinets made of natural wood are more expensive than those made of chipboard or MDF. But in terms of visual qualities, substitutes from the woodworking industry cannot be compared with natural wood.
Natural wood is more expensive than its substitutes.
Tool
The selected material option must be purchased and transported instead of assembly; a do-it-yourself cabinet diagram is drawn up taking into account the available equipment.
To complete the work you will need:
- Saw on wood.
- Surface grinding machine.
- Square.
- Tape measure or other measuring device.
- Fastening systems.
- Metal corners.
- Carpenter's saw.
- Sealing mastics.
Note!
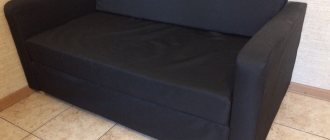
Dark sofa: advantages and disadvantages of dark sofas. Features of choosing dark shades of a sofa for different styles (photo + video)
- Chest of drawers for the bedroom: TOP-170 photos and videos of chest of drawers for the bedroom. Choosing the shape, size, color and material of the chest of drawers
- Light sofa: TOP-130 photos and videos of light sofa options for different rooms. Varieties of upholstery materials and colors
To make the cabinet look perfect in the interior, you need to choose a shade; it can be applied using water-based acrylic paint.
Create a project
Having decided on the type of cabinet, you need to create its design on paper, where all the necessary dimensions, general appearance, location of all structural elements, etc. will be indicated.
You should end up with cabinet drawings that are clear and comprehensive. The quality of your work depends on how complete the drawing is, and partly this will serve as a guarantee that you will not encounter unpleasant surprises in the process.
It is best if the diagram of a do-it-yourself cabinet has three projections and the necessary cuts. Of course, if you are not an expert in the field of technical drawings, it is unlikely that you will be able to make a competent drawing.
The most important thing is to make a drawing that is clear to you, looking at which you can clearly imagine where and how each of the structural elements will be installed, what shape and size they have, how they are attached to each other and what kind of fasteners are required.
Preparing a project and making drawings is a very important stage; treat it with due attention and take the time to think about the work process.
Try to imagine how and what you will do, in what sequence, what will be needed from the tool. You must clearly understand all the stages: creative search during the work process is the prerogative of specialists; it is better for a novice home craftsman to do everything according to a pre-thought-out plan.
Hull view
Many design ideas are beneficial because the owners themselves complement the design with various elements. This option is no exception; you need to take into account that the parts must be combined with each other and with the body, respectively.
Assembly involves making the roof, bottom, rear and side walls. It wouldn’t hurt to think through and implement a retractable wardrobe for seasonal shoes into the furniture.
Stage 2: designing a cabinet in the program
First you need to model the cabinet. A free demo version of the furniture design program “PRO100” is suitable for this; you can download it from the official website. The program interface is simple and understandable even for a beginner. The program recreates the process of creating furniture and allows you to work both on the overall 3D view and on each element separately. This is much more convenient than drawing all the details on a piece of paper and then calculating the dimensions. Everything will be clear and there will be less chance of making mistakes. Cabinet design process:
- After starting the program, create a new project.
- In the “Room Properties” section, enter the dimensions of the furniture: length, width and height.
- On the side panel, using the “New Element”, we model the cabinet parts. This is the main tool in the program. The size of each element can be specified in numbers or adjusted manually.
- Next, you need to determine the dimensions of each part, taking into account your parameters. In our case, the cabinet dimensions are as follows:
Indicate the dimensions of the room (cabinet)
- height - 2300 mm;
- depth - 450 mm;
- width - 1500 m + shoe shelf 500 mm;
- Chipboard 18 mm thick, edge 2 mm.
- To get the height of the side wall of the cabinet, subtract the thickness of the chipboard from the total height, since the ceiling will also have a cabinet roof: 2300 – 18 = 2282, round the height to 2280 mm. The second side wall in the program can be duplicated via “Copy-Paste”. For an accurate fit, you need to use your mouse wheel to approximate the angle of connection of the parts. The parts need to be fitted close to each other so that the second side wall is close to the top part.
To protect against changes, the thickness of the parts should be checked.
- After measuring the box, you need to decide on the internal contents of the cabinet. Since the cabinet is three-section, you need to add 2 partitions the same size as the side walls.
- The next step is to calculate the size of the shelves. From the width of the cabinet you need to subtract 4 thicknesses of laminated chipboard (18 * 4 = 72) and divide the result by the number of sections (3): 1500 – 72 / 3 = 476 mm, subtract another 1 mm so that the shelves easily fit into the niche = 475 mm. The depth of the part is calculated by subtracting the thickness of the doors and edges on the shelves from the total depth of the cabinet: 450 – (18+2) = 430 mm. Next, you need to decide on the number of shelves in each section. In our case there are 6 of them.
- Since there will be a bar in the last section, we will leave only 2 shelves there: upper and lower. We install 2 partitions between the sections.
- We design a small bedside table for shoes in the same way.
- We complete the process of designing the internal filling of the cabinet by installing doors. Between the doors you need to leave a small gap of 2.5 mm on each side so that the doors open comfortably. The size of each door was 2239x480 mm.
- Double-clicking on each part in the program opens a window with dimensions. The parameters must be entered into the general table, since the free version of the program does not allow automatic calculation.
Selecting shelves via Ctrl into a group of parts allows you not to copy each element separately, but to insert a section at once. Please note that once parts are copied, they often extend beyond the edge of the cabinet. You need to correct them manually.
There is no need to repeat the names of identical parts. It is enough to indicate their number and sizes for one element.
Separately, you need to note the edge and the places where it is needed. The sides of the chipboard that will be joined to other parts do not need to be edged. If you are not sure, you can edge all sides, this will release less harmful substances from the chipboard, but this will increase the cost. A 2 mm PVC edge is suitable for visible corners, and 0.4 mm for the remaining corners. When calculating dimensions, take into account the thickness of the edge.
Built-in model
For work of this kind, you can use improvised materials; this is very convenient if you suddenly run out of boards, and the nearest store is an hour away.
In addition, rational use of existing funds will help preserve the family budget.
The built-in closet cannot be moved or moved; when deciding on this assembly option, the owner must understand this.
Note!
Small sofas: TOP-140 photos of small sofa models. Pros and cons of small sofas, choice of shape and upholstery
Sofas from IKEA: features of models from the manufacturer. Varieties of sizes, shapes and designs. 120 photos + video reviews
U-shaped sofa: TOP-160 photos and videos of design ideas with a U-shaped sofa. Pros and cons of the design, choice of upholstery and color of the sofa
Stage 5: furniture assembly
Since the design of the cabinet does not provide for a back wall, we begin the assembly process not “lying down”, as usual, but immediately by installing it against the wall. For quick work, you will need 2 screwdrivers, so as not to change the bit with the drill every time. If you pre-drill the parts, you can get by with one tool. Step by step assembly process:
- Assembly begins by connecting the sections: we assemble 2 side walls and 2 shelves between them. Then install the top part.
- The places for fastening the shelves must be pre-drilled, this will ensure a more accurate fastening.
- After installing the cabinet box, you need to install the remaining shelves, aligning them level.
- The final stage of the assembly process is the installation of the doors. If you didn’t drill the holes for the hinges when cutting, you will have to do it yourself using a special forstner drill. The distance from the edge of the door to the center of the hinge should be at least 20-22 mm.
- After installing the doors, adjust their pressure using two mounting screws that need to be tightened.
- For stability, the cabinet is attached to the wall with metal corners.
You can assemble a cabinet from sawn materials in 4-6 hours. Plus it will take time to plan, cut and purchase materials. You can get an individual wardrobe for your apartment, with convenient filling, cheaper than store-bought options and even more so made to order.
Of course, this design can be further improved. If desired, you can add a plinth and install a back wall made of fiberboard for rigidity and protection from dust. The fastening of the main parts can be done not on the corners, but on confirmations, this will be more reliable. The shelves do not have to be rigidly attached to the walls; they can be placed on furniture shelf holders.
Source: DIY YARI channel.
Swinging doors
This is a fairly popular type of construction; the location of the sashes will depend on the presence of sections inside.
Loops are made in the following varieties:
- Detachable fasteners are installed on the inside.
- Universal ones are used regardless of the sides of the furniture; they are attached to the doors and the product at the same time.
The screwing order is as follows: first of all, the system is fixed to the frame, and then the doors are hung on it.
Build process
Start installing the wardrobe by cutting the material according to the cut sheet. Strictly follow the cutting plan. Consider the loss of size due to cutting the material with a jigsaw. The size of the loss is equal to the thickness of the saw blade of the power tool.
Correct cutting of material is one of the main components of successful work.
Installation begins with the installation of support bars, side frames, lower and upper horizontal crossbars.
First, the supporting structure is installed.
After assembling the main frame, intermediate shelves and hanger strips are installed.
The shelves are installed after the frame is installed.
At the final stage, the sections are fastened with screws, door hinges, handles, closers and other fittings are installed. At the very end, the installation of swing doors, lockers, sliding compartments, and lighting fixtures is carried out.
The final stage is the installation of handles and other fittings.
By following the sequence of steps, you will get a unique, one-of-a-kind wardrobe.
Coupe
In this option, during opening, one sash overlaps the other, creating a sliding structure. To install this type of installation you need to have certain knowledge or experience.
Note!
Gray sofa - TOP 180 photos and video designs with a gray sofa. Advantages and disadvantages of furniture in gray tones. Gray sofa upholstery options
- Bookcase - the need to use a bookcase. Varieties of designs, sizes and shapes. Bookcase materials (photo + video)
Leather sofas: advantages and disadvantages of leather sofas. Color options in leather upholstery. Combination of a sofa in the interior (photo + video)
The accessories are sold as a set and include:
- Wheels for the box.
- Guide structure for the web.
- Special installation cassettes.
- To facilitate opening, locks and a closer are provided.
The cabinet structure should have a threshold; this is the most suitable option for such furniture.
Drawings and diagrams
A correctly drawn up drawing is the key to successful work. It is important at this stage to take into account all the nuances and determine the size of the shelves and partitions. All gaps and allowances for processing the material are taken into account. After the main drawing of the internal arrangement of the compartments is ready, you need to draw a plan for cutting chipboard/MDF sheets.
Drawing up a drawing is a necessary stage of preparation for the manufacture of a cabinet.
The drawing takes into account all significant distances, such as length, height, width. The internal arrangement of the shelves is drawn according to all parameters to represent future dimensions. Don't forget to take into account the thickness of the sheets or wood. Since the minimum size of any material starts from 16 mm, this will play an important role.
A cutting plan is a diagram according to which sheets, bars, and facades will be cut. With such a scheme, material consumption will be minimal.
A sketch of the future design also takes place. Experts in the field of design craftsmanship advise using the method of converging points. Select one or two points on the sheet to which all horizontal lines will tend. The vertical ones in this case will be perpendicular to the horizontal ones. In this way, you will be able to imagine the future design of the cabinet with your own hands as believably as possible.
What to pay attention to
Before starting all work, it is necessary to take measurements of the room and draw up a drawing of the future structure. These steps will help reduce assembly time and avoid possible errors in the process.
The width and height are calculated using a tape measure; special attention should be paid to the distance to the baseboard, window sill and sockets.
Well-thought-out nuances will help to avoid problems with the accessibility and convenience of most things during operation or opening doors.
How to make a cabinet yourself
At home, to create a sketch of a future design, you can use your own drawing skills, transferring the desired functionality and dimensions onto paper. Or you can call for help with a built-in graphic editor, such as SketchUp and the like, or draw a drawing in an online designer. Before drawing/drawing the project, you will need to correctly take the dimensions of the niche with a tape measure (for a built-in one) or decide on the parameters based on the future location and functionality.
It is necessary to take into account the dimensions of the sheets so that when cutting there is a minimum of waste. The sliding door system creates certain restrictions on the depth of the cabinet - a typical mechanism requires a distance of about 100 mm of free working space. Therefore, when designing, not only the thickness of the sheet is taken into account, but also the clearance for the system. If the closet has a compartment for outerwear, the calculations take into account the minimum depth of 50 mm, plus space for the mechanism. If possible, it is worth adding another 10–20 mm so that the doors move freely and things do not wrinkle.
Preparation
You can draw a drawing for the product yourself or create it in a CAD program. The computer system is very efficient but difficult to use.
For the first option, you need to purchase a sheet of paper and stationery in advance. It is important not to forget about the thickness of the material used and mark the door fasteners.
The side view is compiled taking into account the depth of the furniture, the fastening of doors and the rounding of shelves.
To ensure that the shelves do not create problems during installation, they should be placed at a distance of 10-15 cm from the front wall. The drawing must also include the dimensions of all filling elements of the structure.
Cabinet drawing
Depending on where the cabinet will be located - in a house, in a country house, in a Khrushchev-era building, it is necessary to draw up appropriate drawings and break the product down into its component parts. If you got a good grade in drawing at school, you can do everything yourself on a piece of paper. Drawings are also created in special computer programs that can be found on the Internet.
Before you start drawing, it is important to take into account the external dimensions of the cabinet and the dimensions of the room. You should pay attention to the baseboard, baguettes, switch, window sills, heating and take into account the distance from them.
- Plinth in the room. If the closet is designed from wall to wall, then the baseboard will not allow the furniture to be pushed in tightly. In this case, you need to bevel the vertical edges of the cabinet, or dismantle the baseboard itself.
- Chipboard thickness. The thickness of the material is calculated taking into account what will be stored in the cabinet and its dimensions. If there are no long shelves for books - from 16 mm. When drawing, you can count on this thickness. For cabinet furniture, you need to choose high-quality material that is more expensive.
When creating drawings and diagrams of a cabinet for the ceiling, we must not forget that its assembly is carried out in a lying position, and then it will need to be lifted and placed. Then its diagonal should be 3-5 cm shorter than the ceiling height. Otherwise, when lifting the cabinet, you may hit the ceiling.
Details
After the preparatory work, you can begin manufacturing the components of the cabinet. The dimensions must be transferred to a wooden base using a pencil and a meter ruler
The next stage is sawing and direct assembly.
Let's get started
When everything is ready, we begin to put our design ideas into practice.
While working, remember safety precautions; compliance with them should always be a priority.
Manufacturing begins with marking all the panels. After cutting them out, mark the necessary holes and drill them. Then edging is done. When everything is ready, begin assembly.
The base is assembled, then the walls are attached. At each stage it is necessary to control the linear dimensions.
After installing the walls, all internal shelves and partitions are attached. Install the drawers. They check how the moving elements move out: they should not interfere with each other, everything should work smoothly and without jamming.
A separate and very important stage is the installation of doors. Doors must be installed with the latches open. After installation, you need to check how everything works.
The last stage is the installation of all plugs and fittings: locks, handles, etc.
Of course, this is only the most general plan of work; in each specific case it may differ in its sequence. The main thing is that everything should follow its course.
Don’t forget about control: check the dimensions, how everything is installed and how firmly the fasteners are made. At the end, you will find pleasant satisfaction from the work done, the joy of your loved ones and pride in what you have created with your own hands.
Photos of do-it-yourself cabinets
What can you create using your talent?
If a person has all the necessary construction skills, then it is not difficult for him to build any cabinet, of absolutely any size.
- What is the best insulated street door to choose?
- Do-it-yourself bed: design, design and stages of making a bed (video + 75 photos)
- DIY table: overview of the main models and step-by-step instructions on how to make a unique homemade table (130 photos)
What types of cabinets can you create using your remarkable construction talent:
- built-in option;
- a wardrobe with sliding doors and a dense frame;
- case version;
- a cabinet option with hinged doors mounted on special hinges;
- open version or wardrobe without doors;
- option with partial installation.
Chipboard panels for work
Chipboard is a cheaper material. However, its structure is not inferior in its properties to solid wood. According to a similar scheme, all parts are subjected to special processing and impregnation to ensure proper protection of the product from damage.
As decoration, you can use special PVC films with imitation of various wood, stone, and brickwork.
Types of cabinets by shape
The shape of new furniture plays an important role in interior design. The choice of a master depends on the area of the room, the purpose of the cabinet, the number and location of other furniture elements.
Note!
Do-it-yourself furniture restoration - removing chips and scratches, restoring surfaces. Instructions with photos and video tipsDIY ottoman: how to make it at home. The best ideas, master classes. Photo + video review of beautiful ottomans
DIY stool: master class on how to make it from wood. Instructions for preparation, assembly and beating (video + photo)
There are several options for hand-made cabinets:
- Linear arrangement. The furniture body is presented in the form of a rectangular structure located along one wall.
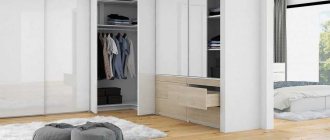
- Corner cupboard. Designed for small or irregularly shaped rooms. The body is presented in the form of two components, which are located along adjacent walls.
- Round model. The rear part of the building has a traditional structure, and the furniture front is rounded. Most often, the front wall is represented by a mirror panel with a compartment door.
Cabinets can also have a radial, polygonal shape, made according to the author's design. However, such a design is quite difficult to implement without the proper experience and skill.
