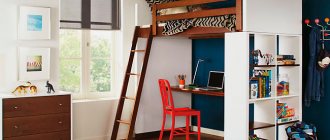
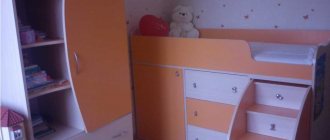
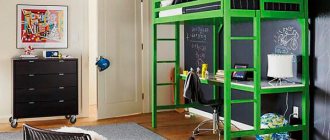
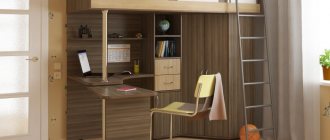
A loft bed with a work area is an ideal solution for a small apartment where all zones need to be rationally distributed. If necessary, you can order or make your own design of any configuration that will suit both a child or teenager, and an adult.
In order not to miss any important points, you should familiarize yourself with the features of beds of this type in advance. Today we will tell you more about loft beds and talk about how to make one with your own hands.
Loft bed with work area
What is a loft bed and what types of designs are there?
The “loft” design is a type of bed that is located at a height of about 1.5-1.8 meters, thanks to which the space below can be used for other purposes. You can make such a product with your own hands, but to do this you need to have at least minimal skills in working with furniture.
Initially, you need to decide on the type of fastening of the structure of the future bed - one or another option should be chosen depending on the purpose of the product.
Table 1. Types of bed fastenings
| Mounting type, illustration | A comment |
On four supports | This is the standard and most common way to install a loft bed. The entire structure is supported on four legs, which allows it to be moved periodically. This type of fastening is suitable for those who plan to move the bed to another part of the room in the future. |
Fastening to the wall and on two supports | This type of fastening allows you to obtain a very stable structure, but its main disadvantage is the inability to further move. Therefore, even before purchasing or manufacturing, it is advisable to immediately decide on the location of the bed. |
Ceiling mount | This is the most original option for installing a bed, which allows you to completely eliminate the presence of supports that clutter up excess space. It should not be forgotten that this type of fastening requires only strong ceilings, otherwise the structure may collapse at any time. |
The first design option is the most popular, especially among beginners. It is worth choosing it in cases where it is not possible to mount the frame directly to the wall or ceiling.
An important feature of all types of beds is the staircase. It can be installed in a straight position or slightly inclined. In the second case, the design will be safer and suitable for children. It should be taken into account that it takes up more free space.
It is easier and more convenient to climb up an inclined ladder
In any case, there remains an additional area below the bed that can be equipped for your personal purposes. There are the following options for using free space:
- Wardrobe and table. In this case, it is necessary to install doors on the side of the structure, and in the remaining space there will be a small table.
- Shelves and drawers. Free space can be delimited using longitudinal and transverse partitions. This will create one closet below that can accommodate a large number of things.
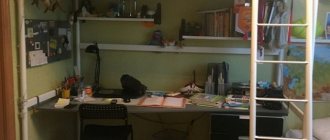
- Desk. If the bed is located at a distance of 180 centimeters, then a large table can be arranged under it. In this case, the need to install additional lighting fixtures should be taken into account, because the structure creates a shadow. That is why it is recommended to place such a bed closer to the outlet.
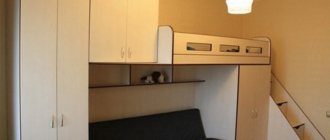
- Sofa. In the remaining space you can install absolutely any furniture, including a sofa. So, it can be used for watching TV, reading and as an extra bed.
- Wardrobe. Such an area can only be located under a high bed. Typically, a dressing room involves installing open and closed shelves. If necessary, you can hide this space from prying eyes using a curtain.
An example of organizing a dressing room in a free area under a loft bed
The following staircase placement options are available:
- On the front of the structure on one side.
- At the end of the bed - in this case, bumpers are installed along the entire perimeter of the front side of the product, and space is left at the end for a ladder.
- Retractable ladder - this option is chosen only in rare cases when making a structure with your own hands, despite the ease of installation. The module is a type of steps (sometimes with drawers), and it extends by installing special rollers. Fixation to the base in this version occurs using metal loops and hooks. The advantage is that the module can be easily pushed in and out if necessary.
- Staircase with podium. This is another safest and most popular staircase option for children. The height of such a podium with railings will be half the size of the bed itself, resulting in a miniature staircase at an angle.
Options for installing bed ladders
Wardrobe or dressing room?
Comfortable bedroom layout
The spacious dressing room is something out of a Hollywood movie. Lots of shelves for clothes, boxes with shoes and hats. Let's face it, in the dimensions of small bedrooms it is difficult to find space for a separate room.
- A sliding sliding door with a large mirror does not take up extra space when opened, and the mirror visually increases the space.
- If the space allows, the dressing room can be made to cover the entire width of the room, then the layout will become more harmonious, without unnecessary corners.
- The cost of a door and several shelves for storing clothes is much lower than a whole closet.
- The small area of the room simply will not allow you to carve out square meters for a dressing room.
- The presence of two doors in a room creates discomfort, but a separate room will add corners and create the effect of a corridor.
- Even if you manage to carve out a few meters for a dressing room, it will be impossible to turn around, much less change clothes in it.
Even at the design project stage, install a socket to illuminate the cabinet. The light will automatically turn on and illuminate the inside of the cabinet. It is very comfortable!
Dressing room in the bedroom
. In this 18 meter long bedroom we used an invisible door that can be finished in the same material as the walls around it.
Lots of wardrobes in the bedroom
How to decide on the size of the bed?
When choosing the optimal bed size, the following nuances must be taken into account: For children under 7 years of age, it is advisable to build a structure 1.6 meters wide, 70 centimeters long, and the height should be no more than 1.2 meters. It is this height that allows parents, if necessary, to approach the child and provide assistance to him in any situation. The disadvantage of the design is the presence of a small functional space at the bottom; it is usually used to store the baby’s personal belongings.
For a schoolchild, it is recommended to install a full bed - 2 meters long and about 100 centimeters wide. The height of the structure in this case can already be up to 1.8 meters. A structure 2 meters long and 1.4 meters wide is suitable for an adult. It is important to choose the optimal height of the bed so that your head does not rest against the ceiling.
In all of the above bed options, bumpers must be installed. Their average height is 30 centimeters.
It is necessary to create a preliminary drawing of the bed, where the dimensions of the parts will be indicated
What materials are used to make beds?
There are several options for materials that are used to create such an exclusive sleeping place as a loft bed. The choice must be made based on your capabilities and personal preferences.
Table 2. Materials for the manufacture of structures
| View, illustration | A comment |
Natural wood | In most cases, wood is used to make furniture in factories and with your own hands. This is the most environmentally friendly option that will last for many years. The most budget-friendly is pine, and the most expensive is oak or beech. It should be borne in mind that any wood needs pre-treatment to prevent the possibility of rotting. |
MDF | Many novice furniture makers prefer to purchase MDF sheets for making structures with their own hands. Their peculiarity is that they are covered with a special facing film, so the product does not need to be coated with special paint and varnish. |
Metal | The metal structure of the bed will be quite heavy, but at the same time reliable. The only drawback is that only a person with the appropriate welding skills can assemble it. For safety reasons, it is better for beginners not to build such beds without the help of a professional. |
Quite often, the above materials are combined with each other, creating the most reliable design. So, you can order a metal bed frame, which will be easy to cover with parts made of wood or MDF.
Mirror in the bedroom
Where is the best place to place it?
A mirror for the bedroom is of great importance. It can visually add space or reflect sunlight from a window, making the room brighter.
- On the wall next to the head of the bed. Waking up in the middle of the night, you will not be afraid of a moving silhouette.
- Opposite the bed. Any movement will be reflected in the mirror, which will not add comfort during sleep.
- On the ceiling. It's no longer fashionable, vulgar and boring.
- On the inside of the door. A dangerous place for a mirror, considering how many times a day you open and close the door.
Mirror in the bedroom
. Here the mirror performs several functions at once. It's convenient to look at yourself while applying makeup. A mirror is part of a successful wall design at the head of the bed. It also perfectly visually expands a small bedroom.
More mirrors in the bedroom!
Making a do-it-yourself attic bed
In this case, wood will be used to make the loft bed. Such material can be processed at home without outside help.
The list of materials needed to make a bed will depend on the prepared design drawing. In this case, you will need the following:
- wood blocks (quantity and size are calculated individually for each product);
- slats;
- chipboards;
- stain and varnish;
- circular saw or jigsaw;
- screwdriver;
- drill;
- sander;
- measuring tape;
- a simple pencil;
- building level;
- mask and goggles to protect the face.
When purchasing, you need to pay attention to the quality of the wood - it must be dry, without signs of rotting
If the design involves the creation of an additional functional area under the bed, you will need to purchase MDF sheets. If desired, you can use natural wood to make such elements.
Tools used in the work process
Fasteners
Manufacturing process: step-by-step instructions
Step one: prepare the parts. Before you begin assembling the bed base, you need to prepare all the parts. You can do this yourself if you have a circular saw or jigsaw, or use the services of furniture makers. The second option is especially suitable for beginners in this matter.
The following details need to be prepared:
- base posts – 50x100x1650 mm;
- frame cross members - 50x150x950 mm;
- backrest crossbars - 50x100x950 mm;
- longitudinal bars of the backs - 50x100x1900 mm;
- longitudinal frame bars - 50x150x1900 mm;
- slats for the bottom of the bed (on which plywood sheets are laid) - 50x50x190 mm;
- boards for assembling stairs - 50x150x1000 mm;
- boards for fixing steps - 25x50x200 mm;
- steps - 50 x100x450 mm.
Sawing parts according to preliminary marks
Step two: assemble the frame. The main stage in the manufacture of a loft bed is the assembly of the frame. The process is as follows:
- Before you begin fastening, you need to arrange the previously prepared parts in the correct order. In addition, it is important to have an exact diagram for assembling the base nearby at all times.
- It is necessary to connect the end parts of the structure, which have two posts, a cross member to strengthen the frame and a transverse base board. In order to securely fix it in the parts, you will need to make preliminary holes for fasteners. The other end part is assembled in the same way.
- The end parts are secured to each other by longitudinal crossbars. Before fixing them, you need to once again make sure the measurements are correct using a building level.
- To secure the longitudinal crossbars of the frame, the tongue-and-groove method is used. At the same time, to increase the strength of the base, metal corners are installed. This step should not be skipped because a large load is placed on the lower crossbars.
We fasten the boards with bolts along the width of the future bed
We fix the brackets for installation
We install the flooring beams into the brackets
Carefully fix the beams
Bottom view of beams
Step three: installing railings. In this case, the railing should be fixed in the process of connecting the base parts, because they go into it. Their height can be adjusted, if necessary, by the position of the racks. The boards are connected to each other using the tongue-and-groove method, as well as using screws and metal corners. It is advisable to fix parts of the structure in two ways to achieve greater reliability.
We cut holes in the flooring for installing racks
Closing the end part
We decorate the racks using plinths
We fix the cross bars
Finished railings: bottom view
Step four: make the flooring for installing the mattress. In order to make the flooring, it is necessary to fix support strips measuring 50x50 millimeters from the inside of the frame. They are secured with self-tapping screws or European screws. For flooring, pieces of boards or sheets of plywood are usually used. Professional furniture makers recommend using the second option, because it allows you to better design the ceiling of the work area.
We fix the flooring to the frame
Step five: make the stairs. You can make a staircase with or without a supporting podium. Typically, when making a bed for an adult or teenager, a ladder is attached to the end of the bed. In our case, you will need to take two bars of the same size, and then make marks on them along the edges for oblique cuts (200-250 millimeters from the beginning) for the purpose of their subsequent attachment to the frame of the loft bed. The ladder is attached to the floor and side frame using strong wood glue.
After which it is necessary to mark the location of the steps (usually they are 250 millimeters apart from each other). The fixation points should be marked using a building level and a simple pencil, and then the steps can be secured with self-tapping screws.
Installing stairs on a slope
Step six: set up a work area. The work area can be equipped with various additional elements. First of all, it depends on the free space that remains under the bed.
We take the table top blank
We fix the zigzag structure on the reverse side
We install the tabletop on folding hinges to the wall
We fasten together the parts of the frame of future shelves
Installing crossbars for shelves
Installing shelves on the wall
All parts should be joined together using wood glue, and then clamped with clamps for better fixation. When the glue has completely dried, the surface can be sanded with sandpaper.
Step seven: finishing the structure. After connecting all parts of the structure, it is necessary to proceed to the finishing stage. To do this, you will need to carefully process the parts with a grinder or sandpaper.
Surface treatment with stain
The decoration of the loft bed has a certain sequence:
- the sanded surface must be covered with a layer of stain;
- Next you will need to apply the varnish and wait for it to dry (it is important to make sure that there are no drafts in the room);
- When the first layer of varnish has dried, you can apply a second one - this will allow you to achieve a more intense color.
Ready-made bed structure on which you can install a mattress
Video – DIY loft bed
Video – DIY chest of drawers
Sockets
Making a competent bedroom design
When combining a desktop and a bed, twice as many sockets are needed. For computer and printer, for charging gadgets, night light, humidifier and TV. And if there is no dressing room, then iron your clothes and curl your hair with a curling iron. You need to think through and calculate everything in advance.
After you have outlined the functional areas on the plan, mark the location of the outlets. Near the bedside tables, desk, closet or dressing room, or in the dressing room itself. You will need an outlet for the TV and a digital TV tuner. Don't forget the outlets for the vanity and one extra for the vacuum cleaner.
The nuances of making furniture
In order to get a high-quality bed design, you need to take into account some important nuances:
- When drawing up a drawing, it is important to make sure that the future bed is reliable, especially if a child will sleep on it. If necessary, you can increase the height of the side boards and the width of the stairs.
- If you purchase damp boards, you will need to dry them at home. The maximum humidity level should be no more than 17%, otherwise the frame will quickly deform. Before starting work, any tree must be at room temperature for at least 24 hours.
- It is recommended to connect the parts together using glue using the tongue-and-groove method. To do this, you need to first form the tenons on the parts using a milling machine and make recesses in the racks according to their dimensions. In addition, you can strengthen the structure with European screws.
- If you already have a ready-made mattress, then when drawing up the drawing you need to take its parameters into account. In addition, you will need to leave about 2-3 centimeters of free space for bedding.
- During the assembly process, you will have to constantly use a building level to get perfectly even corners, otherwise the structure assembled “by eye” will turn out to be unstable.
During the construction process it is necessary to use a level
Advantages and disadvantages of making a loft bed with your own hands
Any design has certain pros and cons, so it is recommended that you familiarize yourself with them before starting work.
It is worth noting the following advantages of creating a bed with a work area below:
- obtaining usable space - this is the feature that most often becomes the reason for making a bed of this type;
- budget savings - making a loft bed with your own hands allows you to save a certain amount of money, in addition, creating a closet, table, shelves in the remaining space eliminates the need to purchase a bedroom set;
- the opportunity to create a product of an unusual design - if desired, you can experiment with the appearance of the structure and create additional decorative elements.
Making furniture yourself - saving your budget
There are also some disadvantages of loft beds:
- not all designs are safe for small children, so the size of the bed and the method of its arrangement are selected in accordance with the age of the child;
- lack of constant access to your sleeping place - for some people, the need to climb the stairs to the bed may seem inconvenient;
- There may be problems with air circulation above.
Designs with a large working area can only be installed in apartments with high ceilings
Where is the correct way to open the door?
Inside the bedroom or outside the bedroom?
Think about the direction of opening the door in advance and indicate this on the plan. In or out is a matter of convenience. Analyze the layout and decide which direction will be convenient for you.
Good - The door opens inward with the leaf facing the wall
. An excellent solution to save usable bedroom space.
OK - The door opens inwards
, you face the wall. In order to enter a room, you must first close the door.
Both good and bad - Outward opening door
. In this case, not everything is clear. The door can open outwards, but you must face it towards other rooms. Otherwise, such a door will interfere with passage.
You can clearly see:
1. Better door opening to the inside. The door leaf does not impede movement.
2. Proper opening of the door outwards. The door leaf does not impede movement.
3. Incorrect opening of the door inwards. The door leaf prevents movement along trajectory “A”.
4. The worst way to open the door is outward. The door leaf prevents movement along both trajectories.
When ordering interior doors for the bedroom, do not forget about a lock for locking from the inside and a limiter that will protect your furniture and walls from being hit by the door.
Let's sum it up
A loft bed is the dream of almost every child, as the sleeping place immediately becomes much more interesting. But for older people, such a design can also be useful, since it allows them to save space, rationally use living space and does not impair the quality of sleep. When making such an unusual bed model, it is important not to deviate from the detailed instructions - this will allow you to obtain a durable, safe design.
Wanting to place a larger number of sleeping places in a small area, the first thing any home owner thinks about is installing bunk beds. When choosing a model, you need to pay attention to the performance characteristics of structures, their appearance and economic component. Read more in the special article.
