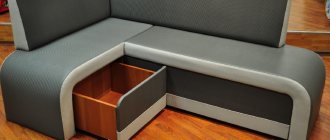
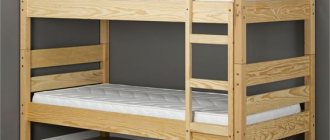
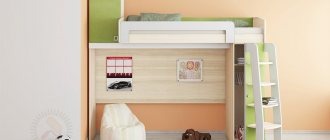
A bed for children is furniture that has to be changed from time to time, given the age of the child. If you can’t buy a crib, you can make it yourself. There are undoubted advantages to this. The crib will meet the child's wishes. If you use high-quality material to create the structure, you will be sure that the furniture will not harm the child’s health. Often finished pieces of furniture emit toxic, unpleasant odors for years. Well, saving money is an important factor in making a decision.
In the article we will look at how to make a comfortable baby crib with your own hands, what you will need for this, we will introduce you to different types of baby beds, we will present the sequence of actions and drawings.
Step-by-step instructions for making a bed
! It should be noted: manufacturing costs will be about 4135 rubles.
To work you should prepare:
- 1. Furniture panel 2000*300*18 mm, 2 pcs. – 1350 rubles.
- 2. Furniture panel 1200*300*18 mm, 2 pcs. – 806 rubles.
- 3. Beam 2000*40*50 mm, 3 pcs. — 1113 rubles.
- 4. Sheathing boards 1300*96*20 mm, 5 PCS. — 486 rubles.
- 5. Screws 3.5*45 mm 100 pcs. – 120 rubles.
- 6. Confirm screw 7x50 mm 14 pcs. – 150 rubles.
- 7. Screw M8*80 mm 4 pcs. – 74 rubles.
- 8. M8 nuts 4 pcs – 36 rubles.
Tools for making a bed:
- 1. Screwdriver.
- 2. Saw.
- 3. Sanding machine.
- 4. Measuring tape.
- 5. Level.
Assembly steps:
- First, the bed frame is assembled. To do this, furniture panels 1200 and 2000 meters long are fastened at the corners. To set a right angle, you can use a homemade chipboard corner (2 chipboard parts of the same size are connected perpendicular to each other using Euro screws). Furniture panels (bed frames) are secured with clamps.
- Next, the two drawers are fastened with confirmatory screws. You will need 3 screws for each corner of the bed.
- Next, you should check the diagonals of the bed: they must be measured with a tape measure. The length of the diagonals must be the same.
- Remains of timber are used for the legs. The length of the legs is about 180 mm.
- Next you need to prepare the timber. To do this, 2 thicknesses of furniture panels (36 mm) and 2 thicknesses of legs (100 mm) are sawn from the length of the beam.
- The prepared beam is tried on: for this, it is placed between the sides of the bed, and the legs are inserted into the corners. It should be a right angle.
- Next, a beam is screwed to each drawer, at a height of 140 mm from the lower edge of the furniture panel. Screws of 3.5 * 45 mm are used for every 10 cm.
- Next, the legs are fixed with a clamp and a through hole with a diameter of 8 mm is drilled. A screw is inserted and tightened with a nut.
- The frame is ready. It is necessary to check the level of the position of the sides of the bed relative to the floor.
- The next step is making the slats for the bed - these are the transverse slats on which the mattress is laid. To do this, the boards are cut and sawed to length from 1300 mm to 1250 mm. This is done to create a reserve for wood swelling.
- The prepared slats are laid on the bed beams at the same distance (30-50 mm). Next they are screwed to the beam. Use 2 screws on each side.
- To increase the strength of the bed, it is necessary to make a stiffening rib: for this, another beam is attached in the middle, parallel to the side beams, which will support the middle part of the bed.
- Next, you should sand the bed with a sander using sandpaper (grit 180).
- After sanding with a machine, the bed must be cleaned of dust and applied with Watco Danish Oil (light walnut).
All! The bed is ready.
The frame can be used as an independent bed, the head of which will be any wall of the room. If you want to make a full-fledged bed, then you need to think about making a headboard for it.
Bed house yourself: step by step
Before you start making a bed-house, you must first make a base for future furniture.
Crib base
First you need to make a base. To do this, you need four bars, the length of which should be 1300 mm. This design will serve as a vertical support for the bed. After you have fixed and secured the block, you need to cut off a small part at the top of each block at an angle of 45 degrees. This procedure is needed for a future roof with slopes.
Before sawing a piece of beams, you need to mark the part of the cut with a pencil, using an ordinary ruler. It is necessary to cut down using hacksaws.
Roof for home
In order to make the roof of the house, you will need four bars, the length of which should be 730 mm. After the beams are secured, you need to cut a part of the beam on top of each beam at an angle of 45 degrees. Don't forget to go over the places where you cut the beams with sandpaper so that your child doesn't get hurt on them.
The support is made from scraps of beams. Everything should be attached to the roof ridge. It is necessary to take glue and attach the upper part of the ridge to the entire blank of future furniture.
Vertical joints and supports will need to be glued. Moreover, this procedure must be repeated several times. After all, the upper part of the house must be mounted on self-tapping screws, the length of which should be 40 mm. Self-tapping screws should be screwed in at least 4 mm from the line of the two roof components.
After completing these steps, we will see the final outlines of the entire structure.
Frame attachment
In order to complete the work with the end of the house, you need to screw a block to the bottom of the structure. The length of which will be 830 mm. This beam will serve as a baluster. Which will support the entire weight of the house.
It is recommended to use a tie to assemble the side components, since the connection will be almost invisible and will look more elegant and beautiful.
For such an inconspicuous installation, you need to drill holes in the bottom of the furniture (in the block) using 11 mm drills. The drilled hole should be in the middle of the crossbar. Remember that the hole should be through.
Then, you will need to drill a hole in the middle of the block itself using a 6 mm drill. You need to place a screw in the resulting hole, and then secure it all with a tie.
You can also use long screws instead of short ones. But it is necessary to pre-treat them with an adhesive substance.
Assembling the base of the house
In order to make the base of the house, it is necessary to use thick beams. Such bars should be identical in size to the sides of the bed. From the inside, thin strips must be screwed to the beams using self-tapping screws.
It must be remembered that the screws must be placed at the same distance. Such plates are a support for the manufactured frame of the house, which supports the bottom of the furniture itself.
It is necessary to make templates from the bar in advance, the length of which should be 6 centimeters. It is necessary to make several holes in a wooden block for self-tapping screws. The distance between each hole made must be at least 25 mm.
On the inside of the rack, mark the location for the hole in which the eccentric will be located. This hole is made with a drill, and then screws 10 cm long must be screwed into it.
Pay great attention to the joints. After all the procedures, it is necessary to pour adhesive liquid into the holes on the lower tier and tighten with bolts
Securing the frame for the future crib
It is necessary to attach all components of the furniture well. To do this you will need four bars. The length of each of them should be 1660 mm.
Remember that the length of the beams is equal to the length of the sides of the bed. All components are attached using glue and screws. Strengthen the entire structure using corner fasteners. Using a photo, you can make your own bed-house for a child.
We assemble the basis of the product - its frame
Making a bed begins with determining its future dimensions. The average dimensions of a single bed are 100 cm wide and about 200 cm long. To make the frame, you can take several boards 25 cm wide and about 4 cm thick: 2 boards 200 cm long (for the sides) and 2 more 100 cm long (for the ends).
The parts are connected in several ways. The choice of any of them depends on the preferences and level of training of the master:
- Making your own bed using eyelets and wooden spikes. This is a rather complicated method, but it ensures reliable and high-quality connection of elements. The connection of the boards should be made W-shaped. The nests can be hollowed out with a chisel or cut out with a jigsaw. The grooves should be about 5 cm deep and about 2-3 cm wide. The corners of the grooves should be aligned at 90 degrees. Then the prepared joints should be coated with glue and assembled.
- Making a bed with a minimum of effort is possible by using self-tapping screws to connect the structural parts. In this case, it is recommended to strengthen the frame with metal corners.
The manufacture of a single or double bed involves the installation of additional longitudinal stiffeners from bars with a cross-section of at least 5x5 cm.
Possible mistakes
Anyone who has not previously encountered furniture making may make a number of mistakes. Here are the most common ones:
- Using fresh wood. Since over time the material will dry out, become denser and, accordingly, decrease in size, the structure will simply fall apart. For a bed, you should only purchase boards that have been left in a dry, ventilated area for two or three years or have been machine dried.
- Neglecting to polish parts. All parts of children's furniture must be properly processed to avoid injury. Since a child can stick his hand even into narrow cracks or crawl completely under the bed, even those that are inside the structure should be sanded.
- Connecting parts using screws. This assembly option is good anywhere, but not in children's furniture. Under the influence of constant loads, the thread will destroy the structure of the wood fibers, and over time the structure will become loose. To assemble the parts, you should use special tenon joints, which are shown in the figure below, and be sure to glue them with wood glue. To strengthen areas that are subject to the greatest loads, metal ties are used.
Progress
We assemble the frame. Let's start with a 40x95 mm board. Let's cut it for the legs. We should get 2 elements 910 mm long and 2 410 mm long.
Blanks for legs From a 45x20 mm board we will make the perimeter of the bed and a couple of blanks for the headboard. Since the factory cut of the workpieces is not very even, I will trim the workpieces manually with a Japanese saw. The peculiarity of this saw is the presence of very small teeth and their “multi-directionality”. This saw gives a beautiful thin cut.
I trim the blanks with a Japanese saw. The following frame parts are: 200 cm and 165 cm. We made them from boards with a section of 145x20 mm.
Blanks for the frame We will also prepare the parts on which the slatted bottom of the bed, an element for supporting the slats and a stand will rest. The stand will be attached to the support in the center of the bed. It is needed for greater reliability.
1. Two sidewalls on which the slatted bottom will rest; 2. a beam in the middle, which will take on part of the load. All ends and rough surfaces should be sanded. We will also soften the edges of the details. Using self-tapping screws, we attach the slats to the longitudinal walls of the frame, on which the slatted bottom will rest.
I attach the supports for the slatted bottom. To fix the legs to the bed, I used corners that would give rigidity in the diagonal direction, and in some places I attached the parts with an oblique screw.
We assemble the structure using corners and fastening with an oblique screw.
I highly recommend buying a jig for fastening “on an oblique screw”. You will need it more than once. The legs of the bed protrude 1 cm above the frame. We make the appropriate markings and attach the parts to the base of the frame. We connect all the parts of the bed frame. I assemble the parts at the headboard using an oblique screw and a corner, at the foot - only with an oblique screw.
Assembling the frame
The frame is ready
I'm trying on the slatted bottom. 6 hours have passed since the start of work. The bed frame was covered with teak oil right on the spot. I brushed the boards for the headboard to emphasize the active wood grain. I use nylon brushes for this. As a result, we obtain a surface ready to be coated with a decorative composition.
I didn’t start dusting the apartment. I brushed the boards for the headboard on the street. I connect two boards to each other “with an oblique screw” and fix them on the frame.
I connect the headboard and legs of the bed. We cover the finished frame with oil.
We will need
Tools:
- Japanese saw,
- screwdriver,
- square,
- hammer,
- device for oblique screw,
- brushing machine
- clamps
- sanding paper (sandpaper).
You don't need a complicated tool to do the job. Let's make do with the minimum.
Materials:
- self-tapping screws 35 mm, 16 mm, Kreg 38, Kreg 51,
- galvanized corner 40x40x80x2 mm 4 pcs.
- boards 3 m 40x95 mm 1 piece,
- boards 3 m 20x95 mm 1 piece,
- boards 3 m 145x20 mm 6 pcs,
- boards 3 m 45x20 mm 13 pcs.
How to very easily make a bed with your own hands from wood
Before you start, you need to familiarize yourself with the types and standard sizes of beds for adults:
| Model | Width | Length | |
| 1 | Single | From 50 to 80 cm | 170‒200 cm |
| 2 | One and a half | From 100 to 120 cm | 120‒200 cm |
| 3 | Double | From 160 to 180 cm | 200‒220 cm |
You also need to take into account the load on the structure - the estimated maximum weight of people who will sleep on the bed or relax. And then, taking into account the data obtained, you should purchase boards and bars with the most suitable parameters.
The principle of making a wooden bed with your own hands is not so complicated. The frame should be made of solid wood, as it is easy to process. And such a product will look great. If you purchase high-quality materials, preferably without knots and pre-processed on a grinding machine, you can save not only time, but also effort.
Fastening elements for solid wood products
During the manufacture of wooden beds, special attention is paid to fastening elements. Among these you will need:
- Wood screws (various lengths);
- Metal corners with a rounded stiffener (to make the wooden structure more reliable);
- Nails (not suitable for all wood).
For more reliable fastening of parts, it is recommended to use clamps.
How to choose self-tapping screws for fastening two specific parts:
- Measure the thickness of the part to which the second part will be attached;
- Measure the thickness of the part that is attached to the main one;
- Add both values (in mm);
- Subtract 10 mm from the resulting figure;
- The resulting value will indicate the length of the self-tapping screw required to fasten the 2 above-mentioned parts.
For example:
- The main part is 55 mm thick;
- The thickness of the attached part is 25 mm;
- 25+55=80mm;
- 80-10=70mm.
To fasten two parts (55 and 25 mm) with a total thickness of 80 mm, it is necessary to use self-tapping screws 70 mm long.
Slatted bottom
From 45x20 mm bars we make a slatted bed bottom. Some questions arose here regarding reliability, so I decided to shorten the step between the slats and laid an additional board at the headboard. There was no need to buy anything, since the scraps that were not used in the design came in handy.
We fasten the edges of the slats with self-tapping screws and secure them in the center with ribbon. Why can't you use screws everywhere? There is an opinion that with such fixation the bed will creak. We won't take risks.
The slats were not coated with oil, I think there is no need for that
Laying out the mattress. The design turned out to be reliable. Looks nice. Plus, I managed to save a lot of money.
Do you want the same bed? Watch detailed video instructions.
Calculation of the quantity of materials
Below is a calculation of the necessary materials for do-it-yourself wooden beds. You can make this bed from solid pine because it is cheap. You can choose more expensive materials. The calculation of the required amount of wood is given in the table below.
| Material | Quantity, pcs | Size, mm | Purpose |
| Board | 3 | 50*100*2400 | Support beams |
| Board | 3 | 50*24*2400 | Decorative finishing |
| Board | 19 | 25*75*2400 | Making a bottom from slats |
| Board | 4 | 200*25*2400 | Frame making |
| timber | 1 | 2400*100*100 | Legs |
Materials
The amount of material is indicated for the manufacture of a bed with a mattress size of 2000 by 1500 mm. This is not a single bed, a bed of this size is suitable for two. If the mattress is of a different size, you will only need to slightly change the length of the boards, but the manufacturing algorithm and sequence of actions remain the same.
In addition to wood, you will also need:
- Self-tapping screws 30 mm;
- Self-tapping screws 60 mm;
- Self-tapping screws 50 mm;
- Acrylic varnish (for decorative finishing);
- Stain;
- Wood putty;
- Solar glue.
The above-mentioned wooden elements are based on the manufacture of furniture without a headboard. By adding a carved headboard, you can create an antique bed with your own hands. In this case, the headboard will not act as a headboard, but rather will act as a decorative element.
Fasteners
What tools and materials are required?
The material from which we recommend making a children's sleeping place is wood. As the article progresses, you will learn how much and what is needed for this or that model of children's bed.
Tools required for assembly:
- Drill and wood bits.
- Roulette.
- Saw or hacksaw for cutting.
- Metal plates for fastening.
- Wood glue for gluing seams.
- Screws or nails.
Tools for assembling a children's bed
The larger your set of tools, the more complex you can make the structure. People who have the skills and available tools of a professional carpenter will be lucky. But young and ambitious dads will have to work hard.
Drawings of a children's bed
The most important thing in a successful design is the diagram and drawings, thought out in advance and drawn up before assembly. Adhering to the assembly of the bed according to the diagram and drawings. You will see in front of you a plan to act on. Therefore, if you have a desire to do it efficiently, do not neglect the opportunity to draw and carry out calculations. We provided drawings for each type of children's bed: bunk bed, loft bed, house bed, transformable bed, with sides and with drawers
What is required during assembly
- Amount of materials needed.
- Tools that will be used during assembly.
- Scheme drawing of the finished bed
- Dimensions of this product (length, width, height).
- Visible fastened places in the structure.
Children's bed sizes
Having assembled a crib yourself, everyone wants it to last for as many years as possible. To do this, you must take into account the period of use of the sleeping place and compare it with the age of the child.
It would be correct and practical to make a bed for two age groups:
- For children under 3 years old.
- For children from 3 years to adolescence.
In other words. For preschoolers, schoolchildren and teenagers, you can immediately make a large and comfortable bed.
Dimensions of a standard bed for babies up to three years old.
- Length: 120 cm.
- Width: 60 cm.
- Side height: from 60 cm.
Standard bed sizes for preschoolers, schoolchildren, teenagers.
- Length: from 140 cm to 190 cm.
- Width: from 60 cm to 90 cm.
Tools
Having selected and purchased lumber and made a drawing of the product, it is necessary to prepare the tools for the work. For this you will need:
a screwdriver or electric drill (if you don’t have them, you should stock up on a set of universal screwdrivers);- electric jigsaw;
- Sander;
- hacksaw;
- meter, pencil and ruler;
- sandpaper.
Materials you will need:
- lumber (boards, beams, slats);
- varnish, stain, paint;
- brushes;
- wood glue;
- fasteners: screws, fittings.
Pros and cons of a wooden bed
A solid wood bed is a classic that never goes out of style. Wooden furniture is acceptable for children and adults; it is valued for its stylish appearance and lack of irritating factors. The wood retains a pleasant aroma for a long time, which has a calming effect. The reliable design is durable, unlike chipboard, the strength of the fastenings does not weaken over time.
With proper care and moderate humidity, the furniture will last for many years.
A wooden bed can become an interior decoration; in the countryside it can be used for additional seating during feasts, but an orthopedic mattress is not intended for such purposes.
You can make an exquisite, unique thing yourself that will delight your household. To keep it intact, it is necessary to protect the wood from moisture and drying out.
As a result of your efforts, you will create a comfortable, spacious bed for a sound and healthy sleep.
Features of making your own bed with a lifting mechanism
The main difficulty in making a bed with a lifting mattress is the correct installation of the transformation mechanism. They can be spring or gas lift. The main thing is to install the mechanisms correctly, but they come with instructions with dimensions for attaching the lifting structure.
When choosing a lifting mechanism, you need to pay attention to:
- transformation method;
- reliability of the design;
- ease of handling;
- withstand load.
In conclusion, we suggest watching videos on the topic of making a bed from natural wood yourself.
Material
When choosing wood, you should pay attention to its technical characteristics, texture and texture, cost, and ease of use. It is best to give preference:
pine.
This material belongs to the budget option. Pine has a pleasant aroma, is resistant to mechanical stress and is resistant to negative factors. A pine bed for a summer house is an ideal option in terms of affordable cost and high quality;- birch. Making a birch bed with your own hands is quite simple. This wood can be easily processed with hand and power tools. Birch is strong, reliable and durable;
- oak This bed will become the main accent of the bedroom. The only thing is that this option is not entirely suitable for a summer residence, as it will be very expensive. But if you have oak boards in stock and a special tool, you can try to make a strong, durable and high-quality product.
How to make a headboard yourself
Imitation of headboard on wall paint
Paint is one of the simple and inexpensive options for a DIY bed headboard. On the wall where the bed will be installed, the shape of the head of the bed is drawn with paint; at this stage, you can get creative and draw a three-dimensional drawing.
Then the bed frame is placed against the wall. This method looks very original in the interior.
Board with perforation in the form of a headboard
A perforated panel is an interesting idea for a DIY headboard that you can make at home in a few minutes.
To do this, you need to select a suitable perforated panel and wrap it around all edges with bright tape. If the panel is adjusted to the size of the bed, then the sawn ends should be sanded and varnished, otherwise the raw edges will cling to the bed linen.
Timber headboard
In order to make a headboard from timber, you need to prepare wooden blanks of the same size, with a length equal to the height of the headboard. The bars are attached to the wall in the intended way: vertically or horizontally. You can leave a distance between the pieces, so the design will look more airy. The bars are coated with varnish or paint.
Upholstered headboard
It’s also easy to make a soft headboard at home. To work, you will need to draw a diagram of the headboard on a furniture board. You can use a variety of back designs: rectangular, round, oval, everything will depend on the intended design. For upholstery you will need thick fabric or artificial leather, as well as a layer of thin foam rubber.
Buttons can be used to imitate a carriage tie on fabric. The shield is covered with a layer of thin foam rubber, then covered with fabric or leather on top. The ends of the fabric and foam rubber are secured to the back of the base using a furniture stapler. Then buttons are sewn on the front side of the back, in a checkerboard pattern, the indentations created on the fabric look like a carriage tie stitched in production. Next, all that remains is to secure the soft backrest to the wall.
Upholstered headboard on wood panels
This method of making a headboard for a bed looks very original. In order to make such a headboard with your own hands, you first need to attach wooden panels to the wall according to the size of the bed. This can include ordinary wooden panels, furniture facades and even old doors. Next, the wall panels are decorated with soft elements.
In this case, ordinary sofa pillows are very suitable, they need to be placed in removable pillowcases and hung on wooden boards with the help of braid. The main condition is that the pillow covers are removable, since they will have to be washed often.
Tips for reupholstering
Old ottoman
When the upholstery is frayed and worn, upholstered furniture, even quite strong ones, takes on an extremely pitiful appearance. And it’s a shame to invite guests. But you can fix this with your own hands by buying seven meters of suitable upholstery fabric and setting aside time for work.
- First you need to disassemble by removing all the overhead elements (in particular, the back).
- Then, using an anti-stapler, side cutters and a flat-head screwdriver, you need to remove the old upholstery. We try to do this as carefully as possible - after all, all these removed pieces will serve as patterns for fresh upholstery.
- Next, we look at what’s underneath: if the foam rubber or spring blocks are out of order, then they will need to be replaced. In any case, a layer of fresh foam rubber will not be superfluous.
- We ripped out the old upholstery and cut out new parts from it.
- Then we sew them where necessary.
- All that remains is to secure the fabric with a furniture stapler, avoiding distortion and pulling it well.
- Then we assemble the updated ottoman.
And if the internal filling is still very good, but only the upholstery has suffered, you can do it easier - sew a new cover.
The following video will tell you how to reupholster an old chair, difan, sofa or, for example, ottoman with your own hands:
Next, we’ll talk about reupholstering spring sofa cushions with our own hands.
Spring cushions
The spring block of the pillow is still quite good, but the upper layers have become unusable - this happens quite often. In this case, the best option is to cover the spring block on all sides with felt, and then with three-centimeter polyurethane foam grade 4065.
The most economical way: leave the burlap of the spring block. If it is shabby, we replace it with old pillow upholstery. Then we glue the outer box made of polyurethane foam grade 3038. Thickness - 3 centimeters.
If the springs fail, they will have to be replaced. However, if the price for them seems too high, you can make new pillows from the same polyurethane foam. It will be cheaper. For softness, we wrap them in padding polyester.
Old sofa with new pillows
Features of bed decor
When making furniture yourself, experiments are encouraged. Although the bed has not undergone any design changes over its long history, there is always room for imagination. At the dacha, you can build a swing bed; the frame is suspended on chains from the ceiling or ceiling. In this case, the headboard and backrest are made small.
Despite its apparent simplicity, such a bed makes it possible to arrange a sleeping area in an original way.
On the Internet you can find a headboard:
- imitating a fence made of picket fence or thin boards;
- figured, the tree can be easily milled;
- with a pattern, it is applied with an engraver or burned with a soldering iron with a thin tip;
- in the form of a semicircle, children's versions are complemented with removable ears;
- a brutal design option is the use of pallets or pallets.
As for modernization, you can make a bed with a lifting mechanism from an old dolphin sofa. Some people prefer to install roll-out drawers on wheels or pull-out drawers that move along a guide.
A bed with a storage system becomes a universal piece of furniture.
Another interesting option is a soft headboard. The plywood sheet is covered with non-woven fabric. You can lay a layer of foam rubber. To create a relief, use a furniture stapler and glue a button covered with the same fabric on top of the metal clip.
By the way, about the fabric. To prevent annoying flies and mosquitoes from disturbing you, canopies made of soft mosquito net or organza are made over the bed at the dacha.
You can make a wooden bed for your dacha with your own hands in no time.
Additional items
The standard model is supplemented with various elements for beauty, space saving, and increased functionality. The boxes are designed at the drawing stage, but they can also be replaced with baskets made of lightweight, safe material. In this case, the height of the furniture should be sufficient for their location under the base.
The sides of the crib are made from safe cotton material. They are made in the form of cartoon characters, animals or simple geometric shapes. Restraints for older children can be made of wood or transparent thick plexiglass - they will prevent the baby from falling while sleeping. It is advisable to think through monolithic elements at the drawing stage.
Children's beds are often created with canopies. They give comfort, tenderness, airiness. The element is secured to the bed using racks or hung from the ceiling. Choose calm, soft shades, translucent fabrics that are pleasant to the touch. For independent sewing you will need: the material itself, scissors, a marking pencil, threads, needles, pins and a pattern. If desired, the canopy is decorated with ruffles, pompoms, and lace.
It is better to attach a children's canopy for little ones to a wide ring and hang it from the ceiling.
A bed for a child should be strong, safe, and reliable. You can independently build a model of any complexity. The algorithm boils down to drawing a drawing, preparing materials, procuring parts, processing and assembly. It all depends on the financial capabilities and skills of the master. Even a basic model must meet safety requirements.
Boxes Side
Canopy
Design
A cottage bed can have a different design, size, and type of construction.
This can be a two-tier product for comfortable living in the country with your family. You can also make it yourself for your dacha: one, one and a half or double bed made of wood. It can be equipped with a lifting mechanism, drawers for bedding and other additional accessories.
As you can see, there are a lot of options for making a country bed. The main thing is to choose the type of design that suits you best and begin the work process.
Tip: the easiest way is to make a bed from pallets in the country. This is an economical option that will be comfortable to sleep on. In addition, such products are at the peak of their popularity and are suitable for trendy styles - loft and minimalism.
Bed assembly: diagrams and dimensions
So, if all the tools are prepared and the materials are cut to size, then you can start assembling the bed. And let's start, of course, with the base frame.
Frame making
We begin assembly with the main boards and legs of the bed, fastening them together with self-tapping screws.
Using clamps, we fix the legs to the side boards. We drill holes in the boards - the diameter of the drill should correspond to the diameter of the screw. Don't forget to countersink the holes for the screw head.
Next, we install thrust boards inside the bed frame; the thickness of these boards should be at least 45 mm. It is on them that the slats will be attached and the mattress will be laid (marked in green on the drawing).
The side and central boards should be mounted 10 mm lower, because Lat holders with lamellas will be installed on them. The photo below shows why this needs to be done.
Before assembly, I coated all the parts with wood glue and for reliability (there is no such thing as too much reliability), I reinforced all the corners in the joints of the bed frame with steel corners. You can see it in the photo below.
Under the middle board for reinforcement, I made and installed a stand leg from a piece of timber. You can use any other design, for example, make it from scrap boards or buy a ready-made cylindrical one made of metal if you find one that fits the size.
Puttying and sanding the frame
Now that the bed frame is basically ready, you can begin to improve the appearance, namely, puttying the mounting holes, as well as other visible wood defects. To do this, use a special wood putty.
Apply the first layer of putty, trying to fill the holes as much as possible, leave to dry, following the manufacturer's recommendations on the packaging.
Important! Don’t try to putty all the problem areas the first time - it still won’t work. Correctly puttying should be done in 2-3 stages, with intermediate drying and abrasive treatment.
Sand the dried putty with sandpaper and a coarse abrasive, for example P80. I used an orbital sander with velcro abrasive pads. You can sand with a piece of sandpaper on a flat block, but this is more labor-intensive.
After blowing off the remaining dust, apply a second layer of putty and repeat the drying-grinding stage.
Finally, we sand the entire surface of the frame to a pleasant smoothness. First with abrasive P80 and then with a finer abrasive P120-180. Of course, there was a lot of dust...
While the putty is drying, we don’t waste time - you can start making the headboard, if of course you need one. Below I will tell you how I did it.
Assembling the backboard for the headboard
Since the double bed turned out to be quite heavy, I decided to make the backrest removable, in case the bed needed to be moved to another room.
For the headboard, you can take a ready-made furniture board, or you can make it yourself. I bought two six-meter boards and from the leftovers, I just got three scraps for making the back (they are higher in the list of materials).
I decided to join three boards into a shield using dowels and glue. In order for the holes for the dowels to match perfectly, I used the following “trick” - having marked the centers of the holes on the edge of the board, I punched nails without a head into them. So that all the nails stick out at the same height, I hammer them in using pliers as in the photo below.
Having aligned the edges of the second board from above, I tapped the top with a mallet and got response dents on it. To drill holes for dowels to a certain depth, I pasted red electrical tape onto the drill so that it could be seen.
Having prepared the holes (clean off sawdust and cut off burrs), I place dowels on the glue (pictured below). Having coated the mating edge with wood glue, I use a mallet to drive the second board into place. The same operation must be done with the third board of the headboard.
Due to the lack of wide clamps (I will definitely need to buy them), I show my ingenuity and, using a car jack (I used it for laying floors), I squeeze a board of three boards in the doorway and wait a couple of hours until the glue dries.
After gluing, I send the shield for cutting and sanding. The most suitable place for this dusty work is the yard.
Having cut off the upper corners, I sand with an orbital sander and P80 abrasive. By sanding I remove small steps at the joints of boards and sharp corners.
The result is a pretty decent shield for the headboard.
All that remains is to install the backrest in place and secure it. To do this, I do the same operation with dowels, only without glue.
Having connected the backrest panel to the bed frame, I secure the connection using metal plates and screws on the reverse side. That's it, now I can detach the back at any time.
It's time to apply decorative impregnation to the bed and install slats. Painting or applying varnish should not cause any problems, the main thing is to follow the manufacturer's instructions on the packaging. You can leave it uncoated, it will just be natural wood.
Installation of slats
Since the length of the lamellas exceeds the required one, they should be cut to the required size.
Having placed lath holders on the ends of the lamellas, we fix them to the support boards with 3.5*12 mm self-tapping screws. The distance between the slats in my case is 92 mm.
Having installed the last slats, you can consider that the assembly is completed and now you can boast that you made a double bed with your own hands.
3D model of a double bed
Click on the picture, wait for it to load and use the left mouse button held down to rotate the model. Rotate the mouse wheel to zoom in and out. Watch full screen - icon in the lower right corner. Exit full screen - Esc key. To fully view 3D models, you need to download the SkethUp viewer program from the official website (free) and install it on your computer. You can download this model for viewing by clicking on the logo in the lower left corner of the viewing window.
Step-by-step photo report
Let's take the following model as an example:
First you need to choose a suitable mattress. It is to its dimensions that all elements of the future structure will be manufactured. Then purchase the necessary building materials - edged boards, timber, slats, water-based varnish, stain, sandpaper and a brush:
Prepare the necessary tools: tape measure, drill, drill bits, circular saw, Kreg Jig set, measuring angle, bolts and screws of various lengths. These things should always be at hand.
Work begins with assembling the racks and sidewalls:
Using a square, make sure that all corners of the assembled structure are straight. Mark the places where the sides will be fixed:
Once the parts are sanded and all the holes are drilled, you can apply a little wood glue to the joints. Without waiting for the glue to dry, remove excess with a napkin.
Fastening of sides with racks:
If necessary, the boards must be fastened from the inside at an angle. To drill pilot holes, use the essential Kreg Jig. This is a convenient and easy to use tool.
Attach the sides of the future bed to the posts:
The crib frame is almost ready:
Now attach the sides of the second tier:
Then prepare the places where the logs under the mattress will be attached:
First fill the unevenness and knots of the frame, then sand it. Next you need to make a ladder to the second tier.
Apply a first coat of water-based varnish. In this case, Lakra “Oak” was chosen. One of its advantages is that it has almost no odor. This is important since there are small children in the house. However, it also has a very unpleasant drawback - it is almost impossible to sand it, and even after drying, a sticky layer remains:
The second floor is almost ready. Next you can attach the logs.
Staircase view:
The staircase in this form is not entirely convenient - it “cuts” the legs, so it will need to be slightly modernized. But more on that later.
The top floor is already ready:
It is clear that the sides need to be increased. There is no need to add anything from the wall side. The bed will be close to the wall, which means there is nowhere to fall. On other sides this will definitely need to be done.
Next, lay the logs of the lower tier:
Now about the stairs. To avoid the awkwardness and pain of going down it, lightly sand the edges of the rungs with a hand planer or sander. This procedure will give them a neat appearance:
The result of the work:
As a result, you will get a reliable and stable structure. Now we can say with confidence that making such a bed yourself, given the abundance of materials and necessary tools that fill the shelves of hardware stores, is not at all difficult.
You will find more ideas and tips for making a two-tier structure in this article.
Installing the slats correctly
When the manufacture of the frame is completed, you need to proceed to installing the lamellas (lags), which are where the mattress will subsequently be placed. A person lying on the bed creates a load on the slats, and from the slats it, in turn, transfers to the frame and legs of the product.
To protect these structural elements from rapid wear, special support strips need to be attached to the longitudinal beams. They must be strong enough to support a person's weight. Therefore, for a single bed, it is recommended to make slats from square beams 4x4 cm.
The slats should be placed on both sides of the cottage bed frame, so for the work you will need 2 beams 190 cm long. The slats should be attached to the body from the inside, using self-tapping screws. The screws should be placed at a distance of 15 cm from each other. To ensure that each lag rests in its intended place, blocks of oak or other material can be attached to the supporting strip. What this design looks like is shown in the drawing:
But making a bed is possible without grooves on the slats. If the plank has a flat surface, then homemade logs are simply installed at a given distance from each other and attached with screws and corners.
You can also purchase ready-made lamellas with fasteners. Another simple and affordable way to make a reliable base for placing a mattress is to place a sheet of plywood or several fairly thick boards on the slats.
The next stage of work will be the manufacture of headboards for the bed. Usually the headboard is made higher than the side in the foot area. The structure can be made from furniture boards, boards, logs or any other material. Here, a wide scope for imagination opens up before the master.
Main assembly steps
The dimensions of the sleeping place for a child are determined by the width and length of the mattress. They are standard and equal to 1200x600 mm. Using these parameters, a wooden baby crib is made with your own hands. The mattress is not made independently, but purchased, since orthopedic requirements must be followed to make it. During its production, the needs of the growing body for complete and healthy sleep are taken into account. To do this, attention is paid to the design of the mattress, which forms the child’s spine:
- For babies, foam models are chosen;
- Children over four years old need a mattress with a spring block. It ensures even distribution of the baby's weight over the entire area.
For small rooms, the bed can be made so that during the daytime it serves as a playpen. When assembling the crib, carefully inspect all its parts so as not to miss chips and other possible defects that could cause injury to the child.
The assembly work begins with the legs, which differ in size from each other. For the headboard they are made longer than for the opposite side. The high backrest is designed for pillows that can be raised. Then, using the drawing and sketch of the children's beds, the frame is assembled, the next steps will be the assembly of the backs and the canopy structure. The crib frame includes:
- bed base;
- backrests at the head and foot.
Assembling a bunk bed at home with your own hands
We have already looked at how to make a double bed with your own hands, and now let’s say a few words about making a bunk bed. The assembly of the structure, in which one berth is located above the other, is practically no different from the usual one. However, there are several nuances that you need to consider when creating a bunk bed for your children.
DIY sketch of a wooden bunk bed
Materials for a bunk bed must be of high quality, durable and environmentally friendly. Pay special attention to the joints of the parts. It is also necessary to securely fasten the structure to the floor and wall. The staircase for the second tier can be very different, but it must be strong, stable and, preferably, equipped with protective handrails.
Box steps are reliable and practical
Single bed for a teenager
Your child has grown up and the children's bed has become too small for him? Of course, in this case, you can go to the store and buy a new product, but a much more profitable option would be to make the bed yourself. There are several advantages here.
Firstly, you yourself determine the desired size and think over the design of the future piece of furniture. Agree, it is not always possible to find a model that meets all parameters in a store.
Secondly, you can make a bed yourself quite cheaply. You don't have to shell out a tidy sum for the well-known name of the company that made the bed. In this case, you only spend money on purchasing consumables.
Thirdly, making furniture yourself is always a very exciting and interesting activity, which can later become your hobby!
Plus, you can involve your child in this task. For your child, this whole process will be very entertaining, because assembling furniture with your own hands is reminiscent of assembling a children's construction set. Only the parts are a little larger.
So, let's move on to manufacturing.
To make your bed strong, durable and attractive in appearance, we will describe all stages of its manufacture in this material, and also supplement the description with the necessary drawings and diagrams. Using the attached manual, we will design and assemble a single bed for a teenage child.
Double bed drawing
After choosing lumber, it is worth considering the future design of the furniture item and its dimensions. To make it easier in the future to manufacture individual elements and follow the strict sequence of assembling the bed, you need a drawing. You can do it in different ways:
- Draw it yourself on paper with a pencil. In this case, you must be able to draw and calculate the dimensions of the product.
- Order from a furniture company. Most modern companies offer not only professional furniture manufacturing, but also design drawings and detailing of all elements. This is a very convenient option. Making furniture this way will cost you a little less than buying it in a store. After the efforts of specialists, you only need to deliver all the parts home and assemble the product in the correct sequence.
- Use special programs on your computer. Here you will need to make preliminary calculations and dimensions of the parts, and you will receive a drawing in different projections.
Which option you choose is up to you. If you know how to draw and do calculations, draw a diagram of the bed yourself. If you have excellent command of a personal computer, use special programs.
Advice: if you want to be sure that the future product will be practical and easy to use, contact a furniture company.
Decoration
Canopy
Many people think that a canopy is not a very practical thing, because it accumulates too much dust and needs to be washed constantly. However, in the absence of this element, all this dust settles on the bed, and the child breathes it. In addition, the canopy can protect the baby’s light sleep from sunlight and annoying insects. This says it all: such a cape is necessary in a nursery. Natural fabrics are usually used as it:
- muslin;
- silk veil;
- cotton veil;
- silk organza;
- chiffon.
