It would seem, where else can old newspapers be used, except for stove kindling or for a fire? In fact, the scope of their application is much wider than one might initially think, and we are by no means talking about cheaply handing over waste paper or gluing wallpaper in the old-fashioned way, when a layer of newspaper was used for better adhesion to the wall. Thus, today newspapers have become increasingly used for handmade projects, yielding unexpectedly wonderful results that inspire new creative feats.
Pros and cons of newspaper weaving
DIY crafts from newspaper tubes, like any creativity, have characteristic features.
pros
- Availability of material.
- Cheap, because old newspapers are worth nothing.
- Simple technique.
- Possibility to paint products in different colors.
- Unlimited number of options.
Minuses
- A large amount of material is required.
- Long preparatory stage.
- Crafts are afraid of dampness.
- Fragility and relative fragility of products.
Preparation of tubes
Before you start weaving, you need to prepare the starting material - wind tubes from newspapers or magazines. You will need the paper itself, PVA glue in a bottle with a dispenser, a long thin knitting needle or a piece of stiff wire. The diameter of the knitting needle/wire is 1.5-2 mm.
These are all tools at the preparatory stage.
Materials
Old newspapers, glossy magazines, advertising brochures, in a word, everything that relates to single-use printed products are used.
Usually, after reading or leafing through a newspaper, they throw it away, or at best, hand it over to waste paper. And craftsmen and craftswomen practically have no concept of “waste”. Everything will be useful for business.
You will also need:
- PVA glue, moment glue;
- acrylic paints;
- varnish
Advice for beginners from experienced craftswomen
Of course, every needlewoman has her own secrets for perfect weaving. Their number is directly proportional to her experience and the number of crafts made. Not everyone wants to share their secret finds and tricks.
But we managed to collect the following basic recommendations:
- The distance between the posts should not exceed 2 cm; if this condition is not met, you will get a loose, fragile weave.
- Treat the posts with care, do not crush or bend them during work - the appearance of the weaving depends on this.
- To avoid holes and gaps in the pattern, after each row, align the posts and press the rows of weaving closer to each other.
- It is better to hide the places where the tubes join together in the weaving, ideally in the middle between the posts.
- Dense and inflexible tubes can be sprayed with water from a spray bottle and kept in polyethylene for 15-20 minutes, after this manipulation the paper vine will become obedient and will not leave creases, and its strength will return after complete drying.
- A wet vine becomes “shaggy” during weaving; if you overdo it with moisture, let it dry a little and continue working.
- Try to trim the ends of the bent posts inside the product.
- The stump of the cut post can be covered with the solution you used to paint the paper vine (stain or color). Therefore, always leave a little coloring solution to mask blemishes if necessary.
- For a neat appearance of the finished product, it is advisable to bend with freshly extended racks. Those. Towards the end of the weaving, cut off the old posts, insert fresh moistened tubes and bend them. They will fit well and will not wrinkle. If you see that the old racks have retained their presentation by the end of the work, spray them with water from a spray bottle, let them moisten a little and only then bend them.
- Sometimes the place where the tubes are glued together may turn out to be unpainted. This is due to the fact that PVA prevents the paint from penetrating into the paper. To avoid this, try to glue the twist with a glue stick or Titanium. When adding extensions, cut off unpainted ends mercilessly.
Today we looked at only the basic patterns, basic techniques and methods of newspaper weaving.
We will reveal to you the features of working on various products in the following articles. *when copying text, please indicate an active link to the source mirpozitiva.ru
Tools
- knitting needles, wooden sticks of different diameters;
- stationery knife;
- scissors;
- a simple pencil;
- ruler;
- clothespins;
- paper clips;
- brushes for glue, paints, varnish;
- boxes, plastic containers, cylindrical, spherical objects, etc. as a frame;
- finishing elements for decoration.
Adhesive accessories
PVA glue is useful both for making the tubes themselves and for priming the entire product and gluing its various parts. This material is consumed quite quickly, so it is better to immediately purchase a large container. Also, its consistency should not be too liquid.
Polyurethane adhesives such as “Moment”, “Titanium” or a glue gun are also useful in the process of creating wicker items. They are mainly used to strengthen and add density to the bottom, gluing decorative elements.
Cutting blanks
The paper is cut into strips 5 to 10 cm wide. The wider your strip, the thicker the twisted tubes will be. It is clear that one product requires tubes of the same thickness.
The stripes are marked using a pencil and ruler. But this is a very long task. Since newsprint is thin, it is better to cut it in whole stacks at once in several layers.
The principle of weaving using newspapers
To turn old newspapers into a coaster, basket, or even a box, you need to turn newspaper sheets into narrow tubes that look like the vine from which wickerwork is made.
Due to its softness and plasticity, even a beginner can master the technique of weaving with newspaper tubes. And taking into account the strength of the material, especially if it is treated with special compounds, the result of the work will last a long time and of high quality.
Before you start weaving, you will need to prepare the materials necessary for the work and make blanks.
The list of all components will include:
- a stack of newspapers (the volume of material depends on the size of the planned product);
- paper glue;
- scissors;
- ruler;
- knitting needle, about 2 mm thick;
- sheet of cardboard;
- acrylic paint of the selected shade.
The production of blanks refers to the transformation of newspaper sheets into tubes. Step-by-step instructions for such production include several stages.
First, you need to cut the existing sheets lengthwise into strips 10 cm wide (using a ruler and scissors).
Secondly, the resulting strips are wound onto a knitting needle one by one, and the process begins from one corner of the paper to the other diagonally. The extreme corner of the sheet is smeared with glue and secured to the resulting tube.
Twisting
The workpiece is twisted tightly and evenly, moving diagonally from the corner. Wrapping is usually done on a knitting needle, which is placed at an angle of 45-60 degrees relative to the edge of the paper sheet. The ends of the winding and in several places in the middle are fastened with glue.
Having twisted the entire sheet, the knitting needle is removed. Dry the tube thoroughly. This will be the main material for weaving products.
- Craft mug: 135 photos and video master class on how to make beautiful crafts with your own hands
- Crafts from spoons - 125 photos and videos, tips and tricks with step-by-step instructions on how to make crafts
- Crafts from cotton pads - 125 photos of beautiful crafts, features and videos of new cotton crafts
Photos and patterns of weaving bottoms of different shapes
As you gain experience, you will want to make products of other shapes - oval, rectangular, multi-faceted.
The section contains several diagrams showing how to make forms more elegant and complex.
Coloring
Rolled newspaper tubes contain printed elements. If you start weaving right away, the product will not have a beautiful finished look. Therefore, the working material should be painted beforehand.
You can also color the finished product. But painting the joints of layers and all the work from the inside is very inconvenient. It will take too long. It is much more rational to paint the working material in advance.
To do this, take a tray, pour a thin layer of paint, put a dozen or more tubes (a handful) at once and roll them over the surface of the paint. This must be done quickly so that the paper does not have time to get wet and lose its shape.
Dry the tubes horizontally on supports or in a vertical position by placing them in a container of suitable size (jar, glass, etc.).
- Cardboard crafts - 135 photos of useful and beautiful crafts for children and adults
Unusual crafts: we make cool and original things from scrap materials (120 photos and videos)
Beautiful crafts: examples of very stylish and unusual options for homemade crafts (125 photos)
New ideas for weaving over the last 3 months and a detailed master class
Almost every day, craftsmen come up with more and more new techniques for weaving from newspapers, willingly sharing their ideas and discoveries on relevant online resources. Such master classes will help beginners learn all the basics of weaving or inspire those who want to come up with something new, but due to various circumstances cannot cope with the task.
Bottle
One of the most popular interior solutions is to braid glass bottles, which can be used for kitchen decoration or for other purposes, pouring homemade wine and any other drinks inside. It is often customary to use such products as a stand, without weaving them all the way to the neck. In this case, wicker glasses are suitable not only for the safe installation and storage of glass containers, but also for all kinds of small things, be it colored pencils, corks, souvenirs and other unnecessary items dear to the heart.
Weaving itself involves the use of basic skills, and more specifically, making the bottom, raising the sides and braiding in a spiral. To do this, you need to fold 3-4 pairs of tubes crosswise and diagonally and start weaving from the center of the intersection, using a tube folded in half as a working “thread”. The whole principle of weaving is to bring one part of it under the bottom of the weave, and the second up, separating the tubes folded in pairs at the beginning of the work and crossing each other on each frame guide as it is completed.
As soon as the bottom disk is completed, the frame beams should be raised upward, continuing to weave not in the horizontal, but in the vertical direction. To facilitate the task, a bottle covered with cling film is installed inside, the shape of which the product should ultimately take. It is advisable not to weave tightly, because if the vessel is not completely sealed with paper birch bark, then it is much easier to remove it from the base with a loose braid.
Mill
The same principle is followed when making such original crafts as a windmill. Inside this decor that makes any home cozy, a vessel, a jar for bulk drinks, packets of seasonings or any kitchen items can also be placed.
The roof of the mill can be removable or solid, and if during the weaving process the working tube begins to run out, which happens every few rows, then you can connect it to a new one simply by inserting one end into the wider other, which will help make the weaving seamless and very neat . It’s great if there are all sorts of cute trinkets in the household that will help you decorate the chalk to your liking.
Organizer
The simplest organizer model is best woven in the shape of a cube, equipped with a hinged lid if desired. In this case, the base is woven according to the principle of a conventional fabric, leaving free guides, which are later used for vertical braiding. The bottom and inner walls of the finished organizer can be covered with colored paper, linen fabric or even thin plywood sheets - the result will be equally stylish and beautiful.
Bird feeders
A bird feeder is not only a wonderful decor for a private home or an open balcony of an apartment in a high-rise building, but also a good cause. You can make such a wonderful craft in the form of a house, a mansion, or even a birdcage.
Another thing is that you need to take care of the reliability of the finished structure by treating it with a weakly concentrated solution with PVA glue, covering it with a layer of water-repellent paint, and then with construction varnish. Naturally, each such layer must be thoroughly dried, because only then will the paper birch bark become truly tough, without fear of humidity and snow.
Flower pots
Ordinary plastic flower pots look too cheap and primitive, while eco-style wooden pots or heavy ceramics cost a lot of money. There is a way out and it is to weave a flowerpot yourself, using budget tubes from newspapers and magazines. At the same time, it is not at all necessary to braid the pots, because much more interesting are models in the form of watering cans, cups and even shoes, which can be painted in different colors.
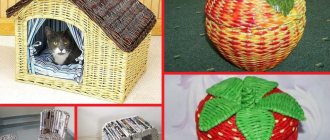
House for a cat
What furry purr doesn’t dream of his own house, and even one made by his master’s hands? In this case, independent weaving is good because you can give the product almost any configuration, giving full rein to your own imagination. Two-story houses with a comfortable roof-terrace, compact round structures reminiscent of an aquarium or classic models with warm soft mattresses inside - there really are a lot of options.
Photo panels
Such a panel can become not only a stylish decor for your own apartment, but also an excellent gift for family and friends, especially if you decorate it with your own photographs as a souvenir, which can be secured with miniature clothespins. The good news is that such a photo panel is woven very simply and quickly, since it is a flat structure that can be made in about half an hour.
Box "Cintz weave"
The so-called calico weaving, performed using a special auxiliary stand, which you can make yourself from a medium-density cardboard box, has also become popular recently. Such help is necessary to clearly delineate the main fabric from the free edge, which will later be used to weave the walls of the box.
The technique itself is elementary, since it imitates a woven fabric, where two working threads braid each guide from different sides, changing their position to the opposite on each subsequent auxiliary tube.
Basket houses
Such structures are much stronger than you might think at first glance. In addition, they are extremely ergonomic, since the presence of a removable lid and a window that provides ventilation allows you to store any perishable food in such baskets, be it vegetables, mushrooms or fruits.
Types of weaving
Crafts are woven from newspaper tubes in different ways. The choice of a specific technology depends on your skills and features of the design of the future craft.
Typically, the tubes are divided into a base - a frame or guides for the future product - and workers with which the frame is braided.
Coloring
There are two main methods of coloring: coloring the finished product and separately each paper twig. The choice is made by the master himself, depending on the color of the paper, its structure, as well as his own preferences. Suitable for coloring:
- wood stain;
- tint varnish;
- color diluted with primer or water;
- any paint on paper (acrylic, gouache);
- food colorings.
After painting, the finished product is opened with varnish. This will give it strength and resistance to wet cleaning.
Simple
The technique resembles conventional weaving of fabric. As a basis, take several tubes along the planned width of the product and place them at a distance of 1-2 cm from each other. They are braided with working tubes, alternately passing over or under the guides of the base.
Weaving is done from left to right, lengthening the working tubes as necessary.
Round bottom for large items
It will be a little easier if you cross several tubes laid one next to the other. In the photo (see below) we took five tubes and intertwined them relative to each other. To make the bottom less voluminous, it must be flattened. The easiest way to do this is with a rolling pin or a bottle - rolling it several times.
To make it easier to work further, coat the intersections with PVA glue.
Next, we take the straw and begin to tie the bottom, passing the straw through three tubes (the rope method). So - through three tubes - we make two rows. Then - several rows - after two.
A few is to ensure that the dimensions of the bottom are almost “right” - in shape.
We weave the last two or three rows through one tube. During weaving, the warp tubes must be spaced at the same distance.
This is actually how it works, you just need to make sure that the distance is the same.
When switching to weaving the walls, we cross the base tubes one with the other. This makes the product more stable and the transition more reliable.
To weave the walls, you can use the working tubes that were used to weave the bottom.
Layer-by-layer
The technique of execution is similar to simple, but denser without gaps. In addition to the main working tube, additional ones are used, which are also actively involved in weaving. They work according to a certain scheme.
If you use additional tubes in contrasting colors, you get noticeable decorative layers.
Simple bends: how to finish weaving
Everything good, even our weaving, tends to end. We propose to analyze the main options for finishing work on the edge of the product.
After weaving is finished, unnecessary posts always remain. You can take the path of least resistance and just cut them off. But protruding stumps will make the edge sloppy and will negate the overall impression of the quality of your work.
Obviously, the remaining racks need to be laid correctly. This is what we will do.
By default, you have already figured out the working tubes yourself: you trimmed off the excess, hid the ends in braid and glued them.
The easiest way to complete weaving
For the first time, the easiest way is to bend each post into the hole from which the next one comes out.
The process of such lazy bending is clearly presented in step-by-step photos.
Simple folding
Reserve a place to finish bending with a piece of tube.
With the rack, go around the next rack and bring it out. Repeat this around the entire perimeter, bringing the ends of the posts outward.
To join the weaving, insert the last post into place of the additional segment, having first removed it.
Now the protruding ends of the racks need to be pulled through the gap into the product. This time, tuck them under the posts. Spread the weave evenly with your fingers (walk along each post and pull it out with your fingers), cut from the inside and glue the remaining ends.
Rod
This type of bending is more difficult than the previous ones. If you decide to take it on for the first time, be sure to check out the recommended video.
Isis
Isis can be considered a relative of the rod. They are performed similarly, but there are some differences. The rod is made from the racks included in the product, and for isida you will need additional tubes
.
Watch all the details of the process in a detailed video tutorial.
In our next article we talk in detail about how to weave a basket from paper wicker From and To >>
Rows
It is also performed on a simple basis, but three or more tubes are used as workers. They work alternately. When the length of one tube runs out, they do not extend it, but start working on a new one, but not from the first, but from the second base post.
They work in this way until the desired height of the product is reached. The principle is reminiscent of weaving a wreath of flowers.
Herringbone
A Christmas tree is a themed decoration for any room. It can also be made from paper wicker. You should first prepare 100-150 tubes and a mold. To do this, a sheet of thick paper is rolled up and secured into a cone. The weaving pattern is as follows:
- Three rods are folded like a snowflake. Place a cardboard cone over the intersection. Under the base there was a “sun” of 6 rays.
- Taking an additional tube, place it on top of two adjacent rays. The right one covers an additional tube, pressing it to the base cone.
- Then the work proceeds in a spiral. Alternately, the lower rod is laid on top of the newly laid beam and pressed against the base.
- When the first row ends, the tail from the first additional tube will remain intact. It will stick or be cut off at the very end.
- Each new row shifts towards the center from the previous one, the work becomes narrower. The mold should be removed 1-2 cm before the end of the cone, because... the weaving sits on it very tightly. To do this, the interlacing of the rays from the bottom of the tree needs to be cut and glued inside.
The finished Christmas tree is painted in a variety of colors. Classic green is no longer so relevant for a modern Christmas tree: it can be completely brown or purple.
Miniature toys and small candies are easily attached to the spiral coils with thread or glue. Such a tree can stand on legs in boots or be “planted” in a pot. A red cap with a bubo or bell is often worn on the top of the head.
Openwork
Particularly beautiful crafts from newspaper tubes are made using the openwork weave method. Unlike the solid one, there are gaps between the paper tubes in the openwork, which play a decorative role.
There are a lot of openwork weaving patterns - from simple ones, reminiscent of a picket fence, to very complex ones with an intricate multi-layered pattern.
Paper vine frame
Crafts from tubes for beginners is a photo frame.
- We use cardboard as a base.
- You can glue the tubes parallel to the edge in the shape of a frame, or you can glue them in a herringbone pattern, like French parquet.
- After drying, they cover it with spray paint, decorate it with ribbon, lace, beads - all ideas are good, and insert a photo.
Spiral
This method stands apart; it is often isolated as a separate type. It is in many ways reminiscent of another paper craft technique - quilling.
The point is that the tubes are flattened and a spiral is twisted from flat newspaper strips, then, if necessary, they are given a convex shape and the spirals are connected to each other.
In a similar way, children of the 20th century made various toys from New Year's paper streamers.
Basket or box without weaving
- From the prepared flat tubes we make circles 2-3 cm in size.
- To do this, roll the finished tube, starting from the tip, into a wheel and secure the outer tip with glue.
- You can make a wheel with a hole inside, or a filled one.
- When the prepared wheels have dried, we glue them together with hot silicone, assembling the chosen shape.
- If this is a rectangular box, we glue the wheels together into a rectangle for the bottom, walls and lid.
- We also assemble the finished parts with hot silicone.
- We paint it with spray paint and decorate it with ribbons, lace, and beads.
- If it is a round basket, we use a saucepan or bowl, which will serve as the basis for giving the shape.
- Glue the wheels together using the mold as a support.
Crafts
Using different weaving techniques, different patterns, design ideas, decorations, a wide variety of products are obtained:
- baskets;
- flowerpot;
- caskets;
- panels, frames;
- topiary – Christmas trees, flowering trees;
- jugs;
- vases;
- trays;
- candy bowls;
- cups;
- flowers;
- voluminous souvenirs - bast shoes, hearts, mushrooms, berries, etc.
Several days pass from the idea of a serious product to its final implementation. But the result is worth the effort.
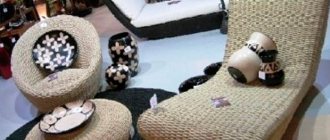
In the photo, you can hardly distinguish crafts made from newspaper tubes from real ones woven from wicker. If you are a creative person and love crafts, you can create beautiful and useful things from waste paper - old newspapers. Truly, imagination and hard work work wonders
Cart, step by step instructions
You need to start from the foundation. Glue together four pairs of pre-prepared long tubes in the shape of a web.
We begin weaving, to fix it, we glue the ends of the first tube together. When making the bottom, every two stakes, we glue the ends of the tubes together for strength. For the first time, you can simplify the work by cutting out the bottom from cardboard and gluing the tubes onto it.
When starting to weave the side walls, place a vessel inside that matches the diameter of the basket, this will make the work easier. When the basket has reached the desired height, bend the ends to form a beautiful rim.
The manufacturing process takes place using the method of horizontal weaving into vertical tubes that extend from the base.
Photos of crafts made from newspaper tubes
Tell your friends
