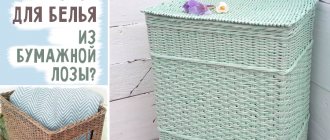
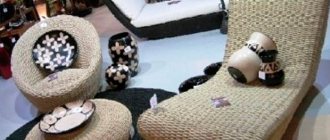
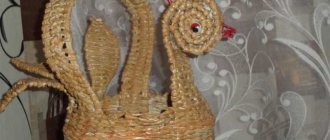
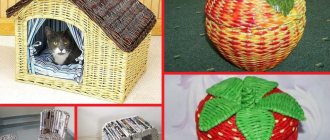
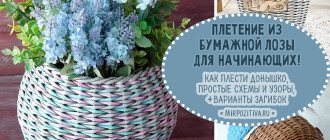
Weaving from wicker, straw and other plant fibers is a fascinating activity, but ordinary newspaper tubes can be a modern alternative. After all, natural materials are quite capricious; a lot of effort must be spent on their proper preparation, which is very problematic in an apartment.
Therefore, paper wicker weaving is rapidly gaining popularity. This hobby requires minimal investment, and the products are very beautiful and durable. In addition, you can easily get rid of piles of accumulated newspapers and magazines, turning them into hand-made masterpieces and delighting your friends with unusual gifts.
In this article we will reveal all the secrets: how to make newspaper tubes and color them, how to properly prepare a man-made paper vine for weaving and other little tricks so that your crafts are impeccable.
Bouquet of roses from newspapers
Various homemade bouquets from scrap materials are well used for home decoration; children also love to make such crafts for an exhibition in kindergarten or school. Paper bouquets look very original; you can make compositions of different colors and shapes from them. For work, you need to prepare the following materials: newspapers, scissors, a glue gun with hot glue, floral wire, decorative tape. A step-by-step description is discussed below.
The beginning of weaving is forming the bottom
In most products, you first need to form the bottom. There are two options: make it out of cardboard, gluing stands to the edges. The option is simple and clear. Perhaps it is better for beginners - weaving the walls is a little easier than shaping the bottom. And so that the ends of the glued posts do not “scratch” the eyes, they are covered with a second similar piece of cardboard.
Cardboard bottom for weaving newspaper tubes
Among the features: in the corners you need to glue a double number of tubes. One will be on one side, the other on the other. In addition to the above option, there is another way - to stick them not on the corner, but on both sides. In this case, the racks are placed from the corner at a distance of no more than half a step (this is the distance at which you placed the other racks).
The second option is to weave the bottom from newspaper tubes. You will need long tubes - spliced from two or three. There are many methods, they are mainly taken from wicker weaving. The principle is the same - the tubes, one at a time or in groups, are intertwined with each other, forming a center. Then, using some of the lozins, they braid the warp, adding dimension or making it more rounded if necessary.
Round bottom for large items
It will be a little easier if you cross several tubes laid one next to the other. In the photo (see below) we took five tubes and intertwined them relative to each other. To make the bottom less voluminous, it must be flattened. The easiest way to do this is with a rolling pin or a bottle - rolling it several times. To make it easier to work further, coat the intersections with PVA glue.
Bottom weaving for square products
Next, we take the straw and begin to tie the bottom, passing the straw through three tubes (the rope method). So - through three tubes - we make two rows. Then - several rows - after two. A few is to ensure that the dimensions of the bottom are almost “right” - in shape.
Read also: Chemical burn of the cornea of the eye
We weave the last two or three rows through one tube. During weaving, the warp tubes must be spaced at the same distance. This is actually how it works, you just need to make sure that the distance is the same.
We finish weaving the bottom and move on to the walls
When switching to weaving the walls, we cross the base tubes one with the other. This makes the product more stable and the transition more reliable. To weave the walls, you can use the working tubes that were used to weave the bottom.
A simple version of the bottom made of newspaper tubes
You can start weaving from round bottom tubes in an easier way. Such a bottom will not look so elegant, but for beginners we recommend trying this method.
For a small product, take eight long tubes. Four at a time we fold them crosswise. You can also roll them with a rolling pin and glue the joint - there will be fewer problems at the start.
Basket
- Several vertical tubes are fixed parallel to each other and an additional long tube is passed through them, which must first pass under one, then over the other tube.
- The tube must periodically be lengthened by attaching another one to it, so the bottom must be completed completely. Then walls are made on its basis. To do this, the remaining racks are enlarged by attaching additional tubes to them.
- Two vines are crossed, the one that went under the vine needs to be bent and go around the second one. One of them should be in the rack, and the second should lie on the surface. Thus, it is necessary to raise all the racks and begin weaving the walls using the technique presented for making the bottom. At the end, the remaining posts need to be folded and the edges woven together as shown above.
Weaving the bottom of the basket (diagram)
Master class on weaving a basket from newspaper tubes
Fungus for the garden
To decorate the garden with decorative wicker fungus you need to prepare:
- newspaper tubes;
- glue;
- scissors;
- deep bowl.
How to do:
- We take 8 tubes as a basis. For a stronger base, you can insert wire inside. The base is like a square that needs to be braided.
- To give the base a convex shape, place the base over a bowl and braid until a mushroom cap is formed.
- To create a leg, bend the tubes as in the photo and continue braiding. In the middle of the leg you need to make a small bulge and braid it to the end.
Weaving walls
Two tubes are inserted into the base of the basket and braided around the posts - one goes in the front and the other in the back. Cut the part you will be inserting diagonally to continue weaving.
Press the inner paper vine with your fingernail to help it bend better. Continue this until the basket reaches the required height. If necessary, increase the guides by extending them with additional tubes.
Form
Flower pots or kitchen pans are used as forms for weaving crafts from paper tubes and newspapers. The basis for more complex forms will have to be created independently. Various boxes and other suitable items may also come in handy.
It is worth remembering: the surface of such forms should be smooth so that in the end there will be no difficulties in pulling it out.
Vase
To make an interesting craft from newspaper tubes, you do not need to master the art of weaving. Interesting, bright and unusual crafts are made from paper sticks flattened and twisted in a spiral. For such crafts, there is no need to paint the tubes if you make them from bright pages of glossy magazines.
Materials:
- paper straws;
- glue.
Step-by-step instruction:
- We flatten the tubes of their magazine sheets and twist them in a spiral. To make the bottom of the vase, you need to glue several sticks together into one large spiral.
- When the bottom is ready, you can start gluing small spirals upward until the vase is the desired height.
Using the same principle, you can make coasters for cups or a teapot.
Types and techniques of weaving crafts from newspaper tubes
Currently, weaving techniques are being improved and many different methods are emerging. Some of them present absolutely no difficulty, which allows novice craftsmen to use them to make crafts from newspaper tubes.
Easy way
In order to weave products from paper tubes in the simplest way, you need to place several tubes vertically and with another additional vine you need to pass first over the first stick, then under the next one, and so on until the end. Depending on the product, you need to select the required number of tubes.
Layer-by-layer
For this method you need to take several vertically arranged tubes and two additional ones for weaving. You need to “hug” each stand with additional vines and so weave until the end, periodically bending and continuing the next row.
Weaving in rows
First, you should place several racks and weave an additional tube through one to the end. In this way, you need to weave subsequent rows, not continuing the previous tube, but starting a new one.
Square weave
This pattern must be woven from left to right through two posts. You need to repeat exactly as many rows of these until you get a square pattern, that is, the height of the woven row will be equal to the distance between the two posts. With another vine, you should start weaving from right to left through two posts. After which you need to continue weaving new rows.
Rope weaving
In order to create this pattern, you should place several posts and secure them so that they do not move during weaving. Two additional vines need to be braided around the racks and intertwined with each other, tightly fitting the twigs.
Rope weaving - ideal for creating baskets
Openwork weaving
There are a number of types of this weaving, it is an open-cell lace and, as a rule, includes several weaving techniques presented earlier.
That is, for example, first the base is woven with a rope, into which X-shaped double structures are then inserted and glued to a new weave of a different type, which completes the product.
Weaving the edge of the product (closure with a pigtail)
In order for the product to look high quality and neat, the weaving must be completed correctly. This can be done in two proven ways:
- False braids . They are woven from several racks, attaching them one by one to the walls of the product.
- Edge braids . They should be woven from the ends of the remaining posts from left to right. One of the tubes is bent outward and the second is bent, passing the first vine under it. Eventually the first vine is brought out inside and glued.
The photo shows how to properly complete the product using the braiding method.
Transition from the bottom to the walls. Raising the racks
Once the bottom is done, sound logic dictates that somehow you need to move from it to the walls to continue working. We'll look at several ways to raise racks to create beautiful pieces.
Smooth or imperceptible rise
The easiest way for a beginner is to simply lift the posts up about 30 degrees with your hands and continue to braid them with rope. After the first circle, the racks need to be raised another 30 degrees and continue to weave with a rope.
By the third, or maximum fourth, row you need to completely align them and continue braiding. This will create a smooth rise.
This method is used when it is necessary to achieve a smooth transition of the bottom into the walls of the product.
In the finished product, such a smooth rise of the racks will look like this: the transition is not sharp, the bottom gradually turns into walls:
Simple vertical lifting. Establishing a stand for the next
To master this technology, take an additional tube, preferably in a contrasting color, so as not to confuse it further, and place it on any rack; we will henceforth call it the first one. This manipulation will allow you to “reserve” a place for the last raised rack.
So, bend the first post, bend it through the additional tube and bring it up through the next one.
Bring the second rack up through the third in the same way.
Repeat these steps around the entire perimeter of the bottom. When you reach the extra tube, take it out and insert the last post in that place.
All the racks are already up. Before weaving the walls, pull each of them up a little.
A clear and sharp transition from the bottom to the walls will be visible in the finished product:
Using a string of three tubes
If you are new to newspaper crafting, this method may seem overwhelming to you. Therefore, we suggest you start your training by watching a clear video master class from Lada Ligai.
The transition made using this technique (a rope with three tubes) will be neat and smooth:
What to make paper vine from
If you decide to turn mountains of waste paper into elegant baskets and flowerpots, we support your desire to make this world a better place and will help you choose the right material for making paper vines.
Newspapers
We recommend starting your acquaintance with the fashion hobby with newspaper
. Firstly, this is the cheapest, or rather even free, consumable material. Secondly, they are soft and obedient. Newspaper pages are easy to roll into a neat tube; even an absolute beginner can handle this task.
Consumer paper 45-48 g/m2
If you have not found any deposits of unnecessary newspapers, visit the nearest stationery store and purchase a couple of packs of consumer paper. It can also be found under the names offset or newspaper.
We advise you to pay attention to the following manufacturers: Kondopoga, Syktyvkar and OfficeSpace. The paper of the latter is slightly thicker and crystal white.
This category of raw materials also includes fax paper. Its density will also allow you to prepare tubes without problems.
Glossy magazines
If you have accumulated a whole collection of glossy magazines that you can’t bear to throw away, then donate it to a good cause. Magazine pages, all kinds of flyers and even leaflets are also suitable for rolling tubes. But we want to warn you right away: products made from them turn out to be rough. In addition, dense, glossy wicker is more difficult to paint than paper.
Therefore, such rigid tubes are most often used to create frames for large products, frames, finishing mirrors and shelves. That is, everything that requires additional strength and rigidity of the structure.
Office paper
This is the most unsuitable material due to its rather high density (A4/A3 office paper has a density of 80 g/m2). The tubes made from it are too dense and unyielding. Using office paper of any format, you will encounter difficulties already at the preparation stage: rolling it into a tube will take much longer than when using other types of raw materials. And the most important thing: the finished vine will turn out to be too rigid, it will be difficult to fit it into the weave, and twists and creases will be noticeable in the finished product.
Having analyzed all of the above, we can highlight our favorites. By a large margin, newspapers and newsprint (aka consumer) paper with a density of 45–48 g/m² are in the lead in terms of the number of advantages.
It is this raw material that we recommend using for preparing paper vines.
Newspaper processing
Before you start weaving, you need to process the newspaper strips - twist them into tubes.
This is done in a certain sequence of actions:
- You need to drop a drop of glue on the edge of the newspaper strip, then place the knitting needle on it. It should form an acute angle with the lower long edge of the sheet. The diameter of the tube depends on the size number of the knitting needle: the thinner the knitting needle, the denser the tube will be.
- Twisting should be done in a circular motion, starting to rotate the knitting needle from the corner of the strip and maintaining a certain angle of inclination of the tool. The size of this angle determines the type of tube obtained as a result.
If the angle is less than 30 degrees, the tubes will be short and very dense - they are good for forming the frame of the product. If the angle is more than 90 degrees, the tubes will come out long and fragile - it is extremely difficult to work with them. The optimal size of the knitting needle angle is 45-60 degrees: the result will be a standard length, and the density of the tube will be moderate.
- When rolling the strip into a tube , you need to hold it by the edge and after each turn around the knitting needle, carefully tighten the paper. This way it will be wound tightly, which will ensure good quality of the tube.
- Having formed the tube completely, you need to carefully pull out the knitting needle and drop a strip of glue onto the corner, then press it with your fingers. One edge of the tube (from which weaving began) should be narrow, and the opposite edge should be slightly wider.
This is important so that during work, if the need arises, you can increase the length of the tube. This is done by inserting one tube with a narrow edge into the wide edge of another tube, after dropping a drop of glue.
There are types of products such as small panels, frames, decorative rugs and others, the manufacture of which requires flat tubes, which must be prepared taking into account certain nuances:
- When securing the edge of the strip with glue before twisting, you need to make sure that it does not fit too tightly to the entire length of the strip. The opposite edges of the tube should be the same in width.
- To twist, you must use a knitting needle of the required size, not forgetting that the diameter and density of the tube depend on the thickness of the knitting needle. And the wider the initial tube, the wider the flat tube formed from it will be.
- The required number of finished tubes should be laid out in one layer on the table, after which you need to walk over them with a rolling pin.
If desired, newspaper tubes are painted in the desired color. Gouache or acrylic paint diluted with water are suitable for these purposes. You can use watercolors and wood stain - but they do not paint over the letters of printed text well.
Painting each tube separately is a rather long and labor-intensive process, so you need to find a suitable container for the job:
- long tray;
- 5-liter bottle with the top cut off for long straws;
- 2 or 1.5 liter bottle for shorter straws;
- small bucket.
Before painting, you need to prepare a solution of the required shade and saturation and pour it into a container. After this, you should place the tubes in the solution for as long as it takes for them to fully color.
If staining occurs in a 5-liter bottle or bucket, a stack of tubes is dipped into the solution with opposite ends alternately. If you are painting short tubes in a small bottle, then after placing them in the solution you need to shake the bottle, then turn the tubes over with opposite ends to the bottom and shake again.
Preparatory stage
An important point is to prepare the vines in the form of narrow tubes. At the initial stage of the creative process, you need to prepare:
- newspapers;
- PVA glue (it is more convenient to use glue in a small plastic bottle with a cone-shaped nozzle);
- scissors (or knife);
- a knitting needle or a piece of wire with a diameter of 1.5-2 mm.
You can twist a vine for weaving not only from newspapers, catalogs, magazines, but also from plain paper. It is more convenient to cut newspapers into long strips, and the elements from them come out more accurately.
Making straws
The process begins with cutting strips. When cutting raw materials, it is recommended to maintain an aspect ratio of 1:3 or 1:4.
It is convenient to cut the newspaper into 4 strips along the long edge, folding it in half, and then in half again.
To form the tubes you will need a knitting needle or a wire rod. The smaller the diameter of the knitting needle, the thinner the paper vine will be. This is important for the aesthetic appearance of the final product. For small objects you will need thinner straws; for large vases or boxes it is a good idea to prepare a wider vine.
The strip is placed at an angle of 45 degrees in relation to the knitting needle and the strip begins to twist slightly in a spiral. The edge must be fixed with a drop of glue.
Having twisted several tubes, it is easy to notice that the diameter of one edge is slightly larger. This is convenient to use for connecting vines when weaving. The straws are easily inserted into one another, and the connection can be duplicated with glue for reliability.
Sometimes the finished parts are rolled out with a rolling pin or bottle to give them a flat appearance.
Painting
In order for the product to acquire an attractive appearance, the vine should be painted. To do this, it is convenient to use acrylic paint or varnish with the addition of a coloring pigment. It is easy to speed up the painting process by placing the parts in a rectangular paint tray or bottle.
After the paint has dried, you can begin to work. To make the tubes more pliable, it is recommended to moisten them a little with water from a spray bottle.
When painting a vine with a brush, you should not apply several layers of acrylic paint; it will settle when bending.
Making tubes from newspapers
By carefully familiarizing yourself with the technology of producing tubes for weaving, you can avoid making frequent mistakes that are typical for novice craftsmen. The most important stage in the production of products from paper tubes is the production of the blanks themselves. The decorative and operational characteristics of the finished product largely depend on their quality.
Before starting work, you need to prepare the main material - newspapers, as well as glue (PVA or pencil), scissors and a skewer (knitting needle) for twisting. The raw material for the manufacture of structures can be any paper: newspaper, magazine, office, fax. Many people like to use catalogs distributed in online stores.
Step 1. Newspaper sheets are cut into blanks having a width of 40...60 mm. Larger strip sizes may be required. It all depends on the diameter of the knitting needle and the thickness of the paper.
Cutting the newspaper
Step 2. Take a thin knitting needle (its diameter determines the size of the tubes).
Important! The thinner the knitting needle, the more difficult it is to make tubes, but over time you can get used to the size. The most convenient tool is considered to be one with a diameter of 1.5 mm. Often the size depends on the type of product being made. For structures such as a laundry basket, it is recommended to use knitting needles with a diameter of 2 mm. But the strips of paper should be wider - about 100 mm. Tubes obtained by twisting onto small-diameter knitting needles are less hollow, more difficult to wrinkle and hold volume better.
Step 3. The knitting needle is placed at an angle on a strip of paper. Moreover, the smaller the angle between it and the strip, the longer the tube can be made. There is no need to apply glue to this edge. Sometimes it happens that when you remove a knitting needle, the right end unwinds a little. But with certain experience this should not happen.
Let's start rolling up the newspaper
Step 4. The paper strip is gradually twisted onto the knitting needle. It is recommended to ensure that the strip fits as tightly as possible.
Using rotational movements, twist the tube, holding the edge
Curling process
Step 5. The remaining triangular tip of the newspaper must be treated with glue. After this, the tube is wrapped to the end.
Important! If you are using white consumer paper, a glue stick will not work. In this case, it is recommended to use PVA.
Step 6. After the operation is completed, the wire is removed from the tube. The result was a blank for future weaving.
Tubes are the working material needed for weaving
You can twist the strips either away from you or in the opposite direction. For right-handed people, the main working hand will be the right hand, the left hand will only move to the end of the tube as it is twisted and hold the product, helping to shape it. The spoke can be placed on top of the workpiece or below. Everyone chooses the most convenient option for themselves, which does not lead to painful sensations (fingers can hurt when producing a large number of workpieces) and allows the work to be done as quickly as possible.
Important! It’s easier to make blanks without lifting them from the table. Weightlifting will quickly lead to fatigue.
The result of your efforts will be blanks from which you can make a lot of useful things. Such tubes will perfectly replace the usual vine.
This is what newspaper tubes look like
How to twist paper straws
It's time to move from theory to practice and learn how to properly and quickly twist tubes from newspapers. At first, this may seem like something incredibly complicated. But in this matter the main thing is to start and get used to it. A little training - and you will see that the spell that prevented your fingers from obeying has dissipated and the tubes will begin to appear almost on their own.
To work you will need:
- Paper
. We talked about it in detail above. Let us only add that newspapers for folding must be taken fresh, whole and uncrumpled. Substandard does not suit us. A clean newspaper edge is suitable for tubes without letters; we will also discuss this in detail below. - Stationery knife.
Make sure you have spare blades, they get dull very quickly on paper. It will be more difficult to work with scissors, leave them for other types of creativity. - Glue stick
. It is necessary for fixing the edges of the workpieces. But often when painting, the ends of the tubes come off after the glue stick, so experienced craftswomen recommend using Glue Moment Joiner PVA in a red jar, you can find it in construction stores. Or PVA glue LUCH in yellow packaging. Or any polymer glue (most often it is sold in large bottles, which is inconvenient for our creativity, so for convenience you can pour it into a syringe). - Long thin knitting needle
. For a beginner, its optimal thickness is 1.5 mm. If you choose a thicker one, then the tubes will turn out to be thicker, with a cavity inside, and will form creases in the weaving. Once you become familiar with the process of winding tubes, we recommend looking for an even thinner knitting needle, ideally 1 mm. If you (or your grandmother’s) do not have such a thin knitting needle, then take a knitting needle from an old umbrella or sparkler, a piece of thin wire, etc.
The thinner the base (knitting needle), the higher quality raw materials you can produce for your masterpieces. Therefore, immediately strive for the ideal and try to gradually accustom yourself to rolling the thinnest, dense tubes possible.
We are preparing a newspaper
- Place the newspaper directly in front of you. If there are a lot of sheets, remove some of them. Fold the newspaper in half vertically.
- Cut it along the fold with a knife.
- Fold half of the newspaper in half again vertically and cut along the fold.
- If you did everything correctly, you will end up with neat, long strips of newspaper.
They are distinguished by the presence or absence of a pure white edge. Tubes rolled from strips with a clean newspaper edge will be white and without letters. Products from the remaining bands will have typographic fonts or designs.
To weave medium-sized products, you will need to use a knitting needle 1 mm or 1.5 mm thick and strips 7-10 cm wide. Remember, the lower the paper density, the wider the strip should be for twisting the tube.
Develop your own experience and experiment with the thickness of the workpieces that is convenient for you. In the meantime, we recommend that for medium-sized crafts, when using a 1-1.5 mm knitting needle, take strips of newsprint 7-8 cm wide, and for massive products increase the width of the strips to 10 cm.
We do not recommend twisting long tubes to a full spread of a newspaper sheet, since with such a strip length the tube does not turn out even. This leads to problems with extensions and, ultimately, with the appearance of the product. So, for beginners, we recommend that you avoid long tubes longer than 40 cm and instead twist tubes from strips 30 cm long; as a result, you will no longer have problems with extensions and the appearance of the product will undoubtedly improve.
The main secret to successfully preparing paper is to cut it along the grain.
When cutting the first strips, beginners often notice that in one direction everything goes like clockwork, but in the other it is much more difficult to cut, and the cut turns out to be “shaggy”. Similar difficulties can be encountered when twisting the vine.
These apparent anomalies are related to the direction of the cellulose fibers in the sheet of paper. That is, before cutting, you need to determine their location.
Method No. 1
Tear the newspaper in different directions (vertically and horizontally). The tear along the fiber will be smooth and straight, its edges will be less shaggy. Accordingly, breaks across the fibers will be uneven. For this method of testing, the familiar but slightly modified rule from childhood is suitable: tear seven times - cut once.
Method No. 2
Fold a sheet of paper in two perpendicular directions and smooth the folds with your fingers. The fold running along the fibers will be smooth and even to the touch, while the fold that runs across will be rough and slightly broken.
From all of the above, let us formulate a simple but very important rule: always cut strips for tubes along the paper fibers.
Spin it on a knitting needle
Now it's time to learn how to properly twist your first newspaper tubes for weaving. Be patient and look at the step-by-step photos, everything is much simpler than it seems at first glance, just don’t forget to strictly follow our instructions.
Advice:
It will not be very convenient to twist on a bare table, since the paper on a smooth surface slides and does not adhere well to the knitting needle. We recommend rolling it on a silicone baking mat; these are sold in hardware stores, Ikea, and Fix Price.
It is desirable that the surface be slightly rubberized, then the grip will be very good, the knitting needle will not fidget and the tube will be wound more tightly. Be sure to pay attention to this important nuance!
Some craftswomen advise using a piece of vinyl wallpaper instead of expensive rugs. Vinyl also gives excellent grip and is a budget option.
Experiment with the choice of bedding and rugs, only then will you understand what will be more convenient for you to do this on.
Method of torsion on the table
Place a strip of newspaper in front of you. Place a knitting needle on its lower right corner at an angle of 30 degrees and begin twisting the newspaper onto it.
At the very beginning, you need to firmly press the knitting needle against the paper with your fingers so that it tucks under the knitting needle, as if swinging it back and forth, then the newspaper will grab a little under the knitting needle and adhere to it. For convenience, you can lightly moisten your fingers with water.
, then the paper will adhere well to the knitting needle.
Try not to make a large angle between the strip and the knitting needle. By placing the knitting needle at an acute angle, we lengthen the tube as much as possible. Do not allow it to move while twisting and make sure that the turns are parallel to each other. This way the workpiece will be the same thickness along its entire length.
Different angles and widths of the turns will give the finished wicker product a sloppy appearance.
Try to press the knitting needle against the newspaper as tightly as possible so that the tube turns out smooth and dense.
After twisting the tip, place your hands like on a rolling pin and twist the rest of the strip.
When a small “tail” remains of it, coat it with glue and twist the tube completely. Finally the knitting needle can be removed.
As a result, you get two types of tubes: light (from white newspaper edge) and with letters.
We would like to give one more important piece of advice. Try to twist the tubes as tightly and tightly as possible. With the correct technique, the turns of paper are arranged so tightly that they form a single canvas. Such raw materials will produce high-quality products, and the weaving process will be easy and enjoyable.
Making a braid for a bottle
To make the bottle look much more beautiful, you need to pay special attention to its additional decoration.
Necessary materials
To work you will need:
- pre-painted newspaper tubes about 150 pieces;
- cardboard;
- PVA glue;
- scissors;
- pencil.
Progress
- We cut out 2 identical round blanks from cardboard with a diameter similar to the bottom of the bottle. At a distance of 2 cm we apply divisions, marking the places where the tubes are attached.
- We glue the tubes to one blank according to the markings and glue a second cardboard circle on top to hide the places where the tubes are glued.
- We lift all the tubes - the racks up.
- We take 2 vines and connect them. We bend it in half and place it behind one of the posts. We put another long tube behind the adjacent counter.
- We will weave the second and subsequent rows using the rope technique.
Making the bottom
The simplest method of forming the bottom of a craft is a cardboard base to which rod stands are attached. When making a square or rectangular bottom, two posts must be secured in the corners.
In addition, it is not difficult to make a cross in four rows consisting of an equal number of straws. To create a flat bottom, the “cross” is rolled with a rolling pin. Then this middle is braided according to a flat weave pattern, bringing the bottom diameter to the desired size.
With this scheme, the number of straws taken at the first stage to make the bottom depends on the volume of the future product.
