Many people like to read newspapers on the subway, on park benches, or just on the couch. They love to watch and feel how a paper page turns, inhale the smell of fresh printing and experience the unique feeling that arises when reading the last page. Reading online is undoubtedly different. What pleasure does it give?
Don't throw away your newspapers after reading them. Traditionally, people try to use newspapers almost always; they come in handy even in trivial cases: to cover furniture with them during renovation, to light a fire, or just to sit on them.
DIY furniture made from newspaper tubes is an idea for those who have wondered about the number of trees that are destroyed every year to enjoy fresh but ephemeral news and morning coffee. Let's look at how to put together practical furniture, inspired by upcycling ideas.
History of the craft
Weaving from plant stems was used already in Neolithic times. Archaeologists have found household items made in this way both in Africa and throughout Eurasia. It is assumed that people used thin tree roots and flexible vines for weaving.
Much later, the interlacing of long rods began to be used in construction. In the nineteenth century, many roofs were made using this technology. Ordinary people made fences near their houses, the rich could boast of wicker furniture.
Today, decorative wicker souvenirs can often be found at folk craft exhibitions. However, you don't have to stop at history alone. Using the weaving technique using newspaper tubes, real designer objects are created.
Let's get started
There are a number of techniques that you need to know, since each of them allows you to achieve a unique and inimitable result for your work. Considering these techniques in isolation from practice will not give you anything. Therefore, we suggest moving from simple products to more complex ones, learning the basics of weaving.
Preparation of tubes
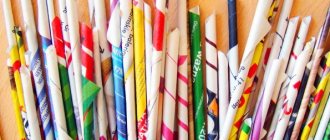
Before you start weaving, you need to prepare the starting material - wind tubes from newspapers or magazines. You will need the paper itself, PVA glue in a bottle with a dispenser, a long pushing knitting needle or a piece of stiff wire. The diameter of the knitting needle/wire is 1.5-2 mm. These are all tools at the preparatory stage.
Lots of ideas - lots of material
To prepare the tubes, you must first cut the paper into pieces of the desired size. We cut newspaper strips or magazine spreads into several parts. Aspect ratio - 1:3 or 1:4 (for example, 27 * 9 cm, 35 * 10 cm). The exact dimensions are not important. Divide the page into several parts so that they are approximately the same aspect ratio as above.
Take a knitting needle and a strip of paper. We twist the corner of the paper around the knitting needle, and gradually, layer by layer, roll it into a tube. Secure the edge of the strip with a drop of glue. To make the tube the desired density, we lay the paper at 45° relative to the knitting needle. Then it will be quite dense, but at the same time it will bend well.
This is how we make paper tubes for weaving
We take out the knitting needle. The tube is not too long; to work, you will have to splice them together. If everything is done correctly, one edge will be thin, the other will be thick and hollow from the inside. To connect two newspaper tubes, drop a few drops of PVA glue into the thick part and insert the second tube with a thin edge. Now we wait until it dries.
Sometimes, for simpler weaving, the tubes are rolled using a regular rolling pin. They become flatter. In this form it is easier to work with them - stretch them between the rows. But this is an optional step. Try “rolling”, maybe you will like weaving from newspaper tubes more this way.
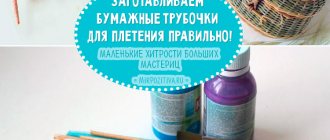
Not everyone likes the “natural look” of newsprint weave. To improve the appearance, the wound tubes are painted. Acrylic paint is best suited for this. It fits tightly, works well with any type of paper, does not flow, dries quickly and has no odor. A water-based, moisture-resistant stain will also work. Paper tubes coated with acrylic varnish, to which a coloring pigment is immediately added, look good. Simultaneously with painting, they become less sensitive to moisture.
Some colors of water stain for dyeing paper straws
Painting each tube with a brush is long and tedious, so they look for a long tray into which the tubes are placed. Paint is poured into it, and ready-made newspaper tubes are lowered into it. Then they are laid out on a layer of polyethylene to dry.
Before starting weaving, so that the “newspaper vine” bends well, you can moisten it. It is better and easier to do this from a spray bottle, simply spraying water.
Photo ideas for weaving tubes
Beginning craftsmen master weaving from newspaper tubes using simple crafts. As you gain experience, you want to diversify your products and use more complex patterns. In some cases, interesting-looking weaving is not necessarily complex. Such an example is in the following photo gallery. It contains step-by-step photos of creating chess weaving.
As you can see, the weaving is simple, and this product looks interesting. There are also other methods. If you look closely at the photographs, there is a chance that you yourself can repeat or do something similar.
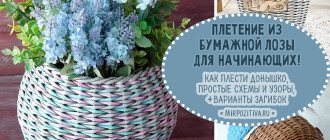
A simple basket. This is a great option to learn how to weave from newspaper tubes
One of the options for finishing the job
Several ways to bend racks
The use of various patterns makes baskets of the same size unrecognizable
But you can’t tell that it’s made of paper
You can weave a basket for a cat from newspapers. She will feel comfortable in such a bed Openwork weaving from tubes - it is important to maintain equal distances
Laundry basket You can also use pebbles/beads as decoration Some are woven with regular rope, some are woven using layer-by-layer weaving Series of identical baskets made of paper tubes - functional and beautiful
Surprisingly, but true - you can even weave furniture from newspaper tubes! And not only a puppet, but also a real one!
Recommendations
Wicker furniture has its secrets. Experienced craftsmen have long found ways to simplify the labor-intensive process and apply them in practice. Among the useful ideas, some particularly useful ones can be noted.
- Folding blanks like an accordion. When using thick paper, this will make it easier to form the tubes.
- Connecting equipment. Using a screwdriver, you can screw on a lot of tubes in a short time without putting too much effort into it.
- Winding diagonally. If the coil density is good, there is no need to additionally connect the workpieces with glue along the entire length.
- Thickening on 1 side. By slightly widening the edge, you can achieve a seamless connection of the tubes by simply inserting them into each other. If you make them with an equal diameter along the entire length, fixation will be difficult.
- The choice of frame base depends on the size and shape of the product. A plastic water bottle is suitable for the vase. You can also use plastic buckets, trays, dishes, and summer country chairs as temporary forms.
- Consolidation. At the end of weaving, the “tails” of the paper tubes should be glued to the base.
- Drying. After completing the weaving, you should leave the product overnight, allowing the adhesive composition to set.
Article on the topic: St furniture sliding wardrobe 16 tips where to attach
Necessary materials and tools for weaving
Everyone himself determines by experience which paper is easier for him to twist the tubes with. Magazines, notebooks, newspapers, sheets of writing paper, advertising brochures, cash register tape and any other tape that you can roll up, even edible tracing paper, will do. You will also need a glue stick, PVA, scissors and knitting needles.
To twist snow-white unpainted fragments, you should pay attention to the percentage of whiteness. The smaller it is, the grayer the wickerwork and vases will be and additional coloring will be required. The thicker the paper, the more difficult it is to twist and weave.
When cutting paper, consider the direction of the grain. To do this, take a sheet and try to tear off a strip lengthwise first. If the edges turn out to be a zigzag, and the tear always tries to move to the side, then the process occurs across the fibers. With this cutting, the paper will not curl, and the tubes will turn out “shaggy”.
Types of weaving
When making products, the paper vine is extended by inserting one tube into another. The fact is that during the twisting process, one end turns out to be thicker than the opposite, and it is not difficult to connect them. You can use a drop of glue, but many people do without it. If the tip is too soft, you can trim it slightly to make the connection easier.
There are several types of weaving baskets from newspaper tubes, and they are similar to weaving from natural wicker:
- Simple weaving;
- Rope weaving;
- Plain weave;
- Diagonal weaving;
- Spiral weaving.
It is recommended to start with wicker weaving with the simplest and most versatile rope weaving. It is more durable than simple weaving and looks more beautiful. In addition to using different techniques for this type of needlework, you can create patterns by skipping rows or creating holes in the work. Using different colors of tubes and alternating them, you can create your own unique patterns and combinations.
Type of weaving from newspaper wicker "rope"
Furniture made from newspapers: an unusual DIY interior item
Every family probably has a lot of old and unnecessary newspapers, magazines, and advertising brochures. They can be used to light a stove or fireplace, and they can be recycled. You can also make furniture and interior decor items from this paper. Yes, don’t be surprised, newspapers can serve as a durable and reliable material for weaving.
You have all come across products woven from wicker. They look beautiful and airy, but are quite expensive. Therefore, we offer you several simple options that will allow you to master the technique of wicker weaving using cheap material.
So, let’s learn how to weave furniture with our own hands in order to decorate the house yourself and without special expenses.
Features of paper curling
Only at first glance, “twisting” is performed quickly and easily. Practice shows that you can master the technique taking into account several features.
- We cut strips of the same size from the press spreads in an approximate ratio of 1X3. To increase productivity, fold the paper into a stack and use a utility knife;
- hold the tool at an angle of 45° and tightly wind the tapes onto it. If you wind the paper at an angle of 30°, you will get a thick stick (it will be useful for “knitting needles”). And at 90° the stick will turn out to be very thin (it is used for edging);
- We fix the tail-kerchief with glue, and then remove the workpiece.
During the twisting process, they are spliced together by inserting the thin end coated with glue from one tube into the wide hollow hole of the other.
For panels, decorative rugs and frames, flat blanks are required.
Place the finished “twigs” on a flat, hard surface and roll them with a rolling pin. Look at the master class in the photo.
Second bottom option
In the second case, we place an odd number of paired guides on the table and begin to braid them with two tubes, one of which is threaded from above, and the second from below.
Having reached the end, the tube is bent, and then the following guides are inserted into the edges. When inserting the guides, help yourself with scissors by cutting one of its ends.
Weaving from newspaper tubes for beginners step by step: photo instructions with examples of work
What can you weave from newspaper tubes?
Wicker decor is increasingly found in interiors. It could be something small, like a photo frame. Such a modest element can be used in almost any interior style (with the exception of high-tech style).
Items made from newspapers look especially good in a country house. A unique village atmosphere is created. Various vases, boxes, and chests would be appropriate here. It should be noted that all these items can be used on the farm. The result of weaving is a very durable product.
In a modern apartment there is also a place for such things. In the nursery you can use baskets for toys. Laundry baskets are ideal for the bathroom. By the way, coated with varnish they are not afraid of moisture.
Sometimes you can even find accessories made using this technique. For example, an elegant wicker clutch will be a great addition to your look.
Weaving from newspapers is a great way to simultaneously get rid of accumulated waste paper and create a unique design object. The result is a beautiful and durable thing that can be used in life. Homemade interior items fill the room with comfort and warmth. In addition, all hand-made products are unique and original. There is a guarantee that no one else will have exactly the same box.
Newspaper flower
Anyone who has learned how to twist tubes can make a flower. A fairly simple craft that can be used both as a decoration and as a hot plate.
What you will need to produce the product: pre-prepared tubes, scissors, PVA glue and decorative composition for finishing.
Step 1. Making the base.
You should take 6 tubes - two bases for the product, 3 pieces each (let's call them base A and base B). Their middle needs to be kneaded a little (it should become flatter). After this, the remaining three tubes (B) are attached perpendicularly to three blanks (A) tightly laid together with glue.
Core formation scheme
You need very little glue, otherwise this area will be difficult to paint over later. After this, you will have to wait a little while the structure sets. You can begin to braid the resulting cross-shaped base.
Making the base
Step 2: Forming the core.
A long piece is prepared from two tubes using extensions. To do this, one of the ends of the part must be cut at an acute angle, after which, pre-lubricated with glue and slightly compressed, it is inserted into the second tube. The resulting elongated part must be folded (not at the joint) and placed behind base B parallel to base A.
When weaving, you can periodically spray the material with a spray bottle. At the same time, the tubes become more pliable.
The lower part of the working tube is brought up onto base A (parallel and as close as possible to base B). The second working part, located at the top, is inserted downwards, under base A. To do this, the three tubes that make it up need to be lifted. The operation is repeated - the lower working tube moves upward, to base B, the second part, the upper one, is at the top. At the bend, you need to crumple the tube a little. The weaving should be tight. This forms the first row of the core.
Core formation
The second row is laid in the same way, only the tubes are placed next to the previous weave.
Step 3. Weaving a circle.
After forming the second row, you need to divide the component parts of the bases into two parts (one will have two tubes, the second will have one). The working tube lying on top is inserted under the first part of the divided base (of two elements) and ends up on top of the single part, the lower one braids the double base tubes from above, after which it covers the remaining base tube from below and is brought up. After this, weaving continues around the next divided warp, alternating between upper and lower grips.
Weaving a circle
The working tube needs to be extended periodically. In this way two rows are woven. After this, the double parts of the bases are separated. Now each of the base tubes is braided on both sides with working elements.
When the diameter of the product suits the performer, it is necessary to secure the working ends of the tubes by pulling them under the row of weaving (for this you can use scissors or a knitting needle and slightly move the dense structure apart) and trim them (you can apply a drop of glue for fixation).
The result was a neat wicker circle, looking equally beautiful both from the front side and from the back, with tubes of bases sticking out along the perimeter.
Growing the Circle
Step 4. Formation of petals.
The tubes of the bases are kneaded to a state of pliability. After this, they are bent and passed through two rows of weaving. The size of the petals can be any size the master likes. The ends of the tubes are cut off. The petals are pulled up a little so that the cut ends are not visible. You can also apply a little glue.
Formation of petals
The resulting piece can be painted with water-based stain or acrylic paint.
Such a detailed description of the manufacture of such a simple product is due to the fact that its production technology can also be used for weaving more complex crafts.
Basket of straws
Before starting work, you need to decide on the size of the product and prepare the material. Unlike the flower, the making of which was described above, longer tubes will be needed for the base. And you need more of them - 6 pieces for each base.
The base is made in a familiar way. The difference is that the division of the base occurs in 2 stages: first into double tubes and then, when the diameter of the base reaches approximately 10 - 12 cm, into single elements. After the bottom reaches the required size, weaving stops. It is advisable to have some form at hand, the diameter of the bottom of which would coincide with the manufactured base.
Round bottom weaving
- You will need two working tubes. They need to be secured to the base by placing them behind two rows of weaving near adjacent base elements.
- The pillars of the basket will be the base tubes sticking out around the perimeter. To prevent them from breaking at the bend, they need to be stretched a little.
- A selected container is installed on the base.
- The racks are raised vertically and braided with working tubes in the same way as was used to make the bottom. Periodically the latter are increased.
- During the process of forming the basket, a violation of the position of the racks may occur.
It is necessary to monitor this and align them (the distances between them should be approximately the same). First row - When the height of the walls reaches the required level, the container is removed from the basket.
Continuation of weaving - The remaining working tubes must be stretched to give them flexibility. Their ends are camouflaged in wicker rows.
- It is necessary to bend the racks.
To do this, they (softened) are hidden between the adjacent post and the weaving. To facilitate the process, it is recommended to use a knitting needle. From above, in the places where the racks were installed, for strength it is better to drip PVA glue. After it dries, you can trim off the protruding ends of the posts. Bending
It's time to move on to painting the finished structure.
A water-based stain is used for coloring.
Using a brush, the composition is applied to the wicker product. After painting, the basket must dry.
Painting with a brush
The basket must dry
To make the product stronger and last longer, it is recommended to varnish it.
Varnish
It is applied in a circular motion. It is better to remove clots of varnish that may form between the rows of weaving in a timely manner, otherwise they will worsen the appearance of the structure.
Applying varnish
After the basket has dried, a second layer of coating is applied. The container for storing small items is ready.
Basket after varnishing
Decorating a basket with fabric and lace
Having mastered the intricacies of weaving, you can move on to making more complex designs and decorations: decorative boxes, animal figurines, jewelry, photo frames, etc. If desired, you can even make a newspaper rack, shelves for books or spices from newspaper tubes.
Kitchen organizer
Kitchen set in Provence style
Coasters for wine and champagne
Rack for salt, pepper and napkins
Many people paint not the finished product, but the prepared tubes. But in any case, when decorating with water stain, you can often observe uneven coverage. Why this liquid may not stain tube crafts well:
- the most common problem is that the composition has expired or it has been sitting in the store for a long time, resulting in separation of the components;
- the stain may not paint over those areas where PVA glue has appeared;
- Glossy paper is difficult to paint, since water-based stains have difficulty penetrating its structure.
Water based stain
Varnish is used to finish finished products. But often wicker structures are used to store food products in them. The issue of security in this case is very important. It is recommended to use only water-based formulations, and with information on the label confirming their environmental safety. There are also varnishes designed for treating children's toys. In any case, it doesn’t hurt to put a paper napkin in the basket where candies and cookies will be stored.
To make interesting designer products with your own hands, you need a little: be patient, collect a stack of newspapers and use your imagination. And the result of the effort and time spent will delight the household for a long time.
You can create real masterpieces from newspapers
Box with cardboard bottom
Rectangular basket
The easiest way for beginners to master crafts from newspaper tubes is to weave a rectangular basket. Its shape allows you to familiarize yourself with the basics of technology and not get confused in complex maneuvers.
Summer hat
In a similar way, you can make your own summer hat for yourself or your loved ones. The technique is exactly the same as above.
Round basket with handle
Weaving from newspaper tubes, namely crafts from them, can turn out better if you use a frame. Such a frame can be a round plate on which the bottom or the entire work will be formed.
Take eight guide posts and connect them together, intertwining them with each other. They should form a square and face perpendicular directions. Next, take two tubes and insert them into the resulting base and begin to weave in a circle, forming the bottom and moving down.
The handle is made of woven paper vine, on which several tubes are wound.
Machine for weaving from newspaper tubes
Products are not always woven around some kind of base. It happens that you have to act almost blindly. To work quickly and still get an even workpiece, some use a special device that is easy to make with your own hands. All you need is a wooden block and two flat strips of the same material. Here are the manufacturing steps:
- Secure a block about 3 cm thick in the middle of the planks using nails.
- Using a punch and hammer, mark the locations of future holes.
- Find a drill with a diameter slightly smaller than the wide part of the tubes, and drill holes at the required distance from each other. It is 2 cm.
- You can insert newspaper tubes into them and start working.
Fungus
- To make this craft, you will need to take 8 tubes and cross them two at a time. Additionally, two vines need to “hug” each tube from the base, extending them to the end.
- To get a semicircular shape for a hat, you need to weave it on a saucer. Having made several rows, the edges of the cap are secured by cutting the remaining posts and threading them inside.
- For the leg, 5 tubes are taken in a bundle, their ends are glued together. For a while, this whole thing is fixed with a clothespin. The twigs are spread in different directions, after which the weaving of one of them begins, bending the selected newspaper tube through the next two.
- From two intertwined tubes, you need to take one more and intertwine the next two. In this way, you need to weave to the end so that the leg is not very tight; you need to insert a stick with a diameter of no more than 5 mm in the middle.
- At the end of the weaving, the tails need to be tucked into the middle of the leg and glued with glue. After which the leg should be generously greased with glue and attached to the cap.
