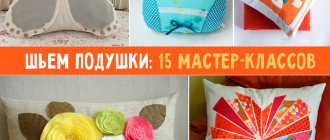
You can decorate your interior in an original way with the help of funny pillows made by yourself. They can perform practical functions of supporting the back and legs. By making it with pockets on the side, it will become an organizer. They can accommodate remote controls for TV and household appliances.
Original and cheerful pillows are a fashionable and stylish interior detail.
Owl pillows will be an unusual item in the bedroom for newlyweds. Several cute birds in the form of an owl family will fit into the recreation area.
The owl toy pillow will perfectly highlight your design with its modern style.
A symbol of wisdom and knowledge, suitable for a child of any age.
How to sew an owl pillow with your own hands
Today there are many different options for what an owl toy can look like. The size of the product and its appearance depend on the type of pattern and material used.
The pillow can be square or round. Some people make a toy in the shape of the animal itself, or apply an applique to the fabric. During a creative activity, you need to use your imagination and not be afraid to experiment. However, before making the product, you should think over the image of the owl, and also outline the position of the wings and beak. The master classes “DIY Owl Pillow” presented below will help you understand all the nuances.
Tools and materials
The size of the toy is selected individually. It all depends on the amount of material available. The proposed DIY owl pillow patterns are designed for A3 size paper.
For needlework you will need:
- Pattern printed on graph paper. In addition, the pattern for the owl pillow must contain fabric allowances for seams.
- Buttons or beads. These parts are needed to make the bird's eyes.
- Needles and threads of different colors.
- Several pieces of fabric in bright colors. Any thick fabric will do.
- Filler. It is recommended to use padding polyester.
- Fabric glue.
- Scissors and pencil.
Terry cloth, felt, and jeans are used as sewing materials. After preparing all the necessary tools, you can begin to create an owl.
DIY owl pillow patterns
There are many patterns and photo diagrams that help you create an owl pillow with your own hands.
The pillow pattern is suitable for A3 size paper. The pattern is for a regular toy in the shape of an owl.
Bottom line
You are convinced that making a gift in the form of an “Owl” pillow for a child, a friend or yourself is not at all difficult. All you need is desire and a little time.Owls are funny birds. Therefore, these pillows are appropriate both in the nursery and in any other room. They will definitely receive attention and a place of honor.
The simplest DIY owl pillow
The interior of a children's room will be perfectly complemented by a simple toy in the shape of an owl.
To create it you will need the following materials and tools:
- plain fabric;
- material of a different shade for the eyes, muzzle and beak;
- felt in two different colors;
- padding polyester;
- scissors, thread and needles.
Before you start creating an owl pillow with your own hands from fabric, you need to prepare a pattern.
Pattern for making basic elements
The pattern is transferred to the main fabric. To do this, two parts of the body are outlined with a pencil and then cut out with seam allowance. Details for the beak, muzzle and eyes are transferred to felt. They are cut without seam allowances.
The muzzle, beak and eyes are pinned to the main body part. When all the elements are in place, you can start sewing. The parts are sewn together using a machine. It is advisable to choose a zigzag stitch.
The finished image of the bird is folded with the other half of the body face to face. The details blur together. In this case, you need to leave a small hole for stuffing and turning the product inside out. The finished toy is filled with padding polyester and the hole is sewn up manually.
The paws can be beautifully drawn, or cut out of thick yellow felt and sewn to the bottom of the toy.
Types of sides and original models
Classic protective edges vary in height: the range of manufacturers includes high and low models. It is necessary to understand the features of both.
Sides for a round crib
- High sides are a traditional and familiar option for protection, which works reliably both as a tool for preventing injuries and as protection from cold air. But some parents note that the high sides significantly block the baby’s view. If this is not a problem for a newborn, then as the child grows up he needs to see what is happening in the world around him. The best option is a combination of high sides on three sides of the crib and low ones on the remaining side. This way the baby will be both protected and open to the world.
- Low sides (their height ranges from ⅓ to ⅔ of the total height of the crib) do not limit the baby’s view and look very neat. But it is important to understand that in this case there will be no complete protection of the child from the hard parts of the bed. Low protection is relevant for babies who have not yet tried to get up in a crib. When the child begins to rise and inevitably fall, it is more advisable to use reliable high protection.
Low sides for newborns
Classic bumpers, consisting of rectangular flat pillows, are losing popularity today. Modern young mothers strive to find for their babies not only high-quality and reliable, but also impressive-looking bumpers.
Particularly interesting are the bumpers in the shape of animal pillows, houses or cars . Such items turn out to be more functional, because when the baby grows up, they can be used as ordinary interior pillows.
ADVICE. When choosing sides, pay attention to the fastenings: elegant ties can come undone, and the baby can get confused in the ribbons, so the simpler and more reliable the fastening, the better for the baby. Concealed zippers on the covers and durable Velcro tape are the optimal combination for a safe product.
Children's crib bumpers in the shape of an owl
DIY shaped pillow in the shape of an owl
To create a figured owl pillow you will need a life-size pattern. The material used is two types of dense fabric. Felt is used to make eyes, and leather substitute is used for eyelashes. Black buttons are used to decorate the pupils.
The main part is cut out by folding the fabric in half
The main feature of the figured pillow is that the owl's body consists of two main parts. Before starting work, you should transfer the pattern to the fabric, taking into account the seam allowances. Two wings are drawn in a mirror image.
Once the patterns appear on the fabric, they can be cut out. First of all, the beak is sewn to the main part of the body, and then the eyes and wings. Eyelashes made from a leather substitute will help make button eyes more expressive. If desired, you can use wool instead. All parts are attached using a zigzag seam along the contour. Only the button eyes are sewn on by hand.
The next step is sewing the owl. The form is folded right side inward and stitched. The main thing is not to forget to leave a hole at the bottom of the product. The toy is turned inside out and then filled with padding polyester. Before stuffing, the piece can be ironed. The hole is sewn up by hand.
Advice! To simplify the task, you can glue the overlay elements. However, sewn parts look neater; If desired, the toy is complemented with decorative lace stripes or bows.
How to sew a multi-colored owl pillow with your own hands
Many mothers make colorful soft toys for their babies. The owl pillow pattern presented below is intended for making a kind of side. For sewing you will need cotton fabric of different colors and ball stuffing.
First you need to draw a pattern on the fabric and then cut it out. Don't forget about seam allowances. That is, the cut out elements should be larger than the paper stencils.
Small details such as wings, eyes, paws, eyelids and beak are sewn to the front side of the owl right away. The fabric for body parts should be multi-colored. The body is sewn together, placing the elements facing each other. Having turned the workpiece inside out, the toy is filled with stuffing.
A pattern that allows you to sew an original decoration for a baby crib
Useful tips
Almost every expectant mother can sew borders made of cotton fabric and padding polyester into a baby crib thanks to the step-by-step instructions suggested above. Below are tips from experts on making your own crib bumpers:
- When choosing the fabric and design of the future product, it is worth using your imagination, because experiments with the color and shape of the sides have a positive effect on the development of the baby.
- Fastenings such as Velcro and ties often do not withstand the pressure of the baby, who pulls on the side, trying to get up in the crib. Therefore, it is advisable to sew overlays from a single piece of fabric. The edges that have not been finished can be folded. This way they will be in the middle. After this, one seam is sewn along at least part of the ties.
- You can use ordinary rectangles as patterns.
- Holofiber is one of the best fillers for sides, which does not lose its shape even with frequent washing.
How to sew an owl pillow in patchwork style
Patchwork is a patchwork sewing technique that allows you to create products from small fragments of fabric of different colors and sizes. To make an owl pillow in patchwork style, you will need a pattern with the correct dimensions, cotton fabric of different colors, felt, paper and scissors.
First of all, transfer the pattern to paper, or simply print it out in A3 format. First, the body of the bird is cut out, and then all the other details. The base of the owl is cut out with seam allowances, and all other elements are cut out without them. On the front side of the detail, they mark where the eyes, beak and muzzle itself will be located. It's worth experimenting with colors.
Once all the elements fall into place, begin sewing. Using a sewing machine, a seam for appliqué or a fine zigzag is adjusted. Using this seam, eyelashes are embroidered on the muzzle. It is sewn to the body using the same zigzag seam.
After the muzzle, the eyes, beak and belly are sewn on. The two parts of the body are also sewn together, the threads are pulled inside out and cut. All that remains is to fill the toy with filler and decorate it. The ears can be decorated with tassels made from threads.
How to sew an owl pillow from jeans
Denim is a dense and tough fabric, from which not only clothes, but also interior items are sewn. To create an owl pillow from jeans you will need a pattern with dimensions, the material itself and filling.
The pattern is printed on a printer on A3 paper. The parts are cut out and then fixed to the denim using pins. Elements such as wings, feathers and beak are cut out from thin felt.
First of all, the eyes, pupils and eyelids are sewn on the front side of the body. After them, you should immediately attach the belly and beak.
It is better to use this pattern to create a denim toy
The wings and legs of the owl will be voluminous. They are sewn separately and filled with padding polyester. The body parts are sewn to each other, leaving holes at the bottom and sides. The legs and wings will be inserted into them later.
Popular colors and prints: for princes and princesses
Borders for a newborn's bed are not only a way to protect the baby from shocks and drafts, but also an excellent option for useful decor for a child's room. Modern fabrics and a wide range of different designed crib bumpers make it possible to choose the ideal option for any interior.
The classic division - pink for girls and blue for boys - also works in the case of a crib protector. But designers advise preferably using delicate shades and be sure to add companion colors. So, a pink-gray or yellow-blue side will look more neat and stylish.
Blue color is popular for boys
Neutral base colors (beige, gray, milky) are ideal if the crib is in the parent's bedroom. In this case, the decor allows you to harmoniously fit a children's item into an adult interior. And so that the side does not seem boring to the little one, you can provide a second set of covers or additional decor.
It is better to avoid sides that are too dark or too bright so as not to create an atmosphere that is unhealthy for the child.
