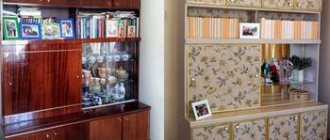
Currently, in stores you can find an endless number of various cabinets, chests of drawers, racks, hanging shelves, multifunctional drawers for clothes and personal items. But if you decide not to plunge into a long search, but to follow the thread of your imagination, then with the help of the following master classes you will learn how to update an old cabinet with your own hands beyond recognition.
After reading the article, you should not have any questions about how to paint a varnished, chipboard or wooden cabinet , what paint to paint and make it suit your own style, and you will also learn some of the intricacies of this work.
Painting a wooden cabinet made of chipboard
Paint selection
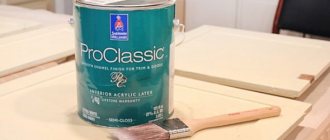
- For processing wood and chipboard, you can use alkyd or acrylic ,
- spray or regular wood paint,
- for deeper coloring - varnishes, but most often preference is given to acrylic paints .
They are non-toxic, dry at room temperature, which in our case and when painting home furniture is very convenient, they are presented in a wide range in stores, they can be colored , i.e. dilute with white paint to achieve the desired color. In addition, there is a choice of acrylic paints with a mother-of-pearl effect or, for example, metallic.
- Varnishes are used mainly to give furniture an antique , but well-groomed, noble and rich look. In this case, the surface is painted several times after each layer has completely dried.
- Varnishes are also necessary to fix the color and protect the surface from scratches and minor damage.
- You will need varnish even if you decide to paint the chest of drawers in an antique or Provence style.
Selecting Brushes and Rollers
After choosing paint, special attention should be paid to brushes and rollers. Why shouldn't you save on painting supplies if you decide to update your chest of drawers yourself?
- With the correct technology for processing the old surface and good painting, the cabinet will retain its appearance for several years .
- If you use bad brushes, you will not protect freshly painted furniture from sticking hairs or lint, which is almost impossible to fix unnoticed.
If you have a task to paint a large smooth surface, then a roller and aerosols will .
- a roller to take the right amount of paint and remove smudges, but if aerosols are used correctly, the surface will ultimately be smoother.
- To paint medium and small cabinet parts, protrusions, bas-reliefs, 2 brushes will be enough - wide and narrow.
ATTENTION: During work, do not leave the brushes dry, it is better to put them in a jar of water, otherwise they will quickly become unusable
Technologies and painting methods
Don't forget about other important painting tools and materials, such as sandpaper or sander, primer, putty, solvent and varnish. All this is necessary to comply with the correct dyeing technology.
Equipment:
- Sandpaper of different grits is needed to pre-grind the old paint layer and sand the surface.
- A primer will be needed to seal small cracks on the surface of wood or chipboard.
- Putty (you can use car putty) and a putty knife will come in handy if there are deep scratches or chips.
- Solvent or white spirit is needed to degrease the surface before painting for better impregnation.
- The varnish performs a protective function and gives the furniture shine.
In general, preparing a cabinet for painting consists of 5 short but very important steps .
- First, carefully remove the old paint and use medium-grain sanding paper (or a machine) to level the working surface.
- All dust must be wiped off, but without using wet rags, sponges , etc. Otherwise, the old paint will only be absorbed better, and the new paint will not adhere well.
- After processing with the finest grains, degrease with white spirit (acetone) and apply a primer layer for better adhesion to the paint.
- If there are large chips, then first fill them with putty and rub them until smooth. Afterwards we apply one or two layers of primer.
When you know all the stages of preparation, it’s time to move on to the main stage and figure out how to paint a wooden chest of drawers and chipboard.
Secrets of good design
If you want to decorate your furniture with a pattern, then do not use more than two or three colors. They should resonate with similar shades of the interior elements of the room. In this case, the furniture will not look like a foreign body. When wallpapering furniture, follow the same principle.
Try to choose wallpaper whose background matches the overall color scheme of the interior, and the design itself is made with brighter and more contrasting colors.
Another option is also possible. When the walls are painted in a deep color (like deep purple), use a light-colored paint (like white) and wallpaper the doors and drawer fronts with small, interesting designs. There are cabinets with open shelves on which small interesting things will stand - paintings, figurines, books.
To provide them with an expressive background that enhances their beauty, cover the inside of the back wall of the cabinet with wallpaper with a single-color ornamental pattern.
Choose the color so that it does not “clog” the items on the shelves and emphasizes their beauty. Don't rush to throw away old furniture. Put in a little effort, use our tips and you will create a small miracle from your closet with your own hands.
Master class No. 1. Stencil painting
Everything is mixed in this closet - romanticism, Chinese motifs, and even something from Gzhel. Everyone sees something different in him. Let's learn painting techniques.
Materials and tools
- Prepared cabinet;
- white paint;
- solvent;
- blue spray paint;
- gold paint;
- stencil;
- brushes
Step by step guide
Step 1.
- We remove all fittings, locks, handles, etc. from the cabinet. Using familiar technology, we will prepare a wooden cabinet for painting.
- We spread newspapers or a large piece of polyethylene on the work surface (on the floor) so as not to damage other furniture.
Step 2.
- We take white enamel and solvent. In a small plastic jar, dilute paint and solvent according to the instructions on the paint can.
- The paint consumption is also written on the can; it is better to use this information and immediately dilute the required amount. If you mix too little paint, you may end up with a different color the second time.
- We make the background of the picture - apply the first layer of paint . Leave until completely dry.
Step 3.
- If the color turns out saturated and you like it, then take a stencil and apply it to the cabinet . Carefully glue on the front side and side walls so that there are no bubbles.
- Shake the spray paint well and spray it over the stencil . For an even color, one layer of blue paint will be enough, so we do everything the first time.
Step 4.
While the blue paint dries, paint the hardware removed from the cabinet in gold leaf. After the parts have dried, screw them into place.
We remove the stencil from the cabinet and place it in the most visible place in the room - after all, it now deserves special attention!
You can decorate the closet with a stencil, for example, with flowers.
Wallpaper can also be glued to furniture
It is better to use vinyl wallpaper and special glue. Having previously carried out an inspection and restoration, we do the following.
- During restoration, leave unpainted areas on which you will paste wallpaper.
Treat them with acetone or gasoline. Apply primer. - Make accurate drawings of the areas on the wallpaper and cut them out.
- Carefully coat the cut piece of wallpaper with glue and carefully apply it to the surface.
- Smooth with a special roller or dry, clean cloth.
Avoid peeling and blistering.
ON A NOTE! If there are no convex or decorative elements on the outer surface of the old cabinet, then you can completely cover it with wallpaper.
Master class No. 2. Updating a chipboard cabinet
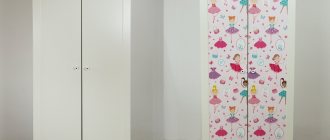
This cabinet looked very cheap since it was made from chipboard. But we updated it with a beautiful ornament for a children’s room, now it can fit into even a high-tech or modern interior.
Materials and tools
- Prepared cabinet;
- white paint;
- pencil;
- knife;
- building level;
- sponge brush;
- masking tape;
- additionally: protective paint (enamel).
Decoration process
Step 1.
- We will prepare the furniture by cleaning the surface from roughness, chips, and cracks using putty and primer.
- After using special products, you need to let the surface dry completely .
- We take masking tape and stick it on the front side of the chest of drawers according to your individual idea.
- We make combinations of triangles along the top and bottom edges, rhombuses in the middle, rectangles at the top and bottom. We cut off the strips and make shapes from them, as shown in the photo.
- We make a rhombus by cutting strips of equal length and placing them perpendicular to each other.
- To make rectangles, first apply the tape evenly, parallel to the cut of the chest of drawers, and use a building level and a pencil to mark equal intervals. Cut through one.
TIP: Watch the placement relative to the fittings (handles, locks) and the gaps between the drawers - it’s better to be symmetrical than even.
Step 2.
- I follow the instructions on the paint can, take a sponge brush and rub in a thin layer to create an antique effect. Let the layer dry.
- After the first layer has dried, apply the second . Then the color will be quite saturated and contrasting compared to the background.
- When you have achieved the desired color and the paint has completely dried, carefully at an angle of 45 degrees remove the masking tape (tape).
Step 5.
The final stage is the application of protective enamel. It will extend the life of the chipboard cabinet and protect it from minor mechanical impacts such as moisture and dust.
And now the stylish wardrobe is ready for active use!
Color options can also be the same as in the photo below.
Restoration with craquelure effect
You can transform old furniture so that it looks truly stylish if you use a special craquelure varnish.
Craquelure is the fine network of cracks that appears on antique furniture and works of art over time. In order not to wait many years, but to get a beautiful vintage surface now, they use a special varnish. To complete the work you will need a wide brush or roller, acrylic paint, craquelure varnish, and PVA glue. To create a surface with a spectacular composition of cracks, no special skills or talents are needed; the process is as similar as possible to conventional painting. How to restore an old cabinet, action plan:
- Prepare the furniture for painting in the usual way - sanding, putty, primer;
- Choose paint of two colors - dark and light, which would contrast with each other. The colors should not be in harmony with each other. A dark color will be used to design a network of cracks, a light color will be used to paint the surface as a whole;
- Using a wide brush or roller, apply dark paint to all items;
- After waiting for the layer to dry, apply craquelure varnish. Do not hesitate to apply several layers - the thicker the varnish surface, the deeper and more spectacular the cracks will be. Wait until the layer dries until your fingers stick easily;
- Time to apply the second color. Light paint should be evenly distributed over the surface. A network of cracks will become visible after the layer dries well;
- To consolidate the result, use regular varnish with the desired effect - gloss, matte or silk. To decorate craquelure, regular glossy varnish is best suited, as it will effectively highlight the cracks.
Master class No. 3. Painting a polished cabinet
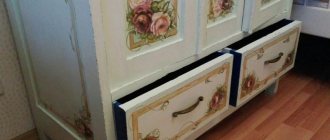
Some people can’t believe that you can make such a piece of vintage-style candy out of an old polished cabinet, without losing functionality. And then we'll tell you how to do it.
Materials and tools.
- Old polished cabinet;
- vintage paint (regular acrylic matte);
- white spirit or acetone;
- brushes;
- sandpaper or sanding machine;
- gold handles for drawers.
Painting process
Step 1.
Despite the fact that we are creating a vintage effect, there is no real need for the dresser to look shabby. Therefore, we carefully prepare it for painting.
- To do this, we remove all the old fittings and sand the entire surface of the chest of drawers. First we use coarse sandpaper, then fine-grained sandpaper.
- It is not necessary to putty and prime, except for serious chips on the surface. Degrease the surface with white spirit or acetone and let it dry.
TIP: Since the paint will be applied in several layers, it is very important that it is well absorbed into the wood.
Step 2.
- Cover with the first layer of paint. Very thin, you don’t have to try too hard and leave unpainted areas.
- Sand the first layer with fine-grained sandpaper. We clean off dust, but do not use wet rags, sponges, etc. in the process. Wash only with a dry cotton lint-free cloth.
- Next, apply a second layer of paint, also rubbing it in. Let it dry and rub it in a little again.
- We repeat this until the color becomes even, but a little rough. For this we used matte paint with a vintage effect. After a few days, it will be completely absorbed and dry and begin to turn yellow (pay attention to the instructions on the can so that you don’t have to repaint everything again later). To avoid this, you can try this coloring method on a small and inconspicuous area. Proceed with full coloring when you are satisfied with the result.
If you bought new handles, check if they match your color and screw them into place. Golden brass carved handles with patterns match the white aged chest of drawers.
Check the chest of drawers to see if it meets your requirements - it is still comfortable, beautiful, and, paradoxically, modern. Vintage is in fashion now!
Restoration methods
Restoring a wardrobe is not a difficult task; not only an experienced craftsman, but also a beginner can handle the job. The main thing is to choose a simple technique, be patient and follow the recommendations. Ideas for inspiration can be found on thematic resources. A master class studied in advance will help you perform all the steps correctly.
Coloring
Painting is the most popular DIY way to restore an old wardrobe. It is available to everyone, you don’t need to show imagination or perform complex actions - you just need to choose a new color scheme. And in order for the coating to last a long time, it is worth following the correct painting sequence:
- First, all surfaces are prepared. To do this, the cabinet is disassembled, the parts are puttied, polished and primed. If it is impossible to remove some elements or you want to preserve their color, you need to seal them with tape.
- The selected paint, preferably acrylic, is poured into a container and begins to paint. You can work with a roller. Movements must be made crosswise so that the paint lies evenly. If you are using a brush, it is recommended to sweep it from top to bottom. The easiest and most reliable way is to use a spray gun.
- It is necessary to apply the paint in several layers, each time waiting for the coating to dry completely. Then you can paint over all the blanks and get a uniformly bright color. This is especially important for surfaces that absorb the composition. It is recommended to start painting with the internal parts: shelves, mezzanines. Having finished processing them, you can move on to the facade, moving from top to bottom.
- The last step should be painting. It not only gives the surface shine, but also protects it from abrasion. If you don't want the furniture to shine, you can use matte varnish.
If several colors of paint are involved, they must be applied sequentially, waiting for the previous tone to dry. You can also use stencils or masking tape to draw patterns.
Prepare surfaces, filler and raw parts
Apply paint in several layers
Cover the cabinet with furniture paint, which will add shine to the surface and protect it from abrasion.
Decoupage
You can restore a chipboard cabinet with your own hands using decoupage. This method is popular when decorating many interior items. The selection of napkins with different designs in every art supply store is always impressive. Usually drawers, small external parts, and mezzanines are decorated in this way. After choosing the texture and location of the lining, you need to follow the step-by-step instructions:
- Prepare the surface by sanding and priming. Then apply paint on it, which will serve as a background. It is better to use light shades.
- Glue napkins for decoupage. You can use a trick to position them correctly and maintain the pattern. You will need to place the napkins face down on a regular clear file, spray them with water from a spray bottle, and smooth the surface with your fingers, pushing out any bubbles. After this, the workpiece is applied to the cabinet in the right place and the file is carefully removed.
- Cover the top of the paper with special glue using a soft synthetic brush.
- When the glue has dried, seal the surface with two coats of clear varnish.
Restoring a piece of furniture using the decoupage method is suitable for decorating a room in a vintage, country or Provençal style.
Prepare the surface of the furniture by sanding down any uneven surfaces and applying a coat of primer.
Apply paint to the wooden surface, preferably a light shade
Glue napkins for decoupage and cover the top of the paper with special glue
When the glue has dried, secure the structure with two layers of clear varnish.
Craquelure
Restoring an old-fashioned wardrobe can make it feel more than modern. In some interior styles, antique designer furniture will look more appropriate. For artificial aging, a method known as craquelure is suitable. This is the use of special paint, which after drying becomes covered with cracks, creating the effect of an old coating. The visibility of antiquity is achieved thanks to the special composition of the product.
How to compactly fold things in a closet, useful tips
The sequence of actions is practically no different from the staining method:
- Remove the old coating, seal all cracks and prime the surface of the furniture with a primer.
- Apply dark paint with a brush, it is necessary for the formation of cracks.
- After drying, apply craquelure. It is recommended to do this in several layers, so the cracks will be more pronounced.
- When the craquelure is dry, coat it with a light or clear varnish. This will consolidate the effect, the characteristic mesh will become visible, creating the appearance of an old coating.
Craquelure cannot be applied to the entire surface of the cabinet; “cracks” can only be created along the edges of the cabinet, on one side or around the design.
If you're regretting throwing out an old cabinet that's still strong, you can simply refurbish it. Restored furniture will refresh the interior, adding new notes and originality.
Remove old coating and fill all cracks
Apply the dark paint needed to create cracks
After the paint has dried, apply craquelure
Finally, seal the coating with clear or transparent varnish.
Photo wallpaper or photo printing
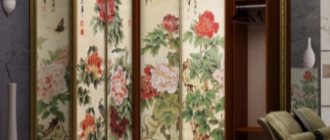
Another original way to remodel your wardrobe is with wallpaper or photo printing. The image selected in the photo shop will be enlarged and printed at the desired size. Or you can buy the wallpaper you like. Then it's a minor matter. The technology for gluing a photo print on a closet is no different from ordinary wallpapering. For greater reliability, you can paint the surface.
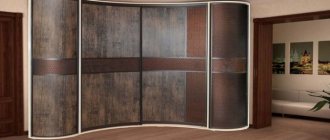
A sliding wardrobe or just an old wardrobe is greatly updated with photographs or photo wallpaper.
Stained glass film
Using stained glass film for furniture restoration has many advantages: it is durable, attractive, has a wide variety of colors, is easy to care for and protects the method from mechanical damage. This way it is easy to repair furniture, spending a minimum of time and money. You will need film and sharp scissors.
It’s very easy to remove the film, and this decorative technique looks very impressive, because the imitation is as close as possible to real stained glass.
To avoid difficulties, you need to use the following algorithm of actions:
- measure the dimensions of the furniture;
- cut the film into pieces of the required size;
- before gluing, free the edge of the material by 10-15 cm from the protective coating;
- stick the edge with the adhesive side to the body and carefully smooth out the remaining film.
This will add presentability to old furniture. In addition to its decorative function, the film protects the glass from impacts and scratches.
Remember! It is important to have a clean, smooth and spotless surface. All imperfections will become visible under the film.
Restoring an old lacquered cabinet using fabric
An original method of decorating old cabinets with fabric. To do this you will need:
- textile;
- furniture stapler;
- foam rubber or synthetic winterizer.
An unusual idea to update cabinet-type furniture with fabric.
The fabric is fixed with a stapler from the reverse side of the surface. Make sure you add a thin layer of padding underneath the fabric. Preference should be given to dense fabrics that do not deform when stretched. An excellent solution for a nursery would be a pattern made from pieces of fabric using the patchwork technique.
The fabric is stretched over the surface of the body and fixed with staples or liquid nails.
Replacement of accessories
Old, shabby and untidy accessories reveal the true age of the furniture and make it look unattractive. Well-chosen fittings will highlight all the advantages of the new design.
Discreet and laconic details fit modern minimalism. Provençal style requires antique carved handles. Classics love curves and carvings. Replacing accessories is easy. To do this, you only need a screwdriver. Don't forget the old loose hinges, these should also be replaced.
Every designer knows that 40% of the success of any interior is details and accessories.
Decor using glass
Many people wonder how to turn an old wardrobe into a modern one. The most elegant way would be to decorate the closet with mirrors. To do this, you need to carefully measure the dimensions and order mirrors from a specialized workshop. The mirror surface is attached with liquid nails to a horizontal surface. To do this, you need to remove the cabinet doors.
Decorating old furniture with mirrors is very popular.
This solution will ideally hide all the imperfections of the furniture, and also visually expand the space.
Now, knowing what you can do with your own hands from an old wardrobe, you can give it a new life, you can surprise everyone with unique design solutions. At the same time, it requires the least investment of money and time.
Give free rein to your imagination and everything will definitely work out.
Sources
- https://mebel-sovet.ru/shkafy/vse-varianty/574-kak-otrestavrirovat-stariy
- https://GidPoKraske.ru/okrashivanie/derevo-i-mebel/kak-obnovit-staryj-shkaf.html
- https://m-strana.ru/design/dekor-shkafa/
- https://svoimi-rukami2.ru/ukrasaem-staryj-skaf/
- https://handskill.ru/439426a-kak-iz-starogo-shkafa-sdelat-shkaf-kupe-proekt-poshagovaya-instruktsiya-opisanie-s-foto-i-rekomendatsii
- https://kallibry.ru/kak-pokrasit-i-obnovit-staryj-shkaf/
- https://severdv.ru/mebel/shkafy-i-shkafy-kupe/chem-i-kak-obnovit-staryj-shkaf-sposoby/
- https://made-box.ru/samostoyatelno/kak-obnovit-staryj-shkaf-svoimi-rukami-foto-do-i-posle.html
- https://berkem.ru/shkafy/kak-obnovit-staryj-shkaf/
- https://nikastroy.ru/kak-obnovit-staryj-skaf-39-foto-kak-otrestavrirovat-skaf-i-ukrasit-ego-svoimi-rukami-restavracia-i-dekor/
- https://nedvigdom.ru/kak-otrestavrirovat-staryy-shkaf/
- https://setafi.com/mebel/shkaf/kak-obnovit-staryj-shkaf/
Wallpaper or film
When using film or any other paper covering to update your cabinet, you should remember that we use the cabinet every day. And usually such a coating does not last long, but it is very simple to implement.
We recommend using this method in conjunction with painting: look at the beautiful ideas for decorating a cabinet using film and painting.
Decorating and decorating old furniture using decoupage
Decoupage is a popular hobby today that allows you to turn everyday things into works of art. Even beginners can cope with this, and stores offer a wide selection of materials for decoupage work. This technique allows you to create spectacular images on the surface of furniture using stencils. How to decorate an old cabinet:
- As always, it all starts with preparing the surface, which is carefully sanded and primed in several layers;
- Paint the furniture in the desired color and wait until the surface is completely dry;
- After the paint has dried, cover the boundaries of the surface where the design will be located using masking tape. This will allow you to get crisp edges;
- Take a decoupage napkin, peel off the top layers and place it face down on a regular office file. Wet the napkin with water so that it sticks to the file; a regular flower spray bottle will do for this. Gently smooth the napkin so that there are no air bubbles or wrinkles underneath, then apply it to the surface of the cabinet. Carefully remove the file so that the image remains on the furniture;
- Carefully coat the napkin with glue;
- Repeat the previous two steps with all the decoupage napkins;
- After all the patterns have been glued and dried, apply a layer of protective varnish to all surfaces of the cabinet.
Spot painting for polished cafe
Spot painting is perfect for a polished cabinet. In this case, there is no need to remove the varnish and sand the surface. The technique is simple:
- Drawing using a marker
- The marker is painted with paint using dots. Learn more about the technique of dot painting of plates here.
Pasting with paper or fabric
A budget option that will require the performer to be careful and attentive. Decoration can be done using paper or fabric. Also, many people prefer to radically update old furniture by ordering special photo wallpapers for pasting; they can also be bought in hardware stores. In order to decorate an old cabinet and cover it with paper, you need to additionally prepare it - level the surface and improve the abrasiveness so that the paper sticks well to the surface. For work you will need the following materials:
- Spatula, long ruler, felt-tip pen, scissors or stationery knife;
- Sandpaper;
- Materials for surface treatment – primer and putty;
- Glue suitable for the selected type of paper and a soft roller for application.
How to cover an old cabinet:
- Take it apart and get rid of the fittings. The greater the number of parts into which the cabinet can be disassembled, the better;
- Remove the old varnish from the surface and sand it well with sandpaper;
- Remove varnish dust from furniture using a damp cloth or sponge;
- Fill uneven areas, cracks and chips, if any;
- Coat each element with primer on both sides;
- You can start gluing. Take measurements of each part and prepare pieces of paper suitable in size;
- Apply glue to both the surface and the paper. Carefully place the paper layer on the part to be glued and smooth it using a dry soft cloth. Repeat these steps with each element;
- Let the glue dry and then proceed with the final assembly.
Don't neglect replacing accessories. New handles and hangers will play a significant role in transforming old furniture and will become its highlight.
Closet Update Ideas
Sticker of molding on the facade of an old built-in wardrobe step by step
First you need to decide on the design. There are many options for laying out moldings in different compositions. You can use wide and narrow at once if the width of the doors allows.
It is possible that a professional tool will be required.
As an option, you can contact a carpentry shop and negotiate with the craftsmen. One drink costs quite symbolic money.
Attach the molding to the door of the hinged built-in closet using liquid nails. For better adhesion, it is better to lightly sand the top decorative layer and degrease it by rubbing with alcohol.
It is better not to touch or smear any excess glue until it dries completely. When they harden, it will be easier to cut them off with a stationery knife and carefully sand them off.
Required Tools
To repurpose old furniture, you will need certain materials and tools. Depending on what kind of furniture needs to be remodeled and what method will be used for this, the choice of tools depends. Most often needed:
- Brushes of different hardness, width and bristle length;
- Roller;
- Sharp knife;
- Needle;
- Metal meter;
- Protractor;
- Hammer;
- Grinder machine;
- Chisel;
- Screwdriver.
Varieties of cabinet designs depending on purpose
Despite the apparent simplicity of the design, cabinets are presented in a variety of forms. The type, size and functionality of cabinets determines their intended use. From the point of view of restoration, floor cabinets are more complex than wall-mounted structures. Let's take a closer look at them.
Floor cabinets can be divided according to purpose into:
- wardrobes (wardrobe);
- book;
- kitchen utensil storage;
- secretaries (stationery cabinet for written work);
- sideboards.
It would not be amiss to mention built-in wardrobes, which are common both in old Khrushchev buildings and in modern apartments. These models are good because they save space. Restoration of a cabinet built into a special niche is usually carried out locally.
The design features of each type have developed historically and, with rare exceptions, may change slightly. It is common to see mirrored doors in wardrobes located in hallways and bedrooms. Wardrobes are equipped with doors of the leaf type or sliding on rollers (sliding wardrobes). Bookcases are usually made open. At the base of kitchen cabinets there are usually holders for cutlery.

