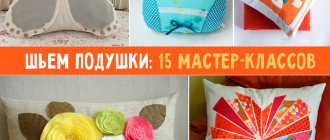
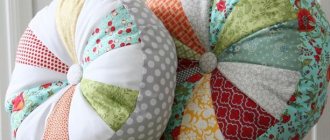
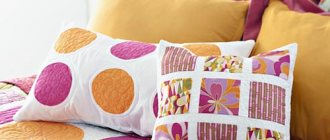
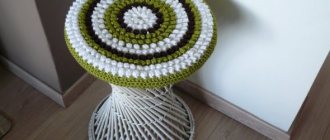
Living room and bedroom, kitchen and relaxation area on the balcony - there are many rooms in the house that can be made more comfortable with the help of beautiful sofa cushions. Buying decorative pillows with a design that matches your interior style in stores is not a problem. But you must admit, it’s much more interesting to sew or knit them yourself. We have prepared seven simple master classes on making sofa cushions of various shapes. Photos, step-by-step explanations and stylish decor ideas will help you understand the nuances of the work.
Sofa pillows in the interior
The classic interiors of modern living rooms and bedrooms will be stylishly complemented by square and rectangular sofa cushions, as well as cushion cushions with original decor.
In terms of patterns and colors, they do not necessarily have to match the upholstery of furniture or curtains. Non-trivial interior solutions and eclecticism (a thoughtful combination of several styles) are in fashion.
For example, sofas can be decorated with many (designers advise choosing an odd number) bright decorative pillows that differ, and even contrast, in colors and textures. They do not violate the harmony at all - on the contrary, they look stylish and interesting. You can arrange multi-colored pillows in one row, in tiers or in groups. Such a colorful composition will look especially good on long, corner and modular sofas.
In high-tech and loft settings, combinations of several sofa cushions that differ in shape will look stylish. For example, oval, triangular and rectangular on one sofa or chair. It’s good if prints or other decorations “echo” each other in shades or thematically. To prevent sofa cushions from looking like a foreign detail in restrained avant-garde interiors, it is better to choose an interesting but laconic decor.
The trend in interior fashion includes decorative pillows with abstract and geometric patterns, with inscriptions, with appliqués, as well as plain ones. You can safely combine different types of prints in one composition. For example, small and large ornaments, a checkered pattern with stripes or polka dots, floral motifs with abstract patterns. However, in order for the overall interior to look stylish, the individual decorative details of the sofa cushions must still be in harmony with each other.
A good solution for vintage and oriental interiors would be unusually shaped sofa cushions. For example, “tablet” pillows, polyhedrons, cushions with elegant and romantic decor: tapestries, rich embroidery, hemstitching, tassels, fringe, lace trim, spectacular draperies.
Beautiful sofa cushions of non-traditional shapes are suitable for a child's room: ball pillows, knot pillows, toy pillows made of bright textiles, artificial velor, fur of a wide variety of rich and cheerful colors. By design, they can complement the main theme of arranging a nursery or become an interesting contrasting accent in the interior.
Results
Decorating pillows can be a fun and creative activity for the whole family. When making such wonderful products for the family hearth, you can involve even the little ones - entrusting them with the easiest stages of work.
The finished product will be a joy not only for you, but also for your loved ones, who will feel their contribution to creating a homely atmosphere.
Creative ideas can be drawn from completely different sources and resources, the main thing is to competently implement them and do not hesitate to ask advice from more experienced craftsmen on forums or in real life in order to avoid minor mistakes that can cost you all your planned work.
Create with joy and be happy!
Cushion sizes
There are no special requirements for the size of sofa cushions. Select them in accordance with their purpose, your vision, desire, room interior style and furniture size. The larger they are, the larger and more noticeable decorative pillows can be.
If we talk about classic square and rectangular decorative pillows, then the standard ones - 40 x 40 cm, 40 x 45 cm, 45 x 45 cm - will look best on spacious soft sofas, beds and armchairs.
Furniture with hard metal and wooden backs can be made more comfortable with the help of large pillows - for example, 50 x 50 cm, 60 x 60 cm or 50 x 70 cm, and volumetric bolsters. They can be sewn from durable curtain fabric, velor or vinyl.
Small decorative pillows are well suited to compact home furniture - small sofas, couches, armchairs, ottomans: 30 x 30 cm; 35 x 30 cm, 30 x 20 cm, as well as not too long and voluminous cushion cushions.
Why are they needed?
You can place decorative pillows on sofas, armchairs, ottomans, in any room, especially a children's room, or a living room. Why do some people decide not to buy ready-made models, but to make them themselves? Firstly, you can create an original version, made with love, only with your hands. Secondly, it is cheaper to remake an old unnecessary thing or create it yourself from scrap materials.
Decorative furniture will be a good gift option for family and friends. The main rule is that they must match the design of the room in which they will be located. Therefore, it’s easy to do this for yourself; when preparing a gift, you must first find out the design of the room for which they will be intended.
Decorative pillows - will help make the interior brighter
How to fill a sofa cushion
Natural fillers: feathers, down, wool, bamboo fibers, etc. are not a very good choice for sofa pillows. They do not hold their shape and volume well; moreover, they quickly accumulate dust and are difficult to maintain regularly. Therefore, it is better to choose durable, comfortable and practical synthetic materials as padding. Fortunately, modern manufacturers offer them in more than sufficient assortment.
Sofa cushions can be filled with:
- holofiber;
- tinsulline;
- struttofiber;
- elastic padding polyester;
- dense foam rubber;
- polystyrene balls/granules.
The choice of material depends on whether you want to sew sofa cushions for comfortable relaxation or plan to use them for purely decorative purposes. In the first case, delicate and soft fillers are suitable for stuffing: holofiber, tinsullein, etc. In the second case, more elastic foam rubber and padding polyester are used.
What filler should I use?
All pillow fillings can be divided into two types: natural and synthetic origin. You should choose one option or another based on your preferences and capabilities.
Table No. 3. Natural fillers
| Filler, illustration | Description |
| Grass | The pillow can be filled with various plants, after drying them thoroughly. Use any medicinal herbs, including lavender, mint, chamomile. If you have an allergic reaction, you should exercise extreme caution when choosing a particular plant. |
| Animal origin (fluff, wool) | Down-filled pillows are considered the softest and most comfortable. Feathers are also used for such purposes, but then the products will be more rigid. The main disadvantage is that the pillows will have to be carefully looked after, otherwise they will quickly become infected with linen mites. In the case of wool, such problems will not arise, but after a while this filler will form into clumps and such a pillow will be unsuitable for further use. |
| Silk filler | This is a very soft and comfortable filler. The only disadvantage is the high cost. |
| cotton wool | This is the most budget-friendly of all possible fillers. With frequent use, such a product quickly loses its original appearance. |
Table No. 4. Fillers of synthetic origin
| Filler, illustration | Description |
| Sintepon | Lightweight filler with good wear resistance. |
| Comforel | An unusual filler that looks like lumps. Thanks to this texture, it retains temperature better, and besides, this type of pillow looks voluminous. |
| Holofiber | This is a soft material that does not emit foreign odors. In addition, it is hypoallergenic and fireproof. |
How to sew a sofa cushion
Sewing sequence for a classic square sofa cushion
What to prepare:
- thick fabric;
- chalk for patterns;
- cutting knife;
- scissors;
- “zipper” (40 cm long);
- filler (sintepon, foam rubber or other).
How to sew a pillow:
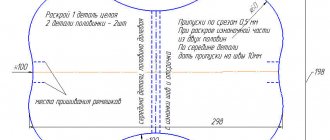
Step 1. On thick paper, draw a simple pattern - a square 40 x 40 cm. Before cutting, measure 2.5 cm from each side (allowances for seams and zipper). The pattern can be drawn with chalk or thin dry soap directly on the fabric.
Step 2. Cut out the fabric for the sofa cushion cover. It’s better to do this by folding the fabric in half, then you won’t have to stitch one side. In this case, there is no need to take into account the seam allowance on the fold side.
Step 3. Fold the fabric face to face. The folded area can be ironed for convenience. We fasten it on all sides with tailor's pins or sweep it away. Sew the sides of the sofa cushion cover using a sewing machine. The seam pitch is 2.5 mm.
Step 4. Turn out the finished cover. Using scissors or a pencil wrapped in fabric, carefully straighten the corners. Let's attach the zipper. To ensure an even seam, the zipper grosgrain tape can be pre-basted to the edges of the cover using large stitches. We will stitch one side of the fastener with the zipper open, the other with the zipper closed.
Step 5. Straighten and iron all the seams on the front side. We will re-stitch along the edges of the seams until the zipper stops, that is, we will make a backstitch. This is necessary so that the edges of the fabric sections do not fray, and the wrong side of the pillow cover is neat.
Step 6. Turn the cover inside out and straighten the corners. Let's lay additional lines on both sides of the zipper. The machine foot should move close to the teeth of the fastener. Then the finishing seam will be perfectly smooth.
Step 7. Iron the decorative pillow cover. Fill it with filler to the desired density. Close the zipper and shake the pillow several times so that the filling is distributed evenly.
In this way, you can sew both the inner cover for the filling (nappernik) and the outer decorative cover of the sofa cushion. The following video tutorial from Natalya Kasyanik will help you visualize the intricacies of sewing a classic decorative pillow of a square or rectangular shape.
Starting a workflow
Having collected together the entire arsenal of sewing accessories, you can safely get to work. If you are a beginner and have little experience in sewing, you should start with the simplest and most uncomplicated options. More experienced needlewomen can try to repeat more complex and sophisticated examples. The main thing in this matter is desire and perseverance.
First of all, you need to imagine the approximate shape and appearance of the pillow you want to make. If you are afraid of spoiling the materials, resort to examples in specialized literature or the Internet. This will help you break down your work into specific sequential processes.
If the pillow is square-shaped, cut two pieces of fabric of the same shape. This applies if the product has a different geometric, but simple shape. This will be the so-called face and back of your product.
Sewing a cushion for a sofa with your own hands doesn’t end there. It is necessary to fold both pieces with the front parts facing each other and attach pins along the perimeter. This process should not be avoided. It is the pins that allow the fabric to be fixed well, not to bulge, and to be stitched well in the future.
Then the finished product is stitched or stitched on all three sides. We use the fourth side for stuffing. You can sew directly on the pins, they will not break. Next comes ironing all the edges and filling the inside with any filler.
Sometimes it is placed in a separate bedspread to prevent it from spilling. The fourth section of your pad is hand sewn with a blind stitch. Now the product is ready for final decoration.
Patterns and diagrams of sofa cushions
Pattern of a square sofa cushion
Pattern of a figured pillow using the patchwork technique
Pattern of the pillow-toy “Bird”
Pattern of a children's horseshoe pillow
Pattern of a decorative sofa cushion
Sofa toys pillows step by step
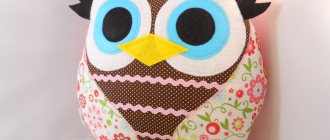
Owl pillow toy
What you will need:
- white and yellow fleece/felt;
- blue cotton fabric with polka dots;
- blue cotton fabric (plain or with a bright print);
- narrow blue ribbon;
- small black beads or buttons - 2 pcs.;
- a piece of openwork lace;
- pattern paper;
- pencil and chalk;
- pins;
- cutting knife;
- filler.
How to sew a toy pillow:
Step 1. Draw the owl pattern, enlarging it to the desired size.
Step 2. Cut out the patterns. We attach them to the fabric with tailor's pins. Mark the seam allowance with a dotted line; 1 cm is enough.
Step 3 Carefully cut out: two main parts of the toy pillow (body with head and ears) from blue fabric; four pieces for wings made of blue polka dot fabric; two white fleece mugs for eyes; one yellow fleece triangle for the owl's nose. In addition, you will need two parts for the bow: a rectangle and a square. We will cut them out of fabric with polka dots. Dimensions - optional, proportional to the size of the pillow.
Step 4. Iron all the details. We attach the eyes, beak, wings and lace strip to the owl’s body using a decorative “zigzag”. Using a glue gun, attach buttons or beads - the pupils of the bird.
Step 5. Place both parts of the body face to face. With pins. We will lay a regular stitch along the contours, with an indentation of 1 cm. We will leave a section of 3-4 cm (at the bottom, between the owl’s wings) unstitched, for filling the pillow. To ensure that there are no ties on the material, we will make notches on the ears and other convex areas of the toy.
Step 6. Turn the pillow inside out and straighten the corners. Let's iron it. Carefully and evenly fill with filler to the desired density. Let's check whether the ears and other protruding parts are well filled. Let's sew up the hole.
Step 7. Let's make a voluminous bow. Fold the square in half (you should get a wide strip) and iron it. Fold the rectangle face inward. Let's sew (with an allowance of 1 cm), turn it inside out, iron it, and gather it in the middle into a beautiful gathering. Secure with the prepared strip.
Step 8. Attach the bow to the owl's ear. We will glue another decorative bow, made from ribbon, onto the owl’s body, above the lace.
Pillow-toy “Cat”
What to prepare:
- cotton fabric the color of baked milk (with a soft print);
- plain cotton fabric - pink and dark beige;
- brown fleece;
- dublerin/non-woven fabric;
- dark brown buttons - 2 pcs.;
- pattern paper;
- chalk or thin marker;
- brown floss;
- tailor's pins;
- iron.
How to sew a toy pillow:
Step 1. Download the pattern. If necessary, we will increase it to the required parameters. Carefully cut out all the elements of the drawing.
Step 2. Lay out the paper parts of the toy on the fabric. Attach with tailor's pins. Mark a 1 cm seam allowance with a dotted line.
Step 3. Sequentially cut out from cotton fabric the color of baked milk: one half of the kitten’s body; four parts for the front legs; two parts for the tail. From brown fleece: the second half of the body; four parts for the rear legs. Made from pink cotton fabric: four pieces for the cat's ears. Let's make a decorative heart from light beige cotton.
Step 4. To make the pillow-toy durable and last longer, we seal the parts of the body with double rubber. To do this, place the cut out elements inside out on the adhesive side of the dublerin. Secure with tailor's pins. Let's cut exactly along the contour. We will remove the pins.
Step 5. Fold the parts of the cat’s body made of fabric and dublerin in pairs. Iron them thoroughly so that they stick together completely. Glue or sew a heart on the front part with a decorative zigzag.
Step 6. Fold the blanks of the cat’s ears, tail, and paws in pairs (facing one another). Let's lay the lines along the contours. Leave small holes for filling. Along the edge, use curly (or regular) scissors to make frequent notches or teeth.
Step 7. Turn the sewn parts inside out, straighten all the corners and protruding parts, and iron them. Fill evenly and tightly with filler. We attach them with pins to the front (cotton) part of the body. Sew with a zigzag stitch twice. Using chalk or a thin marker, draw the cat's face.
Step 8. Place the fleece back of the cat on top. Align, secure with pins or baste. Let's sew a line along the contour, connecting all the elements. To stuff and turn the toy inside out, leave a small unstitched area between the hind legs.
Step 9. Turn the toy pillow right side out. Let's iron it. Distribute the filler evenly and tightly inside. Let's sew up the hole.
Step 10. Let's finish the job. We sew the front legs by hand. We decorate them with buttons.
Step 11. We beautifully embroider the details of the face on the finished children's pillow “Cat” with brown floss.
Original decorative pillow “Knot”
What you will need:
- elastic knitted fabric with beautiful patterns or plain;
- cardboard tube from foil or paper towels;
- a thick knitting needle or similar device;
- filler (preferably synthetic winterizer);
- glue gun/textile glue;
- ruler;
- chalk;
- scissors.
How to make a beautiful knot pillow:
Step 1. Cut the knitwear into strips. The optimal width is 17 cm, length is 2 m. If the length of the fabric is shorter, we will connect the strips with a glue gun or fabric glue.
Step 2. Let's make knitted blanks for voluminous tubes. Place each strip of fabric wrong side up. Apply glue along one of the sides along the length. Fold the strip in half and quickly fasten the sides together. Let's smooth out the unevenness.
Step 3. Turn out the glued blanks. This is easy to do using a cardboard tube. We will pull one end of the fabric through the tube, turn it inside out on the opposite side, and put it on the tube. Stretch and gather the fabric into a tight gather, turn it right side out. There is no need to remove it from the cardboard tube.
Step 4. Fill the blanks with padding polyester. To do this, place the filler inside the tube. Using a knitting needle or other suitable object, push the padding polyester into the knitted piece and press it lightly. Distribute the filler evenly.
Step 5. We will tie a beautiful voluminous knot from the resulting soft tubes. This is convenient to do on the floor. Place two blanks (you need knitted tubes 2 m long) perpendicularly, crosswise.
Step 6. Alternately bend the ends of the knitted tubes with a loose loop in the following order: first - the top one, then - the left, bottom and right. We will pass the right one from above into the first loop (the one that was formed when bending the upper end of the fabric tube). Carefully tighten the knot.
Step 7. At the next stage, we perform the same actions almost in reverse order. First, just as before, we will make a loop from the upper end of the tube, then from the right, lower and left. We will pass the left end into the first loop. Let's tighten it and straighten it beautifully.
Step 8. Let’s finish the job by repeating the steps we performed in step six. It is more convenient to tighten the finished knot from the wrong side. Carefully straighten the loops. We fix the edges of the tubes inside the pillow or, for reliability, sew them on.
DIY large sofa pillow
It’s not difficult to make a decorative sofa pillow of impressive size with your own hands. The sequence of work is the same as in the manufacture of standard products. It is also not difficult to enlarge the details of the finished pattern to the desired parameters.
Are you planning to update your sofa and make a real furniture cushion from upholstery textiles yourself? Please note: the work requires certain skill and knowledge of a number of nuances. In addition, you will need special tools. A video tutorial from Natalia Mikhailova will help you visualize the process of making a sofa cushion with a beautiful decorative drawstring clearly and in all details.
About buffs
Puffs on a suitable fabric, smooth and glossy, are another matter. When done correctly, they can be vacuumed and hand washed without any problems. And making all this splendor is not as difficult as it seems. First you need to learn how to read the diagrams for assembling puffs (assembling them, as sewing makers say).
Popular articles Funny sheep
As an example, diagrams for assembling simple puffs are shown in Fig. below. All puff patterns are built on an orthogonal-diagonal grid, the module of which (the side of the square) is 2-7 cm, depending on the size of the product and the density of the fabric. The grid in the diagram can be shown explicitly, as on the right in the figure, or its nodes can only be marked with dots, as on the left. The mesh is applied to the back of the workpiece with a textile marker in a mirror image.
Further, areas that are contracted (collected, assembled) into a buffer are marked either with converging arrows (on the left) or red lines (on the right), and those that are not contracted are marked with simple thin lines. The puffs can be assembled either with one thread or separately. The first method is for the lazy, because... a web of threads is formed from the inside. In any case, each puff is assembled with at least 3 stitches 4-5 mm wide, unless otherwise indicated in the notes to the pattern.
Examples of puff patterns for pillows
Then, the assembly sequence. It is produced in horizontal or vertical rows, again, unless otherwise indicated in the description of the pattern. In the case where the rows are indicated explicitly (on the left), they are displayed in numbering order and the buffs in the row are also assembled by numbers; here – Row 1 1-2, 3-4, etc., then Row 2 and so on. In the absence of an explicit indication of the rows (on the right), the puffs are assembled simply in numerical order; according to the diagram on the right - 1-2, 3-4, 5-6, 7-8, etc.
Try to assemble any scrap of fabric into puffs according to these entry-level patterns, and you will see that it will take little time, even if you assemble one at a time. And then watching a selection of master classes on making pillows with puffs that are much more spectacular and complex won’t seem like a nightmare:
Video: DIY buffalo pillows, master classes
Crochet sofa pillow, diagram with description
Decorative pillow-cushion
Crocheting this colorful cushion pillow seems difficult only at first glance. Even inexperienced needlewomen can make it in just a couple of free evenings according to the scheme. You will need only three parts (one rectangular and two round), multi-colored decorative “bumps” and high-quality, fairly elastic filler.
Scheme of the main blade for the cylinder:
How to knit:
Diagram of the side elements of the roller
How to knit:
Pillow assembly sequence:
Patchwork
The patchwork technique has long been loved by adherents of handcraft. Even novice needlewomen can create simple motifs. Any cuts and remnants of fabric that fit the overall textile ensemble of the space are used.
Many people mistakenly believe that patchwork decor is only appropriate for Provence, country or Russian estate style, but this is in vain. Pillowcases made from triangular pieces in calm tones will fit perfectly into the space of a Scandinavian living room. Colorful mosaic pillows will become an original attribute for eclectic interiors.
Knitted sofa pillow, diagram with description
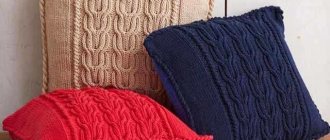
Set of knitted sofa cushions
What to prepare:
- yarn (acrylic/wool blend 80 m/50 g) - apricot, vanilla, terracotta 250 g each;
- ready-made sofa pillows - 3 pcs. (two square and round, corresponding sizes);
- standard knitting needles No. 4, No. 5;
- circular knitting needles No. 5;
- "zippers" - 3 pcs. (L - 40 cm).
The approximate yarn consumption is calculated for sofa cushions of the following sizes: square - L - 40 cm, B - 40 cm; round – D – 40 cm.
Knitting patterns:
Ornament No. 1
Ornament No. 2
Sequence of work:
Knitted pillowcases for sofa cushions, ideas with photos
Knitted sofa cushion “Clock”
Stylish interior pillows knitted using the patchwork technique
Elegant sofa cushion made of Bruges lace
Decorative pillowcases for sofa cushions, ideas with photos
Set of interior pillows with elaborate embroidery
Decor of sofa pillows with romantic puffs
Sofa cushion with bright voluminous felt applique
Other ideas for interesting decor of interior pillows can be found in videos from leading popular handicraft blogs on YouTube. We wish you exciting creativity!
Decoration methods
Decorative pillowcases are often decorated with additional elements, such as embroidery or appliqué, frills or lace, beads and other elements. Elements can be fixed before the product is manufactured or after. Markings for decorations are applied to the outside of the product, then hidden or washed off after decoration is completed.
If you wish, you can also decorate pillowcases purchased at the store.
In addition to standard decoration methods, pillowcases for sofa cushions can initially be sewn from scraps of fabric, which will replace the appliqué effect. This method is more complex, but also economical. You can use unnecessary pieces of fabric or swatches from other products.
To make such a pillowcase, you need to make a pattern, attach scraps of fabric to it, and baste them. You can sew them together either by hand or by machine.
Decorative pillowcases can also be made from any old material, such as a torn shirt or jeans. This will also allow you to create a unique product design.
In the photo of pillowcases you can see different decoration options.
