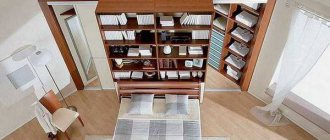
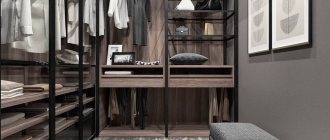
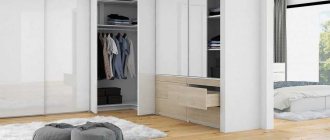
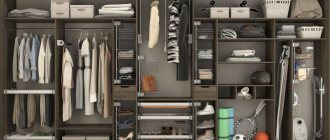
The online wardrobe planner is a universal tool that allows you to design your own interior. There are different types of such constructors, each of which has its own set of options.
Choosing the right furniture for your dressing room is a pleasant but difficult task. We have to solve many questions: how best to arrange cabinets in a small room, whether they will match the wallpaper, how the room will look as a whole. You can use the services of designers, but each of them has their own view of things, and sometimes it takes a long time to find a compromise. An online closet planner will help solve the problem.
What is a wardrobe designer
An online wardrobe room planner is a program that makes it possible to plan the interior of a future dressing room, recreate the environment in 3-D format and calculate the necessary materials. With its help, you can independently develop a design, arranging the furniture as needed for maximum comfort. The design result is printed and provided to the manufacturer to fulfill the furniture order.
Before sitting down at the computer and designing a dressing room, it is advisable to create an idea. This could be an option made on paper, in which the necessary little things will be taken into account: hangers for outerwear, shelves for underwear and small drawers for accessories. Proper planning of your wardrobe will help you create cleanliness and comfort in your home, organize things rationally and choose a good design.
How to choose a dressing room
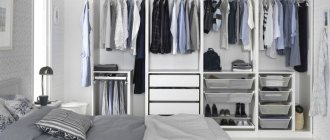
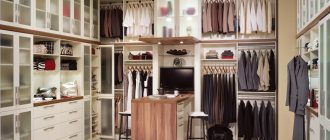
How to choose wardrobe systems? The designer helps you decide on the details, but before that you need to decide in advance what type of wardrobe you want to see in your home. The options can be roughly divided into classic dressing rooms, cellular (mesh systems), as well as frame and panel options. You can place them all on any unoccupied area of the apartment: just separate a section of the room with doors and install a wardrobe system behind them to your taste.
It is often placed in a free corner in the hallway, but it is very difficult to do everything correctly if you do not use a corner wardrobe designer. It's not hard to find online, so it doesn't pose much of a problem. On the other hand, with its help it will be possible to best assess the available space and possibilities for placing shelves, racks and drawers.
Before choosing a particular wardrobe system, it is recommended not only to use a wardrobe designer, but also to consult with a specialist. He can point out previously unnoticed shortcomings of solutions, and also talk about the pros and cons of each system.
IKEA closet planner
One of the most convenient programs is the development of IKEA - PAX planner. To design a dressing room, you need to go to the company’s website and select the “Independent programs for storage systems” option. Here are the main stages of working with the program:
- Several combinations will appear on the screen from which the desired one is selected.
- You can adjust one of them or create your own design by transferring pieces of furniture to your virtual room. To do this, in one of the tabs in the upper right corner, select the necessary components: shelves, drawers, laundry baskets. You can even experiment with a virtual closet renovation.
- When the desired result is achieved, it must be saved and printed. The cost of the project will appear at the top of the window. The project will also receive a code that needs to be written down in order to later be modified or transferred to IKEA employees for production.
The procedure can be clearly seen in the following figures:
This online dressing room layout will solve several problems:
- Create a room design almost from scratch.
- Hang clothes in virtual closets.
- Imagine how the furniture and other interior items will be located.
Website: www.ikea.com
Online designer for wardrobes and storage systems for free
HOW TO WORK WITH THE ONLINE DESIGNER OF CLOSET SYSTEMS?
Stage 1. How to choose the shape of the room
Before you start planning the wardrobe system, you need to decide for what shape of room you are choosing the system for. Our wardrobe system designer Wardrobe.online gives you the opportunity to design rooms that have 1, 2 or 3 walls. At the first stage of work, you can select the so-called mode. free design, in this case you can install the guide rails yourself by choosing the desired height. In automatic mode, the rails install themselves, always at a height of no more than 30 cm from the ceiling. The “free design” option can be convenient if you need to design a non-standard room, for example, in the attic.
Stage 2. Set the dimensions of the room
Now you can set the desired length and height of your chosen room using special sliders.
Stage 3. How to add the necessary elements to the room design
In the middle of the screen you will see a virtual wall where you can place the necessary elements of the wardrobe system while designing your room.
A special slider, which is located at the top, will help you change the scale of the picture, that is, increase or decrease the virtual room. You can also use the mouse wheel for this.
You will find all the elements necessary for your design on the bottom panel.
To add a new item, go to the submenu of the presented products, for example, select the "Baskets" or "Mesh Shelves" option. In this submenu you will see all the images of the current product range with characteristics.
The working field is divided into sections of 20 cm, this is done to facilitate work. But you can change the marking characteristics, for example, reduce the step to 10 cm or remove it altogether. To do this, use the button located in the main menu at the top.
How to add a model to your virtual room? To do this, move the cursor over the selected model and hold down the left mouse button. As the element moves around the workspace, its color will begin to change, signaling how acceptable the position it finds itself is. If an element is highlighted in green, it means the position is valid. If the color changes to red, this is a signal about an invalid position. Our designer helps the client to avoid mistakes during planning at the very beginning of working with the project.
The selected object will "stick" to nearby posts or other objects as it moves along the virtual wall. This was done in order to save components later and simplify the entire design. For example, you can successfully save components by using one bracket to fasten several adjacent objects.
The selected object will "stick" to nearby posts or other objects as it moves along the virtual wall. This was done in order to save components later and simplify the entire design. For example, you can successfully save components by using one bracket to fasten several adjacent objects.
The selected object will "stick" to nearby posts or other objects as it moves along the virtual wall. This was done in order to save components later and simplify the entire design. For example, you can successfully save components by using one bracket to fasten several adjacent objects.
Basket dividers can also only be installed on an existing basket in the virtual room, either stationary or retractable. After you change the room configuration, a list of all elements of the wardrobe system, as well as their characteristics and prices, will appear in the panel on the right. Here you can also see the total cost of the entire structure.
After any configuration change, in the panel on the right, the designer displays a complete list of wardrobe system elements, their characteristics and cost. As well as the total cost of the structure.
Stage 4. How to edit a room, change and delete individual elements
In further work on designing a virtual room, you can move each element of the wardrobe system in the same way by simply clicking the left mouse button. You can move not only shelves, baskets, crossbars or dividers, but also guide rails and racks.
To delete an existing element, you can use one of two methods:
- Move the mouse cursor over the desired element and click the right button.
- Hover your mouse over the desired element and click the red cross that appears.
Our constructor has some architectural features that pose some minor editing restrictions:
- You can move elements mounted on racks only within the rack and vertically.
- You can only move posts and rails within one wall.
- If the hanger bar is supported by two or more elements, you will not be able to remove or move them until you “remove” the bar itself.
- If you move a post or guide rail, any structural members attached to it will also move.
- When an element or any structure falls into red, i.e. invalid position, they return to the starting position.
Stage 5: Design with advanced features
The Wardrobe.online wardrobe system has a number of special design advantages that will help you save on fasteners. You can take advantage of all these advantages when you design your space using an online designer.
Adjacent elements.
Two brackets are needed to securely secure a shelf or basket to studs, but if two or more items are located side by side, you can save on mounting hardware by skipping one bracket. This way you only need 3 brackets instead of 4 if you need to mount two adjacent baskets or shelves.
To make it more convenient for users to work with the online designer, shelves and racks that move during design “stick” to ready-made objects in virtual space.
Adjacent placement of crossbars for hangers.
In the same way, you can save fasteners when mounting crossbars for hangers. If two crossbars are attached to adjacent baskets or shelves, then during installation you can “skip” one bracket. You can securely mount hanger bars using only 3 elements instead of 4. In this case, a plastic connector is used to connect the bars. Important: the designer of our wardrobe systems Wardrobe.online in this case will add a plastic connector to the list of products automatically and correct the number of brackets for the crossbars.
A common crossbar for hangers, fixed to adjacent elements.
In order not to mount several short crossbars for hangers, you can install one common, long crossbar for adjacent baskets or shelves
Extraordinary “lids” for sliding baskets
To reduce the overall cost of the wardrobe system, and at the same time increase the strength and rigidity of the pull-out baskets, you can use stationary baskets or mesh shelves as covers for them. In this case, a stationary basket or mesh shelf is mounted on the same fastening elements with a retractable basket.
To make it more convenient for you to design a room, mesh shelves and stationary baskets themselves “stick” to pull-out baskets of suitable sizes that are already located in your virtual space.
Stage 6. Free design functionality
If users themselves are well versed in computer technology, then they may want to place guide rails independently and at the desired height when working with a wardrobe system designer when designing their premises. This can be useful if you have a room with a variable ceiling height for design, for example, it could be an attic or attic.
The free design functionality in the online designer can be enabled at the stage of choosing the shape of the room.
In free design mode, the system will behave slightly differently:
- Only racks will be automatically added to your virtual room, and you will need to install guide rails yourself. For installation, a group of load-bearing rails will be added to the element menu.
— The racks will be installed at a height of 30 cm from the topmost element, but not higher than 30 cm from the ceiling. This will be done by default.
— If there is a guide rail on the wall above the stand, then the stand itself will be attached to it.
Stage 7. Sets of ready-made solutions
The range of wardrobe systems Wardrobe.online includes not only a number of set elements, but also several basic sets. These are ready-made solutions for different rooms: for an apartment, a cottage or a garage, they will provide reliable and convenient storage for your things. The online designer of wardrobe systems makes it possible to add any basic sets to your virtual room, which also have several assembly options. You can add kits using the “Ready solutions” submenu.
Stage 8. Main menu and project management
To work with a ready-made project, the designer of wardrobe systems Wardrobe.online has a number of convenient functions.
Clear the project and re-download the online designer.
If you click the "Back to Top" button, which is located in the main menu, you will clear your project and return to the very beginning, that is, selecting a room. If you click the "Clear" button, you will simply remove all collected elements from the virtual room and can start designing again.
Save and load the finished project.
To save the finished project so that you can continue working on it in the future, you have the “Save” and “Load” buttons. The project will be saved in a file with the extension .const.
How to print a project and export it to PDF format.
By clicking the "Print" button, you will send your finished project for printing. The project can also be saved in PDF format by clicking the “Export to PDF” button
Stage 9. Completion of work and sending the order.
The designer of wardrobe systems Dressing room.online is fully integrated with our company’s website, which makes it possible to send an order immediately after finishing work on the project. To submit your order, simply click the "Buy" button. Your order may immediately go into the shopping cart on the website, or a form for submitting an application will appear there. It all depends on the integration settings.
Other constructors
IKEA PAX is not the only online planner; there are other types of such programs.
Furniture designer ELFA
Preparing a project with a specification here will take 10-15 minutes. A significant disadvantage of the program is that it is not publicly available; a special key is required to work with it.
Website: mebelmne.ru
Planner Larvidge
which is valued for the perfect binding of elements to each other. Before you start planning, you can use the video instructions that are on the website. The Lavrij wardrobes themselves are easy to assemble, spacious and laconic.
Website: larvij.com
ARISTO
These wardrobes are made of high quality steel and allow you to place shoes and clothes even in a small room. In addition, they are suitable for storing household and sports equipment. The structures are easy to install and model by rearranging the shelves.
Website: www.aristo.ru
Wardrobe design software is a resource that lets you design a room in real time. It will help you rationally arrange furniture, calculate the cost of necessary materials and design a room that is comfortable for the family.
Options for building wardrobe rooms with prices
Cabinet wardrobe, L-shaped
Size: 2200x2700x2500 mm. Laminated chipboard: Kronoshpan (Poland) Decor color: Sand Additional equipment: closers, trouser hanger, pantograph Price: RUB 37,800 Order according to your sizes
Built-in wardrobe, L-shaped
Size: 1900x1300x2600 mm. Laminated chipboard: Kronoshpan (Poland) Decor color: Maple Additional equipment: full extension drawers, rod system of different levels Price: RUB 15,300 Order according to your sizes
Cabinet wardrobe built into a niche
Size: 2200x600x2500 mm Laminated chipboard: Kronoshpan (Poland) Decor color: Smooth white Possible designs: MDF, chipboard Price: 30,000 rub. Order according to your sizes
Corner wardrobe, built-in
Size: 2400x2400x2650 mm. Laminated chipboard: Kronoshpan (Poland) Decor color: Beech Additional equipment: closers, trouser hanger, pull-out baskets Price: 49,000 rub. Order according to your sizes
Built-in wardrobe, U-shaped
Size: 3000x2900x2650 mm. Laminated chipboard: Kronoshpan (Poland) Decor color: Snow white Possible designs: MDF, laminated chipboard Additional accessories: door closers, trouser hanger Price: 70,000 rub. Order according to your sizes
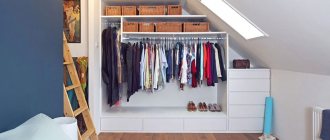
Cabinet wardrobe, in the attic
Size: 2500x1800x2200 mm. Laminated chipboard: Kronoshpan (Poland) Decor color: Snow white Price: 48,000 rub. Order according to your sizes
Wardrobe storage system: Aristo
Size: 2400x2400x2600 mm mm Price: from 17,222 rub. linear meters Order according to your sizes
Wardrobe built into a niche
Size: 2000x600x2500 mm. Laminated chipboard: Kronoshpan (Poland) Decor color: Maple Additional equipment: full extension drawers, rod system Price: RUB 21,000 Order according to your sizes
Wardrobe built into a niche
Size: 2100x500x2300 mm. Laminated chipboard: Kronoshpan (Poland) Decor color: Bleached oak Additional equipment: rod system of different levels Price: 20,000 rub. Order according to your sizes
Built-in wardrobe, U-shaped.
Size: 1700x1500x2600 mm. Laminated chipboard: Kronoshpan (Poland) Decor color: Oregon Additional equipment: full extension drawers, rod system of different levels Price: 24,000 rub. Order according to your sizes
