Features of the restoration of the Soviet wall
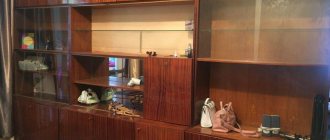
Previously, the Soviet wall was an attribute of any home. It was prestigious and beautiful. But time takes its toll, and furniture loses its former appearance, not to mention changing fashionable furniture trends. But don’t rush to throw it in a landfill. There is an excellent solution - restoration or alteration.
If desired, the Soviet wall can be restored or updated, extending its life for another ten years. But you will have to work hard. After all, the process is labor-intensive.
The restoration process consists of elementary stages and can be done with your own hands, even without experience.
The benefits of creating new furniture from old ones with your own hands
Do you want to change the decor, introduce original ideas into the interior, so that old furniture sparkles with new colors? Take advantage of the huge number of ideas and methods on how to reconstruct outdated furniture.
You will bring your ideas to life and create magnificent things.
And every piece of furniture keeps its own memories and family traditions.
The furniture of old times had its main advantage - it was very strong, durable, and was made from natural wood.
Using all your imagination, you will decide for yourself how best to use certain parts of the sets, what new purpose the table, chair, chest of drawers, etc. will have.
You just can’t raise your hand to take such things to a landfill.
You think this is difficult to do. It's actually not that difficult. You will give things a unique look. There are many materials and methods you can use to repurpose your furniture yourself.
By restoring interior items, you can save a significant amount of money than by purchasing new furniture.
Take advantage of the huge number of ideas and methods on how to reconstruct outdated furniture.
Before you begin, decide which restoration method you will choose. Purchase the necessary components. Remember, in this matter you need diligence, endurance, and a serious approach. Maybe this will encourage you to start your own business.
You will delight not only your relatives, friends and acquaintances with amazing things, but also fulfill orders.
Required materials and tools
To work you need to prepare the following tools:
- drill;
- screwdriver;
- hammer;
- pencil and ruler.
The selection of the necessary building material completely depends on the chosen restoration method.
The selection of the necessary building material completely depends on the chosen restoration method. The standard set of materials is as follows:
- primer;
- sandpaper;
- varnish or paint;
- alcohol;
- decorative elements;
- accessories.
Stages of restoration
To breathe life into the old Soviet wall you will have to work hard. Because time has hardly been kind to her. Let's consider each stage of work separately.
Replacement of furniture fittings
Most often, the fittings in old furniture become unusable. The doors do not close well or the handle has fallen off. Therefore, their replacement will be a prerequisite for restoration. Moreover, sometimes a simple change of fittings radically changes the appearance.
Old fittings must be replaced
Surface cleaning
A sharpened dowel can clean narrow spaces well.
Before proceeding with the restoration of the Soviet wall, it must be thoroughly cleaned of dirt. To do this, simply walk over the surface with a soapy solution. For heavily soiled areas, you can use a soft toothbrush.
Primer and putty
Before applying paint to the wall surface, it is recommended to coat it with a primer. If there are chips, holes and other irregularities on the furniture surface, they need to be eliminated using putty. After the primer has dried, it is important to degrease the surface with an alcohol-containing compound. Even vodka will do here.
An acrylic primer mixture works best to saturate cracks and other imperfections on wooden furniture.
Afterwards, you can begin to eliminate minor irregularities. To do this, apply putty with a spatula. As soon as it dries, the treated areas are cleaned with sandpaper. It is opened with one more layer of primer.
An acrylic primer mixture works best to saturate cracks and other imperfections on wooden furniture.
Applying varnish
It is better to apply varnish in a well-ventilated room, eliminating access to open fire as much as possible. The old coating must be carefully removed, without leaving even the slightest stain. Treat damaged areas with sandpaper. The varnish should be sprayed at a distance of 30 cm from the surface. The movements are wide in the horizontal direction.
When streams of varnish appear, the distance from the surface must be increased.
On average, the varnish dries in two days. This information must be indicated on the packaging. Then the surface is treated with fine-grained sandpaper and the dust is wiped off with wet wipes. The varnish is applied in several layers after the previous ball has dried. Two or three times should be enough.
Painting
It is recommended to apply paint in one direction.
It is best to paint in a couple of layers. One may not be enough. If you plan to paint a Soviet wall in several colors, you can use masking tape to make the boundaries clear. The furniture can be used for its intended purpose no earlier than after 7 days.
Decoration
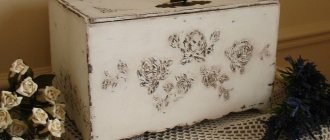
It is not enough to simply varnish or paint a Soviet wall to restore it. You can turn on your imagination and use various techniques: stencil, decoupage, mosaic, applique and even coloring. It all depends on your imagination and the availability of materials.
Don't be afraid to experiment. Bright colors and intricate patterns are sure to give new life to your furniture.
It is not necessary to use techniques completely over the entire surface of the Soviet wall. This may be partial decoration. First, the furniture surface is painted and then decorated.
For example, decorating door corners using decoupage method. To do this, you will need suitable napkins or designs that will fit into the interior of the room, as well as a special varnish.
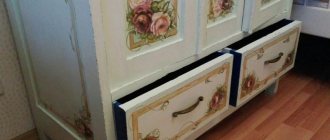
You can leave the facades plain, or decorate them in decoupage style
Work technology
Carrying out work for any type of restoration has one general technological sequence - preparation and actual updating.
Preparatory work
Before you decide to remake old Soviet-era furniture, you need to understand that such a process is only justified if it is made of wood. It is not advisable to renew old furniture made of chipboard, since the service life of these structures is not long, and perhaps the wall is no longer suitable for restoration. So, there are preparatory activities that must be carried out before any restoration:
- Clean the surface from dust and dirt, while dismantling all decor and fittings;
- The old layer of paintwork must be removed. This can be done with coarse sandpaper or a sanding machine. A solvent solution can also be applied;
- Grout deep cracks with a special material;
- Fill chips and dents with wax and sand;
- Prime the surface with a wood compound. It is advisable to use acrylic compounds that fill all microscopic cracks.
The preparation stage is very important, since the final result depends on the quality of surface cleaning.
Removing dust and dirt
Remove old paint or varnish
We erase the deformations
Prime the surface
Update instructions
Before you restore old furniture, you need to decide on the design you want to get. Let's consider the most popular updating method at the moment - decoupage. The preparatory work has been carried out successfully, and restoration can begin. The algorithm for performing the work is simple and will not cause difficulties even for a beginner:
- Cut out the desired design, or take special napkins for decoupage. If you are doing the work for the first time, take pictures of medium size relative to the surface on which they will be applied;
- Apply PVA glue to the surface, you can use a blending composition. Do not coat the entire wall at once, as the glue may dry out while you are covering one area, so you need to work in stages;
- When gluing a pattern, you must strictly ensure that the edges adhere to the surface. Drawings can be pasted overlapping each other, so the decor will be voluminous and original;
- If you need to paste over a corner, the material just neatly bends around the corner, there is no need to cut anything. Smooth the picture with your fingers or a rubber spatula to remove air bubbles and leave to dry;
- The next stage is varnishing. Apply a thin layer of clear furniture varnish with a brush or lint-free roller and let it dry. We repeat the process 3-5 times;
- After the last layer of varnish has dried, you need to rub the surface until it shines; this can be done with a soft cloth. Polishing should be done in a circular motion without pressing.
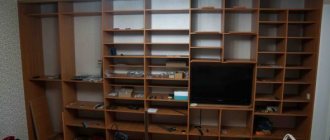
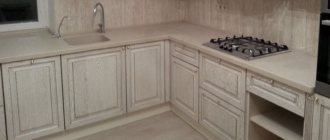
In the before and after photos you can see how to update an old furniture wall with your own hands.
If you follow the instructions and apply designer methods of decorating furniture, you can get a great result that will be the pride of the apartment owners.
We cut out the elements and cover the furniture with glue
Paste stencils
Varnish
Step-by-step instructions for the restoration of a Soviet wall
Restoration consists of the following stages:
- Replacement of accessories and minor repairs.
- Surface preparation : removing old coating and sanding.
- Primer coating . Degreasing the surface.
- Elimination of chips and other irregularities using putty. Primer coating.
- Applying varnish or paint in several layers.
- Decoration.
Historical excursion
In the first years of the formation of the Union, the councils hardly thought about the conditions of the homes of workers and peasants. Those decades after the revolution were difficult for everyone, people had to use the furniture that they already had. At that time, even in the future, there was no such thing as “Soviet walls.”
All production capacities were aimed at establishing the state as such, and then at meeting the needs of the front. During these years, the main furniture producers in the country were wood processing plants and factories, sawmills, and small cooperatives where interior items were made by hand. The furnishings of rich houses of that time were distinguished by pretentiousness and pomp; it supported the canons of the pre-revolutionary years. Wardrobes, sideboards, chests of drawers and dressing tables were solid, massive, they were made of wood, often valuable species, and decorated with beautiful carvings and paintings. Few could afford this, and therefore these examples of furniture from the Soviet era are now the most valuable.
Ordinary people were content with rather rough cabinets and cabinets, cobbled together from what was at hand. There could be no talk of any aesthetics or luxury then.
Ten years after the end of the Great Patriotic War, the party decided that it was necessary to abandon excesses in construction. This provision also concerned the personal space of citizens, and therefore the interior furnishings of their homes.
Rules for caring for restored furniture
In order for the Soviet wall to serve you for a long time, it is important to ensure optimal conditions in the room. This is a temperature range of 15-20 degrees Celsius and a humidity of 50-65 percent.
It is better not to place such furniture next to heating elements. It is necessary to ensure a minimum distance to them of no closer than 0.5 m. Even direct sunlight can change the color of the coating. Therefore, it is recommended to periodically rearrange the furniture so that sunlight hits different parts of the wall.
Dust should be wiped off with a clean and dry soft cloth. It is better to give preference to flannel.
Decorating with paints
Laconic monochromatic style with built-in fireplace
If you have old furniture left in your house from your relatives, do not rush to throw it away, because it can be remade. A little imagination and simple building materials will allow you to give a second life to the Soviet wall. Moreover, this furniture can become a real highlight of your interior. And not just old and unnecessary trash. Your main weapon is imagination, paints, stickers and our article.
Dresser update
The old chest of drawers had stood for who knows how many years in the attic, but it was very strong and reliable, it had not dried out one bit, only the polish was cracked. It is much stronger than modern products. This is a feature that is inherent in old, Soviet-era furniture. It's not very detailed (to put it mildly), but after standing in poor conditions for several decades, it remains strong. Remaking a chest of drawers is more complex: two techniques were used: painting, and then decorating using polyurethane moldings and wallpaper.
