A mirror is an integral part of the interior of every home. It can be oval or patterned, large or small, serves to decorate the room, and performs its immediate functions. Throughout his life, a person watches his reflection, sees his own maturation, development, withering, monitors his appearance, and does not leave his home without looking at himself.
Understanding the importance of this attribute, people pay special attention to it. The product can be purchased in retail chains and specialized stores, however, the price may be too high, and the proposed decor does not always match the style of the room. In such a situation, you can choose the shape, decide on the size and design the frame yourself. It is the framing that carries the decorative load; it allows you to make even an unattractive-looking thing stylish.
Features and Benefits
A handmade frame gives the mirror an original look. Any product is suitable for decoration, and the result of hand-made work looks professional. Homemade framing has a number of advantages, among which are:
- Independent selection of available materials. Any raw material is used, be it iron, gypsum, wood, leather or others;
- Minimum costs. Purchased frames will require a large investment;
- Exceptionality. Hobbyists and craftsmen can realize interesting ideas and plans, harmoniously combining the result with the interior of the room, use all kinds of decorative elements, from forged to carved;
- A handmade product is a luxury. Your own thing is a particle of the heart, soul, moment of life. Everyone tries to create a masterpiece for themselves, some kind of ideal, so the object will always please them and lift their spirits.
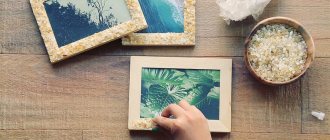
Shell mirror frame
Before you start working, create a pattern using shells. Place each shell on the surface of the future mirror frame. Use your own imagination to the maximum when you create an ornament.
For work, stock up on:
- Masking tape
- Glue
- Seashells
Sea mirror
Manufacturing process:
- To prevent the glass from becoming dirty during operation, seal it using masking tape. Then you can glue the shells. When you finish your work, set it aside until the glue has completely dried.
- Once the glue has dried, paint the frame.
- Paint in several layers. Apply paint every half hour to allow the previous layer to dry.
- Apply layers carefully so that they are not too thick.
Material selection
Anyone can turn an ordinary mirror into an original decorative element. For this purpose, you can use various raw materials, for example, wood, branches, cones, pebbles, paper, fabric, metal. The main thing in the work is to choose those components that will match the interior of the room. To get acquainted, let's look at the most popular materials.
- Polyurethane. It is characterized by durability, strength, and resistance to mechanical stress. It's easy to work with him. Due to the fact that the raw material is neutral to moisture, the product can be installed in the bathroom or kitchen. The frame can be made from ceiling plinth. It cuts perfectly, holds its shape, and retains the color layer;
- Mirror glass. The material has a multi-colored coating, high reflectivity, is opaque on the outside, and does not deteriorate from water. It is difficult to work with; glass cutting skills are required;
- Leather. A non-standard approach to framing. It has many color shades, a smooth, embossed, laminated structure. Made from the skins of various animals. Products in such a frame will look harmonious with leather furniture and emphasize style and wealth. Both wall and floor structures will look gorgeous;
- Rope. Even a beginner can do this decoration. However, hemp fiber quickly gets dirty and absorbs moisture, so the finished product should not be installed in a room with high humidity;
- Polyurethane foam. Household chemical products can also be used to create interesting frames. You need to work with it very carefully, as it is difficult to wipe off, after which scratches may appear. Polyurethane foam sealant is not resistant to high temperatures, is afraid of sunlight, from which it darkens and loses its properties;
- Tree. One of the most preferred options. Wood does not lose its relevance. Compatible with all interior styles, more suitable for classic and Provence. It features a natural structure and many shades that allow you to create a unique design. For work, slats, boards, saw cuts, even branches are used;
- Gypsum. Inexpensive raw materials that allow you to create any shape. It can be used either independently or in combination with other elements. Using dyeing, you can give an item an antique effect or make it gilded. When installed in a room with high humidity, treatment with a special waterproof impregnation is required.
In a vintage spirit
A large mirror in a frame made from an old window or door will give the interior a touch of impressiveness and colorful antiquity. A little imagination, appropriate decor and you will have a truly unique, exclusive piece of furniture.
Got an old forged frame lying around? We advise you to urgently find a use for such an elegant little thing! Great idea - a frame for a mirror. If you want, place a picture that matches the style.
Styles
Mirror surfaces are used in various industries, medicine, science, and also in everyday life. There are many different compositions, but the decor is most relevant in the interior. Selected to match the image of the room. Let's look at a few examples of mirror design for some styles:
- Classic. Always relevant, does not get old over time. Strict geometric shapes are welcomed; gilded or carved wooden structures are used for framing. They are located in the hallway, in the hall on top of the fireplace. Floor-standing specimens also look elegant;
- Country. A characteristic feature is natural elements. Wood, wicker, and stone are used for the frame. Additionally decorated with shells, pebbles, and forged elements. Combine harmoniously with solid wooden furniture;
- High tech. Characterized by straight, sweeping lines, an abundance of metal parts with a minimal set of decor. Mirror surfaces are used both on walls and ceilings. Metal and wood are used for framing;
- Art Deco. There is nothing superfluous in the design. The frames are the simplest, uncomplicated. Smooth lines and rounded shapes are welcome. Preference is given to painting in light colors;
- Romanticism. Natural materials are used: stucco, light wood. There are no sharp lines or corners. Characteristic are floral motifs, pastel colors, openwork carvings;
- Minimalism. Framing is minimal or absent. There should be one reflective surface per room, but at full height. The shape is primitive geometric.
Eclecticism (mixing styles) is gaining popularity in interior design. However, in order to create the right image of the room, one thing is important - the mirror should look harmonious.
Frame for mirror made of ceiling baguette
- Try to navigate by the size of the mirror. Cut 4 identical parts - this will be the future frame. Cut the corners at a square so that they can join.
- Glue the parts to each other to form the base of the frame.
Details
- When the glue is completely dry, turn the frame over. Putty the joints on the reverse side. This will make your frame more durable.
We glue
- Also putty on the front side, but do not do it completely. But only where there are bayonets and along the inner edges.
- After the putty has dried, paint the frame with dark paint. Also carefully paint the border inside.
- After the paint has dried, apply gold paint to the convex areas of the product. Apply so that the paint does not get into the recesses of the ornament.
Paint over
- When the paint has dried, coat the surface with varnish.
- Cut a hole in the cardboard that matches the size of the mirror. Leave a little allowance for the frame itself.
- Glue the mirror to the cardboard and also glue the frame.
- Attach a cord to the inside of the product so that there is no void between the frame and the mirror.
- When the element has dried, cover the side areas with putty and dark paint. Then apply a golden tone. Apply each layer in stages.
Ready
Form
Regular round, oval, rectangular products are the most common and are universal. They look good in rooms decorated in any style. However, there are many other options, made in the form of different geometric shapes: triangle, rhombus, trapezoid, polygon and others. You can also find combined designs, for example, a rectangular mirror, in which one or more sides are wavy or oval.
Items may have unusual silhouettes. Canvases designed in the form of a human figure, as well as animals, fish, and plants look interesting. There are sets of numbers, symbols, and abstractions. It all depends on the idea and wishes of the person. An interesting shape with the right frame design can make a mirror the accent of a room.
Lace mirror frame
The presented lace frame looks quite interesting and homely.
So stock up:
- Lace
- Glue
- paint
- Double-sided tape
- Paper
Lace
Manufacturing process:
- Paint the lace using spray paint. Dry the product thoroughly for several hours.
- Cover the back of the mirror with tape. Cut off the excess tape.
- Remove the film from the tape. Glue the mirror to the paper lace and press firmly.
- Do the final work - glue the mirror to the wall.
Design and decor
There are many interesting ideas for decorating a mirror frame using available materials. All the necessary elements can be made with your own hands. An out-of-fashion, damaged edging can easily be turned into an original, unique designer item. You can give a second life to an outdated product in the following ways:
- Paint using a stencil. The frame is decorated with beautiful patterns, flowers using paints and special templates;
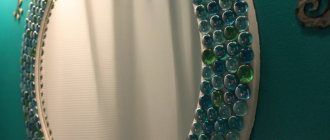
- Decorate with mosaics. Glass and ceramic elements are used for decoration. The strips are lubricated with glue and attached to the frame;
- Product design. You can use coffee beans, curly pasta, and various cereals as decoration. You can create any composition by gluing elements around the perimeter;
- In a nautical style. You can decorate with any material related to the marine theme. A win-win option is shells of different sizes;
- Decoupage. In this way, you can restore an old frame without losing its antique quality. Plaster figures, fabric and paper decorations will also look beautiful;
- Decoration made from disposable tableware. To create an original design you will need a cardboard circle the size of the mirror and several dozen plastic spoons. We break off the hand holders and insert the parts with a spiral. If desired, they can be painted in any color;
- Decor with old toys. Small figurines from Kinder surprises, old cars and other small items are perfect for decorating a frame. After gluing, they must be painted the same color.
Mirror frame with floral pattern
To create a mirror with a floral design, you will spend a minimum of time. You will also need to stock up on:
- Acrylic paints
- Sponge
- Stencil
- Masking tape
- Nail polish remover
In flowers
Manufacturing process:
- Prepare a stencil or purchase one at the store.
- Attach the stencil to the mirror with tape. If the stencil involves the use of several paints, then cover some of the patterns with tape so that the paint does not get into the wrong place. Leave only those areas that you will paint with a certain paint.
- Mark the location of the stencil in advance.
- Paint over the pattern using a sponge. Once you've painted one color, you can paint other areas, removing the tape each time. Draw the contours of the ornament in some places using a thin brush.
- You can also complement the design with multi-colored dots by applying them all over the mirror.
Color solutions
The completed design allows you to create a beautiful frame. Its color is important. In order for the mirror to fit harmoniously into the interior and look sophisticated, the decorative elements of the frame must be of a suitable shade, they should be decorated in the same way, for example, with lighting.
When choosing a color for a frame, it is necessary to take into account such points as location, the presence of a window or baguette nearby. Its size and features, as well as the material used to make the frame, are also important. The main factor when choosing a color scheme is the overall style of the room. Noble shades (gold, oak, bronze) are suitable for a classic interior, while bright colors will look great in a modern room. Warm, light colors are suitable for vintage rooms.
Decorative frame for mirror
When decorating, ensure the structure is resistant to strong moisture. Also try to secure the decorative elements more firmly.
Prepare for work:
- Old frame
- Glue
- Decorative elements
Decorating the mirror
Manufacturing process:
- Wipe off the coating from the old frame. To remove old paint, use paint stripper.
- Apply primer to the surface of the frame. This will prepare the base for the glue.
- Then apply glue to the areas where you will glue beads and other decorations. Attach decorative elements in a chaotic manner.
Wall mounting methods
There are various ways to securely mount a mirror on the wall. The choice of method depends on the surface material and frame dimensions. Another important factor is the characteristics of the room where the mirror will be used. The fastener should be durable, simple and inconspicuous. The most commonly used installation methods are the following:
- On hooks. The mirror is hung on elements screwed into the wall. A hole is drilled into which a plastic dowel fits and a hook is placed. To do this, the frame must be equipped with reliable hinges;
- Using glue. Suitable for products weighing less than 10 kg, provided that the surfaces are perfectly flat. You won’t have to break the integrity of the walls or drill the tiles. Can be mounted on a cabinet;
- With double-sided tape. Can be stuck to almost any surface. Smooth bases (plastic, Teflon, silicone, rubber, polyethylene) are not suitable. The thickness of the tape is at least 0.8 mm, width is 3 cm.
Mirror frame “Cloud”
So, for the cloud mirror frame you will need to stock up:
- Round mirrors
- Foam board
- Newspaper or paper
- Glue
- With nails
The process of making a “Cloud” frame for a mirror:
- Take regular kitchen lids. The diameter of the covers should be 7 cm larger than the mirrors themselves. Trace them on paper with a pencil and cut them out.
- After cutting out the circles, place them on the table and make the desired shape.
- Glue the circles together, this way you will get a template for the future product.
Sample
- When the glue dries, transfer the template to the prepared foam board and trace it.
- If you are satisfied with the workpiece, cut out one single figure from the foam.
- Make holes where you will place the mirrors. Cut the holes not too deep.
Cutting holes
- Make fastenings in a couple of places where you plan to insert mirrors. Take an awl and make through holes in the frame. Then insert the mirrors.
- Take the glue, apply it to the back side of the element, press it tightly to the base, and hold for some time. Do the same with other mirrors.
- Hammer a couple of nails at the distance of the holes and install the frame.
Ready
How to do it yourself
Creating a mirror frame with your own hands is an extremely creative process. The idea must be well thought out so that the mirror composition not only meets all safety requirements and complements the interior, but also provides great aesthetic pleasure. When choosing decor, you must take into account the frame material and the surrounding environment.
Made of wood
To make the simplest design, you will need wooden blocks, fasteners, decorative materials and working tools. Assembly of the frame is very simple. The prepared boards must be cut to the size of the mirror at an angle of 45° and carefully sanded. Then you need to make a groove in each of the parts for a more convenient and safe placement of the glass.
We combine the blanks to check the geometric correctness with the obligatory fitting of the mirror. If everything is assembled correctly, you can begin assembling the frame. We treat the ends with wood glue and connect the parts. If the mirror is heavy, you can make cuts at the corners and add dowels. You can decorate a natural product with figured cutting, paint and other decorative elements.
From dry branches and bark
A sun mirror made from dry branches or bark will fit perfectly into any interior. To work, you will need the natural material itself, glue, primer, plywood frame, and spray paint. If the mirror is square, you should use a suitable frame, placing the branches along the frame. We paste the round edging with wedges along the entire perimeter, alternating short and long. The product should resemble the radiant sun.
In order for the bars to stick well, they must be held with light pressure for at least 30 seconds each. When all the elements are well fixed, remove the remaining glue with sandpaper, apply a primer and leave to dry. Lastly, coat the product with varnish.
From toilet paper rolls
Stunning interchangeable mirror decor made from simple materials will decorate any interior. We will make a prefabricated product from cut pieces of bushings. At the preparatory stage, we clean the dense tubes from any remaining paper and level the surface. Then the bushings must be painted with acrylic paint. The color intensity is adjusted by the number of layers.
When the paint on the pieces has dried, you can start cutting. We fold the tube in half, forming symmetrical folds and cut it into pieces 2 cm thick. The flowers of the completed frame composition will consist of such petals. Using hot glue, we connect the petals in groups of 5 pieces. You only need to coat the edges, forming a flower. From the obtained parts we make a frame.
From polymer clay
A small mirror decorated with polymer clay will be a stylish decoration for your dressing table. We will make the base stand from a single rolled out layer. Its size should be several centimeters larger than the mirror itself. To form a picture, you can use a texture sheet or create it yourself using the painting technique. Bake the prepared part.
After cooling, place the back wall with the pattern down and place a mirror in the middle. Lubricate the resulting frame with liquid plastic and place the remaining texture parts on it, pressing them tightly against each other. The final stage is creating the leg. It must have a special shape so that the mirror stands stable. You can attach it with glue or wide tape.
From plastic spoons
Simple plastic spoons can turn a mirror into the main interior detail. To bring an original and simple idea to life, you will need a cardboard frame, glue, scissors and plastic spoons. We cut out the frame for the frame from cardboard and cover it with fabric for ease of gluing. The handles of all spoons must be separated.
Now the blanks can be attached to the base of the future frame. Using a glue gun, we densely assemble all the details in the form of chrysanthemum petals. When the assembly of the structure is completed, the glue is completely dry, you can begin painting. To do this, use paint in cans.
From cutlery
This mirror frame would be appropriate in the kitchen. Decorating with cutlery can be used for both round and square mirrors. First of all, cut out the base from plywood or thick cardboard. We apply metal forks and spoons to the workpiece to determine the type and correct it in time. They can be arranged alternately in the form of rays or in any form.
We attach the products using a glue gun and place a round plate on top. The prepared ceramics will hold the mirror well and will not allow the structure to deform. The resulting voids can be filled in a circle with beads.
From ceiling plinth
You can build a frame for a mirror without any effort from a ceiling plinth. Polyurethane, wood, gypsum materials, and molding are suitable. First you need to measure the mirror and mark the baseboard. We cut the baguette pieces with a miter box at an angle of 45°. Then we apply the blanks to the mirror and check the correctness of the cuts.
You can assemble the elements using glue, metal, and wooden corners. This depends on the type of material of the future frame. When the glue at the joints has dried well, the frame can be attached to a sheet of plywood. To give the structure strength and aesthetics, the junction of the base and the carved platband is puttied.
Before attaching the frame to the plywood, you should make holes at a certain height and stretch the lace. It will serve as a mirror holder.
From clothespins
An impressive frame can be made from the simplest material - wooden clothespins. They must be placed strictly on the same line. To make it easier to create the correct figure, you need to place a jar or plate in the center of the mirror. The edges of the object will serve as a border.
Clothespins must be firmly attached to the mirror. A glue gun is suitable for this purpose. Apply the hot solution to one side of the clothespin and close it several times. This will allow the adhesive mixture to be evenly distributed over the surface of the wood. Then we lean all the elements one by one against the base. You can use satin ribbon or metal loops for fastening.
Mirror frame made of plastic pipes
To get the job done, stock up on:
- Cuttings of plastic pipes of various diameters
- Sandpaper
- Glue
From plastic pipes
Manufacturing process:
- From the pipes, cut even rings of equal width. Use a miter saw with small teeth for this work.
- Sand the cut of each ring until they are smooth.
- Glue the rings according to the pattern (select it in advance). The final frame can be round or square.
- Glue the mirror to the rings. Hang the product by the mirror itself.
Interior functions of this item
In fact, such an ordinary and seemingly uncomplicated household item has a lot of properties that can improve the overall appearance of the room.
With its help, you can expand the space and visually double a small room. This function is best accomplished with a full-wall mirror. A mirror can make a room brighter if placed in the right place - opposite a lamp or window. It is important to choose the right place to install this important piece of the interior.
If you don’t have the best view outside the window, it is advisable to avoid its reflection in the glass. Mirrors can be a great way to decorate cabinet doors, walls and even the ceiling. Mirror decorations will look very stylish if you use them wisely in decorating your space, and a baguette is a good solution if you have ideas for placing it in your cozy world.
Mirror frame made from disposable spoons
Stock up:
- Thin fiberboard or thick cardboard
- Glue
- Disposable spoons
Cool mirror
The process of making a frame for a mirror from disposable spoons:
- Cut out a large circle from fiberboard or cardboard.
- Place a mirror in the center.
- Trace the mirror using a marker.
- Take disposable spoons and cut off the handles.
- Glue the spoons along the edge of the mirror. Make at least three layers.
- Glue the spoons very tightly so that the backing is not visible.
- To make the frame look more impressive, paint the spoons with any paint.
- When the frame is completely ready, glue the mirror.
