Mirrors are presented in the design of any apartment.
They not only perform their direct function, but also decorate the interior, visually increasing the space. During use, scratches may appear on the reflective smooth surface. Such defects spoil the entire impression of the mirror and require elimination.
We will tell you in the article whether and how to remove scratches from a mirror.
Is it possible to remove the damage?
At its core, a mirror is a smooth surface whose main purpose is to reflect light . Despite the strength and thickness of the material, the mirror is fragile. If handled carelessly, scratches can easily remain on the surface.
To carry out restoration work, it is better to remove the mirror and place it on a horizontal surface. For convenience, it is better to remove the frame.
You can eliminate minor damage and add shine at home using folk or special means. But you won’t be able to deal with serious damage on your own.
Decorating the frame
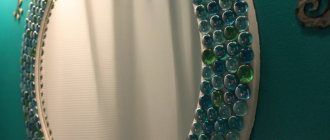
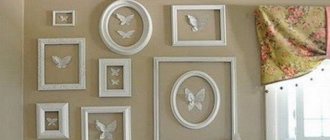
If the mirror itself is fine, but its frame has lost its attractive appearance, try yourself as a designer. The following will help you decorate the frame in an original way:
- various pebbles;
- shells;
- old jewelry.
The choice of materials will depend on your capabilities, imagination and style of the interior as a whole (the updated product should fit harmoniously into the overall picture).
Thus, restoring mirrors is a rather painstaking task, but the efforts made will still pay off, since you can extend the life of the damaged product. This is especially valuable if the item is old and dear, like a memory. It must be remembered that some cases may be too serious, then, unfortunately, it will not be possible to solve the problem on your own.
Subscribe to our Social networks
Home Recipes
You can smooth out microcracks and make them less noticeable using simple home recipes. To do this, you will need simple tools that you already have in your household.
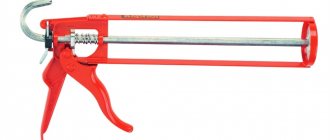
Silicone sealant
To carry out the work you will need:
- glass cleaner;
- silicone colorless sealant;
- toothpick;
- stationery knife;
- lint-free cloth or rag.
Procedure:
- Apply glass and mirror cleaner to the surface of the mirror.
- Rub the liquid in with a lint-free cloth until the surface is clean and dry.
- Using a toothpick, carefully apply the sealant precisely along the cracks.
- Let the product dry.
- Carefully remove any remaining sealant protruding onto the surface with a knife.
- Treat with glass cleaner.
Walnuts
Walnut kernels will help camouflage the defect. For treatment, you can use a piece of the nucleolus to rub the area with the crack.
But the best result is achieved when the kernels are ground into flour . Enough to work a small quantity. Just a little olive oil is added to the resulting powder so that the composition becomes paste-like. And the resulting paste is rubbed into the mirror.
Vegetable oil
To rub a mirror with cracks, any available vegetable oil can be used. Just a few drops are enough to treat a scratch.
The oil must be rubbed into the affected surface using a soft, lint-free cloth.
Vinegar and mustard
To work, you will need table vinegar and mustard powder. Both ingredients are taken in equal proportions and rubbed into the mirror surface. Polishing completes the treatment.
Toothpaste
To polish the mirror, white toothpaste without colored inclusions can be used. A small amount of paste is squeezed out of the tube onto a sponge and rubbed into the surface that requires restoration. The rubbing movements should be clockwise.
Nail polish
Use clear nail polish to disguise scratches. To hide the defect, varnish must be carefully applied to the damage and rubbed in.
Foil
If the surface damage has affected the back of the glass, a different approach will be needed to repair the defect and restore the reflectivity of the mirror.
For restoration work, ordinary foil can be used . When preparing the surface for work, it must be cleaned, and the mirror itself must be removed from the frame and free access to the back side.
You will need a small piece of foil - a little larger than the scratch itself, which requires masking. The mirror is turned over with its back side up and wiped. Using tape, secure the foil to the area where there is a scratch on the front side. The piece of foil must be absolutely even.
Causes of wear
Sometimes, after several years of service, we notice that the mirror does not reflect well and some spots appear. Turning the canvas over, it turns out that the coating has been torn off from the back side. It's called amalgam.
This coating can come off for various reasons. And these are not necessarily the consequences of scratches and mechanical stress. Amalgam also begins to slip if normal air circulation on the inside is disrupted. If you see transparent spots on the reflective side, you should think about gluing the mirror correctly or choosing a different place for it.
The production of mirrors is technologically quite complex. To create a reflective surface, a thin layer of metal, supplemented with special additives, is applied to the reverse side. Metal microparticles are gradually applied to the surface, often in several layers.
It will not be possible to achieve the same effect at home without special industrial equipment. Therefore, if your antique mirror in a wooden frame has worn out and lost some of its reflective properties due to peeling amalgam, partial restoration will be required.
No one is stopping you from giving the product to a special company, where they will do professional restoration. But it is very expensive and not every city has such specialists. The cost of the service sometimes exceeds the price of the mirror itself. First, you should try to perform the procedure yourself, at home.
Practice clearly shows that it is possible to restore a surface using available materials, and the result often exceeds expectations.
Special means
To perform work to improve the condition of the mirror surface, special preparations can be used.
Paste GOI
GOI paste is a special composition for grinding work . The main component is chromium oxide. The paste is used very widely - not only for caring for mirror surfaces, but also for polishing:
- glass,
- ceramics,
- metal alloys, etc.
How to use:
- grind the substance into powder;
- using a cotton swab, apply the drug to the damaged areas in a thin layer;
- rub and polish each area for at least a quarter of an hour.
Polishing with GOI paste must last for 15 minutes for there to be a visible effect; the exposure time cannot be shortened. The price for 20 grams is on average 50 rubles.
Cerium oxide
Cerium oxide is a chemical compound that can be purchased in powder form . This substance is used in ceramics, for processing jewelry stones, removing scratches on mirrors, etc. The product is available in packaging of various weights.
To repair a mirror and eliminate defects, cerium oxide is diluted to form a paste. The surface requiring treatment is moistened and the prepared composition is applied.
Periodically moistening the surface, polish with a felt cloth. Adding water helps prevent premature hardening of the mass. If necessary, add “gruel” and continue rubbing. Price for 0.1 kg is about 500 rubles.
Master class: restoration of an old mirror
Once, they gave me an old mirror for restoration, and after searching on the Internet, I managed to find out that it belonged to the late 19th - early 20th centuries.
The duration of work is indicated taking into account parallel work on other orders and New Year holidays 
Initially, having examined the front of the work, I got the impression that I would have to remove the old covering, replace the backdrop and grind out the missing part.
However, after all the small parts were removed, it turned out that the amount of work had increased many times over, since many parts were affected by shashel and fungus, and some parts were broken and fastened to the frame with nails. In this regard, the restoration period has also increased dramatically.
I started removing the old paint, the smell of wax was so strong that I had to open the windows 
For removal we used: a remover, an engraver with different attachments, emery, and plastic scrapers.
Step by step, detail by detail, we removed the paint from all the parts, after that, scanning the broken parts - some were glued together, some were replaced with new ones.
The cleaned parts filled the entire space 
Parts affected by fungus were sanded and then treated with the Spectra antifungal compound.
At the same time, he was engaged in other orders, during periods of absorbing and drying parts 
We completely replace the backdrop of the top of the mirror, since it was broken into 2 parts, and we fasten it with two bars.
We immediately paint it and hide it until assembly.
We specially cut out the preliminary (original) part in order to preserve all the irregularities of the original.
Having defeated the fungus and removed all the consequences of the activity of the bugs, we proceed to priming and painting all the parts.
Having painted with the first layer of impregnation and allowing it to dry thoroughly, we selectively seal the places of previously hammered nails, leaving some places for the “breath of antiquity” and re-painting and proceeding to assembly 
In order not to get confused in the details, photos of each section of the mirror were initially taken:
Having assembled all the parts together, we install a new mirror, at the top the old mirror, at the request of the customer, is left old, but after certain manipulations with a washcloth and detergents, using an extract, we wash it))) and additionally cut out a new small mirror in case of replacement
install the backdrop and new hinges for hanging the mirror
The final result, as always, was examined and approved by inspector Kuzya 
And this is what we ended up with:
Thanks to everyone who read my master class to the end 
If deep damage
More difficult work awaits if the scratches on the glass are deep. Simple rubbing in this case will be ineffective. A recipe using GOI paste and epoxy glue will come to the rescue.
Work order:
- Clean the mirror using glass cleaner. This will degrease the surface and prepare it for further processing.
- Dry the mirror.
- Fill the cracks with epoxy glue. When filling cracks, the epoxy should be distributed evenly, without air bubbles or unfilled cavities.
- Excess filler should be removed with a cotton swab or carefully cut off with a utility knife.
- Leave for 4 days.
- Polish the surface using GOI paste.
If the surface damage is very serious and you cannot fix it yourself, you can contact a specialized workshop.
Step-by-step instruction
How to restore a mirror with large amalgam damage?
You need to carefully remove the mirror from the frame and place it on a table covered with a soft cloth. Thoroughly clean the damaged surface with a brush. Then wash with glass cleaner and dry. Now degrease the damaged area with gasoline or alcohol and dry again. Using scissors, cut a piece of foil slightly larger than the size of the damaged area. Apply glue to the treated area of the mirror, apply the foil with the shiny side down and press. Use a napkin to smooth the surface of the foil from the center to the edges. Carefully remove excess glue with a sponge and dry the mirror for several hours. Place the restored mirror back into the frame.
Repairing a mirror coating is labor-intensive and requires investment, so mirror restoration will probably not be cheap.
To restore the surface of a mirror that has minor damage, grinding and polishing are used.
Prevention measures
Caring for a mirror surface should include the following points:
Carrying out regular cleaning using special products or homemade compounds;- exclude exposure to abrasive or other surfaces, including the hard sides of sponges;
- It is advisable to have complex damage and chips repaired by a specialist;
- mirrors do not tolerate constant moisture well, so mirror surfaces that fog up in the bathroom must be wiped dry regularly;
- Rubbing the mirror with shaving foam will help prevent the mirror from fogging.
Any dirt that gets on the mirror must be removed immediately.
Wardrobe decor with full color posters
Wardrobe doors with photo printing are not a cheap pleasure. Color posters based on vinyl film are much more affordable and often look much better. This is achieved through high quality printing. You can paste a poster on one of the doors or make a composition on all panels of the wardrobe.
Drawings on color posters can be very diverse: from abstract figures to your own photographs of memorable places. They should be applied like regular vinyl stickers.
