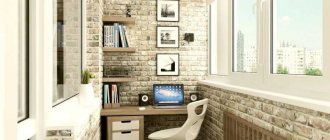
The balcony and the storage room are two places in the apartment where a serious struggle takes place for every square centimeter of free space. No matter how spacious utility rooms are, there is usually not enough space in them. Our proposed project is intended to partly solve this problem. Without unnecessary lyricism, let's get to the main thing.
Design, construction and mounting methods
Before you start creating a rack, you need to decide what the shelves in the pantry and the structure itself will look like, as well as what fastenings to connect the shelves to the wall.
There are only two options for how to make a rack, namely, make a free-standing shelf, or simply attach the boards directly to the wall.
First, you should draw the idea on paper. This will allow you to visualize the desired rack, take measurements and most successfully place it, taking into account the wishes and intended storage items.
In order for a pantry to be equipped with shelving, it must have enough space.
It must be taken into account that the shelves should be positioned in width from bottom to top, that is, the bottom shelf will be the widest, and the top, accordingly, the narrowest. This is due to the fact that the largest items will be stored on the lower shelves, which are inconvenient and impractical to lift upstairs.
It is necessary to carefully consider the distance between the shelves and correlate it with the items that you plan to store.
Depending on the wishes of the owners, the racks can have any shape that the location chosen for attaching the structure will allow.
You need to consider the amount of free space - if the racks take up too much space, then it will be uncomfortable for you to walk in the pantry.
More often, U-shaped and L-shaped shapes are chosen; this type of shelves is the most practical. For installation, it is better to prefer metal brackets and fasteners; they are the most durable and will withstand any weight on the shelves.
Choose any option that suits you.
What to consider when planning a storage system in the utility room
As we have already said, it is important to think about what exactly you want to keep in the closet and relate it to the area. If it is small, then it is better to equip spacious mezzanines, and put drawers or baskets below for items that you use less often than others. This option is not suitable for building materials.
When calculating the depth of the shelves, do not get carried away. Remember that you need to leave free space between them so that it is convenient for you to enter, take something, turn around, and take out large objects. It is advisable that the passage occupies at least 70 cm. In a room with a high ceiling and an upper tier directly below it, provide space for a stepladder or ladder.
Measure the longest containers that you plan to put away for storage, and make several compartments just for them.
A few more tips for arranging storage shelving in an apartment
- Straight shelves without intermediate supports are only suitable for small closets with a distance of no more than 2 m from wall to wall. Otherwise, the board will sag.
- The width of the ledges increases from top to bottom; the heaviest things need to be removed downwards. This is due to safety and convenience.
- Use the rule: the larger the load, the thicker the material (this applies to wood, plywood), the more fastenings and the smaller the gap between the support posts.
- The optimal mezzanine width for cans with blanks is 30 cm or more.
- It is preferable to fix light equipment against the wall; massive structures are stable due to their weight.
- Take care of separate lighting for the pantry, do it before starting other work.
- Before installing storage systems, the utility room must be prepared: thoroughly cleaned, if possible, level the walls, re-paste them, paint or tile them.
- If necessary, cover the walls with antiseptic impregnations to protect against mold.
- If the room will be open, paint its walls in bright colors that match the surrounding interior.
Taking into account all the tips and features of your room, draw a sketch of the future closet indicating the design parameters and start creating it.
Necessary materials
When deciding how to make shelves in a pantry, you need to decide on the material from which the structure will be made. There are several options.
- The budget option allows you to make shelves from the material included in the furniture. If you have an old wall or an unnecessary chest of drawers, then you can disassemble them and get a fairly durable and, at the same time, free canvas for making boards.
This will be enough to ensure that the pantry has good and reliable shelves on which you can store anything. - The second option involves purchasing material for shelves in the pantry. The choice must correspond to the list of intended items for storage, their dimensions, and weight.
It is advisable to make a rack directly in the pantry, since if it is large, then it will be difficult for you to bring it inside.
If it is expected that the racks will be loaded with conservation, then a solid board about 30 mm wide will be the best choice.
Preparation
Before installing storage systems, the pantry must be repaired: clean the space, carry out dry and wet cleaning, remove old wallpaper and flooring. If necessary, the walls of the storage room or attic are leveled and also put in order: painted or pasted over.
It is recommended to use a primer that contains antifungal impregnations.
Laminate, parquet or linoleum is laid on the floor. It is also worth equipping the pantry with ventilation and lighting, which will greatly facilitate the use of the room.
What material can be used?
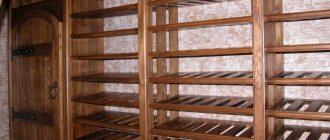
One of the most affordable and durable materials for creating shelves in a pantry is wood. Boards made of natural wood (pine, larch), as well as chipboard, are fixed with metal fasteners. The heavier the items that will be stored in the pantry, the thicker the boards should be. For conservation, large equipment, construction tools and other heavy things, it is worth providing an additional stiffener.
If you make shelves in the pantry with your own hands, you can use what you have at hand - wooden pallets, old unnecessary furniture, plastic fruit boxes. Plywood is considered a budget option, but thin sheets are not suitable for heavy objects. Lightweight but durable plastic is suitable for storing books, clothes and bulk products. It is easy to care for, and the material is not afraid of moisture.
Metal racks are considered the most durable and do not require additional reinforcement. Modern products have a collapsible design, they are easy to rearrange and transport, and the material can easily withstand temperature changes. When purchasing, you should pay attention to the coating - it must be protected from corrosion with a special composition.
The photo shows shelving, drawers and wall shelves for a spacious pantry.
What is the best way to arrange shelves in a pantry?
The placement of shelves is primarily affected by the size of the utility room.
- A small pantry (about 2 meters) allows you to install shelves in only one row - linearly, along one wall. Sometimes structures are made rounded - this shape allows you to gain a few centimeters and use three walls.
- The angular arrangement in the form of the letter “L” is considered much more practical, but the storage area should exceed 2 meters. For maneuvers you need to leave a small passage, especially if the room is elongated and narrow.
- In a large utility room, it is optimal to place shelves in the shape of the letter “U”. In this case, it is necessary to calculate the depth of the structures so that there is room in the middle for movement.
The photo shows a pantry in which the shelves are functionally arranged in the shape of the letter “P”.
Deciding on the sizes
The most popular and practical form of shelves is straight. The length of the shelf is usually equal to the length of the wall. If the distance between opposite walls is 2 meters or less, then the shelf does not need additional support. Otherwise, the structure should be strengthened, especially if you plan to store seaming tools and tools.
The thicker the wooden shelf, the more fasteners it requires. Also, its strength is determined by the distance between the support posts: the more massive the structure, the smaller the gaps.
To make using the shelves convenient and safe, the heaviest items must be moved down. The width of the projections should decrease from bottom to top. The standard shelf width for canned food is 30 cm. The height depends on the size of the items.
The photo shows a pantry with a wide aisle between wooden shelving.
Tools for work
To understand what tool is needed for the job, you need to clarify what exactly needs to be done. If the material for the shelves is not prepared and needs to be trimmed and sharpened to the required dimensions, then it is imperative to have a jigsaw or a hacksaw for wood and a plane. They will help you make shelves of the right size. You will also need sandpaper to sand the edges of the cuts and give the shelves a finished look.
Tools needed for work.
You need a hammer drill to create holes in the wall for dowel-nails to attach brackets, and a screwdriver to connect parts to each other, if necessary.
This is enough to ensure that the pantry has good and reliable shelves on which you can store anything.
You will definitely need:
- Tape measure, for creating markings and measuring distances;
- Construction level so that the rack with shelves is level;
- Pencil or colored chalk for marking the wall.
When you have prepared all the materials, you can begin the process of installing them in place.
How to make a bookshelf yourself?
A bookshelf is one of the most popular options for homemade wooden shelves. It fits organically into the interior of a small room, is comfortable and practical. Wood is an easy-to-work material, and shelves made from it are practical, comfortable, durable and easily fit into any interior.
Classic wall shelf
One of the classic options will be a shelf with three cells measuring 100 * 40 cm. The design provides a small upper side 10 cm high for additional placement of a number of books.
To work you need to stock up:
- jigsaw,
- sanding machine or sandpaper,
- drill, screwdriver or screwdrivers,
- screws or self-tapping screws,
- square,
- brush,
- varnish for wooden surfaces.
The calculation of the dimensions of the parts was made for a board with a thickness of 2 cm.
Step-by-step instruction
First of all, you need to cut out 2 long pieces:
- 50 cm,
- 96 cm,
- 26 cm.
Then they get to work.
- The wooden parts of the future shelf must be sanded or sanded.
- Assembly begins from the bottom, which is fixed in the side walls at a distance of 1 cm from the edge. This will make the product look more interesting. Fastening is done using self-tapping screws.
- On the inside of the fixed base of the shelf, you need to mark the places for attaching additional supports. With the same cell size, the step will be 32 cm from the side wall on each side.
- The inner walls are attached to the base strictly at right angles.
- I secure the top lintel of the shelf.
- If the design does not provide a back wall, then it is recommended to reinforce the shelf with metal corners.
- The shelf is treated with stain, dried and varnished. Varnishing usually occurs in 3 stages with an interval of 12 to 48 hours for surface drying.
Taking this option as a basis, you can make a bookshelf yourself.
Choosing a place for a shelf
When thinking about how to make shelves in your pantry, it is important to decide on the location. The place where the shelves will be attached should be chosen taking into account many factors.
The wall on which it is planned to mount must be load-bearing.
This is the key to the strength and durability of the structure. A thin interior partition may not withstand the load and shelves filled with heavy objects will collapse.
In addition to boards, you can use particle boards, plywood and other suitable materials.
If the fastening is not carried out directly to the wall, then you can use your imagination in accordance with the desired shape of the location.
Consider the dimensions of the items you intend to store.
It is important to prepare the storage room itself, level and tidy up the walls in advance so that the shelves stand up straight and there is no need to adjust them to the topography of the wall.
It is worth taking care of lighting before the installation of the rack occurs.
How to cover a wooden rack
In a dark closet, aesthetics may not be so important, but if we are talking about a balcony or loggia, the appearance of the rack already matters. Ordinary pine looks boring, and using species with a beautiful texture is expensive and not very smart for an ordinary commercial structure. An excellent compromise in this case is the use of stain.
An inexpensive tinting composition will turn boring pine into dark wenge, stained oak or other expressive wood. The magic of cheap finishing - and ordinary shelves turn into a loft-style shelving unit. What is important, when working with stain at home, the apartment will not become a painting shop, with all the ensuing consequences. Most stains are odorless, and all the consequences of working on linoleum or parquet are easily washed off with ordinary soapy water. Do you like this decoration idea? Then read our detailed guide to stains, in which we talk about the intricacies of working with each type of composition.
In a damp garage, and even more so on the street, aesthetics fade into the background. Here the primary task is to protect the wood from damaging external factors, so painting the wooden shelving is the optimal solution.
A reliable film coating will protect the wood from the destructive effects of moisture and other adverse factors. What paint to paint a wooden shelving unit? We would recommend using alkyd or oil-based compounds with a preliminary application of a special primer, so as not to go broke on paint that will sink into dry wood, like sand. Read more about how to choose paint for exterior woodwork here.
Manufacturing and installation process
So, the place for the shelving has been chosen, all the tools and materials have been prepared, the layout of the shelves has been made on paper, and all the dimensions have been verified and calculated? You can begin the main process of making shelves and installing the structure.
- The first thing to do is to use a tape measure and a building level to apply markings to the wall, which will serve as the basis for the fastening.
Using a tape measure, mark the height of the shelves in the center of the room and using a laser level, draw horizontal lines.
Using a hammer drill, you need to make holes in the wall in the places where the brackets will be attached.
Using dowel-nails, guide profiles are attached to the walls.Secure the bases for the brackets and install them.
How does this rack compare favorably with others?
- There are no complex carpentry joints here, and all load-bearing units are as strong as possible. This is mainly ensured by the use of double drawers.
- The rack is made from simple and affordable lumber: square or rectangular timber and a narrow edged board. By correctly calculating the material, you will not have any scraps.
- All parts are straight cut and can be easily produced in series by sawing a stack of boards in one pass. If you don’t have a miter box or saw, a simple miter box and a hand saw will suffice for accurate cutting.
- You can easily change the height and width of the rack, the number and depth of shelves. And also, if desired, this rack can be made corner or U-shaped. The drawing is maximally adaptive.
- Despite all the reliability and stability, the rack is very light and mobile. It can stand on its own or be anchored to the wall. It is better to do rigid installation if the height of the rack exceeds 2 m.
Installing shelves in a pantry
Wooden shelves for a pantry can be made with your own hands in 2 ways:
- without installing vertical posts;
- on a frame made of timber or metal.
For the safety of home owners, it is better to secure the racks firmly to the wall. But sometimes the frame version is made mobile and free-standing.
To make a frameless structure, you only need boards or sheet materials of the required length and width. Corners, brackets or short pieces of bars are used as supports. The length of each segment should be slightly less than the depth of the shelf. Frameless structures are most often assembled when the room is small and the size of future shelving will not exceed 1.5 m.
Construction begins with marking the walls: the height of the lowest tier above the floor is determined, 2 marks are placed on the wall, and then the operation is repeated on the opposite side of the room. Before installing supports under the shelves, it is advisable to check the horizontality of the resulting surface using a building level standing on a board, the edges of which are aligned with the marks on the opposite walls. Having leveled the first shelf, mark the places for drilling holes for dowels.
Hammer the dowel capsule into the drilled holes. Make through passages for self-tapping screws in the bars and secure the supports to the wall. To mark the next tiers, use the installed bars as a zero mark. Fasten the bars at each level in the same way: using self-tapping screws and dowels.
When the supports are installed, cut the boards or plywood into pieces of the required length and sand the cuts. The shelves can lie freely on supports, but for greater strength, it is better to fix the horizontal parts with self-tapping screws to the bars. If brackets are used instead of corners, they must be installed on a long wall inside a niche. The pantry shelves will rest on the parts of the support protruding in front of the wall.
Frame rack
The frame supports can be fixed to the walls or screwed to the ceiling and floor. In this case, the part farthest from the facade is checked with a plumb line for verticality, and fixed on the side wall right in the corner of the pantry. For the front supports, set the desired depth of the shelf along the side wall, place marks and align the verticals and the offset of the front part of the tier. The stand is attached to the side wall with dowels. For horizontal supports, you can install only side elements, as in the frameless version. For heavy loads, it is rational to place 2 long supports between the sidewalls.
To create a mobile structure, use a light metal corrugated pipe or a 5x5 cm block:
- Cut out 2 pairs of posts at a randomly selected height. Their number may be greater if the rack is longer than 2 m. Additional racks are placed every 1-1.5 m.
- Connect the verticals in pairs. The horizontal parts will serve as support for the shelves, so the distance between them is regulated by the needs of the owner. The result of the work is 2 or several staircase-like structures.
- Cut 4-6 longitudinal connecting elements. They will help to combine all the frame posts into a stable structure. They need to be fastened on the inside of the paired vertical “ladders”, under the jumpers between the posts. These parts are placed at the bottom, top and middle of the frame. After this, the structure can be moved.
- The frame installed in the desired position should be equipped with horizontal shelf parts. To ensure the neatness of the product, choose wood at the junction of the shelf and the racks. The finished floors are placed on the frame supports. If necessary, you can fix them along the contour with self-tapping screws.
It is advisable to paint the finished product to protect it from rotting and corrosion.
Non-standard use
If you don’t want to store construction tools, an ironing board or food supplies in the pantry, then you can pay attention to bold and unusual solutions. Non-standard use will make a small space as efficient as possible
If you often work at home or like to spend your free time at the computer, then a small closet can be equipped as a work office. Place a table with a chair behind the door, and small shelves on the walls. You can also use the door for various hooks and hanging shelves. But this method of arranging a pantry is suitable only for neat people who can give up free useful space for storing things.
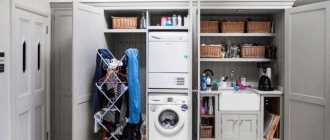
If the pantry is located next to the bathroom or kitchen, then you can even organize a laundry room. There is also room here not only for a washing machine, but also for shelves with powders and conditioners, for a basket with clothes and a small dryer. This method will significantly save space in the kitchen and bathroom. And for greater functionality, you can provide and attach a folding ironing board to the pantry door.
Tips for choosing
When choosing a shelving unit for your pantry, you should consider the following basic recommendations:
Choose a model with high legs or free space below
Eliminate plastic varieties from your options. Despite the assurances of the sellers, this item is impractical. It will not last long, and under accidental mechanical load it may even break off from the base. Focus on the parameters of the room, taking into account the height of the walls, choosing the permissible width and depth of the model
Don't overpay for a brand name. Advertising is not always an indicator of good quality of a product. To evaluate the performance characteristics of products, study customer reviews on furniture forums. This will allow you to understand which model is worthy of purchase.
Original options for shelving structures
Anyone who believes that a rack is a rough frame with shelves is deeply mistaken. Indeed, for the basement and garage you don’t have to imagine too much. Strength, durability and functionality are the main slogans for these premises.
For the home interior, on the contrary, I want to do something special and non-trivial. Therefore, home-made masters spare no time and effort to capture our imagination. A couple of oak boards and a few glass bottles are all that is needed to create an original design.
Photo No. 1 Rack made of bottles and boards
Despite its simplicity, the strength of such a rack is quite high. You can store not only books on it, but also use it to display your wine collection.
Anyone who has dealt with high shelf structures knows that without a good ladder it is impossible to reach their upper tier. Why not use shelves as steps - a resourceful person thought and created such an original system.
Photo No. 2 Rack-ladder
The classic frame shelving rests on the floor, and to install the rope shelving you only need two hooks in the wall. Of course, it won’t be possible to store heavy cans of preserved food on it, but it is perfect for books, photographs and souvenirs.
Photo No. 3 Hanging rope rack
You can make a rack with your own hands so that others will appreciate your creative nature using steel water pipes and fittings. This design looks perfect in an industrial-style interior. In addition, it is quite appropriate in an ordinary apartment.
Pay attention to the original way of mounting the shelves. They are mounted on racks according to the principle of a children's “pyramid”, tier by tier
Photo No. 4 Rack made of water pipes
This rack does not have rear support posts. The high rigidity of a steel pipe reinforced with tees makes it possible to eliminate them. This design can be placed anywhere: in an apartment, on the veranda, in the attic or cellar.
If your house has a staircase leading to the second floor, then the free space under it can be adapted for shelving. It will turn out functional and beautiful, as in photo No. 5.
Photo No. 5 Shelving under the stairs
Having studied the original homemade options, we will consider the sequence of design and assembly of wooden and metal shelving.


