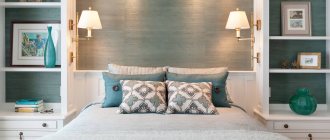
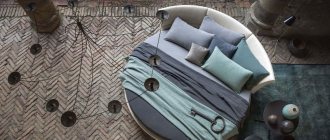
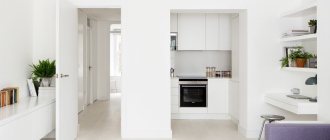
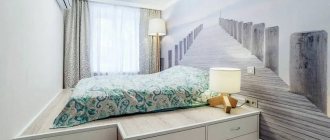
Various “caves” are often included in apartment layouts. With some creativity, a recess in the wall can be turned into a useful space. Place a comfortable bed in it. Do not turn it into a banal storage room or utility room. Make your small one-room apartment cozy.
Even when there is no alcove, you can make it yourself. Anyone who is comfortable with a hammer and a screwdriver will be able to cope with such a not at all difficult task.
A feeling of comfort and security are important motives for turning a “hole in the wall” into a cozy nest.
Interior finishing options
Today, a wide variety of interior finishing models for building niches are available to craftsmen. All finishing materials are available at any hardware store at reasonable prices. At the same time, the master will have to take into account the complexity of the design, the cost of the material, and the future design.
Design styles
When decorating a niche, you need to choose the same style that is present in the bedroom. The recess in the wall, which has turned into an architectural ensemble, should be harmoniously combined with the general mood and stylistic direction.
If a modern style was chosen to decorate the bedroom, then geometric motifs should predominate in the interior. This also applies to niches. Its shape should be clear, with clearly defined angles.
Wall cladding can imitate natural materials (wood, stone, brick), metal lamps are installed, characterized by a special laconicism.
The niche of a classic bedroom is decorated in pastel colors and does not stand out particularly against the general background in color. It can only be indicated by a more pronounced wallpaper pattern.
Classic niches have softer shapes: rounded corners, arched silhouettes. The boundaries of the wall recesses are marked with baguettes or stucco molding.
Lighting can come in the form of elegant wall sconces or table lamps mounted on a small shelf at the head of the room.
There are frequent examples of decorating a bedroom in an oriental style. In this case, niches at the head will make the bed truly royal. They take unusual shapes known as Moorish arches.
The built-in structures are located at different heights and are filled with various decorative items of oriental themes. These can be brightly decorated vases, stylized lamps, figurines and other beautiful little things.
How to make a niche under a bed
How difficult is it to create something like this with your own hands? In fact, everything is much simpler than it might seem at first glance. The main thing is to have a clear idea of what you need to get in the end, to have a tool and the ability to work with it, and a desire to make your life more comfortable.
Setting up a bed inside a niche
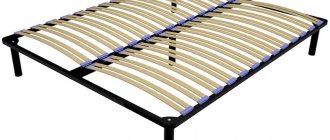
As you already understood, such a design has three main parts: the bed itself, which can be purchased separately or presented in the form of a mattress; podium (not always used); partitions and boxes.
Podium
Let's look at what and how all this is made, and we'll start with the podium.
Table. Instructions for making a podium.
| Photos, steps | Description |
Step 1. Determining the level | In this example, the bed is not located in a niche, but for us this will not matter, since the work is done in exactly the same way. So, the first step is to take a level (water or laser), with which you mark the perimeter of the walls at the desired height. Advice! You can use a bubble level, but be prepared that this tool may produce an error, which is not critical, but unpleasant. |
Step 2. Installation of base beams | Next, along the perimeter of the walls (according to the marks), we fix the beams cut to length. In our example, the master does this with metal anchors. This solution may not be suitable for a niche, especially if it is made of plasterboard. In this case, wooden mortgages are made inside the structure, resting on the floor, to which the beams are tied with powerful screws. |
Step 3. Installation of load-bearing beams | At the next stage, load-bearing beams are placed across the main ones. They need to be installed every 40-50 cm, and secured with long self-tapping screws. |
Step 4. Installing vertical posts | The main beams are quite securely fastened to the walls, but over time the connections will begin to loosen and sag, which can lead to unpleasant consequences. To prevent this from happening, it is necessary to install vertical racks under these elements, which will take the main load. At least 3 of them need to be installed on a two-meter beam. The racks, just like the beams, are connected to the walls, but you can already use plastic dowel screws. |
Step 5. Installing the central verticals | We use powerful timber as beams, but it can also bend under loads. To make the bed reliable and squeak less, we install vertical stands under these elements, in the amount of 1-2 pieces. These racks will help you divide the space under the niche into sections if you plan to install drawers inside. |
Step 6. Installation of plywood | Having thoroughly strengthened everything, we sheathe the resulting structure with plywood. The ideal material thickness would be 20 mm. |
Step 7. Putty | Those parts of the structure that remain visible must be puttied. An elastic wood putty is used, which will then be sanded to a perfectly smooth state. The surface is subsequently covered with paint. |
Step 8: Finishing | After painting, the boxes are assembled and installed (if planned), and the surface of the podium is refined. In this case, it was decided to cover it with laminate. Everything turned out beautifully and neatly as a result. |
Bed accessories
Plasterboard niche
If you have ever worked with drywall, you should not have any difficulties; if not, then read carefully, and everything will definitely work out. You are free to enter any form, so we won’t pay attention to that now. Our task is to understand the principle of construction.
Table. Instructions for creating a niche.
| Photos, steps | Description |
Step 1. Marking | First of all, it is necessary to apply markings to the walls, floor and ceiling. This is necessary in order to accurately mount the wall profile PN 50*40. The easiest way to do this is to use a laser axle builder. If desired, it can be replaced with a plumb line and a water level. You will also need a pencil, tape measure, and a lace tap to quickly draw straight lines on the indicated surfaces. Attention! If the partition is parallel to the finished wall, then when making markings, it is necessary to shift it in depth by 12 mm - the thickness of the wall plasterboard layer. |
Step 2. Installation of guide profiles | According to the completed markings, U-shaped wall profiles are attached. They are mounted using dowel screws or self-tapping screws if the fastening is to wood or a plasterboard surface. The width of the PN profile used is selected according to the planned thickness of the partition. Standard option – 50*40 mm. |
Step 3. Installing the rack profile | Next, the PS 50*50 rack profile is installed - it has stiffening ribs, which allows it to better resist bending. It is rigidly connected to the guides, which is easiest to do using a cutter, as shown in the photo. The step between the rack profiles is 60 or 40 cm. |
Step 4. Strengthening the frame | If there is a doorway in the partition, then the racks framing it must be reinforced with wooden beams of the appropriate section. The remaining racks should also be strengthened, for which the following technique is used - the profiles are paired to form the letters “H”, as shown in the photograph. They are connected to each other with self-tapping screws. |
Step 5. Sheathing with plasterboard | After this, the frame must be sheathed with sheets of plasterboard. They are fastened with metal screws 25 mm long. The installation step of the screws is 15-20 cm. The work is done quickly and quite easily. The main thing is to ensure that the joints fall exactly in the middle of the profiles. |
How to cut drywall
Subsequently, the drywall is puttied and finished with various materials. The most popular solutions are painting and wallpaper, but for these purposes you can use the most unusual options, which will make the design of the bed unique.
Decorative painting
For those who do not like interior decoration and large-scale renovations, there is an alternative option - stencil painting. For this purpose, a set of stencils (sets of PVC films) and acrylic paints are used.
The surfaces of the niche walls are pre-coated with plaster or liquid wallpaper. After the coating has completely hardened, you can proceed directly to the design of the alcove.
This method is especially popular for decorating children's bedrooms, because with the help of paints and a brush you can draw a whole fairy-tale plot in the room and create a fascinating atmosphere.
Types of hidden beds in the floor and wall
Bed under the podium for small and narrow rooms
In fact, this is a bed with a pull-out mechanism, hidden under a frame, above which there is a work desk, sitting area, etc. You can make a podium with your own hands, but you will have to order a retractable mechanism with wheels. Suitable for small children's rooms for two children where space needs to be zoned.
Podium bed with a sitting area on top
Transformable bed for studios and one-room apartments
A sleeping place hidden in a closet can be designed in two ways: hidden in a niche and covered with closet doors/partition/curtain, or order a wall where the bed is raised and hidden in the wall. The second option is more suitable for studios, since the design is usually a desk, sofa, wardrobe and bed at the same time.
Transformable bed hidden in the closet
Decor elements
In a studio apartment, the bedroom is located behind a partition
With the current variety and relative cheapness of building materials, as well as advances and technologies in the field of woodworking and paint and varnish industry, there is a great variety of different layouts and interior design solutions for apartments. The information content of our time allows us to learn innovations almost first-hand and combine different styles.
Decorative plaster
A niche covered only with decorative plaster has an advantageous design. The walls, bottom and ceiling of the alcove are white and blend perfectly with other interior features.
In addition, this finishing method does not require special skills and abilities, and the material is adequately durable. Before applying plaster, all surfaces must be coated with 1-2 layers of primer, which will increase the adhesion of the plaster to the underlying wall.
TV installation
Construction niches located on the wall opposite the bed are used as a platform for TV and music speakers.
If the size is sufficient, shelves or holders for disks and flash cards can also be installed there. However, it is worth remembering that a TV in a niche in the bedroom requires high-quality protection from moisture.
