The beauty of interiors and adjacent areas is created not only by construction and finishing materials. They will not look so impressive if you do not complement them with decorative elements, contrasting spots and interesting shapes.
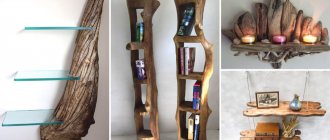
These properties are combined in decorative furniture, for the manufacture of which unusual materials are used. Furniture made from driftwood and branches is worth trying your hand at making unusual tables, chairs, armchairs and small decor.
Working with wood in its natural form requires experience and artistic vision.
Garden furniture made from branches and driftwood
A huge number of garden furniture options can be made from ordinary branches, tree roots and driftwood. Seemingly trash can turn into real masterpieces of garden decor. The cost of original works of folk craftsmen made from branches and driftwood is quite high. But, if you show your imagination, you can make similar elements of garden furniture yourself. In terms of practicality and beauty, handmade furniture will be no different from its expensive counterparts.
In order to make a beautiful bench, sofa, stand or shelf, the material must be prepared in advance. In order for garden furniture to be in the same style, it is necessary to gradually select interesting specimens of driftwood and process them.
Before you begin assembling furniture, the bark must be removed from snags and branches. The material must be thoroughly dried. In order to prevent the effects of insects and rotting processes, the wood must be treated with antiseptic and antipyretic agents.
Driftwood chair
Bench made of driftwood
The advantage of furniture made from branches is that to make them you only need the branches themselves, a screwdriver and a hacksaw. Even fragile girls can assemble the simplest furniture from branches using only twine or any other textile material.
The finished product is given the desired shade using stain and varnished. You can also use acrylic or enamel paints for coating.
Bench made of branches
A bench is an essential element of any summer cottage. Today, such structures perform many important functions: from their intended purpose to giving the garden a unique design.
Many owners of suburban areas prefer to build benches themselves, since this simple task will not take much time and money.
There are several basic materials that are used as the basis for constructing benches.
Wood
The most popular option is wood. It is believed that it is from this material that the most aesthetic designs are obtained.
Due to the universal aesthetic characteristics of the material, wooden benches fit perfectly into the landscape of any garden
It is important to consider that the benches are always in the open air. Therefore, it is necessary to choose those types of wood that are characterized by maximum resistance to atmospheric conditions.
These include: hazel, oak, cherry pine, and larch. For additional protection, the material is coated with a special varnish.
Metal
Metal is popular for the production of benches for many reasons: durability, practicality, resistance to precipitation, ease of use. As an optimal option for the garden, openwork structures with interesting patterns are most often made. As an alternative, you can stick to minimalism.
Stone
Stone benches are impressive and monumental. Main materials: granite, marble, quartzite. In some cases, rough stone is used to create a unique design, in others, stone with a smooth surface is used.
Plastic
Plastic is the most affordable, convenient option. It is considered more seasonal and budgetary than aesthetic and decorative. However, if properly designed, a plastic bench can become a garden decoration. Colorful pillows, lanterns, flowers and much more are often used for decoration.
DIY bunk bed for children
In a family with two children, installing a bunk bed for children will help to significantly expand the area of the children's room.
If you have experience in carpentry and the appropriate tools, making such furniture will not be difficult. A beautifully made bed on two levels will create a comfortable atmosphere in the room. What to make a bunk bed from
Of course it's a tree. Usually they resort to softwood lumber. Timber and boards are most often used as furniture assembly elements.
Dimensions
Before you start making a two-level bed, you need to make a detailed drawing of the furniture indicating the exact dimensions. All details are combined into a single specification in order to understand what and how much to buy.
The width and length of the structure are calculated taking into account the fact that children, upon reaching adolescence, should not be constrained by the size of their beds. Therefore, the stock is made 1.9 m long and 0.9 m wide.
The height of the furniture should be such that the top cover does not hang over the child sleeping on the 1st level of the bed. The height of the lower platform from the floor must be at least 400 mm. This is necessary so that the child can not only sleep, but also feel comfortable in a sitting position.
The distance between the 2 levels must be at least 110 cm. The height of the upper fence is made within the range of 490 - 500 mm. The fence is necessary to prevent the child from accidentally falling down while sleeping. The height of the furniture from the floor to the top of the fence will be 1.9 m.
The ladder is very important. It is made from edged boards and timber. The ladder must be securely fastened to the furniture body. It is made with a width of 350 - 400 mm. The steps are spaced in increments of 250 mm.
Of course, this is not a dogma; homeowners can make their own decisions about the size of sleeping places. The main thing is to ensure complete safety for children in bed.
What is needed to make children's furniture?
First of all, you need to prepare tools and stock up on lumber. Skilled people will always have timber, boards, hardware and the necessary tools in stock. If you can’t get something, you need to make purchases at a hardware store.
Materials
To assemble bunk furniture you will need:
- timber 5 x 7 x 200 cm – 4 pcs.;
- timber 1 x 4 x 200 cm – 6 pcs.;
- edged board 10 x 2.5 x 600 cm – 4 pcs.;
- screws 90,70 and 30 mm – 100 pcs.;
- furniture varnish – 2l;
- fiberboard sheet 2.44 x 1.22 m.
Tools
- drill-driver;
- grinder with emery wheel;
- angle machine with abrasive wheel;
- hammer, screwdrivers, tape measure and brushes;
- wood hacksaw;
- pencil.
Step-by-step instructions for assembling a bunk bed
- A 10 x 40 mm beam is sawn into pieces for frames and staircase steps.
- The edged board is sawn into pieces for fencing and vertical posts for stairs.
- A beam of 50 x 70 mm is cut with an angle machine into 4 support posts, 2 m long.
- Form 2 frames, connecting the pieces of timber with screws.
- Fibreboard sheets are installed around the perimeter of the frames using a screwdriver.
- Assemble the stairs from edged boards and 10 x 40 mm timber.
- Cutouts are made in the support pillars for installing frames.
- Mount the bases under the mattresses, securing them with screws.
- Install the ladder using a screwdriver.
- Fences made from edged boards are secured.
- All furniture surfaces are cleaned with an emery wheel. They also smooth out all the corners of the wood.
- The entire structure is varnished in two layers.
- The screw heads are covered with plugs to match the color of the furniture.
Expenses
- timber 50 x 70 mm – 8 m = 360 rubles;
- timber 10 x 40 mm – 12 m = 120 rubles;
- edged board 100 x 25 mm – 24 m = 600 rub.;
- fiberboard sheet 2.44 x 1.22 m = 180 rubles;
- screws = 100 rub.;
- furniture varnish – 2 l. = 100 rub.
Total: 1460 rubles.
The bed is ready. All that remains is to put the mattresses, make bed linen, put pillows and blankets. In some cases, furniture is painted with white enamel. You can use nails instead of screws.
Woodpile
How often, when walking through a forest or park, we see thick dry branches broken by the wind, snags or pieces of rhizomes. It's a shame to pass by such material. A person with imagination immediately imagines a beautiful, functional thing. Crafts made from tree branches can decorate the yard of a house or the interior of a room.
Man instinctively associates himself with nature and considers himself a part of it. Therefore, any natural material - stone, wood - brings comfort and tranquility to your home. Wood is a warm material. It absorbs moisture and creates a healthy microclimate. It’s not for nothing that in a log house you can breathe so easily and sleep well. The best bathhouse is also wooden. You can put unusual furniture made of branches in it - a bench, a hanger, stools. It smells of pine resin and birch broom. This adds vigor and strength.
What can be made from driftwood and branches? You can make pieces of furniture and decor from different parts of wood.
You can’t put furniture made from stumps in your house or on your veranda. But such an armchair or stool is well suited for a yard or summer cottage
An original solution for a table and seat made of stumps and thick branches will attract the attention of your neighbors and guests. In order to make such items, you need to have artistic taste, woodworking tools, time and patience.
The main advantage of stump furniture is the lack of materials costs. Everything can be done even without nails using a hacksaw.
Furniture made from stumps and driftwood will harmonize with the rustic style of the site. A real or decorative well made from a log house, a wattle fence made from willow twigs or a fence made from thick branches will look good.
The simplest solution is a bench made of two stumps with a thick board placed on them. You can leave it without a back, or you can equip it with a back made of sanded thick branches. It will be beautiful and unusual. This will be a combination of furniture made from branches and stumps.
Even the marks of time that inevitably appear on the tree do not spoil the appearance of garden items and look natural.
Furniture made from roots and stumps is massive and durable. From a solid tall stump you can use an ax to cut out a chair or a chair with a backrest. The root can be planted on the armrest of such a product.
The most difficult thing is to deliver the forest material to the site and load massive logs or stumps onto the truck.
Stumps are used to make stable stools. They are also sanded and varnished. You can decorate the body of the stump with carvings. The top is colorfully decorated with colored glass or flat stones. They are glued to liquid nails or epoxy resin.
Furniture made from driftwood and thick curved branches are real fairy-tale creations. Product parts are fastened together with self-tapping screws and wood glue, depending on the configuration of the items. Furniture made from branches gives room for imagination. From this material you can build something like a small gazebo. It is good to plant wild grapes near it, which will eventually entwine the tree.
The material for a garden chair, sofa or chair is cleaned of soil and dirt, the bark and top layer of the rhizome are scraped off to light wood, and impregnated with stain and varnish.
Furniture made from branches creates the feeling of openwork weaving.
The garden plot of creative owners is inhabited by fairy-tale characters - goblins or birds - products made from driftwood, gnomes made from tree roots and other forest inhabitants. Logs turn into bears, frogs - princesses and other figures.
To make furniture from branches or furniture from stumps, the wood must be well dried so that it does not rot. To protect against bark beetles, it is treated with antiseptic compounds. DIY crafts made from branches add a romantic style to the interior. You can make an exclusive thing with your own hands.
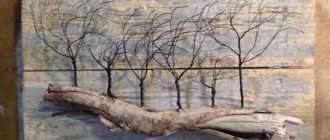
There are many varieties of such crafts. Handmade crafts from tree branches include wall decoration, various vases, figurines, candlesticks, coasters. If you want the masterpiece you made to decorate your interior for a long time, you need to choose the right material for it.
Style for the creative
An interior containing furniture made from driftwood and branches is called rustic. Some consider it a rough, even brutal variety of country style.
The classic design features wood floors and paneling and dark beamed ceilings. All this visually reduces the size of the room, so it is rarely used for apartments. But in country houses, in the country, in a bar, sauna or as garden furniture, this is the best option. And one hundred percent exclusive that you can be proud of. Fans of everything non-standard will appreciate it. In a modern interior, such things or a wall panel with imitation of living trees claim to be conceptual.
And even a stump
If a stump has formed on the site, you can use it as the center of the composition, surrounding it with logs. The main thing is that the hemp furniture has an even cut - the table and chairs will be stable. If desired, they are supplemented with backrests made of branches and pillows are placed.
You can even use an old rotten stump as a flower pot. They are placed in the rotten middle only in a pot so that the wood does not completely collapse, and if there is moss and other vegetation on the stump, this is only a plus: they will add decorativeness.
The quirkiness of roots, branches or driftwood creates endless scope for implementing the most unexpected solutions. They are fabulously beautiful and at the same time look cozy, but most importantly: they exist in a single copy.
How does such wood appear?
The basis for the appearance of snags is a living and dead tree, as well as its parts.
When a plant weakens or ages, its immune system can no longer effectively resist various pathogens and pests.
Therefore, damage appears in some areas, changing the properties of the wood.
Over time, damage leads first to death and then to decay of the wood, as a result of which part of the plant loses strength and is destroyed by wind, rain or other factors. Since there is no clear boundary between normal and damaged wood, the damaged areas take on the most bizarre shapes.
If destructive processes occur on a tree, then over time the damaged fragment breaks off from the trunk or roots and turns into a snag, that is, a severely damaged piece of any part of the tree.
If a branch or trunk breaks off from the tree even before the damage, then it will become a snag only after various microorganisms have sufficiently damaged it , and these defects will be noticeable even with a cursory examination.
If the damage affects the roots, then they turn into snags after the trunk breaks off from them, and the root system comes out of the ground under the influence of various factors.
Bench with backrest with tongue-and-groove joints
The next project is an outdoor wooden bench with a backrest. It has a fairly strict appearance and will become a functional decoration in any garden or dacha. The vertical slats of the back give the massive structure visual lightness. Shaped armrests and a curved top bar add Japanese influences to a clean, classic look. It is simply created for carefree contemplation on shady alleys, and will look even more expressive surrounded by greenery and flowers.
If in the previous two projects we talked about how to make benches using simple carpentry joints, then here we will talk about the classic tenon-socket connection. It underlies all design elements of the project. You will have to make a lot of spikes and nests, so it is advisable to think about optimizing this process in advance. The simplest and most affordable option is to use a hand router and a saw table.
Advice! For accurate and quick selection of slots, use a homemade milling template with slots of the required sizes.
Drawing of a bench with a wooden back
Advice! Decorative antique finish perfectly complements the simple design of this wooden bench with a backrest. Use the brushing capabilities to texture individual structural elements - the top crossbar, the middle backrest and armrests. The combination of smooth and aged surfaces will create an original design contrast.
Prepare the details
According to the dimensions specified in the drawing, make the main parts of the bench. To quickly apply markings, use pre-prepared templates. Duplicate parts can be mass produced. After cutting, fasten all the identical parts into a pack and process their ends with a sander, this will significantly speed up the work process.
Make spikes
On the saw table, form tenons on all tenon pieces, following the dimensions from the diagram. Using a groove disc will make this job much easier. This can be done no less carefully with a regular saw blade, followed by trimming the waste with a chisel, as shown in the photo.
Mill out the sockets
Assemble the sidewall
Perform dry assembly of the sidewall. If the joints in the structure are not tight enough, fine-tune them using one of the methods we discussed in the article “Perfectly Fit Joinery Joints.”
Carry out sequential gluing of the structure
After checking the accuracy of the fit of the connections of the entire bench, proceed to sequential gluing of the base elements first, and then the back. After the glue has completely dried, attach the seat strips with self-tapping screws.
Links to thematic forums
Homemade items made from driftwood are in great demand, so authors often discuss their works on thematic forums and share their experience there on what and how to do.
We have prepared a list of the most authoritative forums where you can get a lot of useful information:
- Forumhouse;
- Aquaforum;
- International Aquarium Forum;
- Farm "Nut Orchard";
- Forum about repair and construction;
- Club of decorative gardening lovers;
- Forum of aquarists of the Primorsky Territory.
Furniture made from stumps and solid wood cuts
Stumps are an excellent material for making stylish, inexpensive and completely unique furniture with your own hands, because in nature there are no two absolutely identical trees. Such stump furniture will fit into almost any interior, be it light classic or country, Scandinavian style or minimalism, loft or industrial. If the stump is painted in glossy or metallic shades, then even high-tech can organically accommodate such an object. A processed cut of a tree trunk or stump can become a comfortable coffee table in the living room, a bedside table in the bedroom, stools in the kitchen or a table in the bathroom. Most often in the interior, a stump is used as a cabinet or table.
How to make a table from a stump with your own hands
First, find a suitable tree stump to create a table or cabinet. This is not so difficult even if you are a purely city dweller without a dacha. Firstly, there are a lot of companies that deal with wood - logging, sawmills, and so on; you can purchase cut wood of the desired size from them. Secondly, we advise you to interview all your acquaintances and friends who have dachas or relatives in villages; they probably have supplies for firewood or uprooted stumps. And thirdly, you can take a saw, go into the nearest forest, find a fallen tree and cut it into pieces.
The stump should be dry, but not rotten. If the bark comes away from the trunk easily enough, then such a stump can be used. If you find fresh wood, you need to let it dry. Leave such a stump for a month or two in a warm and dry room.
The bark must be removed from the trunk. To do this, take a chisel or chisel and carefully, using a hammer, remove the bark.
If you plan to use the stump not just as a decorative decoration, but as a functional piece of furniture, you need to level it. Using a building level, check how level your workpiece is. If the surface of the stump is sloped, level it with a plane.
Sand the cut of the stump and the side with a sander or by hand with sandpaper.
It’s good if the stump has an interesting natural texture with knots, cracks and chips. After you have processed and sanded the entire surface of the stump, clean the cracks of small shavings and dust. To do this, you can use both plumbing tools, a cloth, and a regular vacuum cleaner.
Any stump or cut of a log is beautiful in its natural form. But you can paint the stump in any color (after a coat of primer), apply patterns with a brush or using a stencil, or, at a minimum, open it with varnish or apply a water-repellent impregnation for wood. The latter is especially true if your future table will be actively used outdoors or in a room with high humidity, for example, in a bathroom. Remember that even one coat of varnish will darken the wood a little. It is recommended to apply two or three layers of water-based varnish, and after the last layer has dried, polish with a soft abrasive fiber.
Such a table made from a stump can simply be placed on the floor. You can also use shortened legs from old tables or stools, wheels or special stands
By the way, the use of legs, firstly, will protect your floor from scratches, and secondly, will raise the stump and ensure air circulation, which is important for the long service life of such furniture
Cabinets and tables made of stumps in the interior
Look at different options for tables and bedside tables made from stumps in the interior.
Tables made of stumps in their natural form with minimal processing (click to enlarge):
Painted stump tables:
Stools and chairs and stumps in the interior
There is practically no difference between a table and a stump stool. But it is obvious that sitting on a stump is not very comfortable. In order to make the stump a comfortable stool or footstool, you can simply put a pillow on it. You can also make soft upholstery with filler and attach it to the surface of the log. The presence of a back will make the stump chair even more comfortable. Designers and carpenters cut such a chair from a single piece of wood using a chainsaw, followed by processing. Some examples of using stumps as seats can be seen below.
Examples of do-it-yourself corner sofas
An example of a do-it-yourself corner sofa would be a design with a side part that rises upward. It is convenient to store any things in it. If there are often guests in the house who stay overnight, then a sofa that turns into a bed with one easy movement of the hand is suitable. For this purpose, special retractable mechanisms are installed.
Follow the instructions when assembling the sofa!
It can be very difficult to select the necessary sofa model in a store, since most often they offer standard models. And the instructions for assembling a corner sofa yourself are simple and even a beginner can handle it. The main thing is to study it carefully and without haste, because the future design will always be in plain sight and flaws will definitely not decorate it. This way you can easily make a completely suitable model for the interior.
Garden furniture made from stumps
It’s as easy as shelling pears to build soda furniture from ordinary stumps. Moreover, many stumps may remain after uprooting old fruit trees. In this case, the issue of transporting the material disappears by itself. If you show a little imagination and creativity when working, the resulting stumps can turn out to be unique, exclusive furniture that will not go unnoticed. For example, the seats of hemp stools can be decorated with mosaics made from pieces of broken dishes. Small pieces of broken saucers, cups or ceramic tiles are attached to the surface of the stump using liquid nails or epoxy glue.
Unnecessary stumps can become unusual firefly stumps, which during the day will decorate the garden or summer cottage and serve as an ordinary seat, and at night they will turn into lantern stumps. Such stools perform two tasks at once - they illuminate the garden area and expand its boundaries. Making such an element is very simple. It is enough to put a fluorescent or LED strip on a well-cleaned saw cut and cover it with plexiglass and secure it with self-tapping screws.
If you have the skills to work with a chainsaw, you can make an excellent chair from a tree stump. If the cut height allows, the chair will have a back and even armrests. For a chair with armrests you will need a tall and wide stump. It will turn out to be an analogue of the usual soft chair.
Stump - teremok
You will need: a stump, a log, a hammer, a saw, a chainsaw, a chisel, a hacksaw, tall grass for a broom, an elastic band or rope, for the path - pieces of roofing felt, fine gravel, a watering can with water, a regular broom, a fence, a brush, paint, toys.
Master Class
- Remove the core from the stump for doors and windows.
- Mow the tall grass and make a broom.
- Place a grass broom as a roof.
- Line the path to the tower with pieces of roofing felt.
- Cut the log into circles using a chainsaw, then lay them out on the roofing felt.
- Fill with fine gravel and sweep the gravel from the wooden circles with a broom.
- Fill with water and leave to dry.
- Put up a fence, paint the tower and place toys as residents.
The tree stump is ready!
Mandatory requirements for the bench
In addition to the previous nuances in the process of designing a product, it is worth taking into account a certain list of requirements that it must meet. The following must be taken into account:
- Safety
. You should not allow an unreliable design of the product, because this can bring a lot of troubles when using it. To ensure safe use, it is worth choosing only high-quality material, as well as fastening devices and any accessories. - Convenience
. Undoubtedly, such an item in the garden as a garden bench should be comfortable so that nothing interferes with the relaxation process. To do this, you need to approach the project creation stage very competently and carefully and think through all the details in advance. - Immune to influence of external conditions
. To ensure long-term preservation of appearance and service life, it is necessary to select only solid material at the assembly stage of the product. Additionally, it is worth treating it (if made from wood material) with special means that can provide protection to the product.
Step-by-step guide to creating a frameless model
Necessary materials and tools: furniture fabric of the desired type, 2 foam sheets, 7 pieces of zippers, reinforced threads, glue, sewing machine, measuring tape, chalk, sharp scissors; 8 foam blanks, 2 pieces each - square (80 by 80 cm), rectangle (60 by 80 cm; 20 by 80 cm; 30 by 80 cm).
- At the very beginning, you need to make four out of eight foam rubber blanks. To do this, each pair must be glued together using PVA glue.
- Making the first part. You need to find patterns for a sofa without a frame on the Internet. Let's mark 3 strips of fabric, size - 20 by 160 cm. Two parts need to be sewn in half, attaching zippers to them. Next we stitch the opposite two sides.
- Next you need to sew the squares and stripes according to the suitcase principle. We process the edges from the inside of the products using an overlocker.
The manufacturing method for the remaining parts is the same. Therefore, further we will consider only their sizes and some other nuances.
- We mark 2 rectangles (60 by 80 cm) on our fabric, then cut them out. Next you need to cut out a strip for them (20 by 120 cm). Next - two strips 20 by 160 cm. We assemble a cover from them.
- Next, you need to cut out rectangles with a size of 86 by 60 cm and four squares with a side of 20 cm. We attach zippers to the opposite edges of the larger element.
- At the next stage, we have to cut out four parts: these are 2 blanks 20 by 30 cm, 2 blanks 20 by 80 cm and a blank 80 by 78 cm. We need to fold 2 strips of the bottom and sew a lock along the fold line. Next, stitch all the products from the wrong side.
- Finally, we come to the last, most important stage - assembling all four parts of the sofa. Think from the very beginning how all the furniture pieces will be connected to each other. There are two connection methods. The first is stitching the blanks inside out. The second, and simpler one, is to sew a double strip over the joint. This way, one of the chairs will be ready. To complete the manufacture of the sofa, you need to do a similar operation with the rest.
Bench options
- A bench made of logs that blends well with the surrounding nature. It consists of half a log, used for a seat, and two short round logs, which are legs.
- A beautiful wooden bench with a back and armrests, reminiscent of a sofa. Curved and cut elements make it more attractive, while leaving knots and irregularities gives the structure a natural look.
- Bench made of wood and metal. The base of the structure is metal. The wooden parts of the seat and back are attached to it. The thin metal parts make it look lightweight.
- The bench has a simple, classic shape. It is made of wooden, rather wide boards. This width allows you to sit comfortably on the bench. Armrests make the design more complete.
- An original bench made of wood with figured details. This option is well suited for a site with a natural, rural design. Carved legs and armrests, a figured back - all this gives the product originality.
- A bench with an interestingly shaped back. The curved parts gradually bend back, creating a unique design. The seat is slightly curved but has a more traditional appearance.
- A set of wood – a table with two benches. The design looks traditional due to the material used. The original solution is to fasten all components into a single structure.
- The bench is made of solid logs. A single piece is cut out of it, combining the back and seat. The legs are attached to the bottom. The log required is quite large.
- Bench with a drawer for storing toys. Outwardly it looks like an ordinary wooden bench-sofa, but under the seat there is a drawer in which you can put various things.
- A comfortable bench made of wood with a simple shape. The base is made in the form of a rectangular box. The back is also simple with a straight shape. The seat has soft cushions for added comfort.
- Wooden bench located around a tree. It is made as if it consists of four benches, each of which has one armrest. The composition looks attractive and comfortable.
- A simple bench made of wide boards. It looks solid, but its size is somewhat hidden due to the gaps between the boards and the light blue color in which it is painted.
Design selection
The design of the entire table can be divided into two components: the choice of tabletop and legs.
When choosing a countertop design, it is important to consider some features of your room and your imagination:
- If you want a round or oval shape, then you should have enough space, because... it has impressive dimensions. Ideal for a large living room or hall, and also harmonizes with the gazebo;
- A small tabletop is a beautiful addition to a small living room;
- The rectangle shape is suitable for all occasions.
When choosing legs, rely solely on your taste. You can make a table with one, two, three or traditionally four legs.
What do you want the final version to look like? This is a purely personal question and depends on your taste and preferences. If you want something unusual, but nothing comes to mind, you can look at photographs of tables made from cut wood and make everything according to the sample.
Types of benches
Garden benches are traditionally divided into several categories. The criterion for division is location.
They are usually installed near the threshold, which determines the choice of material. Design experts insist that the appearance of the front bench should match the exterior of the country house. Thus, if the structure is made of stone, then the bench, accordingly, should also be made of stone.
water bench
The main purpose is to be able to spend time comfortably near a body of water. For the construction of structures, it is recommended to choose waterproof materials - artificial or natural stone.
Can be located virtually anywhere in a summer cottage. Plastic is usually used as a base, as it is lightweight and easy to maintain.
An indispensable option for hardworking summer residents. Garden benches are installed so that the owners of the site can relax comfortably while working in the garden. To ensure aesthetic pleasure that accompanies relaxation, the structures are located next to flower beds.
This variety can also be called a “solitude bench.” The fact is that it is customary to place them in the most remote places of the garden so that a person has the opportunity to hide from prying eyes. A popular material for manufacturing is wood.
Seasonal bench
This is a foldable design that is lightweight. This greatly simplifies the task of moving the bench from one place to another: in the summer - in the shade, in autumn or spring - in sunny places. The optimal material is plastic.
Rocking chair
It is generally accepted that swings in the garden are entertainment exclusively for children. But not everyone is ready to agree with this stereotype. You can make an amazing wooden hanging sofa swing with your own hands.
Tools and materials: pine beams, boards, hacksaw, hammer, tape measure, drill, nails, concrete mortar.
- First of all, we install side supports in pre-created holes (recommended depth is at least 1 m) and fill them with concrete solution.
- We install horizontal crossbars and secure them with metal corners. This will make the structure stronger.
- You should also install fixing plywood pads in the place where the beams meet.
- We install a crossbar in the gap between the side posts. You need to secure it with large nails. We screw in very strong screws.
- Attach chains to these screws.
- The last step is to attach the rocking seat of the size you need.
- If you strictly follow these instructions, your household will be able to enjoy swinging on this beautiful swing in your home garden or country house at least every day.
Self-production
Simple options
Even a novice summer resident who does not have too much experience in working with carpentry tools can make wooden crafts for the dacha with his own hands. Naturally, you need to start with simpler options, and then you can move on to monumental products that will become the central element of the landscape design of your dacha.
The manufacturing instructions below give only general direction. Otherwise, you should rely only on your own taste and sense of style. Don't be afraid to experiment.
Perhaps in the future your wooden sculpture will be a role model.
- The simplest option is plywood garden crafts. On a sheet of suitable size, you can draw out individual parts of a pony, donkey or goblin, cut them out and tie them together using strong twine.
- Another idea is small branches of fruit trees. They are suitable for making wall or floor planters. In this way you can make pots for house plants with your own hands. In this case, it is advisable to cover the interior space with plastic film to avoid soil spillage or insert plastic containers there.
- Having gained experience in working with a manual or electric jigsaw, you can begin making more complex crafts. Carefully transfer your chosen design onto the plywood and carefully cut it out. The finished wooden sculpture is sanded with sandpaper, cleared of sawdust and coated with varnish or paint to protect it from adverse environmental conditions.
- There are other DIY plywood crafts: for your dacha you can make not only garden sculptures, but also figurines that look natural in the garden. For example, plywood bunnies will be an unexpected detail decorating a carrot bed. The procedure for making them is simple: draw an outline and cut out the shape using a jigsaw.
Complex designs
For those for whom making country wood crafts with their own hands has already become a kind of hobby, you can offer more complex options - making a mill or a wooden well. Here, in addition to your desire, an accurate mathematical calculation is necessary, otherwise the cut out parts will be impossible to fit together.
You can also offer a simpler option:
- We saw planks of the same length, which will be the basis for the mill (you can use small blocks of suitable cross-section).
- We take two sticks and place them parallel to each other at a distance slightly less than the length of the element itself.
- The next two elements are placed on the laid planks (perpendicularly) (the whole process is somewhat reminiscent of building a log house only on a smaller scale). You can fasten the parts to each other using nails or glue.
- Having constructed a structure of the required height, we begin to build the roof. To do this, take four small blocks and connect them in pairs to form a ridge. Pieces of ondulin left over from the construction of the house can be used on the roof. Then the design will fit best into the landscape design of the site.
- The material for the blades will be two or three planks, fixed at an angle like an aircraft propeller.
- You can decorate the structure with a decorative climbing plant that will entwine one of the walls.
The well is made in a similar way. In this case, you can complement the composition with a miniature bucket and a bench. By fencing all this off, you will get a beautiful and unusual playground for children.
Do not forget that the wood must be treated with antiseptic compounds, varnished or painted. This will extend its service life and make the crafts more attractive.
Accessories
Furniture fittings are divided into internal and external. Internal fittings include hinges, door stops, stops, brackets, fastening strips, and external fittings include handles, supports, plugs and legs. External elements are made from materials with high decorative properties, and for internal fittings reliability is more important.
The production of any furniture product is not complete without the use of auxiliary accessories.
Experts divide fittings depending on technical functions:
- To connect parts to each other: all kinds of guides, handles, legs and fasteners;
- Rotating mechanisms: hinges, bearings, so-called swing devices;
- Transformation mechanisms: roll-out devices, lifts for tabletops and seats, recliners.
It is worth noting that high-quality fittings are a serious investment. According to experts, its price can reach up to 15% of the cost of a furniture set. But such expenses are completely justified, since it is low-quality fittings that begin to fail first, and not wood, metal or chipboard. And if a fastener breaks or falls out, it is not always possible to repair it.
Furniture fittings are all kinds of fasteners, handles, curtains, supports and decorative elements.
Assembly diagram step by step
The general assembly diagram for a corner sofa will look like this:
- First, the armrests are assembled from timber and foam rubber.
- The frame of the left part of the product is mounted.
- The right side frame is assembled.
- Upholstery work is being carried out.
More detailed instructions for making and assembling a soft corner sofa for the living room or bedroom are as follows.
How to make armrests?
The top and bottom of the armrests are cut out of chipboard and attached to wooden slats. Next, vertical support bars are installed on top and bottom of the sidewalls. As a result, you should get some kind of box, which will have one side, top, bottom and an open front wall with vertical elements. Now the armrests can be covered with foam rubber.
Right part
On the inside of the sidewall, in the place where the seat will be located, a chipboard overlay is installed. All sides of the product are covered with foam rubber, except for the back wall.
Now a second armrest is made, which is a mirror image of the first. The seat side and back are made from chipboard. The elements are fastened together with plywood.
We make two more similar parts for the second part and fasten them together in the same way. A vertical beam is screwed to the two sidewalls.
Important: To strengthen the structure, it is recommended to reinforce the rear wall with vertical support bars.
Let's move on to assembling the frame for the inclined back. For this, a support frame and two vertical slats are used. The manufactured frame must fit tightly into the previously assembled frame.
Now the seat is made from plywood. The thickness of the plywood must be at least 8 mm. The seat is installed on the frame only after it has been covered with foam rubber and upholstered with fabric.
Left side
First, the necessary sidewall parts are made from chipboard and fastened together with plywood and timber. All blanks are mounted on a frame and reinforced with vertical bars. Next, a frame for the backrest is made and a lifting mechanism is installed. The assembled frame is covered with foam rubber and covered with fabric.
Step-by-step instructions for upholstery
As for the finishing of the corner sofa, it is worth including the process of upholstering the product with materials. Work is carried out in the following sequence:
- First, measurements are taken of all the parts that will be covered with materials and they are cut.
- Before upholstery, all elements of the sofa are covered with foam rubber and padding polyester.
Since foam rubber will quickly lose its shape upon contact with fabric. A padding polyester layer will prevent wear of the foam rubber and make the seat and back softer and more comfortable to use. - The armrests are covered not with padding polyester, but with non-woven materials, for example, agrotextiles or spunbond.
- Three additional pillows must be placed on the back of the seat. Their inner cover is made of non-woven material, and the outer cover is made of beautiful and practical fabric.
Important: when cutting, you need to make allowances of a few centimeters on each side. Therefore, experts recommend not cutting out all the fabric at once. First, work is carried out on one part to understand how many centimeters should be left for allowances
First, work is carried out on one part in order to understand how many centimeters should be left for allowances.
Tip: for the bedroom you can try making a couch, ottoman or sofa. And next to the sofa, a coffee or glass table or even an ottoman will look good.
Assembling a straight sofa
If, after purchasing a sofa, a decision was made to install it yourself, then a certain sequence of actions is necessary and a mandatory study of the sofa assembly diagram is necessary. First you need to carefully, without damaging the upholstery, remove each part from the packaging. After which it is recommended to simply leave them in this state for a while so that the material can “assimilate” the humidity and temperature conditions of the room.
At this time, you can check the quantity and quality of the accessories that come with the kit, and also prepare the required tools: screwdrivers, you may need a drill with drills of the required diameter, hexagons.
The next step is to screw the legs, if any. This needs to be done for the simple reason that when assembled the structure will be less agile and much heavier. In addition, it makes sense to free up space for further work so that all parts and tools are in sight.
The straight sofa includes the main frame and additional elements (back, armrests, decorative components).
The basic assembly process is carried out as follows:
We install the fasteners by aligning the holes and inserting bolts, self-tapping screws or screws into them as provided in the manual. Next, carefully twist them. Similarly, we connect the seat and back of the sofa. The design obtained at this step is the basis.
Then we install armrests and all decorative elements, if any, on the frame on both sides. There are cases where the mounting holes were not visible because they were hidden behind the upholstery
Then it should be carefully bent. The instructions should say this.
At the last step, we check the sliding mechanism, if the sofa is equipped with one. Its operation should proceed smoothly, without creaking or extraneous sounds.
Throughout the entire process, it is recommended to constantly check the sofa assembly instructions.
