Features of the banner: what to look for
The quality of the upholstery fastening. The most important thing when transporting furniture is the reliability with which the upholstery is fixed. The fabric should not be too tight, but not loose either. To check the correctness of the manipulations, press the material with your hand: if everything is done correctly, the fabric is pressed effortlessly and returns to its original position. If there is squeaking and squeaking, the upholstery is too tight, which means there is a high risk of damage over time.
There are also nuances when transporting corner, spring and leather sofas. More details about them:
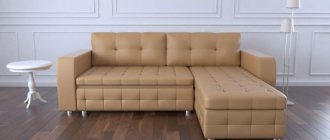
Corner sofa. It is very important to align the pattern correctly. Marking of upholstery material starts from one edge to the opposite. First sew the corner, then the bed and lastly the back.
Spring sofa. Here you will need some extra fabric. Indeed, it is often necessary to lay an additional layer of fabric between the metal frame and the finishing upholstery. This layer minimizes the risk of the upholstery tearing on both sides of the sofa where there is no soft layer of padding.
Leather sofa. If the upholstery material is genuine leather, it is important to consider several points:
- fabric thickness - no more than 1.5 mm to increase elasticity and reduce the risk of cracks in places of deviation;
- Upholstery with wet leather is excluded: when drying, the fabric will shrink;
- needles/pins cannot be used for temporary fixation of tissue; holes in the skin do not close;
- to sew leather, you need to lubricate the sewing machine foot with Vaseline; thus, the material will be protected from tears, and the stitching itself will go faster;
- The suture fabric is at risk of slipping when stretched. To avoid these places, you need to iron it through gauze.
Upholstery of a leather sofa - materials
Reupholstering a sofa with leather is a popular service. Because even a leather sofa loses its appearance during long-term use and you have to think about replacing the upholstery.
To replace the upholstery, artificial or natural leather is often used.
Depending on the processing, genuine leather for interior items comes in three types:
- Aniline. Can be painted in any color. It allows air to pass through well and absorbs moisture. Has good performance characteristics.
- Semi-aniline. Amenable to minimal processing. Fine-grit sanding is usually used, as well as painting and embossing.
- Corrected. Amenable to multi-stage processing. It has excellent performance characteristics, since a thin layer of varnish is applied to the surface, which provides protection from external factors and increases wear resistance. This material is great for refinishing a corner sofa from a living room or another piece of furniture that gets a lot of use.
A more affordable alternative to the material for upholstering a leather sofa can be eco-leather or another type of artificial leather. The material has the following advantages:
- allows air to pass through well;
- does not deform due to temperature changes;
- has excellent wear resistance;
- Available in different colors and textures;
- does not require special care.
In the materials section, see also:
- Upholstery of sofa with artificial leather
- Upholstery of a sofa with eco-leather
For services for reupholstering leather upholstered interiors, please contact our specialists.
Our specialists also perform reupholstery with fabric upholstery. We have a huge range of colors and patterns, as well as plain fabrics.
Cutting upholstery fabric
Fabrics for new upholstery are cut using old patterns. To do this, you need to straighten the patterns, attach them to a piece of fabric and secure with pins. Next, we trace the pattern along the contour and cut it out, notching along the edges. When sewing, be sure to pay attention to the direction of the longitudinal thread.
If the old upholstery fabric is severely deformed or stretched, then some parts of the sofa will need to be measured with a flexible ruler. To strengthen the seams, choose a more reliable type of binding, zigzag the free edges of the fabric.
Changing the upholstery of the sofa
I suggest you get acquainted with my monster sofa. This is a very common model, in my opinion, it is comfortable, but there is a nuance - the upholstery. We wanted light skin, but by chance we chose fashionable eco-leather, but in fact dermantin... Everything was fine for about a year and a half, and then cracks appeared, these cracks grew into small holes, and then.... Alas and ah. So, a photo of the victim:
Replacing the sofa was not in our budget, but it was simply impossible to continue living like this. I decided to change the upholstery and replace the pillows (these ones are too hard) with regular ones: either feather or padding polyester. I advise you to choose dense padding polyester for these purposes - they hold their shape well and do not shrink.
I will partially change the upholstery; I will not touch the frame itself, because... The material there is in good shape, plus it washes well. The following will be replaced: 2 stationary parts of the sofa and one retractable part. Those that are stationary, with a tie, I will leave it, but I will do it with buttons (I have wanted it for a long time). Regarding the choice of material for upholstery: in principle, you can use the usual fabric you like, but I still advise you to choose upholstery fabric, it is much denser and has higher wear resistance, which is important in the case of a sofa. I chose chenille for the base and jacquard chenille for the decorative pillows. Sometimes they are found in regular fabric stores, but it is better to contact professional stores. There is a huge selection for absolutely every taste. The prices are very different, I advise you to pay attention to the “leftovers”, many stores have a measuring flap, where you can buy excellent materials at bargain prices. These “remnants” can be quite large in size (for example, one of the offered pieces of my fabric was 21.5 m). The fabric that I liked cost 300 rubles per meter, width 140. Here it is:
So, for work we need:
— furniture stapler (I have the most ordinary one, it costs about 600 rubles);
— staples for a stapler (6 mm seemed small to me, and 12 were too large, so I took 8 mm), 150 rubles/1000 pcs.;
- sewing machine;
— upholstery fabric (I took 9.5 meters, including delivery 3200 rubles);
- thread No. 20;
— zippers on pillows;
- scissors;
- marker;
- a tool for removing old staples (I used a screwdriver and pliers);
- pins;
— buttons (at your discretion, a tight “leg” is required);
- cord for ties (I used waxed one).
First, let's disassemble the sofa:
I have 3 seats. Two with a tie, one of which is L-shaped with an internal corner, the second is rectangular, and the third is rectangular without a tie that extends (with a handle). We start with a rectangular one with ties. We remove the material that covers the reverse side, cut off the old screed and remove the old upholstery:
Next, we take the necessary measurements and cut out the required piece of fabric (in length: pillow length + pillow height * 2, the same in width) with an allowance of at least 5 cm on each side. We place the fabric face down on the floor and place part of our sofa on top of it. You need to decide how to handle the corners. Or by folding:
Or we'll waste it. I will scribble, because... if the corners are made by folding, I get the idea of working “in a hurry”, it looks like something…. Not so short. And these folds of fabric are a breeding ground for all kinds of “evil spirits.”
In order to do everything neatly, I proceed like this: I lay the fabric on the floor, put a pillow on top, bend the fabric and secure it with masking tape, so that the corners remain outside:
Then I take a ruler, rest it on the floor, lean it against the sofa on both sides of the corner and make notches from the inside:
Based on these notches, draw a rectangle and, combining the drawn lines, chop them off:
It is better to pin along the line (I forgot to take a photo) so that you can try it on or sweep along it.
Let's try on:
It is important that during fitting, the fabric is put on with little effort. If everything is good, let's go sew the corners. My stitching runs 5 mm from the intended line in the direction of decreasing the upholstery, this is necessary so that the fabric sits tightly and the corners do not “run away” during subsequent tension. I made a straight stitch so that later the corners would be a little soft, or you can round the ends a little (just a little, no more than a couple of centimeters down from the corner).
We try it on, cut off the excess (I cut along an already drawn line, we get wonderful blanks for patchwork 
Next you need to stretch the cord with buttons. On the front side of the upholstery we make marks where the buttons will be:
Initially, I had holes in the foam rubber for the screed, but I didn’t have a needle that long, so I used ordinary tubes as assistants. Place the pillow on its side and insert the tubes into the holes:
For convenience, it is better to shorten them later so that they stick out slightly from the sofa on both sides.
I have 5 lines with 3 buttons each. I advise you to use a minimum number of buttons per piece of rope - this way the tension will be better. We fasten the cord to the frame with a zigzag (do not spare the staples) and begin to make a tie. I advise you to start from the middle line, then the line higher and higher, then turn the pillow over and move in the same way from the farthest to the closest line. Unfortunately, there are no photos of the process, because... you need 2 hands (and it’s even better if you have an assistant), but everything is quite simple: we push a needle with a threaded cord from the bottom side of the pillow (which is in the photo above) through a tube through the foam, take out the needle, pierce the fabric at the mark, put on a button, and pass the needle in the opposite direction, move the tube along the cord and cut it off, then into the next tube and so on in order. When we have completed the row, we stretch it well so that the buttons “sink” a little, helping ourselves to “sink” them from the front side, while making sure that they “sink” evenly. The row was completed and secured in the same way with a zig-zag. We repeat the required number of times and get:
Next, we begin to stretch the material (long sides first) and see how the situation changes before our eyes:
Here in the photo only one side is stretched. First, we fix the fabric along the line of buttons with a furniture stapler, and then, if everything suits us, we can fix it along the perimeter. When tensioning, keep in mind that the fabric must be stretched very tightly and evenly (so that the foam does not “sag”). Look at the previous photo - the first two lines along the buttons are stretched well, but the next 3 are overtightened (instead of a line it turns out to be a plane). If this happens, you need to loosen the tension a little.
We go around the entire perimeter and get:
Turn it face down, cover the back side with fabric, and place the staples close enough. I didn’t take any photos, I think everything is clear.
Next up is the retractable part. We “undress” her. Mine has a small “step” for fixing when disassembling the sofa and a small rounding for the handle.
We cut/sew according to the order already described, before fixing with a stapler, we cut the fabric in the area of this curve and fix it:
Next we process the “step”:
And fix it with a stapler.
Next, stretch and fix the fabric around the entire perimeter.
For the handle you need a piece 60-70 cm long and 15 cm wide (wider/narrower, as you prefer). Fold the edges towards the center along the handle:
Then fold it in half lengthwise again and stitch it as close to the edge as possible. We fix the handle in its place, and don’t skimp on the staples.
We get the following result:
We fix everything well with a stapler. Close the back side.
The last pillow with an internal corner. We place it on the fabric, draw and cut out the fabric without this corner (be sure to leave an allowance of 2 cm):
We cut out another rectangle with a length equal to the sum of the lengths of the two sides of the corner + 2 cm for the seam on each side, and in width - the height of the pillow + 2 cm for the seam + 5 cm for the stretch (I did not measure the width, because I had a narrow and a long remainder, then, after fixing, I cut off all the excess). Sew it on. It turns out like this:
Next, according to the already familiar scheme: corners (for the inner corner, the fabric must be cut, as in the description of the hole for the handle), fitting, tying with buttons, tensioning, fastening). When stretching, we start from the inner corner so that the seam “goes down” and is not visible later.
I made decorative pillows in dimensions 68*68 (cut into 70*70 cm squares), with zippers. 3 pieces are from companion fabrics, and 2 are from the main fabric.
I won’t describe the process - everything is clear)
We assemble our sofa and get:
What I would like to pay special attention to:
1. Before tensioning, be sure to align the stitches of the corners so that they fall on the corners of the sofa.
2. For the first time, it is better to choose a fabric without a pattern, so as not to overtighten it, but even if there is no pattern, watch the fibers of the fabric when stretching.
3. While stretching, be sure to iron the fabric with your hand from the center of the part to its edge to remove all the “excess”; these “excesses” make the work very sloppy.
4. Regarding buttons: the tension force can be easily checked - sit on a ready-made pillow, if the nearest button “lays” on the fabric, then more force must be applied. With a good tie, the buttons do not come out, but remain tightly “fitted”.
The most important thing is not to be afraid, but just take it and do it. Everything will definitely work out! Good luck with your creativity!
If you liked it, click the button with the same name, if not, feel free to criticize, and if you have comments, be sure to write, I’ll try to take them into account when compiling the next master classes!
In what cases can you not do without the help of professionals?
- If the useful life of the product exceeds 5 years. Surely, in addition to worn upholstery, damage to frame elements occurs. When pulling furniture, you need to fix all the defects and you may not have the necessary tools or spare parts on hand.
- If you are going to reupholster furniture with leather or leatherette. This is a difficult material to work with, and it is not always possible to do it correctly at home.
An interesting individual sofa design requires the help of a professional
Leather upholstered chair padding
Classic sofa in a new velvet upholstery
Cost of restoration
If you need restoration of an old friend, contact us. We will do this at an affordable price, as we adhere to a loyal pricing policy. The cost of work in each case is calculated individually and depends on several main factors:
- type of sofa and its size;
- the need to replace the filler, folding mechanism, and fittings;
- the material used;
- urgency of the order, etc.
It will cost more to reupholster a leather sofa than one with fabric upholstery. Design features or other factors may also affect the final cost. Regardless of whether you need restoration of a straight or corner sofa in Moscow, contact our company. The hands of our experienced craftsmen can easily cope with changing upholstery, filling and structural elements in a short time and of course with high quality.
How to calculate the required amount of material
Transporting upholstered furniture around the house is a complex and time-consuming process. To avoid having to sew on individual flaps on a sewing machine, you need to take into account the size of the roll of the selected fabric. When calculating the required footage, you need to remember about the possibility of fabric overlays. On average, up to 30 cm is taken into account.
Craftsmen advise taking into account two lengths and two widths of the sofa. With this approach there will be no difficulties with calculations.
The decisive aspect is the pattern of the chosen fabric. The designs and patterns match each other and this will require additional yardage of fabric.
Reupholstery, repair of a spring sofa
Step by step, the sofa is repaired and reupholstered something like this:
- all necessary materials, tools, fittings are selected;
- the product is partially or completely disassembled;
- Damaged parts are replaced;
- the upholstery is cut out and secured in the right places;
- the updated design is assembled and the result of the work is evaluated.
To understand what exactly needs to be replaced in a particular product, you will have to disassemble it. Beginners doing this for the first time without outside help are advised to take photographs of each stage of dismantling - this will eliminate the possibility of confusing what was originally there.
Necessary materials, tools
For complete disassembly, repair, and assembly of the structure, you will need a number of tools:
- large screwdriver, open-end wrench for unscrewing bolts;
- pliers, staple remover, for removing the staples that secure the upholstery;
- nail puller - if the fabric is fastened with small nails;
- hammer for hammering tenon joints;
- vice for firm grip of glued areas;
- furniture stapler;
- screwdriver;
- perforator;
- "gypsy" needle;
- sharp scissors;
- a simple pencil for marking;
- metal tape measure or ruler for taking measurements.
Materials needed:
- upholstery fabric;
- timber, boards, plywood for replacing damaged parts;
- spring blocks, furniture foam rubber for restoring the “filling”;
- rubber glue - if you plan to cover it with leather;
- PVA glue for gluing wooden parts.
Disassembly, damage assessment
Sofas with different design features are disassembled slightly differently:
- “Eurobook” model – the seat is raised, placed on the back, and the fastenings of the side frames are unscrewed (if any). The seat is removed and the back is unscrewed. If there is a withdrawable section, it is also removed. Next, you can remove the upholstery, foam rubber, springs;
- The “accordion” sofa is a three-section structure, all parts of which are fastened together. First, remove the clamps of the rear part that tightens the side panels, which also need to be removed. The triple frame and headboard are removable. Afterwards, the laundry box is dismantled - to do this, raise the seat, unscrew the bolts that secure it;
- corner - the sofa is moved away from the wall, all covers and pillows are removed. It is recommended to remove the upholstery using special tools - part of the fasteners may be located under it. Next, the sidewall is dismantled, connecting their planks to the back of the piece of furniture.
Later, the seats and corner elements are removed. If there is a backrest on the short half, remove it by first unscrewing the nuts that secure the seat to the frame. The base is disassembled last - the sequence of actions depends on the exact mechanism of transformation of the corner model.
When the sofa is disassembled, the condition of its individual elements should be assessed - depressions, slabs, protruding springs need to be corrected. In some models, the legs and upper parts of the armrests are removed separately. The fittings also need to be removed in advance. Often the lamellas in the sofa, which support the orthopedic structure, break - they must be replaced with new ones. When all fastenings and mechanisms work well, they are simply cleaned of dust and lubricated with oil to eliminate squeaking.
Frame repair
Restoring the frame is sometimes done “without a single nail,” using glue, but most often additional fasteners are required in the form of screws and metal corners. For many modern designs, spare parts are sold in furniture stores and construction markets. When purchasing, it is advisable to take the worn part and fastening with you, so as not to make a mistake. When the transforming mechanism is worn out, it is also replaced with one identical to the previous one.
Possible problems, options for restoring the spring block
The spring part can consist of old-type parts with a height of up to 20 cm, a spring width of 15 cm, a thickness of 0.5 cm, or modern ones, where the height is 12 cm, width 10 cm, thickness 0.22 cm. In modern products, each spring is connected to neighboring ones wire spiral. It makes sense to replace damaged springs if there are only a few of them. To do this, on one side, loosen the fixation of the element, on the other, unscrew it, insert the other. When about half or more of the springs are damaged, it is easier to buy a new spring block of the appropriate size.
To increase strength, it is reinforced with corsage ribbons stretched across the block.
The nuances of restoring the “snake” spring
“Snake” is a set of soft springs that reduce the cost of construction, but become unusable too quickly, as evidenced by the “hammock effect.” The “serpentine” parts run from edge to edge of the entire block, each of them independent of the others. Fastening is done with special long brackets, strips, and clips. Damaged springs are removed with pliers and replaced with new ones, and you can change one, several or all. When it is necessary to “strengthen” the structure, the number of snakes is increased.
To increase the service life of the “snake” structure, the spring block is covered with a thick layer of foam rubber, which helps to evenly distribute the load between all springs.
Selection and installation of new fillers
When replacing the filler, it is important that the thickness and height of each fragment coincide as much as possible with what it originally had. If the parameters are larger or smaller, the structure may be skewed and there may be problems with its assembly. To ensure that the dimensions are appropriate, measure the places where deformations and abrasions are least noticeable.
Foam rubber is the cheapest sofa “filling”. Synthetic winterizer is also inexpensive, but it is not durable either, which is why it is used together with other materials. Holofiber is more expensive, more durable, latex is a type of filler with “memory”. Durafil, made of polyester, is comparable in its characteristics to a spring block. For a product with a complex, intricate shape, cast polyurethane foam is preferable, and pillows, armrests, and backrests are stuffed with synthetic down.
Felt consists entirely of natural wool.
To change the filling, you must first remove the old contents from the sofa. According to the size of the latter, a new part is cut out, which needs to be replaced on the frame using a stapler or small nails. For strength, it is recommended to combine several materials, especially for the seat - it experiences the heaviest loads.
Sewing the cover and installing it on the frame
The cover is cut out according to the dimensions of the old “shell” and sewn together by machine. It is important to respect seam allowances. Each fragment is covered individually; the place where the part is inserted is masked with a hidden seam made by hand. If the textile material is characterized by “flowability”, its edges are processed with an overlocker. The staples are installed at a distance of three to five centimeters from each other.
Upholstery is purchased with a small margin - up to 10-15%; if there is too much of it, the excess will be used to make sofa cushions and other decor.
Assembly, decor
The order of assembly work depends on the furniture model and the number of individual fragments. To check whether the assembly is well done, you need to sit on the sofa, lie down, unfold and fold it. The product should not wobble, creak, or have noticeable distortions. During installation, all existing joints should be carefully strengthened and screws should be tightened. When the large parts are attached, the legs and other design elements are installed.
DIY pillows, cushions, capes, and decorative buttons are used as decor. If you have wood carving skills, the structure is decorated with applied carved parts, and instead of simple old legs, turned ones of appropriate thickness and height are installed.
First steps: measurements, fitting
If we consider the most common models of sofas, then among them we can distinguish corner ones, which consist of two parts. In addition, both parts are the same size with the only difference being that one serves as a pillow (removable and raised), and the other does not. You need to start with the one that rises, and you can already sew a cover for the second part on it.
PHOTO: YouTube.com Both sections of the corner sofa have the same dimensions
Having lifted the movable section, it is necessary to lay the material with the wrong side out; the main work will be performed on it. It is important that all corners meet. A little extra material won't hurt; then they can be easily cut. But at this stage they can even come in handy - working with fabrics without tension is much more convenient.
PHOTO: YouTube.com The fabric should be laid with the seam facing out and stretched
Additional tools required to fit future cases
To adjust the fabric to the section of the sofa, you will need:
- scissors;
- tailor's braid (centimeter;
- needles and thread;
- a lot of pins.
If you have a lot of experience in sewing, then you can do without pins, but they make the work much easier and reduce time.
PHOTO: YouTube.com Additional Tools You'll Need to Get Set Up
Using pins and what they are used for
When laying a piece of fabric of the required size into the section of the sofa, you need to carefully collect the corners and then pin them along the vertical side seams. This is done to make them easier to purchase. This seam can be called a draft before sewing on a machine.
PHOTO: YouTube.com Pins help temporarily fix the material in the desired position
Next, the material must be sewn together using pins using a regular needle and thread. The temporary stitch will hold the fabric securely in place and allow the pins to be removed. You should not do this with too small stitches, otherwise the thread will be difficult to remove later.
PHOTO: YouTube.com Sewing hooked, pins removed, time to work on the sewing machine
All that remains is to remove the future section cover and engrave it on a typewriter. But even if you don’t have such equipment at home, you can always do the work manually. Of course, this requires patience and accuracy, but the result can be just as good. The sewn fabric should be turned to the right and tried on again.
PHOTO: YouTube.com The firmware is perfect, the dimensions are correct, so it’s time to think about the elastic
"Composition" of sofas
The interior of the sofa (back and seat) is made in several options:
- springless - high-density furniture foam latex is used. The latter will cost many times more;
- spring - the product is equipped with a “classic” block with springs or snake springs are used that support the latex, foam “filling”. Independent springs are also used, each of which has an individual textile cover.
The composition of the insides of upholstered furniture depends on the model of the product; the “pie” may contain:
- spring block of the “Bonnel” or “snake” type;
- padding polyester;
- felt, thermal felt;
- horsehair;
- bamboo fiber;
- interlining;
- mat;
- batting;
- polypropylene fabric;
- Fiberboard;
- polyurethane foam (including chopped), etc.
It is recommended to replace outdated filler materials with more modern, environmentally friendly, wear-resistant ones.
We disassemble the sofa and assess the scale of work
Stretching a sofa begins with disassembling it. In the process, you will be able to assess the extent of the damage and decide what exactly to do. For this part of the work you will need:
- a large screwdriver to remove visible bolts (if any);
- A small flathead screwdriver, pliers, or staple remover to remove the staples that secure the trim.
The main thing is to remove the old upholstery.
Then everything will become clear. Actually, that's all. First, remove the individual pillows, if any, and remove the side walls. It’s hard to say - there are many designs. Look carefully to see if you find anything. If you have removable parts, you can try starting with those.
Separating the upholstery
The next step is to separate the fabric from the frame. It is attached to a wooden frame. Pry the brackets with a flat-head screwdriver and pull them out. Some may fit very tightly and are easier to remove by grasping the raised back with pliers or pliers.
We disassemble the sofa: remove the staples
Remove the fabric carefully, trying not to damage it too much. We then use it as a sample for the new sofa upholstery. There are several layers underneath the upholstery. Maybe felt, padding polyester, some kind of fabric. If the sofa repair was started only to replace the upholstery, then look at the condition of these materials. If there are signs of wear, it is better to replace. After all, it will be a shame if after a few months the sofa needs to be stretched again, but this time because the layers of the lining have worn out.
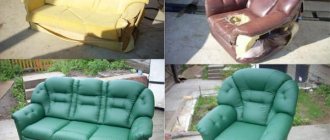
If the sofa is old, there may be a picture like this
After removing the tissue, it's time to evaluate which parts you'll need to replace. Everything is clear with the upholstery and lining. It is advisable to leave the cake in the same composition. If old materials were used that are not currently on sale or are too expensive, replace them with modern analogues. The main thing for folding sofas is to achieve the same height of the seat and backrest that they had before, since the folding mechanisms are designed for certain parameters of the “pillows”. To avoid confusion with the thickness of materials, find areas that are not worn (or less worn) and measure the thickness.
Assessing the damage
This step is necessary if the sofa seat is uneven, there are humps and depressions, and protruding springs (as well as under). In seats that are made only of foam rubber, everything is simple: they are usually replaceable. They can be made from high-density foam plastic by folding several layers; you can order ready-made foam rubber at a store that sells furniture parts. It is advisable to order a latex mattress of the exact size (measured after removing the fabric and all layers.
If there are springs on the sofa, remove all layers of upholstery and approach them. If there are no burst springs, the frame and its connections are strong, without play or cracks, the spring support is in good condition, you can stop there. We change the layers of covering, sew a new cover, stretch it and secure it. This completes the stretching of the sofa.
Home restoration services
Among our clients, sofa reupholstery at home is a popular service. This contributes to several significant advantages:
- Saving money. Our services will be much cheaper than buying a new friend. This is especially true for repairing furniture with premium upholstery, since new models cost a lot of money.
- Appearance. If an old friend does not fit into the interior, but at the same time has retained its functionality and form well, it is reasonable to change the upholstery, choosing a material of a suitable color and texture.
- Unlimited scope for design. We offer a huge number of fabrics and other materials for furniture upholstery, so we can easily implement any design ideas.
- Convenience. If the service is performed at home, a heavy straight or corner sofa will not have to be transported to the workshop, which means there is no need to hire movers and look for suitable material.
Replacing upholstery and filling on upholstered furniture is necessary in different situations:
- the seat was heavily squashed (the filler lost its properties and shape, the spring block broke);
- the upholstery has lost its attractive appearance, severe scuffs or torn spots have appeared on it, stains that cannot be cleaned with anything;
- the color or texture of the upholstery does not suit the new interior, or you want to change the style or size of the furniture.
Repair is also necessary if the frame breaks, the folding mechanism or other components fail. In any situation, contact our company. Our specialists will carry out repair work of any complexity in the shortest possible time.
How to reupholster a sofa at home: step-by-step instructions
All work on stretching a sofa can be divided into several stages: calculating materials, preparing tools, removing upholstery, removing old stuffing, etc. Let's take a closer look at each of them.
Step 1. Calculate the required amount of material
It is easier to calculate the filling volume; for this you need the dimensions of the sofa. To calculate the amount of upholstery, it is important to consider several nuances:
- Check the width of the upholstery roll. If this parameter is not enough for any part of the sofa, you will need to sew the upholstery.
- Do not ignore the size of the overlap of the material on the frame; it can be up to 20 centimeters. The upholstery is attached to the sofa with special staples.
- It’s better to play it safe and take into account the double parameters of height and width, because it’s easier to remove scraps than to connect pieces that were missing.
- For patterned upholstery, it is important to choose the right pattern, and in most cases this increases material consumption.
Step 2: Prepare your instrument
When removing old upholstery, you will not need at least a utility knife, scissors, a hammer, a screwdriver, a construction/furniture stapler and a set of open-end wrenches.
Step 3: Get rid of upholstery/filling
The upholstery material is removed with a utility knife. By the way, if you carefully remove it, you can use it to calculate the amount of new tissue. Remember that the upholstery is often attached with staples to the back of the sofa, and removing each of them is problematic even for a specialist. So sometimes it's easier to pull the fabric out of the staples and then carefully push them back into the wood.
Even if you really want to save money by replacing the litter, it is best to throw it away. Over the years, even the highest quality materials accumulate dust, dirt, microbes, cake and sag.
Step 4. Inspect the structure for problem areas
The sofa is dismantled. This stage is especially important if we are talking about fairly old furniture. It is important to note faulty or non-functioning fasteners and mechanisms. To do this, inspect the pieces of wood; if they are damaged they must be replaced. Also lubricate the metal contact points with silicone, this way you can get rid of the squeak.
Step 5. Cut and secure new material and filler
First you need to secure the upholstery to the wooden base.
Before that, collect the filling. If several layers are planned, it is especially important to fix them with special, odorless glue. This layer of filler is stapled perpendicular to the plane of the wood beams for good adhesion.
To correctly cut new material, you need to take measurements from the old upholstery or measure the parameters of the padding that was fixed. The last option is the most accurate. When cutting material, leave 2-4 centimeters in case of an error. After preparing the cut, cover the pieces and straighten them as much as possible. The seams of the cover should be parallel to the edges of the parts, the corners should be in contact with the corners of the frame. In addition, the cover is sewn from the middle, so it will be possible to remove excess fabric without visible defects by stitching the edges, for example, by hand.
Stage 6. Assemble the sofa
This process occurs in reverse order. That is, the back and seat are assembled last. Before assembly, inspect all the parts again: fabric, glued structure, individual parts.
Stage 7. Decoration
An optional, but important stage for those who start with a small reform and end with large-scale work with the reform of the entire room.
If the sofa is too cramped and looks new, you can update the area around the furniture with “small losses”. For example, change the wallpaper, decorate the wall with photo wallpaper or picturesque prints.
Picturesque prints are also appropriate on pillows. The easiest way is to replace the covers with new ones, as opposed to the main upholstery of the sofa. In addition, the brightest solutions are in the center of the sofa, neutral ones - on the side.
Sources
- https://dekorin.me/restavratsiya-myagkoj-mebeli-svoimi-rukami/
- https://mblx.ru/mjagkaja/kak-izgotovit/1158-restavracia-divana.html
- https://www.divano.ru/informacija/istoriya-mebeli/interesnye-fakty/kak-peretyanut-divan/
- https://FurniLux.ru/remont/peredelka-starogo-divana.html
- https://idoom.ru/stroim-dom/dekor/obivka-mebeli-na-domy-65-lychshih-idei-svoimi-rykami-podarite-vashemy-divany-novyu-jizn.html
- https://mebeldizajn.ru/peretyazhka-myagkoj-mebeli/
- https://ss-p.ru/mebel/kak-obnovit-staruyu-obivku-na-myagkoy-mebeli-svoimi-rukami.html
- https://prim-mebel.ru/divany/kak-obnovit-obivku-divana-svoimi-rukami.html
- https://homius.ru/kak-obnovit-staryj-potjortyj-divan.html
- https://novinkimebeli.ru/kak-peretyanut-divan/
- https://stroychik.ru/mebel/peretyazhka-divana-svoimi-rukami
- https://mebel-expert.info/mebel-svoimi-rukami/krovati-i-divany/pereobivka-divana
- https://www.ivd.ru/dizajn-i-dekor/mebel/novaa-zizn-starogo-divana-7-idej-dla-obnovlenia-28551
- https://ectrl.ru/otdelka/kak-obnovit-staryj-divan.html
- https://severdv.ru/mebel/divany/poshagovaya-instrukcziya-po-peretyazhke-divana-svoimi-rukami/
Do-it-yourself sofa reupholstery
It is quite possible to renew the covering of upholstered furniture yourself or with the help of professionals. When performing work on your own, you may encounter the following difficulties that are difficult to overcome without special skills:
Problems may arise at the first stage of disassembling furniture. Sometimes it is difficult to do this without special skills and tools. Therefore, having decided on this job, you need to test your strength by pulling at least a stool. Using this simple task, you can hone your technology and select a tool.
Sofa parts can have complex geometric shapes. Therefore, it is difficult to make the correct pattern for them, and then carry out the correct stretching. It will be easier to make a pattern if you copy it from old upholstery.
Upholstering a book sofa, which essentially consists of two rectangular halves and two sides, is much easier than a non-folding sofa with large armrests and additional pillows, or in the case where the pattern consists of several pieces of fabric.
When restoring old furniture, it may not be enough to just replace the upholstery. Often it is necessary to replace the filler, repair the frame, and even replace the springs in old sofas.
Antique furniture requires very careful handling; its repair and renovation is best left to professionals.
Materials that are difficult to work with can be used for finishing. Leather is much more difficult to deal with than fabric. For the first hand-made reupholstery of a sofa, it is better to choose fabric materials.
