Vadim
21096 0 0
Vadim September 9, 2016
A good owner always strives to furnish every corner of his home beautifully and, no less important, functionally. A balcony or loggia has long been transformed from a spare storage room into a useful space. In modern design there is even a separate direction responsible for this sector of the apartment. In this article I will talk about how to choose or make your own table for a balcony or loggia.
Folding furniture on the spacious balcony.
Buying a ready-made table in a store
Owners of balconies who love factory furniture need to contact the retail chain for a folding table. Here you can choose high-quality furniture for various purposes.
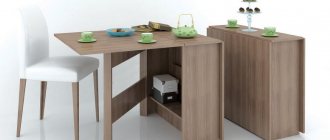
Folding table from Ikea
In order for a table to fit a specific balcony, in addition to the shape and size, the following features of the models are important.
- Type of material.
High-quality models for balconies are made from materials that are resistant to sudden changes in temperature and moisture. The choice of model depends, first of all, on the style of the balcony space and its condition.
Folding table from kitchen countertop
For a glazed balcony, furniture made from any environmentally friendly material is suitable.
On an open balcony, the material must be resistant to the harmful effects of the environment.
- Transformation method.
The ease of use of any model, as well as the safety of the family, depends on the folding method.
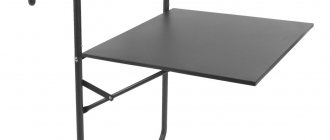
You can buy folding tabletop brackets
A table with a retractable leg that folds easily is dangerous for small children. An awkward movement is enough for the tabletop to fall onto the support. Folding furniture must have reliable fixation.
- Easy to attach.
High-quality folding tables are sold assembled. The only requirement is to mount the product on the wall. The kit should include fasteners and instructions.
Table folding wall fastening - IKEA - burst
Fastening should not cause any difficulties for the user, and should take little time.
Advantages and types of balcony tables
- Space saving.
- Rational use of small-sized premises.
- Increasing the usable area of a balcony, loggia.
- An ideal place to work, eat, relax.
- Can be used to hide communications (pipes, batteries).
- Minimum expended effort, materials and money.
- A successful design move - provided that the materials and color palette are correctly selected, a self-made table will be in harmony with the interior of the room.
- Huge variety of shapes, sizes, configurations and design solutions.
The most popular types:
- removable hanging table on the railing;
- folding;
- transformer (folding);
- stationary, fixed directly between the walls.
Preparing to make your own table
The manufacture of a folding table begins with preparatory work.
- The wall is being strengthened.
In some cases, it is necessary to dismantle the facing material to install embedded bars. The cladding on the reinforced wall is being restored.
- Material is being prepared.
The main consumption of material is on the countertop. It is good if the material is not very thick and is easy to process. The most popular materials are:
- hardwood;
- chipboard;
- profiled board (lining).
- The instrument is being prepared.
The standard tool set includes:
- electric jigsaw;
- hammer drill or drill;
- screwdriver or screwdriver;
- pencil, tape measure, level and marking tools.
The problem of choice or the torment of creativity
At one time, I set out to bring my loggia into proper shape. And as it turned out, insulation, exterior and interior decoration are only part of the overall process. It is equally important to properly furnish the room.
You can install a cabinet or a standard desktop on the P44T loggia without any problems. For those who are not in the know, P44T is a designation for the design of modern houses with an open plan. But my apartment, like most people living in our country, was built according to a standard design back in Soviet times.
Furniture and desk on loggia P44T.
Almost everyone knows that the dimensions of such a loggia are quite modest, so a standard tabletop, even from a small kitchen table, will look like a bull in a china shop. A small, compact and preferably retractable table was required. Of course, now you can order any furniture, but I’m used to making such small things myself, this is my hobby.
As strange as it may sound, the first problem I encountered was choosing a model. It seems like a small thing, but there are many options. Here you immediately need to decide for what purpose you need such a table. And what balcony are you going to put it on?
Hanging plastic table.
- I examined in detail many options and came to the conclusion that the hanging option is best suited for an open balcony . As a maximum, you can install a retractable table, but here you already need to look at what it is made of. After all, in fact, the product will be outdoors all year round and not every material can withstand this;
- A cabinet table is more suitable as a work option for those who like to tinker . Its beauty is that such a compact design can be easily moved wherever you want. Plus, as you understand, there is additional space for storing many useful things;
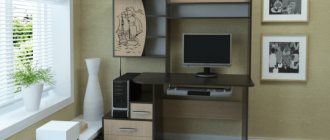
- A computer desk is essentially the same as a work desk, but for some reason it is generally accepted that on a balcony it should be located in some corner . And be, if not completely stationary, then at least folding;
Computer desk at the end of the loggia.
- But the most popular in this niche is a small folding table for the balcony . The secret of such popular love is that it is quite simple to manufacture, and most importantly, when folded, it takes up practically no space.
Making a wooden table
Any shape can be chosen for a wooden tabletop. The side that will be adjacent to the base is made in a rectilinear shape. This design is made in stages.
The first stage is making the tabletop.
The dimensions and shape are determined before work begins. As a rule, a semicircular shape is chosen. A strong, durable table is made from wooden cloth up to 3 cm .
How to make a table on a balcony window sill
Modern designs of window sills allow them to be used as comfortable and functional tables. Upgrading a window sill on a balcony does not require any special financial costs, and wood, chipboard or MDF can be used as a material for the future table.
The optimal time to arrange a window sill table with your own hands is to replace the windows. However, if such events are not planned in the near future, but the table is needed now, you can do the following:
- Choose the appropriate panel color.
- Take into account the thickness of the tabletop, which should not interfere with opening the window.
- Purchase metal chrome legs, self-tapping screws and polyurethane foam.
- Apply marking lines to the original material.
- Use an electronic jigsaw to cut out the tabletop along the outlined contours.
- Determine the location of the radiator.
- Using a feather drill, make holes with a diameter of about 36 mm. for air circulation and heating of the glass unit.
- Carefully remove the existing window sill.
- Install the product in the window opening.
- Fill the voids with polyurethane foam.
- Let the foam dry.
- Seal the joints with gel sealant.
- Make legs of the required length from a chrome tube.
- Install the legs by attaching them to the tabletop with self-tapping screws.
Thus, you can solve the problem of limited balcony space in an original way. Using homemade compact furniture will not only help you save money, but will also allow you to maximize space where there is none by definition.
Was the article helpful?
Making a table from chipboard
It is very easy to make a table from chipboard. It consists of four parts: a table top, two rectangles and a triangle.
Step-by-step production is as follows.
The first stage is making the countertop.
- Markings are made on the chipboard. For example, choose a semicircle with a width
400 mm, length 800 mm;
- use an electric jigsaw to cut out the workpiece;
- the sides of the workpiece are smoothed with a file and then with sandpaper;
- The cut areas are coated with a protective compound, varnish or paint.
We paint our blanks with white enamel in 2 layers
The second stage is making the support.
The reliability of the structure depends on the condition of the support. When folded down, the support is covered by the tabletop.
The support elements are made from the same chipboard to fit the dimensions of the tabletop in the following sequence:
- cut out a rectangular blank 880 x 100 mm long. It will be the base to which the hinges for the tabletop will be screwed;
- cut out a rectangular blank measuring 200 x 600 mm. A folding support element will be attached to it;
- cut out a triangle with sides 300 x 600 mm. It will be a support for the tabletop;
- The workpieces are polished and then coated with protective compounds.
The third stage - assembly of the structure.
This is the final stage, which includes:
- attaching a rectangular base to the wall under a vertical support;
- installation in the upper part of the base of a rectangular blank for fastening the tabletop;
- attaching hinges to the tabletop and support;
- fastening the tabletop with a loop to the upper rectangular workpiece, and with a support loop to the rectangular base.
The table is ready and waiting for its guests
Expert advice
- On an unglazed balcony, materials that absorb moisture and are exposed to ultraviolet radiation should not be used. Plastic or glass are the best options for open spaces. You can also use natural solid wood with a special impregnation that prevents the material from deforming when exposed to water and sunlight.
- The more metal parts, the more reliable and durable the design. Standard (factory) mechanisms must be used as components for folding and folding products.
- The thickness of the working surface should not be less than 10 mm. Otherwise, the tabletop may bend, deform, or break.
- The preferred height of the dining table and desk is 75 cm. Products assembled with your own hands must also meet the generally accepted standard. An exception may be designs made for people with physical disabilities (too short or too tall, disabilities, furniture for children's institutions, hospitals).
- The depth of the tabletop should be 50...150 mm greater than the supports under it, and at the same time not exceed the total dimensions of 600 mm.
- When the table width is more than 90 cm, it becomes necessary to use several support bars or legs.
Making a table from clapboard
Very often, after covering the walls of a balcony with clapboard, unused material remains. It’s easy to make an original folding table with a stop from leftovers and scraps.
The manufacturing process is divided into stages.
Scheme for manufacturing a table with an emphasis
Drawing of a table with a support frame
The first stage is making the countertop.
To make a rectangular tabletop measuring 70 x 60 cm, you need:
- connect 4 lamellas 70 cm long with a tongue and groove system into a single whole. For reliable fixation, the joints are lubricated with glue and reinforced on the underside with furniture staples;
- round the corners of the structure. Cut off the side tenon;
- Cover the sides of the tabletop with a protective compound and varnish.
The second stage is the production of supporting parts.
6 cm thick slats are used as supporting elements, or blanks are cut out of the lining.
There should be ten such blanks:
- base for vertical wall mounting 75 cm long;
- base for horizontal mounting to a wall 60 cm long;
- 4 vertical posts 75 cm long;
- 4 horizontal bars 30 cm long.
All workpieces are cleaned with sandpaper and then coated with a protective compound and varnish.
The posts and crossbars are connected with self-tapping screws to create 2 frames.
If you want a larger table, make two supports
Stage three - assembly of the structure.
- using anchors, a vertical and horizontal base is attached to the wall;
- 2 frames are attached to the vertical base on furniture hinges;
- The tabletop is attached to the horizontal base on furniture hinges.
Thanks to the hinges, the tabletop can be easily tilted back and rests on the extended frames.
In the video there is an option with a support leg:
Original solutions: photo gallery
A stationary narrow table on the balcony and a compact folding or folding design help to rationally use the narrow space. Independent development of drawings, manufacturing and installation of furniture with your own hands will save the family budget, especially if assembly is planned from scrap materials. A creative approach will be the key to creating a practical and comfortable corner for work and relaxation.
YOU MAY ALSO BE INTERESTED
Metal rack
Metal shelving is stronger than wood and can support very heavy objects. They are designed for storing large power tools and other metal objects. Structures welded from water pipes are especially reliable.
Frames are assembled from the profile according to the same principle as from wooden blocks, and shelves are laid on the crossbars. Instead of a profile, you can use metal corners. Only the supporting frame is made of metal, and it is better to make the shelves from wood. This will lighten the weight of the structure and reduce the cost of its manufacture.
If pipes are chosen as the material for the rack, only a portable structure can be welded from them. When the frame is welded, it should be treated with anticorrosive and painted. If gaps remain under the first layer of paint, after it has dried, the pipes are painted again. When the metal rack is installed on the balcony, boards or chipboard sheets cut to the size of the shelves are laid on the crossbars.
Requirements for shelving on the balcony
Before making a rack, you should calculate the load that will fall on the shelves and take into account the conditions under which the structure will be used. This will help you adapt the rack to your needs.
Design requirements:
- Safety. The joints must be reliable, and the shelves must be spacious enough so that the items stored on them do not fall out;
- The shelving should not block the window or interfere with the flow of sunlight into the room;
- Fire safety. If heating devices are used on the balcony, the wooden rack is not located near them;
- Dimensions. There should be enough space on the balcony, the rack should not interfere with movement;
- Stability and strength. The structure should not be shaky, and if there are doubts about its reliability, you need to additionally fix the rack to the wall.
Please note: Chair for a balcony or loggia: ready-made option or do it yourself
In addition, you need to choose the right material for the rack. For example, chipboards, even after treatment with impregnating compounds, easily swell under the influence of dampness, so it is better not to use them on open and uninsulated balconies.
