Most modern apartments do not have a large area. Therefore, their inhabitants are forced to approach the process of organizing living space creatively. Multifunctional pieces of furniture are very useful in such cases, for example, a folding table on the balcony, which can become an additional place for working, eating, or practicing your favorite hobby. However, it is necessary to take seriously the process of selecting manufacturing materials and product configuration, as well as correctly placing it.
What is a folding table
A folding table is a type of furniture that is attached to the wall. The design allows it to be folded when not in use. This feature helps save space. Balcony tables come in different sizes. It can be round, oval, square, etc.
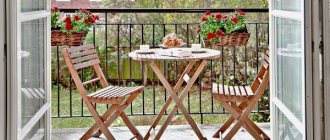
Installing a folding table on the balcony is an excellent idea.
It can be made of wood or metal. Folding tables in apartments are installed on the balcony. This room is usually narrow, and therefore this design fits perfectly into it.
How to make a folding table
Compact folding tables visually expand the living space and give the interior a stylish look. They can be used for snacking outdoors or relaxing with friends.
- room layout;
- search for materials and tools;
- assembly of the structure.
First of all, you need to think about the interior design. A homemade folding table should fit well into its surroundings and justify its presence.
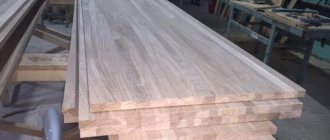
At the preparatory stage, you need to decide on the working material. Wood is best. However, it is worth considering in advance that heavy natural wood costs more than light, durable plywood and chipboard. Then comes the choice of model, color and size.
In addition to the material for making the countertop, you will need the following tools:
- Jigsaw,
- Drill and hammer drill,
- Connecting fasteners, dowels and screws;
- Screwdriver;
- Metal corners;
- Loops;
- Wood paint;
- Sandpaper;
- Antifungal impregnation;
- Varnish.
Carpentry work includes three stages:
- Making blanks with your own hands: a) cutting out the tabletop of the required size; b) cutting out a rectangle 8-12 cm wide and reaching the base of the tabletop; c) rounding corners; d) cleaning the cut sides of the tabletop and rectangular support with sandpaper or an emery machine; e) impregnation of workpieces with an antifungal mixture; e) varnishing on wood.
- Assembly of the structure, which includes: a) central and folding panels; b) top beam; c) ties and racks; d) stand legs and support leg; e) dowels and panels.
- Attaching a folding table to the wall on the balcony includes: a) marking and installing sleeves for attaching the metal corner; b) horizontal installation of the corner to the wall with screws in 3-4 places; c) attaching hinges to the tabletop; d) fixing the table when unfolded using a support leg made of a metal pipe; e) fixing the table support in the raised state by making a small groove on the inside of the table top.
Advantages and disadvantages of the design
As stated above, the main advantage of such a table is space saving. Located on the wall, assembled, it does not take up free space. The design of the table is as simple as possible, so it is very convenient to arrange and remove it.
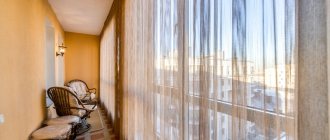
Today, even small loggias are used as functional space.
The folding table generally creates coziness on the balcony. It will fit well into the interior, thanks to the many options for its design. But there are some disadvantages, the main one being that such a table will not be able to withstand a lot of weight.
Installing a folding table will make your balcony not only more beautiful, but also functional.
If you are planning to make a piece of furniture that will have to hold a large mass, then it is better to take care of additional fasteners.
Selection and location criteria
Folding tables are selected taking into account the following criteria:
- Available area for furniture placement. It is necessary to take measurements in advance, otherwise the structure simply will not fit on the balcony. In some cases, you can place an almost full dining table.
- Interior style. If the balcony is already decorated, the table should fit into the concept without creating dissonance. Its shape, color, and materials used are important.
- Main purpose. This determines how often and how intensively the furniture will be used. Accordingly, they make a choice in favor of functionality with durability or decorativeness.
- Balcony type. For open tables, only tables are suitable whose tabletop material and fittings will “survive” the vagaries of the weather.
A piece of furniture can be installed:
- At the end. This is the only option for a narrow balcony. But in this case, the person sitting will be facing the wall, and additional lighting will be required.
- On the railing. The furniture can only be used if there is no frame. The design is removable, which ensures mobility.
- In the window opening. The furniture becomes a kind of continuation of the window sill on the other side. But not all rooms have a window onto the balcony.
- Under the window. A prerequisite is that the balcony must be wide enough and spacious.
- In the corner. Corner tables in the shape of a triangle are non-functional. They are more like a shelf.
When purchasing a table for a loggia, it is necessary to check the functionality and reliability of the fastenings and the quality of the tabletop coating. It is advisable that the furniture be accompanied by assembly instructions.
On the railing
In the window opening
Under the window
DIY folding table for the balcony
The table can be bought in the store. Nowadays many ready-made options are sold. But we recommend trying to assemble a folding table for a balcony with your own hands. This way you can make a piece of furniture that is perfect in size, material, color and shape.
Making a table with your own hands is not difficult.
Despite the fact that a folding table for a balcony is a transformer design, it is not difficult to manufacture. The mechanism itself is similar to that installed on the tables that we lay out for the holidays. It's quite easy to recreate this idea.
Make a drawing before making the table.
The standard design consists of two main parts - the tabletop and the clamps. To make a hanging table with your own hands, read the step-by-step instructions.
Choosing a table design
The choice of design and appearance of the table will depend only on your fantasies and desires. Many people make the structure the color of natural wood, since balconies are usually lined with clapboard and the table goes well with the walls.
You can paint the table however you want.
You can add some color and make the table in a bright color. Just pay attention to what kind of paint you buy. The climate on the balcony changes in exactly the same way as on the street, so it is necessary that the paint is frost-resistant and does not peel off from exposure to moisture.
Selecting Tools
To assemble a table for a balcony with your own hands, you will need the following tools:
- electric jigsaw;
- drill;
- screwdriver or screwdrivers;
- roulette;
- level;
- hammer;
This is a standard set of tools for assembling furniture. It will be possible to do without some things, but the list may be expanded, depending on what nuances relate specifically to your build.
Preparation of materials
Materials for creating a table must be selected and prepared in advance. You will also need fittings in the form of self-tapping screws, screws, nails and connecting elements. Their choice will depend on how you decide to mount the table to the wall.
Use quality tools to assemble furniture.
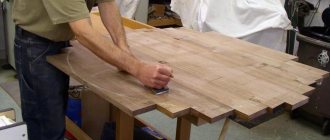
Remember that before you begin assembly, each piece of wood must be sanded well. If this is not done, the boards will not be level, and household members will easily get splinters.
Be prepared for the fact that you will need an impressive set of tools.
Plus, untreated material is very difficult to wash or wipe with a cloth, and on the balcony dust accumulates many times faster than in an apartment, and the furniture there requires more frequent cleaning.
Making a table
The production itself should begin with a drawing. The diagram must clearly display the size of the finished product, the room where it will be located and the dimensions of the necessary parts. After this, you can prepare the tabletop and fixings. The materials for them can be ordered, they will be made to the required sizes, or you can make them yourself.
The table model can be made in a special program.
Once you have all the necessary parts, you can begin assembling the finished product. First, install the clamps. They can be attached to self-tapping screws, after which place a tabletop above them, which is attached to the wall using hinges.
Use a quality mechanism to assemble the table.
They will allow you to unfold and remove the table.
Chipboard, wood, lining
Decide what the product will be made of. It can be natural wood, chipboard, boards from old furniture, etc. The first option will cost a little more, but will last longer and be more reliable.
Chipboard is one of the most popular materials for furniture.
Other types of materials should also not be excluded; they have their advantages. First of all, it is economical cost. Chipboard is a fairly popular material, and its price-quality ratio is considered ideal.
Wood is the main material for making furniture.
Lining is a board that is installed, clinging to the previous one. They are made from different types of wood. The most expensive of them are boards made of larch or aspen, and the budget option is pine needles. A board made from budget material is perfect for a balcony.
Even a small table on the balcony will create coziness.
Expensive types of wood are usually used in baths, or other rooms where there are high temperatures. Since there are no such indicators on the balcony, coniferous boards will perfectly fulfill their function and retain their appearance.
Decor features
Decoration should be given special attention. If you want the table to be made in color, then the parts must be painted before you hang it on the wall. If for some reason it was not possible to do this in advance, do not be discouraged. Painting can also be done on the finished product, but this must be done carefully, having first protected all surfaces around it.
You can make the table in any color.
An excellent decorative option would be color film. It tolerates temperature changes well and can be washed. Plus, gluing it does not require any special skills. You can also decorate the table using complex elements, for example, wood carving.
Minimalistic style is relevant at any time.
If you have a talent for this art, now is the time to use it. Many people leave furniture on the balcony in a natural wood color. This option fits into almost any interior and looks advantageous.
Use wood varnish.
However, it is recommended to pre-treat the boards with varnish so that they do not swell when exposed to moisture and changes in temperature. Also, untreated material is difficult to clean, so pay special attention to this point.
Master class No. 1: for the balcony
This is what the table looks like when folded.
For manufacturing you will need the following elements:
- pine board measuring 94*810mm for the back;
- laminated pine tabletop dimensions 400*810;
- board 44*710 and 44*300 mm for mounting on the wall and supporting the structure;
- boards in the form of a triangle with sides 300*300 mm to support the tabletop;
- pine block 44*100 mm.
Also see ideas on how to decorate an empty wall
You also need to prepare:
- hinges and screws 16 mm;
- 2 screws 4-40 mm;
- 32mm pocket screws;
- wood glue; dowels;
- special cotton wool;
- brushes
Special tools will also be required:
- drill and bits;
- Grinder;
- pencil and tape measure;
Manufacturing includes the following steps:
A semicircle is cut out of the tabletop using a jigsaw. Then the hinges are attached.
And here are some ideas for arranging a small balcony.
The upper part is attached to the support.
Take a triangle support.
The block is fixed on the top of the support. There should be 20 mm left from the edge. 40 mm screws are used as fasteners.
Attach the hinges to the back of the table, top and bottom. For this, 16mm screws are used.
The T-shaped part is attached to the bottom of the table using screws and special wood glue.
The support is connected to the T-shaped part.
The support structure is connected to the tabletop.
Using a brush and cotton wool, the coloring composition is distributed on the surface.
The paint can be applied in several layers.
Then we mount the table on the wall. To do this, marks are pre-measured.
This is what the finished design looks like.
Where can the structure be placed?
A folding table made by yourself can be placed not only on the balcony. It will fit well in almost any room in the apartment. It can also be built at the dacha, for example, by equipping it with a veranda.
Such a piece of furniture can be relevant everywhere, as it takes up virtually no space. If desired, you can make it so that when assembled it will be completely retracted into the wall. To do this, you will need to make a small space in the wall so that the tabletop fits partially or completely into it.
A homemade table can be made easily.
A DIY balcony table is an excellent solution that will not only decorate your apartment, but also make your balcony more practical. Agree, it’s nice to sit on the balcony on a summer evening and enjoy a cup of aromatic tea.
How to make a hanging table
Hanging structures are the best way to save space. To make them yourself you will need:
- chipboard sheet,
- metal corners,
- loops,
- screws,
- varnish,
- sandpaper.
- Choose a location.
- Calculate dimensions.
- Create a drawing.
- Cut out the tabletop.
- Sand the tabletop with sandpaper and varnish.
- Attach a triangular or U-shaped support to the tabletop.
- Install metal corners on the wall.
- Secure the tabletop to the corners with hinges.
- Check the structure for strength.
Please note: Bedside table for the balcony
Table options for the balcony in the photo
Space for shelving
As a rule, there is no solid wall on a glazed balcony. The only durable surface is the wall of the house, brick or concrete - it is this that is the load-bearing support for the future rack. It turns out that the structure will be fixed to the wall between the window and the balcony parapet. But this is not the only arrangement of shelving.
If there is a blank end wall in the balcony glazing, you can also install a rack near it. In this case, it can occupy the end part of the balcony, and this is the best location, since the passage will remain free, and the shelves will not block the approach to the window. The blank wall at the end of the balcony also makes it possible to make corner shelves.
On the spacious balcony there is the opportunity to experiment with the shapes and sizes of shelving. You can make several structures and place them in different places, depending on their purpose. For example, shelves for flowers are placed in the most illuminated place, and cabinets for storing things in remote corners of the balcony.
Preparing wood for installation
Dimensions 2000*800*400
To make a wooden rack, well-dried bars are used, since wet wood will warp after drying. As a result, the structure may become askew, the fastening points will become loose, and the shelves will have to be reinforced again.
The bars are inspected, and if necessary, they are sanded: irregularities, burrs, and peelings are smoothed out. Sandpaper is attached to the sanding block, and the wood is sanded manually. Instead of a manual sanding block, you can use a grinding machine (preferably a belt or vibrating one). It is not necessary to sand all the wooden elements; it is enough to sand only the shelf boards and bars that will be on the front of the rack.
Important. Sanding is carried out only along the grain of the wood. First, the treatment is carried out with the coarsest sandpaper, then medium-grain, and finally the finest.
The tree has a significant drawback - it is attacked by wood-boring insects. It is also susceptible to rotting if kept in a humid environment. Since it is not always possible to create favorable conditions for wood on the balcony, it should be hidden with preventive antiseptics. The wood is treated with an antiseptic twice, but a second layer is applied only after the first has dried.
Labor and cost
| Work stage | Time spent |
| Making a countertop | 1 hour 10 minutes |
| Making a support | 1 hour |
| Assembly | 1 hour 30 minutes |
| TOTAL | 3 hours 40 minutes |
| Material | Quantity | Cost, rubles |
| Chipboard | 1 sheet, 2100 x 600 mm | 1200 |
| Antifungal agent | 0.5 l | 250 |
| Dye | 1 l | 90 |
| Varnish | 1 l | 600 |
| Wood screws | 15 pcs. | 15 |
| Loops | 4 things. | 300 |
| Sandpaper | 1 roll | 100 |
| TOTAL | 2555 | |
Door arrangement
You can buy ready-made louvered doors.
Things stored on shelves do not decorate the balcony, so it is better to close them with doors. They can be made swinging or folding. Hinged doors usually consist of two leaves, which are attached to furniture hinges to vertical bars. Doors are made from plywood and wooden planks. First, light frames are cut to size, after which blanks cut from plywood are attached to them. If the door for the cabinet exceeds 1.5 m in height, additional crossbars are mounted on the frame, which will hold the shape of the frame and prevent it from deforming. The hinges are screwed to the doors and then hung on the rack. To prevent the doors from opening spontaneously, a furniture latch or magnet is installed.
Folding doors are a little more difficult to make. They consist of several slats connected to each other by furniture hinges. The slats are made from thin boards or furniture panels, their edges are well sanded with sandpaper or covered with a melamine strip.
Advice. If the rack is completely closed, you can make two pairs of doors. The upper ones cover the shelves located under the ceiling (the mezzanine part of the shelves), and the lower high doors cover the rest of the shelves.
For racks intended for flowers, doors, of course, are not needed. They are hung only on the upper shelves where things will be stored, while the lower ones remain open.
