Nowadays, a healthy lifestyle is very common.
And table tennis can be a great way to keep fit while also having fun. At the same time, it is not necessary to sign up for a gym, just get your own tennis table. And in order not to buy expensive equipment, you can always assemble the table yourself.
A little history
The name "Ping Pong" appeared at the end of the 19th century. A number of historians believe that the game owes its appearance to the rainy weather of Foggy Albion, which forced tennis matches to be interrupted.
To be absolutely precise, table tennis and ping-pong are two different sports, but in everyday speech they are very often used as synonyms.
The whole difference between Olympic and amateur sports lies in the “clothing” for the rackets. Table tennis uses rubber-coated rackets, while ping-pong uses either uncoated or cork-and-parchment-coated rackets.
The first set for the game was released by Jaques of London in 1891. Well, many modern home craftsmen know how to make a tennis table without resorting to the services of branded salons and stores and willingly share their knowledge on their own websites.
Table tennis table drawing and dimensions
Important : the dimensions of the standard playing field are 1525 mm by 2740 mm.
The height of the playing surface above the floor should be 760 mm . The thickness of the tabletop for an amateur tennis table varies in the range of 12-28 mm, but the average is 18 mm.
It is necessary to pay attention to the fact that the supports of the tennis table should not extend beyond the contour of the playing field. Ideally, the support structure is recessed into the playing field and lags behind the edge of the tabletop by approximately 200-300 mm.
For indoor play
According to the table manufacturing diagram, you will need:
- legs (8 pcs.);
- crossbars (4 pcs.);
- lateral ligaments and spacers (2 pcs.);
- clamps (8 pcs.);
- countertops (2 pcs.);
- hinge plate, brackets, axle (8 pcs. each) and lugs (16 pcs.).
On the World Wide Web it is not difficult to find photographs of a tennis table with a step-by-step explanation of how to assemble such a product.
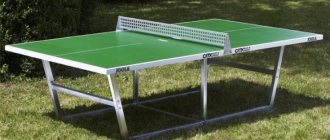
Tennis table Start Line Cadet (with net)
Start Line Cadet is a compact table for small spaces with a net included.
Video reviews (3)
Comparison of table tennis tables. Previously, we only dreamed of such things.
Assembly of tennis tables of the Compact Start-Line series
Assembly of tennis tables of the Sport Start Line series
S1-52I, S1-53I Sponeta Indoor tennis table. Installation and operating instructions
How to set up table/net
Characteristics (4)
| Parameter | Meaning |
| Accommodation | in room |
| Playing field material | laminated chipboard |
| Playing field thickness | 16 |
| Mesh included | There is |
Prices for Yandex.Market
Compare prices (2)
How to buy or where we are +
"SkidkaGUID" is a price comparison service in stores, a cashback service and assistance in choosing products through a selection of video reviews, testimonials and product comparisons. Most of the stores presented on the website deliver throughout Russia, so it is beneficial to use online ordering on the website of this store (you can find out whether orders are delivered to your region on the website of the selected store). To buy the selected product, you need to click the “ buy ” button next to the selected store and continue purchasing on the website of this store. To get cashback, follow the same steps by registering first.
Second option
Knowing the standard dimensions of a tennis table (2.74 by 1.52 and height 76 cm), you can make sports equipment in the simplest way.
Sheets of plywood and legs are purchased. Everything is held together with self-tapping screws, the product is painted, and in just a couple of hours the table is ready!
Note!
DIY induction heater ♨️ - reviews of the best manufacturing options. Varieties of homemade device designs + step-by-step master class (160 photos)
- Do-it-yourself Gauss cannon: TOP-130 photos of the best ways to create it yourself. Design features + master class for beginners
- DIY clamps - a step-by-step master class for beginners. Schemes for manufacturing different designs + 170 photos
Tennis table design and standards
For a sports game you need a ball, rackets, and a game table with a net for marking boundaries. Two or four opponents can play. This sport develops speed and reaction speed, fine motor skills, and is a remedy against fatigue and tension. Will allow you to make your vacation eventful and active.
Players use wooden rackets that are covered with a bright red rubber on one side and black on the other. To play ping pong, the racket is covered with sandpaper on both sides. The ball is made of white or orange plastic with a diameter of 40 mm.
Dimensions
The tennis gaming table has standard dimensions: length - 274 cm, width - 152.2 cm, height - 76 cm. A net with a height of 15.2 cm is attached in the middle.
The thickness of the tabletop affects the rebound of the tennis ball - it cannot exceed 30 cm and be less than 25 cm and must be the same over the entire playing surface.
The product is divided strictly in half by a white line 3 mm thick, and markings are applied along the edge. The white stripe is 20 mm thick.
There are mini tables, or children's tables, their width is 0.61 m, length - 1.1 m. Such products are made with adjustable legs and rise to the height of the child. It can be installed in a room, folded and put in the trunk of a car.
At competitions, tables are used in two colors: green or blue. But for lovers they can be blue, green, gray or brown. With glossy or matte surface. For a comfortable game, a matte surface is better; it produces less glare and the ball is more clearly visible on it. The tabletop must be perfectly flat, otherwise it will be very difficult to play.
There are two types of products: collapsible and stationary. The collapsible option is convenient if you have a small area or the table is located in a summer cottage and it needs to be removed indoors often. It's very light. The disadvantage of this design is low reliability.
In order to install a stationary structure, it is necessary to equip a special room, the area of which is at least 5x8 meters. This could be a separate room or a covered area outside.
Designs may be different. There are products made of glass, wood, concrete, granite, plastic, plywood and other materials.
Outdoor table
Making a folding table is more difficult, but such equipment is much more practical. The difficulty lies in the large number of connections and parts that must be carefully adjusted to each other.
You shouldn’t get hung up on exact measurements – a couple of millimeters or even centimeters are not decisive. The most important condition for a normal product suitable for playing is a flat and smooth table surface.
Particular attention should be paid to the material - if the product will be constantly outdoors, materials such as fiberboard or chipboard cannot be used. Even covered with several layers of paint, playgrounds made from these materials will very quickly lose their shape and bend.
What can you make a billiard table from?
A billiard table is a very complex product, it is a luxury item. The player can lean on the tabletop or put his entire weight on it, so the table must be heavy and durable. It should not vibrate or warp. The ideal dimensions would be: height - 80 cm, length - 2 m, width - 1 m.
The product consists of a frame, tabletop, base of the playing surface, supports, sides and pockets.
The billiard table has its own requirements:
- strength and reliability;
- mobility;
- be able to transform into a tennis or dining table.
The product is made from quality material. Previously, solid wood was used: oak or beech. For a cheaper option, they used pine. From the legs to the tabletop, one type of dense wood was taken.
The best materials for making countertops and sides are mahogany, ash, oak, and pine. The tabletop can be made from a solid stone slab, concrete, metal, plastic and chipboard (chipboard with a facing film based on paper and melamine resin) with a thickness of at least 20 mm, or more.
Chipboard table top
There should be no cracks on the chipboard sheet. The main condition for the product is a flat surface. It quickly wears out and becomes deformed due to the bounce of the balls. The thicker the sheet, the better.
Plywood table top
Plywood can be a cheaper option than stone or timber. It is better to use birch plywood with a thickness of at least 24 mm, which can be coated with water-based acrylic paint in 2-3 layers. This will improve the moisture resistance of the plywood.
Laminated plywood
The material is laminated with non-flammable melamine. Laminated plywood does not warp or bend during use. From this material you can make a tabletop solid or split. Can be used outdoors and tolerates temperature changes well.
The base plate of the product consists of three or five parts (depending on the size of the field), which are connected using threaded ties. The seam between the slabs is carefully puttied, the surface is leveled so that the joints between the slabs are invisible.
If you run your palm over the countertop, the joints should not be felt.
Base material
The base can be made of different materials. The main thing is that it is resistant to damage.
The base material for the product can be:
- The natural stone is Ardesia slate. It is durable due to its slate structure. A falling ball weighing 290 grams will not leave dents or cracks on the slab. It has an ideal surface for rolling out balls; damage that may occur during operation can be easily eliminated.
- Made from synthetic granite - synthetic granite. A composite material based on marble chips bound with epoxy resins. Has the property of crumbling.
- It is more difficult to obtain a slab of the required size and thickness from marble. Marble is susceptible to damage and difficult to polish.
- Made from laminated chipboard (laminated chipboard). The big advantage of a slab made of this material is its low weight, the minus is increased background noise. Chipboard wears out quickly.
A good foundation must withstand a considerable load of weight without changing its geometric parameters.
Necessary materials
In order for the table to “tolerate” any weather conditions (heat, direct sunlight, cold, rain, snow), it must be made of either plastic or laminated, water-repellent birch plywood.
This is the material that is best used when making a do-it-yourself tennis table for the outdoors. The thickness of the material used should be in the range of 16-20 mm.
The traditional color for gaming tables is green. If you purchased plywood of a different shade, you should paint the playground in the desired color, this will only enhance the “capabilities” of the playing surface to withstand precipitation.
Note!
Do-it-yourself electric scooter - a master class with step-by-step instructions for doing it yourself. Tips and simple patterns for beginners + the best photo reviews
DIY rocking chair: TOP-120 photos of the best manufacturing options. Master class on creating a rocking chair at home
Smokehouse from a gas cylinder - the best master class on making a homemade smokehouse with step-by-step photo diagrams for beginners
Since transporting a standard sheet of laminated plywood is extremely difficult, you can purchase a couple of sheets of a smaller size, and on the spot, during work, fasten them together using a beam of a suitable size.
Important! Complete moisture resistance will be provided by edging the edges of the table top with an aluminum profile.
Types of tennis tables
The popularity of table tennis is due to several factors. There is no need to spend money on paying for a gym and a trainer. It is enough to have one like-minded person. This is a great way to get your kids and family involved in sports. The small size of the tennis table allows you to store it in the country and display it in the garden during leisure time with friends. A healthy vacation is always good and beneficial. This means healthy sleep, good appetite, and a toned figure. The rules are simple, and you don't need to be a professional athlete.
The main thing is to choose the right type of ping pong table:
- Stationary. It is most often placed on a personal plot in an open area or under a canopy. Of course, if there is a room of adequate size, it can be easily placed in the hall. You can still move it, but only without dismantling or folding it. But the design is lightweight and two people can easily handle the task after the game.
- Folding.
This modification is convenient because when there is no one to play with, it can be folded in half and hidden. It is often equipped with wheels for ease of transportation. By the way, by lifting one side, you can train on your own, train your hand, throw a shot, practice serving. - Adjustable.
This design, when the height of the legs is adjusted at the request of the players, is convenient for small people, teenagers, and children. For example, you are relaxing in the country with children. When they have played enough, in a minute you will raise the tabletop to the level of an adult, and you will play sports yourself. - Mini tables. The small size of the table tennis table is necessary for the youngest children. However, if you “cut” it lengthwise and make it foldable, such a table will fit into a car without any problems, and you can take it with you on a fishing trip or a picnic. Then it is enough to find a flat area and level the surface.
- Street made of concrete. If you want to install a tennis table in the courtyard of an apartment building or in a park, you need to make sure that the structure is massive, durable and non-transportable. Therefore, the top panel and supporting supports are cast from reinforced concrete. Then the coating and markings are applied.
- Glass decorative.
This model is more of a designer one. The convenience and advantage is that the surface of the glass always remains smooth. It is not deformable, which means there will be no dents, chips, etc. Moisture also does not cause any harm to this material. Therefore, even in an open area of a personal plot, the table will last a long time.
From the above it is clear that an outdoor tennis table must have a number of special characteristics. He should not be “afraid” of atmospheric phenomena. Rain water and direct sunlight should also not cause harm. Therefore, before starting work, determine where and how often you will play table tennis.
Legs
The table must be strong and stable, because... During game battles, opponents may accidentally lean on or push him. It is better to make the supporting base of the platform from a metal frame. For this you will need:
- four pipes measuring one and a half meters;
- squares - four one meter long and the same number two meters long;
- eight half-meter squares.
Minuses
Inconveniences are caused by the lack of transport rollers on the table, a thin tabletop and materials that cannot ensure a uniform rebound.
This drawback is found in outdoor products: melamine countertops are inferior in performance to chipboard, and metal edging disrupts the uniformity of rebound.
Operational problems arise in the following cases:
- there is no anti-reflective coating on the surface;
- the rollers are made of insufficiently strong material and cannot withstand weight;
- The tabletop material is fragile;
- the surface is uneven, damaged or deformed.
Frame assembly
Let's look at the instructions on how to make a frame for a tennis table at home.
Step No. 1. Using two-meter squares, we connect a couple of pipe sections and weld them together. The first crossbar is located twenty centimeters from the top edge, the second seventy centimeters lower.
Note!
Do-it-yourself compressor: TOP-130 photo reviews of finished compressors. Step-by-step instructions + diagrams and drawings
- Do-it-yourself wind generator: TOP-170 photo reviews of finished devices. Detailed DIY instructions for beginners
- Do-it-yourself spot welding - the best master class on making homemade spot welding with step-by-step photo diagrams of do-it-yourself work
Step No. 2. Align the assembled frame and weld it.
Step No. 3. A similar operation is carried out to design the second pair of table legs.
Step No. 4. In the place where the table is installed, holes more than half a meter deep are dug, sand is poured in and the legs of the tennis table are dug in.
Step No. 5. The table legs are fixed in the ground with cross-shaped mortgages. Using a spirit level, it is necessary to achieve the most uniform height of the table legs.
Step No. 6. The holes are filled with bitumen or cement.
What you need to know
The tennis table can be made collapsible, that is, folding, or solid (stationary).
You need to make your own choice and decide which option is more suitable.
See also
How a memory foam mattress works, pros and cons, which one to choose
From the standpoint of practicality and ease of use, the second option wins. But such structures have the disadvantage of lower structural strength. Although much still depends on what materials it will be made of. If we are talking about low-quality tables made of OSB or plastic, you should not count on a long service life. If you take stronger materials as a basis, assemble a table from a profile and a wooden beam, then you will definitely be able to enjoy playing table tennis for at least 5-10 years.
A free-standing stationary table will require room. Moreover, it was allocated specifically for this design. The optimal minimum area is 5x8 meters.
Otherwise, the table itself will fit, but it will be inconvenient to play.
There is also an increased requirement for the evenness of the base, that is, the floor. If the floor turns out to be crooked, you are unlikely to be able to play normally.
There are several standards. Moreover, they must correspond not only to a professional one, but also to an ordinary tennis table intended for playing at home. This will give you more opportunities and pleasure from the process.
[adv1]
- The optimal standard length of the structure is 274 centimeters;
- The width should be kept to 152.5 centimeters;
- When choosing a height, focus on the value 76 cm. As you can see, this indicator differs from the height of the table, since here we are talking about playing while standing;
- The mesh also has its own standardized height. It is 15.25 cm;
- For professionals, it is better to make a table with a thickness of 28 mm;
- Amateur designs start from 12 mm in thickness.
I am sure that adhering to the established standards will not be so difficult.
But if they comply, it will be possible to assemble a table correctly, which will ensure a comfortable and enjoyable game of table tennis.
Drawing game lines
In order for the table to be ready for play, markings must be applied to it. A white line 3-5 mm wide is drawn in the middle of the table. Before applying paint, you should use masking tape to mark the boundaries of the center line, this way you can clearly draw the boundary without getting dirty.
Stepping back from the edges along the entire perimeter of the site by 15-20 mm and also marking the boundaries with tape, we apply white paint to indicate the playing area of the table.
Assembling and installing the countertop
- To begin with, a frame is assembled from 40x50 mm timber.
- It is better to take the actual dimensions at the outer corners of the already installed supports from the profile pipe.
- If the base is made without deviations, then the dimensions of the frame along the internal perimeter should correspond to 2080x1040 mm.
- You will need two beams with a length of 2160 mm and three with a length of 1120 mm.
- It is advisable to join the beams with a half-timber overlay or a tenon joint.
- The frame is assembled rectangular with a crossbar in the middle.
- Instead of the crossbar, which will be at the junction of the two halves of the tabletop, you can use the remaining strips of plywood in one layer or folded in half. If the halves of the table are joined with strips of plywood, then it is advisable to place them on glue and then additionally screw them in with screws along their entire length, in two rows.
- To combine the tabletop with the frame, strips of plywood are cut into three parts, the central part should fall between the long sides of the frame, and the short ones on the outside, not reaching the edge of the tabletop 7-10 cm, so as not to interfere with the installation of the mesh.
- The frame and tabletop halves are connected together using metal furniture corners and screws. The corners are distributed evenly along the inner and outer perimeter of the frame in increments of approximately 30 cm.
- The most vulnerable place of the tabletop is the ends; they should be reliably protected. Simple painting or end-tape will last 2-3 years, then chips and blisters will appear. Therefore, it is better to edge the table with an aluminum corner: we precisely cut the parts according to the final dimensions of the table: 1525 and 2740 mm, and make a cut inward at 45° for the ends that meet at the corners.
- In the centers of both shelves we make 3 mm staggered holes, the step in each row is 60 cm.
At the bottom ends of the tabletop, you need to chamfer 2.5–3 mm and apply silicone hot glue to the edge; use white plastic rods. An assistant should heat the applied bead of glue with a hairdryer until the end of the plywood is completely covered with it, then the aluminum corner is pressed tightly until excess protruding appears. Pay special attention to filling the corners.
After the glue has dried:
- Drill through the plywood with a 3mm drill bit through the holes in the corner.
- Countersink the metal to 7 mm.
- Reinforce the edging with 12mm countersunk screws.
- From the front side, excess glue is cut off with a sectioning knife. The corner will protrude above the tabletop by 2–3 mm; you need to rest the hacksaw blade against this edge at an angle and pull it with force 5–7 times along the entire length. Along this groove, the edge is broken off with pliers, then the end is finished with an abrasive stone until a 2 mm chamfer is obtained.
Assembly
The last stage of work on making the table will be attaching the playground to the metal base. This can be done in two ways.
First option. Three or four holes are drilled in each table leg plate and the tabletop is secured with screws.
Second way. Through holes are drilled in the table legs, as close to the surface as possible. The playground can be fixed motionlessly either with pieces of reinforcement or with massive wooden splinters inserted into the holes. This option allows you to remove the platform and store it in a dry room during the winter.
Using scraps
When making a folding tennis table with your own hands, a certain amount of scraps remains. From these, as a bonus, you can make several rackets for the game. Markings are applied to a piece of plywood:
- draw a rectangle with dimensions 2x16 centimeters;
- semicircles with radii of eight centimeters are drawn on the wide sides;
- from the center of the picture we draw a rectangle with dimensions of 3.5x18 centimeters;
- cut out the racket with a jigsaw;
- use glue to thicken the handle;
- We clean the glued parts with clamps.
All that remains is to glue the shock-absorbing material to the shock part of the product and you can start playing in the fresh air.
pros
Tennis tables have the following advantages:
- They are distinguished by the uniform rebound of the ball from the playing surface: this gives the player the opportunity to predict the trajectory and direction and calculate the force of the impact.
- The designs are convenient for transportation and storage.
- Outdoor options tolerate moisture, cold, heat and sunlight well, while indoor samples are protected from glare.
The following nuances are characteristic of outdoor all-weather tables:
- The material of the tabletop makes it resistant to weather conditions, the playing surface does not bubble from moisture and does not fade in the sun.
- Metal edging guarantees durability.
- The anti-reflective coating is applied in such a way that it becomes possible to play in conditions of excessive and uneven lighting.
Anti-vandal tables are securely reinforced, constructed of durable materials, and equipped with a metal mesh.
The advantages of professional tables include:
- Quality workmanship that guarantees durability and long-lasting playability.
- Ergonomic design: installation and dismantling require a minimum of time and effort, even with a large weight of the product.
- Playing qualities: professional options lead in game speed and ball rebound force.
Advanced or semi-professional equipment is convenient for training athletes. Amateur models are budget-friendly, lightweight and compact when assembled.
The advantages of folding systems are as follows:
- One-sided folding makes it possible to train without an opponent.
- Full folding is designed for regular transportation and convenient storage.
Folding option
The dimensions of plywood sheets sold on the market are perfect for making a folding table. In general, this material has the disadvantage that it sags over time, so it is better to make the tabletop from two sheets.
The joint and possible minimal gap at the location of the mesh are quite acceptable. When choosing a material, special attention must be paid to its quality. The surface must provide the necessary quality of rebound of the ping pong ball.
Important! Choose first or second grade material. One side of the plywood must be sanded. Use the cutting service when purchasing material so as not to have to do this work on site.
Looking at the pictures of the tennis table, you will notice that the tabletop is made of a maximum of two sheets. A larger number of pieces sharply reduces the quality of the playground and it is not recommended to make it from more than a couple of pieces of material.
How to make a ping pong table with your own hands
Currently, there is a wide range of ping pong table models on the market, however, a homemade table can compete with most of them. The designs of such products are simple and do not require the use of complex technological techniques. And the preliminary purchase of high-quality materials will allow us to produce a product suitable for use both at home and outdoors.
Ping pong table
Before you start making such a table, you need to decide which design will be more acceptable for you. Ping-pong tables can be folding or stationary. The latter option is best suited for outdoor installation.
Stationary table
And folding models allow you to save useful space when the game becomes irrelevant. When deciding in advance where the table will be installed, you should remember that there should be enough space around it for players to move freely. The area of such space should be 5x8 m.
Folding table
The flooring deserves special attention. It is advisable to give preference to a solid and smooth anti-slip option. A floor made of bitumen or concrete is excellent for this purpose. Wooden flooring installed on a level and hard surface is no less effective.
Tabletop dimensions
In accordance with standards accepted throughout the world, a classic ping pong table should be 2740 mm long and 1525 mm wide, with a standard height from the floor of 760 mm. However, it is possible to make a table with other dimensional characteristics, taking into account individual requirements and the area of the space expected for its installation. For teenagers, the height of such a product can be from 600 to 700 mm. The dimensions of the mini-table are 2440x12200 mm, and in some cases even 110x61 mm. The thickness of the tabletop of such a product used within a club, according to generally accepted standards, should be 22 mm, while for a professional game you will need a tabletop with a thickness of 25 to 28 mm. And for amateur tennis, a slab with a thickness of 16–19 mm is quite suitable.
Tabletop dimensions and height of a ping pong table
Details
Work begins with preparing the largest part - the gaming table. If the pieces of material are not cut at the place of purchase, then they should be brought to standard sizes.
In order to increase the service life of the tabletop, its ends should be treated. The edge is cleaned with sandpaper. Even more reliable protection is edging the edges with squares.
The supporting frame is made of half-meter bars and longitudinal beams. Height-adjustable furniture legs can be used as supports.
How to make parts yourself?
According to the drawings, markings are applied to all workpieces using a square, pencil and tape measure. Before doing this, it makes sense to treat the wood with a special solution for moisture protection.
The cheapest option is stain. Boards and beams are sanded to make them smooth and even. Then, with a hacksaw, all excess is removed so that each part corresponds to the dimensions specified in the specification for the drawing. To ensure fit doesn't become an issue, it's vital to measure to the nearest millimeter.
First, the supporting frame is assembled. If the slab is loosened on a machine, the dimensions will be ideal. Otherwise, you will have to use a jigsaw and sand the cut ends with sandpaper. The frame from the boards is assembled using self-tapping screws. It is then secured to the base with brackets. This fastener is reliable and durable.
The main thing is that the cross-sectional dimensions of the legs are ideal. Then the table will not wobble. After this, the tabletop is laid on the assembled and leveled frame, secured from below and the mesh is pulled. You can purchase it at a sporting goods store or make it yourself.
Final design
The assembly process is not difficult. It is advisable to make reinforcements in the places where the legs are attached. Load distribution is achieved by installing metal plates at the points of fastening with bolts or screws.
All that remains is to carefully secure both sides of the tabletop to the frame and make the necessary markings.
Another way to make a tennis table
To assemble the table legs, you will need a 20x40x4 mm profile pipe, 6 m long, and 16 m of steel angle with equal 20 mm shelves, at least 3 mm thick. To give the tabletop exceptional resistance to moisture, its edges must be edged with an aluminum corner profile 20x20x1.2 mm, you will need sections of 280 and 160 cm - two pieces of each.
We dig in and shake up the table legs
A tennis table must be very stable. Its base, a metal frame, must be made conscientiously.
First, cutting the parts:
- Profile pipe: 4 pieces, 1.5 m each.
- Angle steel: 4 pieces of 1 m and 4 pieces of 2 m.
- the rest of the corner into 8 parts of 0.5 meters each.
We place two sections of pipe in parallel and connect them by welding with two two-meter crossbars made of angle steel. The first is installed 20 cm from the upper edge of the leg, the second - 70 cm below the first.
First, we assemble the frame using millimeter tacks, align the diagonals of the rectangle formed inside, and only then weld the seams tightly. The second pair of legs is assembled in the same way.
- In the place where the table is installed, you need to mark a 150x100 cm rectangle with pegs and lacing.
- With an indentation of 10 cm in each direction from the cord, the turf is removed and a small trench with a depth of a bayonet or a little more is dug; the bottom must be thoroughly cleaned. At the corners of the trench you need to dig four pits 75–80 cm deep and 50 cm wide so that the center falls exactly on the marking peg.
- Pour 10–15 cm of dry sand into each pit and insert the legs so that the upper ends are 80 cm above the ground. Align the legs in a horizontal plane using a long rule and a slatted level; the process will be more convenient if you place broken bricks under the lower crossbars.
- Connect the pairs of legs together with 1.5-meter sections of the corner, shift the attachment points by welding 50–60 mm below the longitudinal crossbars. After assembling the base frame, you will need to remove it from the pits, from now on you will not be able to do without the help of a partner.
- At 100 mm from the lower end of the legs, we weld cross-shaped embeds from 50 cm pieces of corner that will hold the table in the ground. Each welding seam on the product must be cleaned from slag with the angle grinder, and if necessary, more metal must be deposited on top. Afterwards, the pipe is degreased with acetone and coated with a phosphating primer, followed by the application of two layers of enamel of any type.
- After drying, the frame is installed in place, but now to level it you need to slightly embed the legs into the sand with gentle blows on their upper ends to a level of 75 cm from the ground.
- After this, the pits are filled with broken bricks mixed with soil and spilled with a bucket of water every 25 cm.
- Once the legs are in place, the top ends should be level. By laying the profile with a bubble level on the legs in pairs, the horizontal plane is checked.
If necessary, adjust the length of the legs by grinding off the excess with an angle grinder.
On top of each leg it is necessary to weld a square or triangular plate made of sheet steel with a thickness of 2 mm. The right-angle plate is aligned with the outer corner of each support so that the main part faces inward of the table.
Country competitions
Active recreation in an ecologically clean place is a great option to strengthen your health and boost your immunity before the long cold months of the year. Building a tennis table for a summer cottage is not difficult.
The main condition is the availability of free space of 5x7 meters. Having the necessary materials - sheets of plywood, a couple of three-meter boards, self-tapping screws, you can safely get to work.
StartLine Olympic Outdoor tennis table with mesh, outdoor
I would like to share my impressions of purchasing a StarLine Olympic Outdoor tennis table with mesh, outdoor. I've been wanting to buy a tennis table for a long time. I’ve always loved to play, but it’s time to teach the younger generation to an active lifestyle. Otherwise, only the tablet is of interest. The table was needed for infrequent games at the dacha on weekends. Therefore, I chose inexpensive and moisture-resistant. After exploring the Internet and reading reviews, I settled on this manufacturer. Yes, and it was in stock at ONLINE TRADE.RU. I didn’t want to wait until the summer season. I was afraid that by summer the prices would be higher. Show in full
Build process
The simplest construction trestles of the required height are made from available materials. Then:
- trestles are installed at the same level;
- the boards are laid and screwed with screws to the length of the tennis table;
- sheets of plywood are laid over and secured with slats;
- The table top is sanded and several layers of antiseptic are applied to it.
If, when leaving your summer cottage, you do not have time to disassemble the table and insulate it from the effects of precipitation, it is recommended to sew a cover from waterproof fabric. This way you can protect the product from damage, and during your next visit to the dacha you can again organize a family ping-pong tournament.
Exploitation
Each model is created either for indoor use or for outdoor installation. Indoor equipment deforms when exposed to moisture, sun and temperature. Wear and tear reduces playing quality and is dangerous.
The moment of assembly and dismantling is one of the most important in operation. Instructions are included with each product. Compliance with it will save time and protect players from injury, and parts from damage. Caution is also necessary during transportation.
Tennis tables are not suitable for other purposes (unless the instructions provide for transformation into a picnic or lunch table).
They are designed for play by two or four participants or for independent training. They cannot be used for sitting, lying or storing objects. The structure may not support the weight.
If the rollers are not equipped with a special braking system, the model can only be installed on flat surfaces: where spontaneous movement and sliding will not occur.
To prevent injury and equipment damage, inspect fasteners, screws, and clips. They need to be tightened and secured as necessary.
Another important point is caring for the surface of the countertop. It ensures proper play, so you want to prevent scratches, scuffs and discoloration.
Wipe it with a soft sponge without detergents: standard powders and gels leave marks and damage. There are special surface care products - they will not harm the coating.
It is recommended to store the assembled table in the same conditions in which it is used. If you use the case during breaks between games, the service life will increase.
