It should be noted right away that it is difficult to make an even cut on the tabletop using an electric jigsaw. A cut that will be comparable to a cut with a circular saw. This is possible, but achieving this is more difficult than sawing off a tabletop with a circular saw.
Special files are an important element for obtaining an even, clean and smooth cut on the tabletop using an electric jigsaw. For such work you need thick files with a fine tooth pitch. The thickness of the file is needed so that the cut does not “walk” vertically, that is, it is perpendicular to the surface of the tabletop. Actually, this is the main problem when sawing table tops with a jigsaw - the bend of the file at the bottom of the cut and the cutting line moving away from the vertical.
A fine tooth pitch is needed to avoid chipping on the edges of the cut.
Most jigsaw files sold have a thickness of 0.9 to 1.3 mm. If you use such a file to cut a chipboard tabletop 30-40 mm thick, the file will bend and the cut will be deviated from the vertical. Moreover, the deviation can be very large - up to several millimeters. The amount of “blockage” depends on the thickness and density of the chipboard.
Leading manufacturers have special saw blades for precise (vertical) cutting. The thickness of such files has been increased to 1.7 - 1.9 millimeters.
Reworking the jigsaw sole
When setting up a jigsaw, you first need to check the perpendicularity of the sole, since sometimes the clamp is not firmly fixed. Specialists often modify the sole of the tool, that is, they reduce the gap between the leg and the pressure pad. This eliminates "breaking" of the crust in the layers of material on top.
When using pads, it is important for every novice craftsman to remember that they should not scratch the surface of the part. In this case, they need to be replaced every five meters of cutting. Zero clearance can be achieved by attaching the cover plate to the jigsaw support leg.
The lining has only one narrow slot that fits tightly to the cutting element. Therefore, even a weak feed of the teeth can cut off small chips, and not turn out the chips of the top layer. The highest quality pads, which are guaranteed to last you a long time, are usually made from:
- sheet plastic;
- metal material;
- fiberglass.
Types of jigsaw blade shanks
The first thing you should pay attention to when choosing a jigsaw file is the type of shank. And this is logical: if your tool is not designed to work with this variety, then you simply will not be able to use the new blade. There really aren't that many options:
It is often called “Boschevsky”, since it was this company that developed files with this type of shank. Since Bosch is the market leader in jigsaws and jigsaw accessories, and other industry giants are trying to switch to this standard, it is not surprising that T-shank files are currently the most common. The T-shank fits most modern jigsaws - Bosch, Makita, Metabo, Hitachi, Skil, AEG, DeWALT, Sparky, Interskol, etc.
The second most popular type of shank is the American standard. This is a universal shank for older models of jigsaws Skil, DeWALT, Wolf, Ryobi, Stayer, BlackDecker, etc. These files are suitable for all jigsaws with block and screw clamps.
Files with this shank are only compatible with older Makita jigsaw models.
It differs from the T-shank only in the presence of a second stop. These files are only suitable for older Bosch models.
Tile
You need to prepare a file without teeth and apply abrasive to it. The pendulum stroke must be turned off and the speed reduced to minimum. In this case, a jigsaw is one of the effective devices for cutting out curved elements on tiles.
READ How to Wind a Spring on a Chainsaw
What is the best way to connect two countertops at a right angle of 90 degrees?
L-shaped arrangement of furniture in the kitchen is a common option for most apartments, especially in older houses. To arrange the set, connecting the tabletops at an angle of 90 degrees with a small room area is the only option that allows you to fit everything you need. This leaves room for a dining table if the rooms are not combined.
The best solution to the problem is to level the wall before installing the furniture and achieve right angles and a flat wall surface.
A connection using an aluminum profile may be more practical than a Euro saw. During installation, the aluminum profile is treated with silicone sealant, which makes the connection airtight. The connection becomes impervious to water, so its location near the sink will not affect its service life and appearance.
In this case, the euro saw may begin to swell from water entering the gap. If the coating is plastic, then water will not spoil it, but more often chipboard or chipboard is used for kitchen countertops. When moisture gets on it, especially with regular exposure, it begins to increase in size. To prevent this, before installation, you need to carefully cover the ends with a waterproof sealant; a colorless plumber's sealant will do. Everything needs to be processed, all cuts.
File sizes
Canvas length. The length of the saw blade can vary over a fairly wide range - from 40 to 250 mm. The longer the file, the thicker the workpiece it can cut. It should be borne in mind that the actually achievable depth of cut depends not only on the length of the blade, but also on the capabilities of the tool itself. For sawing thin materials, it is better to use short files: their use guarantees a neat, clean cut, because the process is not hampered by the deformation of an excessively long canvas.
Web width. The width of the blade is selected depending on the type of operations that are supposed to be performed using a jigsaw. Wide saw blades are ideal for straight cuts: they are easier to guide in a given direction, which means the cutting line is straight.
For curly cuts, on the contrary, you need a blade with a narrow back, which makes it easier to perform various maneuvers, “drawing” smooth curves.
Thickness of the canvas. And finally, the thicker the file, the less it will deviate from the vertical position during operation, i.e. the cut along its entire length will be perpendicular to the surface of the material. However, in pursuit of a neat cut, do not forget that too thick files may not fit jigsaws with a quick-release mechanism.
Sawing with a format saw
The most suitable tool that can be used to cut boards and pressed materials of different thicknesses. The cuts are precise and multiple parts can be stamped.
Professional machines are used for industrial purposes.
They are small in size and weight (up to 20 kg), and easy to install. If necessary, the machine can be removed and moved to another location. The tool is suitable for longitudinal cutting to a depth of up to 8 cm. Also, in a home workshop, you can saw the tabletop with a circular saw with an extended work table.
At home, household machines are usually used.
They are more convenient than household ones, as they allow you to make cuts not only along longitudinal, but also along transverse lines. The maximum cutting depth is 9 cm. When working, you need to apply precise markings and follow safety precautions.
Guide rail for jigsaw
The guide for a jigsaw is a simple device, at first glance, similar to a large metal ruler or rule. The main difference between the tire and the above devices is a special groove along which, like on rails, the sole with a jigsaw mounted on it moves. Most guides have rubberized strips that prevent sliding on the surface of the material, and for additional fixation, they are attached with small clamps. The average length of such devices is from 1.5 to 3 meters, and can be increased by another, similar ruler, using an adapter.
Why does a jigsaw cut crookedly?
The saw blade leaving the pre-designated mowing line can be due to several reasons. The operator may not have enough experience in handling the tool, the file may be defective, and the rod and guide roller for the jigsaw may have serious play. In order not to guess from the coffee grounds, it is worth starting to sift out the factors that determine the accuracy and evenness of the cutting line cut in your individual case.
As usual, it’s better to start with yourself and your approach to sawing. Often, novice craftsmen rush things and, wanting to speed up the cutting, apply a lot of pressure to the jigsaw . The tool does not have time to bite evenly into the material and create a clear groove for the file, which begins to follow the path of least resistance and makes unpredictable movements. This problem is especially common when working with thick timber (from 40 mm) and varnished plywood from Soviet times.
This is one of the reasons why the jigsaw moves to the side. What to do about this? The answer is obvious. Apply the minimum pressure sufficient to guide the tool along the mowing line and set the maximum number of revolutions (when working with wood). The pendulum mode usually does not affect the evenness of the cut if its design is in good order.
The quality of assembly and wear of tool parts can be a good reason for the formation of beveled lines when sawing. There are basically no complaints about devices from the budget segment (up to 2,500 rubles), as well as hopes for their conscientious assembly. It’s another matter when original, branded instruments begin to perform such tricks. Often, the cause of a crooked cut is the guide roller, the jigsaw rod or its sole.
You can check the reliability of the element’s fixation by simply tugging it with your hand. Loosening of the rod or roller by more than 1 mm determines that this device is not capable of producing a perfectly even cut. The more play there is in the parts, the less accurate the cutting line they form. This problem should be corrected based on the circumstances. If the part itself is worn out, it can be replaced with a similar one. It is difficult to fix a breakdown if the attachment point to the mechanism is worn out. Not every modern Kulibin undertakes such repairs, and this problem is usually solved by purchasing a new tool.
READ How to Put a Chain on a Saw
Unfortunately, the products of many trusted brands are often counterfeited, and jigsaw files are very popular in this regard. It so happens that low-quality and counterfeit products have a rather short service life, which brings many problems to the owner. One of these problems is a crooked cut. An initially smooth blade can bend due to poor-quality metal, which can cause deformation of the tooth set, if it was present at all. In this regard, if your jigsaw cuts crookedly, replacing the saw blade can correct the situation. The process of choosing a high-quality jigsaw file was discussed in detail in a separate topic.
hunter_cbx
Honestly, the title “How not to cut a countertop” would be more correct
The first cut of the tabletop was done with a hand saw in the entrance on the first floor in order to drag it into the elevator. The cutting was done with a large margin (about 8 cm) and in haste. This is what we ended up with (you can take it as a standard).
Next, according to the original plan, the edge was leveled using a straight edge cutter. As you can see in the photo below, the top edge turns out to be perfectly smooth, but due to the wrong direction of work with the router, the laminate cracks on the side of the facade. Of the three attempts to level the edge using a router, all ended with a similar result (the photo shows the results of the third attempt). After the experience of previous work with a wood router, I had the feeling that the router was working hard on 38 mm thick chipboard and slightly overheated.
The next cutting attempt was made with a jigsaw. When working with a jigsaw, the cut is made from the reverse side due to the direction of the teeth on the file (they say that there are special files with the reverse arrangement of teeth, but I have not found any). A Boche T101B (clean wood) file was used for a smooth and clean cutting edge. First, a guide was attached to the tabletop with clamps, along which the cutting was carried out. After 20 cm of cutting, the jigsaw begins to move slightly to the side and the file overheats - and this is the result. Although the edge of the cut (in the photo it is the top) turns out to be quite clean. As a result, we have an overheated file and overheated inserts (these are two small parts that are responsible for the correct positioning of the file during operation) - now all this requires repair (replacement).
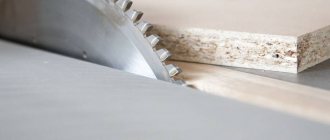
And finally it was the turn of the circular saw. Similarly to working with a jigsaw, we fasten the guide using clamps and saw along it. You should start cutting from the front edge (facade) to avoid chipping on this part. We select a saw blade with the largest number of teeth to ensure an even cut. I used a blade with 48 teeth for a diameter of 130 cm - in the end it turned out that the diameter of the saw was too small - in some places the lower edge was undercut by about 2 mm. For this reason, I had to do all the cuts from the front side, which ultimately led to small chips (which are completely covered by the aluminum side panel). Unfortunately, I did not have the opportunity to check the cleanliness of the cut when sawing from the inside out; most likely the edge would have been smoother.
Well, this is the result of cutting with a circular saw. On the left - chips when sawing the tabletop, on the right - a not entirely successful cut (two turned out perfectly, but the third tilted slightly to the side, then I had to slightly straighten it with an edge cutter, it’s good that it turned out to be the back wall. Apparently the reason for this is the length of the cut or crooked hands.
And now the actual conclusions: 1. It is absolutely not necessary to buy a 38 mm thick tabletop; it is more difficult to process at home. You can get by with a standard thickness of 28 mm.2. If it is possible to order cutting of the tabletop in a workshop, then do so (especially if you have no experience in this matter). 3. IMHO, it is best to cut with a circular saw with a disk of about 190 cm and a fine tooth, starting from the front edge (facade) and most likely from the back side (but I could not check this).4. The experiments took a total of 25 cm of the countertop, it’s good to have a margin of 60 cm. 5. If I fix the jigsaw before the weekend, there will be a new post about installing the sink
Why does a jigsaw cut crookedly and how to fix it
In most cases, the process of straight and figured cutting of materials requires extreme precision of the tool. This statement is most true for an electric jigsaw. The thin saw blades used in this device can easily change the cutting angle, which can negatively affect the accuracy of the mowing line. The clarity of the edges of the product and the evenness of the cutting line are cut depends on the skills of the operator, the serviceability of the device and the saw. Next, we will tell you how to get the planned contour with perfectly clear edges and what to do if the jigsaw moves to the side.
DIY jigsaw guide
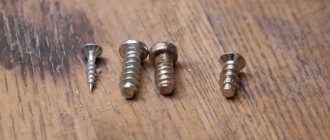
If a jigsaw cuts crookedly, and it is not advisable to buy an expensive guide, you can completely get by with improvised means. Any smooth edge with a thickness of 5 mm or more can become an impromptu stop: a straight strip, usually a piece of plywood and other straight surfaces of suitable sizes. A pair of ordinary clamps can serve as clamps for the guide to the material. If the condition of the surface of the opposite part of the material being sawn is not of great importance, the guide can be screwed onto a pair of self-tapping screws.
To make the fishing line as neat and even as possible, use the optimal file suitable for the material being processed. More visual processes for making and using a homemade guide are demonstrated in the following videos.
Fraser
The milling cutter allows you to get the cleanest possible edge of the workpiece, while the quality will not be so easy to distinguish from the formatter, and sometimes it will be even better.
First, you need to cut the workpiece with a jigsaw, making an indentation from the marking line by 2-3 mm, and then align the line according to the template. Usually, for this purpose, a second piece of laminated chipboard is used, sawn on a format saw, so that it is of a suitable size.
It is necessary to use a copy cutter, that is, one with a bearing. This way you can get a very clean cut. Among the disadvantages of working with a router, there is a lot of hassle, since there is a need for precise markings, preliminary filing of workpieces and setting templates for the router.
Laminated chipboard and the nuances of its processing
In order to cut the tabletop without chipping, you can use a circular saw.
- laminated chipboard;
- blade;
- jigsaw;
- jigsaw .
In practice, chipboard began to be used only in 1940 in the USA, but after a very short time its popularity spread throughout the world, thanks to which all sorts of varieties appeared. The most popular variety has become laminated chipboard, which is not just a product of pressing sawdust with glue under high temperature, but also additional physical and chemical protection in the form of a melamine film.
When cutting simple chipboard, no complications can arise, but with laminated chipboard everything is much more complicated. Often, countertops are covered by the manufacturer with multilayer HPL plastic, which further complicates the process. Coatings can vary greatly in their properties, but they are always polymer, which is why they have the same nuances during processing.
The process itself is quite simple and can be described step by step:
- Using a sharply sharpened blade, a groove is made 2-3 mm deep. If there is a polymer coating of any kind, then the blade must first be warmed up and used without delay. When cold steel is pressed onto hard plastic, even with very serious sharpening, microcracks will appear, which is desirable to avoid;
- Using a jigsaw, slowly and carefully adjusting the direction, a cut is made. If there are places where the direction changes, then it is better to use a hand jigsaw or find the thinnest possible file for an electric analogue (inconvenient, but sometimes necessary).
READ How to Cut Logs with a Chainsaw
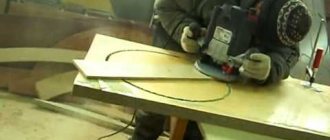
Sawing with a router
A good method to get a clean cut.
First, the material is cut with a jigsaw at a distance of 2-3 mm from the marking bevel strip. Then the line is smoothed with a cutter according to a previously prepared template. A cutter with a bearing will do the job. When cutting ordinary chipboard, no difficulties may arise, but chipboard makes it increasingly difficult.
This way you can make not only straight, but also curved cuts, and make radius parts.
READ How to Cut Wood
We choose a pollen letter with a large number of teeth to ensure an even cut.
Among the shortcomings of the method: you need to apply clear markings, submit the blanks in advance and install the template under the router. In other words, it is awkward to cut off several similar parts using a tool.
Sawing a tabletop without chipping
When making kitchen furniture, it is very important to know all the details. So, one of the most difficult moments when working was and remains the subtleties with chipboard. The reason for this is quite simple: a board or simple chipboard is then perfectly sanded and coated as needed with the materials of interest, while the laminated chipboard is already covered, and it is unlikely that it will be possible to replace it.
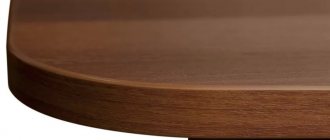
The countertop is one of the most important components of kitchen furniture.
Most often, the problem arises from the question of how to cut a tabletop, because there are all sorts of situations, and the result must be perfect. To begin with, it is worth noting that there are many cutting tools, and not one, but several will be used at once. So, a circular saw will give a wonderful result, but a high-quality unit costs a lot of money, so it is found only in special factories. The grinder, in turn, despite its similarity, will cause a huge number of chips.
In practice, two professional interchangeable tools are used - a jigsaw and a jigsaw.
How to cut a 38mm tabletop with a jigsaw at machine speed (trick)
Experts divide the blades (files) for them into 2 categories: tearing little by little on both sides or tearing strongly on one side. In this case, you will need those that tear on one side.
The secondary instrument will be used like a surgeon's scalpel. You need a very sharp blade that will fit comfortably in your hand. With this blade, before sawing , you need to make a groove 2-3 mm deep, which will allow you to complete the work painlessly.
Final cutting steps
- rasp or file;
- sandpaper;
- paste GOI;
- adhesive tape;
- decorative corner made of duralumin.
Everything here is quite simple, and you don’t need to use millimeter precision, and each stage is performed in several versions.
At the very beginning you need to sand the wood. To do this, first use a rasp (file), which removes the excess. Then, using a sanding machine (zero sandpaper), the wood is brought into an attractive form. This stage is necessary even in cases where nothing is planned to be done after it. Torn wood elements attract moisture much faster, which is why wear occurs at a tremendous speed.
After the wood has been restored to normal, the plastic needs to be restored to the same condition. Usually special polishes are sufficient, but finding them in retail sales is not always easy. In addition, there is one more complication - you will need very little polish, and it will be a pity to throw away the rest. The ideal option is GOI paste, which is available in almost every home, and the directions for its use allow you not to worry about future use.
Even with successful cutting and high-quality grinding, you need to make sure that even missed millimeters do not make themselves felt. To do this, you can use a special furniture decorative corner made of duralumin. The corner is fixed in place without spoiling the appearance.
There is one more piece of advice from experts: when cutting, you can use a guide tape with an adhesive layer, which will prevent the blade from deviating from the route.
You shouldn’t be afraid to cut the table top without chips with your own hands when it’s really necessary, but if possible, it’s better to take it to the nearest workshop, where it will be done using special equipment very quickly and with the utmost quality.
Sources:
https://instrumentoria.ru/45-pochemu-lobzik-pilit-krivo-napravlyayuschaya.html https://masterpomebeli.ru/kuxnya/stoleshnica/kak-raspilit-stoleshnicu-bez-skolov.html
What cannot be sawed
A grinder or an angle grinder is something you should not use to saw a tabletop. Some masters recommend this method to save time. However, it has more disadvantages than advantages.
Use a level to make precise cuts.
Firstly, the quality of the parts is low: due to the sudden movement of the disk, many chips appear. Secondly, if large discs are used, there is a high risk of injury.
Professionals will make better cuts thanks to the availability of special devices.
In addition, after work a lot of dust remains, which is unacceptable at home.
