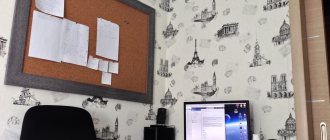
Interior decor for people who like to plan and organize everything, or in families with children, can have not only an aesthetic function, but also have a practical application. An excellent solution for placing things that are pleasing to the eye and important reminders is a cork board on the wall.
Note boards on the wall: possible applications
For people of the older generation, their acquaintance with the board on which they can write happened at school. You erase the carefully written chalk note and make a new one. And so on ad infinitum. Today there are many alternatives to the classic school board. And the scope of use has expanded significantly. Boards used for announcements, presentations, sketches, calculations, etc. are found in every office, organization, and institution.
The process of placing information on note boards is carried out by writing or attaching already filled media
Widespread distribution and versatility are ensured by the main operational quality - the ability to clearly demonstrate the content. The process of posting information is carried out in two ways:
- performing a recording;
- attaching already filled additional media (paper or similar).
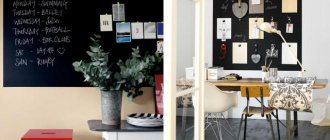
In addition to institutions, boards can increasingly be found in residential buildings. They are hung mainly in rooms where all household members periodically gather. Here priority goes to kitchen-dining rooms and dining-living rooms. A weekly note board is a great general organizer for the family. No one will forget about joint hikes, expected visits, and solutions to pressing everyday issues.
Some housewives skillfully use such common informants to create a menu - they invite family members to write down their wishes. You can find boards in offices, workshops, children's rooms, hallways.
Boards for notes can increasingly be found in offices, children's rooms, kitchens, hallways
Cork covering for walls: basic qualities of the material
Boards for posting information can be made of various materials, in particular balsa wood. Before talking directly about such products, it is worth getting acquainted with the material in general. Its main advantages are environmental friendliness and presentable appearance.
Wall coverings are made from balsa wood. This can be wallpaper (a thin layer of cork applied to paper or non-woven fabric), rolls (2 mm thick canvas consisting of two layers), panels. The last option is slabs 30x60 cm thick. The cork panel on the wall also has two layers: the bottom one is made of pressed chips, the top one is a thin slice of tree bark - veneer. This coating has a number of significant advantages:
- the material is light;
- quite moisture resistant;
- not affected by temperature changes;
- resistant to mechanical stress.
If we evaluate cork material used as insulation for walls, it is worth noting its low thermal conductivity (heat is retained in winter and does not penetrate into the room in summer) and high noise insulation.
Original wall coverings are made from balsa wood: wallpaper, rolls, panels
Certain qualities of the material, namely lightness, resistance to damage and interesting appearance, have become the reason for the active production of boards from balsa wood for the wall.
Important! The top layer of balsa wood products may have a decorative coating. This allows you to choose an option that matches the interior of the room.
We invite you to familiarize yourself with our range of materials
Floorboard - Extra grade
Wood Larch Width 120 mm Thickness 27 mm Length 3 m Qty.
in pack 4 things. 3400 rub/m2Floorboard – Prima grade
Wood Larch Width 120 mm Thickness 27 mm Length 3 m Qty.
in pack 4 things. 3000 rub/m2
Cork board for notes: dimensions, application features
A cork board for notes is a square or rectangle with a frame. For office versions of the product, the frame is often made of aluminum - a lightweight and practical metal. Home models may have a more original appearance, both in terms of shape and frame material.
The standard sizes of factory-made cork boards are usually the following: 50x60, 60x90, 100x100, 90x120, 100x150 cm. These are standard options, but there are products with other dimensions. The technology for making the base of the boards is the same as for cork wall coverings: the bottom layer consists of pressed chips, the top layer is made of veneer.
The standard sizes of cork boards are as follows: 50x60, 60x90, 100x100, 90x120, but much larger products are also available
The top coating of note boards, made of cork, has the unique ability to pass through the surface and retain sharp objects. In this case, the structure of the material is not damaged at all. Pushpins and pins are used as fastening for such boards. The buttons should be in the shape of a stud. The hat can be either a standard metal one or a decorative one made of plastic.
Cork boards for residential premises are distinguished by more original frames made of wood, plastic, and artistically processed metal. At home, boards are convenient to use not only for notes, but also for posting photographs (mobile photo exhibition), children's drawings and other creative works.
The fastening buttons and pins do not need to be removed and returned to the packaging. They can be “stored” in one of the corners of the board. This makes it much easier to use.
How to tighten floor boards
The components of the structure must be tightened after drying, which takes up to 6-12 months. If board classes AB and B are used, they may be slightly deformed.
When laying such lumber, the smoothest ones should be fixed first. They are leveled as much as possible and secured. Next, the flooring components are alternated so that the curved and concave sections coincide.
In this case, it is impossible to simultaneously apply force for alignment and screw in the hardware, so several options for tightening tools are used:
- Wedges. You need to take two wedges (triangles made of wood with a long acute angle), secure the support and tamp the flooring with them. In its simplest form, a piece of board is used as a stop, which is screwed to the joists at the required distance for each leveled component;
- Clamps. Quite an expensive pleasure, especially considering the suitable sizes;
- You can assemble your own leveling machine, which is easily screwed to the joists and is equipped with a lever to easily and quickly press even several boards at a time.
DIY cork board: simple and original
Many people come to the decision to make a cork board for the wall with their own hands. There are several reasons for this:
You can purchase a frame for a cork board ready-made or make it yourself
- the ability to make a product of the desired size (it is not always possible to find a suitable option);
- give the board an original shape (manufacturers often offer standard rectangles);
- arrange in accordance with the overall design of the room;
- use high-quality material (Chinese-made boards have a too thin top layer, which becomes damaged over time even with proper use);
- desire to save money.
You can make your own cork board for notes on the wall in the following way:
- Purchase a panel of the appropriate size. The thickness must be at least 12 mm.
- Using a shoemaker's (or similar) knife, cut out the desired shape. If you plan to change the location of the board, it is better to supplement the structure with a base, for example, made of carbolite.
- Frame the product. You can purchase a ready-made one, since there is now a huge selection of both sizes and shapes, or you can make it from a cable channel (if the sides are straight), flexible plastic (if it has rounded outlines).
The advantage of making a cork board with your own hands is the ability to make a product of the desired size
Helpful advice! If it is not possible to find a sheet of the required thickness, you can buy and connect several thinner panels with special glue.
If you want to give the product an original look, you can cover the surface of the board with fabric. You should use a material with a sparse weave and a smooth texture. Using thick fabrics can cause the pointed parts of buttons and pins to catch and pull out threads.
Cork board in the interior
In the design of offices, bedrooms, children's and teenage rooms, a cork board can become a functional decorative element:
- Its advantage is that over time the content can be changed, creating an interior with a completely different focus and mood.
- Separately, it is worth noting cork as a material for storing small items. Designers turn it into real open boxes, on which every bracelet and necklace is visible, so there is no need to waste time searching for the right accessory.
- In the hallway it can store keys, wallets and documents. Positive affirmations on the surface will create a good mood when leaving home.
How to hang a cork board on a wall: tips and tricks
Particular attention should be paid to the process of hanging the cork board. Factory versions come with hinges or have specially reinforced holes. Here it is necessary to correctly and carefully insert nails, screws or other fasteners into the wall.
But when it comes to self-made products, you need to choose the best method to ensure reliability and aesthetics.
The easiest way to attach a cork board to a wall is to screw it with screws
- Alternatively, the board can be attached to the wall with through screws. Then you should decorate the cap and try not to squeeze the cork part of the product during the screwing process.
- To decide how to attach a cork board to the wall using overhead hinges, you need to evaluate the strength of the base (if one was used) and the frame. If there is a wide wooden frame, it is better to fix it to it. If there is no dense sheet backing, the hinges should also be attached to the frame.
- When fixing the loops, you need to ensure that their outline does not extend beyond the board either in the top or side parts. Otherwise the product will look rough.
- The board is usually hung on already decorated walls. Therefore, before starting work, it is necessary to make precise markings. The further the loops are removed from the edge of the board, the easier it is to hang.
When fixing, an important aspect is the choice of level. He must ensure that the board is accessible to all members of the family (or team) for whom it is intended.
An important aspect is the height of placement, since the board for notes must be accessible to all family members
Main stages of installation
Step-by-step wall cladding with boards consists of several main stages:
- Surface preparation.
- Frame installation (if required).
- Fastening boards.
- Padding.
- Opening with varnish, stain or painting.
Surface preparation
Surface preparation is an important stage of finishing work. It consists in:
- cleaning walls from heavily crumbling plaster elements;
- sealing cracks and crevices;
- treatment with special antiseptic solutions;
- thoroughly drying the working surface;
- securing a vapor barrier film if installation of insulation is involved.
Preparing the wall surface for finishing with boards.
Frame and frameless methods of fastening boards
The boards can be attached to the frame or directly to the walls. The frameless cladding method implies a flat surface, with minor level differences. The advantages include ease and speed of installation.
The frame method involves the preliminary installation of sheathing - metal from PN and PS profiles or wood, which, in principle, is much more economical. This method allows you to insulate walls, but if the boards are installed with gaps, you should not use mineral wool-based insulation.
Before installing the sheathing, you should calculate the dew point and its possible displacement, taking into account the presence of insulation and the main external material. If it is shifted to the inner surface of the wall, the design should be reconsidered to avoid the appearance of mold and mildew, or careful external insulation should be carried out.
Wooden sheathing. Installation features
To install wooden sheathing, you should prepare dried bars of 30×30 mm or 50×25 mm, pre-treated with an antiseptic. Before installation, they must be kept indoors for at least 5-6 days on a flat surface for acclimatization.
You will need the following tools:
- Carrying (if using an electric drill).
- A jigsaw or wood saw.
- Electric drill or screwdriver.
- Chisel.
- Pencil or chalk.
- Dowels 10x130 mm, if the base surface is concrete or brick.
- Wood screws (if the base is wooden).
- Level or level.
- Backing blocks.
The sheathing is attached horizontally, if the boards are attached vertically and vice versa.
Rack pitch - 50 cm, self-tapping or dowel pitch - 45-50 cm, distance from the ceiling/floor - 10 cm.
If the length of the sheathing bars turned out to be small, they can be increased; if, on the contrary, they are large, after measurements and marks, we cut off the excess with a jigsaw or a hacksaw.
Using a level, we fix differences and install backing bars of suitable sizes to level the frame.
It is important at this stage not to forget to remove the wiring. It is better to do this during the day if it is connected to the mains, since you will have to turn it off for safety reasons. Care must be taken to ensure that each exposed wire is thoroughly insulated until work is completed.
For hidden wiring, it is necessary, using a chisel, to cut holes in the sheathing of a suitable size if they somehow intersect, which often happens when boards are installed vertically.
Installation of sheathing.
After installing the frame, you need to once again make sure that it is fixed exactly level, fix the insulation, if used, and you can start screwing the boards. Thanks to anonymous transactions and the absence of problems with the law, more and more casinos for cryptocurrency without investments are appearing online. This is a casino where you can play with any currency or Pin-Up casino payment system convenient for you. By the way, everything is fair here, the casino operates under a federal license, and everyone can win a tidy sum. Pin Up Casino is a crazy casino, as any of the more than a thousand players who regularly withdraw their winnings will tell you.
Installation of boards
It is important to first inspect the material for the presence of woodworm tunnels and immediately, at the initial stage, reject the planks on which they are present.
Inspect the boards for cracks and woodworm passages.
Before installation, the boards must be allowed to rest indoors for at least 5 days.
Boards prepared for wall finishing.
Then treat with an anti-beetle agent, for example, “Barrier”, and a fire retardant.
Pre-treatment of boards with antiseptic solutions.
Before cutting elements of suitable length, all measurements are taken very carefully; the planks that will be attached above the doorways should be left with a slight allowance and cut flush with each other after screwing.
For installation you will need:
- Self-tapping screws for wood. You can use nails, but in this case, repairing the coating will be more problematic.
- Carrying (again, if using a drill, and also for even cutting boards with a jigsaw over doorways).
- Electric drill or screwdriver.
- Wood crowns, if there is a need for round holes for any pipes.
- Wood saw or jigsaw.
The method of fastening the boards depends on the presence or absence of tongue-and-groove joints and can be either hidden or open.
Tongue and groove fastening
Tenon and groove is a special type of hidden fastening, implying a tight connection of elements with a minimal joining seam. On one end of the material there is a longitudinal vertical notch - a groove - along the entire length, and on the second - a ridge - a tenon.
The starting and finishing board usually only has a groove, but if they are not available, the ridge can be cut with a jigsaw, and then the surface can be carefully sanded.
Ikea cork boards: product characteristics, prices
A large selection of cork boards is offered by commercial and industrial companies. The bulk of the products are standard square and rectangular options. Moreover, the latter can have two ways of hanging: the same model can be placed horizontally and vertically.
The external cork covering of Ikea boards varies in thickness and color. Buyers are invited to choose light brown, sand, and beige shades. Fans of darker tones will also find an option for themselves. The frames of the boards can be contrasting to the main covering or belong to the same color shade. Metal or plastic is used as the material for making frames.
Among the boards of this manufacturer there are many decorated products: the outer covering has a pattern. These are unobtrusive geometric shapes, zigzag lines, repeating patterns, etc. Engraved boards are of particular interest. The area of such products is divided into segments, each with an inscription corresponding to one of the calendar months.
The prices of cork boards for the Ikea wall can be very different. A small board 45x60 cm in a wooden frame will cost approximately 1000 rubles. A 60x100 cm product with decorative design (pattern) is offered for purchase for 1900 rubles. Standard stand options 120x90 cm can be priced at 3,200 rubles. The average thickness of the boards from this manufacturer is 1.4 cm. The price depends largely on this indicator.
Most cork boards come in standard square and rectangular shapes.
Almost every set of boards comes with a set of buttons with transparent heads. This universal fixation option is acceptable for any application of the product.
Magnetic board on the wall: simple, convenient, interesting
An equally convenient option for both home and office use are magnetic boards. As for the shape and size, they practically repeat the cork or standard school options. This is a rectangle, or less often a square, decorated with a frame.
Attaching information on paper to them is even easier than to cork ones: you just bring the sheet to the desired location and attach a magnet.
Related article:
Cork flooring: types and properties of finishing, application features
Properties and features of finishing materials, advantages and disadvantages. Types of cork coverings, prices and reviews.
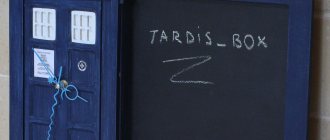
Magnetic boards on the wall for the home are also very popular because they have an additional function: you can write on them with chalk. In the offices of various companies, institutions and educational institutions, rotating boards are a common option: on one side they write with chalk, on the other they use magnets to place information.
Magnetic whiteboards on the wall are very popular because you can write on them with chalk.
Today there are a great variety of magnets on offer: IT-themed (emoticons), educational (letters, geometric figures), just nice flowers, butterflies, neutral round hats...
Helpful advice! It is very important to select magnets in accordance with the purpose of the board. The appearance of these additional elements significantly influences the creation of a certain mood in the perception of the posted information.
A magnetic board for children on the wall is a universal option. Using braces does not require any special skills and is accessible to every child. The ability to draw and write with crayons ensures comprehensive development: motor skills are improved, thinking and creative imagination are activated, and certain learning skills are formed.
Types of coatings for magnetic marker boards on the wall
Magnetic marker boards can conditionally be classified as an improved magnetic chalk version. The “sticking” function is retained, but notes are made with a marker, not chalk. Using the latter is associated with some problems:
On magnetic marker boards, notes are made not with chalk, but with a marker
- chalk must be wiped with a damp sponge;
- it crumbles, whitish dust appears on the floor;
- Even after using chalk for a short time, you must wash your hands.
Markers do not have all of the above disadvantages: notes are wiped with a dry sponge, do not litter, and do not leave marks on your hands.
The following materials can be used to cover boards on the wall for notes with a marker:
- Melamine. The models are inexpensive and have a limited service life of 3 years.
- Polymer paint. Products can be used for up to 5 years. Over time, microcracks may appear that prevent the inscriptions from being completely erased.
- Enamel. The surface is matte, durable, and does not crack. Provides 25 years of full use.
- Glass boards. Virtually unlimited period of use while maintaining integrity. Interesting appearance. Quite a high price.
- Metal ceramics. Expensive and most durable products.
Magnetic marker boards according to the type of design are divided into rotating, wall-mounted, mobile and flipcharts
Based on the type of construction, magnetic marker boards can be divided into:
- on wall (fixed permanently);
- rotating (fixed to an axis around which they can rotate);
- mobile (on wheels);
- flipcharts.
The last type deserves special attention. These are boards on tripods that look like an easel. Almost all offices are equipped with them. The main positive characteristics can be considered compactness and the creation of an intimate atmosphere (promotes the necessary working mood) due to the design features. Small flipcharts are often used for home use.
Advantages and disadvantages
We have already mentioned some of them, so we will add those that have not yet been discussed in this article. Let's add to the advantages of a cork board the ability to dampen the sound of objects hitting the floor. Plus it has good shock-absorbing properties. This is an almost natural material that is safe for human health. By the way, the same plasticity of the material allows it to recover, even if there was heavy furniture on the floor. This floor feels pleasantly springy under your feet when walking.
The downside of cork is its low thermal conductivity (although this is also a plus at the same time). Let’s immediately make a reservation that it is not worth laying a cork board on a warm floor due to the uselessness of the heating circuit itself. Thermal energy will still not pass through the cork floor. Another disadvantage is low tensile strength. Therefore, it is not recommended to walk on such a floor in stiletto heels, much less install heavy furniture without pads.
Kitchen interior
And a few more significant disadvantages:
- High price. And if you purchased a moisture-resistant board, then you will still have to find a special adhesive composition for it.
- It’s not worth comparing the strength with other floor coverings - in any case, this is a minus.
- The service life is short - 10 years. At the end of the period, gaps appear on the floor, which sharply reduces the presentability of the coating.
- The surface of the cork is quite rough, and if it were not for the varnished layer, there would be serious problems with cleaning the board.
Making a magnetic marker board with your own hands
Anyone can make a magnetic marker board for notes with their own hands. The process does not require any special skills, and the necessary materials are freely available in all relevant stores. The tools you will need are cutting devices, a screwdriver, a hammer, as well as nails, screws, and fasteners. If the dimensions of the purchased sheet suit you, you won’t have to cut it at all.
Melamine can be purchased as the main fabric. It is worth choosing a material with a smooth surface. Sheet steel is best suited to create a magnetic field. Both layers should be attached to the plywood board. To ensure that the multi-layering is not visible and the product looks aesthetically pleasing, you need to decorate the board with a frame made of an aluminum profile or a cable channel - whichever is more suitable in size or taste.
Thanks to the free availability of appropriate materials for sale, anyone can make a magnetic marker board with their own hands.
Similarly, the board can be made not only from melamine, but also from plexiglass, Lexcan. The latter material is the most durable, although thin, does not crumble, and has a pleasant matte finish.
To understand how to make your own note board functional and durable, you need to meet two main requirements: the surface must be perfectly smooth and resistant to the chemical effects of marker ink. You can also make a durable coating yourself. To do this, several layers of paint, preferably white, should be applied to a sheet of steel (marker notes are more clearly visible on white), and then a matte varnish coating.
A few tips regarding the manufacturing process and use:
- It is necessary to apply subsequent layers of paint only after the previous ones have completely dried;
- if cutting is necessary, you should use saws for laminated materials (this advice does not apply to metal);
- For more accurate sawing without defects, you should apply a marking line using a ruler and a knife.
For a magnetic marker board to be functional, its surface must be perfectly smooth.
Important! The magnetic marker board should only be attached to a flat wall. The fixation should be as rigid as possible; shaking and distortions will not allow you to make visually high-quality recordings.
Toys or parts thereof for attaching to a busy board:
| Name of the part (toy) / photo of the part (toy) | way to attach it to a bodyboard |
| Musical hammer | Attached to the board through the hole made and suspended on a string |
| Bicycle bell (horn) | Holes are drilled in the board at the same distance and size, corresponding to the location of the holes on the bicycle bell. Then the bell is attached to the board with screws. You can also use strong wire instead of screws. |
| Retroreflectors | Glue or hang on a busy board |
| Plastic mirror (the mirror can be part of the toy) | Glued to the board with glue or hung on a hook or wire. |
| Toy abacus | Attached to the board with screws or strong wire threaded into pre-made holes in the board |
| Toy phone with disk | it can be glued to the board with the smooth side |
| push-button telephone | Glue to the board with super glue |
| spinner | Var. 1 . The spinner is attached to the board with one screw, a hole is made in the middle of the spinner. Another hole is made in the board at the site of the intended fastening. The screw and hole in the board must be such that the spinner can rotate freely. Ver.2 . The spinner is glued to the bodyboard with super glue by the smooth surface of the bearing, i.e. in the place where your fingers hold when playing with a spinner. Just make sure that the glue does not get into the bearing, otherwise the spinner will stop rotating. |
| Unusual rattles suitable for a busy board | Suspended on a string. Holes are first made in the board for this purpose, and a rope with hanging rattles is inserted into them. |
| Educational toy “Labyrinth” | Attached to the board with screws or glued with super glue, if the surface of the toy allows it |
| Magnetic drawing board | Glue to the bodyboard with super-strong glue or hang with screws, rope or wire |
| children's plastic whistle | Suspended on a string through a hole made in the board. |
| colorful hair ties | Used as elements for homemade bills. The rubber bands are strung on a strong thick wire, which is threaded through two holes on the board. And so on for several rows. You get homemade abacus |
| children's wallet | Can be glued to a board or hung |
| multi-colored large beads | You can use them as moving elements for homemade bills. And not only. As your imagination tells you |
| toy car | Attached using holes and strong wire with the wheels facing up. Children love to spin the wheels. |
| Machine on remote control | You can buy a small machine with a remote control and attach it with the wheels facing up. And glue or secure the remote control next to it. The baby, pressing the buttons on the remote control, will watch the rotating wheels with interest. |
| Control panels, calculators, etc. with buttons | Control panels, calculators, etc. with buttons are glued to the board using superglue |
| Keychain flashlight | The keychain flashlight is suspended on a string through a hole made in the board. |
| flashlight | And if the flashlight is larger, and it is in the form of a pipe, then it can be attached using holes in the board and two pieces of strong wire. There are lanterns of this shape and with such a surface that allows you to glue such a lantern with super glue to a busy board |
| Propeller | Attached using a hole in the board and a screw. It will be very interesting for the baby to watch the rapidly spinning element, rotating it |
| Ball or ball | A ball or ball can be thrown into a tube attached to the board (or, alternatively, into a cover from an old umbrella). Naturally, the ball should pass freely |
| children's watch with large dial | the clock is glued to the board |
| clock puzzles | Mounted with screws or suspended. Nearby you can attach a nice fabric pocket to the board for storing numbers. |
| xylophone for children | Attached to the board with screws or strong wire. The xylophone stick can be tied to a busy board or to the xylophone itself using a rope |
| mini piano for children | Glued to the bodyboard with glue on the smooth side |
| Children's tambourine | Suspended on a string that is threaded through holes in the board |
| Sound steering wheel with buttons | Attached using wire and holes in the bodyboard |
| Decorative elements (various wooden or plastic blanks, needed to decorate a busy board) | Glued to the board (in different places), creating a certain color scheme |
| Wallpaper for dollhouse | Glued to doors or to a decorative house on a board |
| Materials for children's creativity (colorful balls, beads, etc.) | All this can be poured into a transparent bottle and tightly closed, and the bottle can be hung from the board so that the baby can rotate the bottle and admire the colorful things |
| Interesting rattles in the form of key rings | Attached to the board using strong wire threaded through holes in the board |
| Toy keyboard or phone | Glued to the board with super glue |
| toy doors from an old toy | The doors are attached to the hinges with screws. To lock the doors, use: door chains, padlocks with keys, latches, etc. |
| bell | Suspended from board using wire |
How to make a busy board, how to attach various parts to the board?
Wooden note board: buy or make it yourself
Note boards made of wood also do not go out of active use. Those, the prototype of which are the classic school ones, were once only brown, but are now green and gray. Despite their limited functionality (you can only write on them with chalk), they also have a number of positive characteristics:
- surface upgrade available;
- unlimited decorative possibilities;
- low price;
- the ease of creating such a note board with your own hands.
Both solid wood and wood boards can be used as materials for manufacturing. The main requirement for the material is a polished top surface. A wooden board does not always require framing; it already looks aesthetically pleasing if the cuts are processed.
Both solid wood and wood boards can be used as a material for making wooden boards
To hang the product, you can use traditional loops, openings, or drill two through holes in the upper part and thread a decorative rope or cord through them - the design will be very original.
The interesting design of the finished products should also be noted. They can be combined with key holders, photo frames, and shelves. Some models imitate easels.
When making your own note boards for the wall, you need to properly apply the top coating. It is best to use special Tikkurila paint for these purposes, which is intended for school boards. When applying, the following requirements must be observed:
- prepare the surface: remove peeling layers of previous paint, sand the remaining layers until matte;
- remove dust and degrease the board;
- Apply paint using a brush or spray and dry.
For the top coating of wooden boards it is better to use special Tikkurila paint
Important! Do not paint over a damp surface!
Making a Note Board from Cork
Usually sold bamboo cork is rolled into a roll so that it can be easily transported; within a day it needs to be unrolled and leveled, with heavy objects placed at the edges. If a ready-made frame is purchased, then it is measured and markings are made on the back of the sheet; a homemade frame can be painted and varnished to give gloss and reliability.
You can also decorate the sheet by painting it, or by drawing interesting shapes, such as geometric ones. After all surfaces have dried, all that remains is to place the sheet in a frame, make fastenings and hang it on the wall. Place notes, memorable drawings, decorative elements and other accessories that you like on it. You can make several small boards at once to hang them organically in the room.
Place notes, memorable drawings, decorative elements and other accessories that you like on it.
Another interesting idea would be to create a cork canvas using wine corks. Having accumulated a sufficient number of corks, you can glue them together in a frame; such a decorative solution will look unique, fresh and impressive.
First you need to rinse them by simply letting them boil for 30 minutes in a saucepan. Wait until they are completely dry, check again to see if there are any stains on them, if dirty plugs are found, then they are sent back to the pan. Wine corks have such good qualities as non-swelling and moisture resistance. A glue gun is suitable for gluing.
In order not to have to look for a long time for a large number of wine corks, they are cut into identical round shapes and also glued to the frame base, which looks no less impressive than the previous option.
Such a decorative solution will look unique, fresh and impressive.
You can also cut out small products of various shapes from sheets, and attach them to the wall in any way at hand; if they are very small, then even double-sided tape will do (but if you have wallpaper, you need to remember that it can damage them), they can be painted with steel, golden, glossy color, placed beautifully on the wall. This will create an original decoration that can also be used to attach notes. All these accessories are easy to make and the process is fun.
An original decoration that can also be used to attach notes.
Cork material gives you the opportunity to show your imagination, a useful and environmentally friendly product. Which can be practically used both at home and at work. A cork writing board on the wall will serve as an excellent decor for the room. There is so often a lack of warmth in the city, when around stone walls, cute notes and memorabilia can lift your spirits well. With the help of such an accessory, you can also warm up your relationships with loved ones by leaving them short wishes for the day.
Boards on the wall for notes and interior: how to place products correctly
Despite the simplicity of the design, finding a good position in a living space for a note board is not so easy. In terms of functionality, it should occupy a place visible to everyone, but making it the central element of the interior would be wrong. A few suggested tips will help you optimally place your home organizer:
- A cork board in an interior of any style will be organic due to one of its main advantages - the naturalness of the material.
- You should not hang the product on a wall where there are already paintings, reproductions and other flat decorations. This will cause chaotic oversaturation.
- A board installed in the hallway should be supplemented with shelves, hooks for keys, umbrellas, etc. Multifunctionality will create additional comfort.
- If you are afraid of bringing an “office feel” into your living space, you can cover the surface with fabric (see the section “Do-it-yourself cork board: simple and original”).
- It is appropriate to decorate note boards placed in the kitchen with elements of the corresponding theme.
- Note boards made from cork organically combine with wooden furniture in children's rooms, but they should only be placed in schoolchildren's rooms. Giving sharp objects (tacks) to children's hands is unsafe.
A board on the wall for notes should be in a visible place, but not be a central element of the interior.
Helpful advice! For a note board to truly become an interior decoration, it must “work.” Periodic change of information, creative works, photos, etc. is mandatory.
Household elements for attaching to a bodyboard:
| Part name / part photo | way to attach it to a bodyboard |
| Padlock with keys | You can make it a lock to the door by attaching rings made of strong wire |
| Compass | Glue it with super glue if the back side of the compass is smooth, plastic, otherwise it is better to hang the compass on a string, if possible |
| Bicycle bell | You can attach the bell to the board using holes in the busy board and strong wire. And also as an option - with screws. |
| Bicycle bell with compass | You can attach the bell to the board using holes in the busy board and strong wire. And also as an option - with screws. |
| Magnifier with handle | Attach using a rope and holes made on the handle of the magnifying glass and in the bodyboard at the location of the desired fastening |
| Door knocker | It is attached to the bodyboard with screws. |
| Tap or adapter with valve | Can be “planted” with super glue or secured with strong wire and a hole (this depends on the shape and material of the part) |
| Doorbell switch | Glues with super glue, especially if the switches have a smooth plastic back side |
| Socket and plugs for it | It is better not to attach sockets and plugs to a child's bodyboard, since the child may develop the idea that all sockets and plugs in the house are safe. |
| Hooks for closing doors | Attached to the bodyboard with screws |
| Universal handle | Attached to the bodyboard with screws |
| Handle-brace | Attached to the bodyboard with screws |
| Plastic or wooden doors | Alternatively, you can purchase plywood cutting boards at the store and cut them into small doors. Or use them as entire doors. The doors are attached to the hinges with screws. To lock the doors, use: door chains, padlocks with keys, latches, etc. |
| Gears | They are attached with screws to the board so that all the gears rotate when the child turns only one. It is better to choose larger and stronger gears |
| Door hinges (small) | Attached to the board with screws (necessary for attaching the doors to the board) |
| door chain Or Toy Holder (if no real door chain): | Attached to the board and door with screws. Used to lock doors. You can buy a real door chain, or you can use, for example, a toy holder on a chain. In this case, the chain on the board is attached to a wire, and on the door it is put on a hook. A hook can be purchased, for example, like this: |
| Rings (metal or plastic) | Rings will be needed for fastening at the ends of multi-colored ropes. Strings with rings at the end are attached to a wheel, which, in turn, is secured to the board by drilling holes and strong wire. The purpose of this game is for the child to string rings on strings onto a hook that matches the color of the string (see next point). |
| Coat hooks | Glue the hooks with glue or attach them to the board with screws. The child can string the ring onto a hook that matches the color of the rope. Or, as an option: glue objects or pictures of different colors near each hook. And invite the child to string rings with ropes of the appropriate color. This way the child remembers colors better. |
| Furniture wheel | Attached to the board with screws. Children love to spin these wheels! If your wheel cannot be attached to the bodyboard with screws, then you can try gluing it to the bodyboard with super glue to the smooth surface of the wheel mounting. We did it. |
| Window wrap | Attached to the door and board with screws. The baby will open and close the door with interest. |
| Various switches and decorative overlays for switches | Switches are glued to the board with super glue or secured to the board with screws. You can also place decorative pads under the switch. Children love to press buttons. And if you can make sure that when you press a switch, a safe light comes on nearby or some sound is heard, then this will delight your baby! |
| Wide elastic bands | As an option, you can take 15 centimeters of wide linen rubber and thread it into some bright, interesting toy (you can also put it into a rattle). Secure a piece of rubber to the ends using screws, for example, to a gear. The baby will want to take the toy, but it has an elastic band and bounces off. |
| Belt buckle | The buckle can be attached to the ends of the belt, and the other ends of the belt can be trimmed slightly and attached to the board with screws. The baby will be happy to practice fastening and unfastening the buckle |
| Small tape measure (you can buy a mini tape measure in the form of a keychain for a busy board) | A working tape measure can be an interesting toy. It can be glued to the board with super glue or hung if possible. The kid will happily pull the tape out of the tape measure, and when he releases it, watch it come back. |
| "Zipper" for clothes | Secure the “zipper” to the board at both ends with screws, hang a bright small toy (or a keychain) to the zipper lock. And the child will learn to open and close zippers |
| Rope | Used for hanging something. For example, you can thread a rope through a toy (for example, a horse or a bear), and fasten the rope through the holes to the board. The child will move the toy along the string. You can also use a rope to lace a wooden shoe, which is attached to the board. |
| Wooden shoe for lacing | A wooden shoe is glued to the board with super glue, and a rope is inserted into the shoe. This is how a child learns to lace |
| Lace-up play shoe (plastic) | Glued to the board with super glue |
| Strong flexible wire | Wire is used to attach many parts to the board |
| Large decorative buttons | Buttons can be: - glued to the board as decoration - sewed onto a soft toy that can be attached to the board - if the button is especially large, then attach it to the board with a screw so that the button can be rotated. All this contributes to the development of the baby’s fine motor skills. |
| Kaleidoscope | Make a round hole all the way through the board to insert the kaleidoscope tube into. (but this option will work if light falls on the tube from the other side of the board). Otherwise, the baby will not see anything in the kaleidoscope. You can attach a flashlight to the back of the board so that when you turn on the flashlight, the kaleidoscope is illuminated |
| children's wristwatch | Attach the children's watch to the board with screws and gears at the ends of the bracelet. |
| Music box or other wind-up musical toy | You can attach the box itself to the board. Or you can take the sounding mechanism out of the box and fix it on the board so that the baby can turn the lever to sound the melody |
| wallet | Attach a child's or an old adult's wallet to the board with screws. The baby will happily open the compartments with zippers, Velcro and buttons. |
| stickers | Decorate doors, empty spaces behind open doors, and empty spaces on your business board with a variety of colorful stickers. |
| housekeeper | Hang the unnecessary key holder to the board or attach it with screws. The baby will happily open the compartments with zippers, Velcro and buttons. |
| Various wooden blanks | Decorate empty spaces on the busy board with various wooden blanks. Blanks can be painted, decorated with stickers, and so on. |
| Brush. Or a piece of fur skin | The brush is attached to the board with screws or super glue. The skin can be beaten around with wooden blocks, thus securing it to the board. Besides, it looks beautiful and interesting. The brush and skins develop the baby's tactile abilities. |
| Key rings | Suspended from the board using two holes in the board and strong wire |
| Keychain with zipper lock | This has already been discussed above (the keychain is attached to the zipper lock) |
| Calculator | The working calculator is glued to the board with super glue. |
| Umbrella cover or small metal or plastic tube | The tube can be taken from under any old toys such as a kaleidoscope, flashlights, etc. You can make a game out of this so that the baby can put the ball into the tube or into a case. Under the pipe or cover, secure a box into which the ball would fall, but so that the ball could be easily removed from there. (We made such a “pipe” from a rubber ring and a children’s golf course: we cut off the sock of the golf course and sewed a ring into the golf course. Then we attached it all to the board using holes and wire) |
| Old safety clock | Glue to a busy board or hang. Kids love to touch and look at watches |
| Plastic multi-colored lids or stoppers from baby food (from AGUSHA fruit and vegetable puree and from hipp tea jars for nursing mothers). Other options are possible | Corks or lids from baby food or tea are multi-colored, bright and can serve as elements for play. You can simply attach them to the board with screws so that your child can rotate them. You can make whole games out of these caps |
| Self-adhesive wallpaper (in the form of bricks and more) | Wallpaper can be used to decorate the walls of a decorative house on a board, doors and more. |
| An old computer mouse with a surviving wheel | Glue the mouse to the board with superglue, after cutting off the wire from the mouse. It will be interesting for the baby to rotate the wheel and press the mouse buttons |
| Bubble film | The film is glued to the board, and then it can be beaten around it with low wooden blocks. |
| Velcro and magnets A chain so that the two sides of the busy board do not move apart (you will need this if you have a double-sided busy board consisting of two boards fastened along the upper base) | The lower part (field) of Velcro or magnets is attached to the board with screws. And the baby himself will “sculpt” the rest of the figures with Velcro or magnets to this field. You can come up with a lot of logic games using Velcro and magnets and implement it all on a busy board. |
| A chain so that the two sides of the busy board do not move apart (you will need it if your double-sided busy board consists of two boards fastened along the upper base) It looks something like this: | You need two separate chains of exactly the same size. Both ends of the chains are attached with screws to the side edge of the boards at the same levels. It is obvious that when the boards are folded, the chains hang; if the boards are placed on the floor, the chains are tensioned and prevent the boards from moving apart. |
| Disc from an old phone Var. 1 Var. 2 | You can attach a phone disk to a business board like this: Var. 1. If you managed to remove the disk along with the front surface of the phone, then you can drill (or punch with a nail and hammer) four holes near the surface of the phone, and also correspondingly make four holes in the bodyboard itself (where you want to mount the disk) and secure it with strong wire disk with phone surface on board Var. 2 . If you managed to remove the disk itself from the phone and you want to attach it to the bodyboard so that it rotates, find a thick screw, then drill a hole in the board for this screw. Next, make a hole in the very middle of the phone disk, slightly larger in diameter than the screw. Place the disk in the desired location on the board, insert and screw the screw through the disk into the board. Don't forget to place a washer between the screw and the disk so that the disk does not come off. |
| That's all we have for now |
