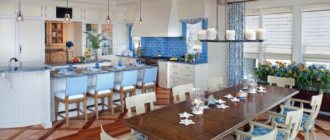
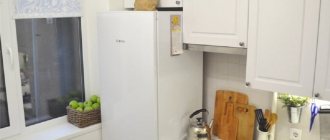
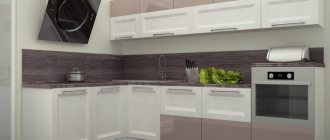
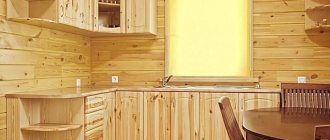
To choose a kitchen design project, you can use special planning programs. Designing in such services is available to anyone who knows how to use the Internet and has basic PC skills. To draw a kitchen online yourself and for free, it is recommended to consider a selection of services and also figure out how to work with them.
Online kitchen designer: how do the services work?
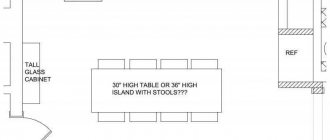
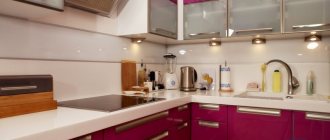
Kitchen designers are designed for independent design and development of the appearance of a kitchen set. They help to visually understand what the future room will look like, arrange furniture, and calculate its optimal dimensions. In such programs, modeling is done in 3d or 2d mode, while the dimensions and projection of the layout are shown in 2d, and the general appearance of the finished set is shown in 3d.
Services for modeling a kitchen by size on a computer work like this:
- Go to the browser and select the desired service.
- Create a new room with dimensions or use ready-made options.
- Choose the color and texture of the wall decoration.
- You begin online calculation of furniture: indicate the dimensions of the lower cabinets, countertops, upper cabinets, and the number of internal shelves.
- You work through each cabinet separately, based on your needs.
At the end of the work, you can review your project in detail, change the colors of the chairs, table and other items. To design a set yourself, you just need to learn how to work with such services, and then download the finished project and bring it to a furniture manufacturing store. You can also use the received project yourself and order cutting of materials in order to carry out the assembly yourself.
Features of designing corner cabinets
With a U-shaped or L-shaped layout, you need to design a corner cabinet. If the structural blocks are connected to each other at right angles of 90 degrees, you need to carefully plan drawers and opening doors. In this case, special inserts are made. This allows the doors and roll-out drawers not to intersect with each other.
For some layouts, you will need to design a corner cabinet.
If a corner cabinet is joined at a 45-degree angle, during the assembly phase the bottom and top of the cabinet are installed between the sides rather than on top. Only in this case will you get a smooth façade and be able to attach hinges.
Online kitchen planner: selection and brief description of sites
At the moment, there are a large number of portals on the Internet where you can make a kitchen project yourself and for free. Some services require registration and logging into your personal account, while others work immediately when you visit the site. Several popular services:
Window sill-countertop in the kitchen: photos of design options, ideas for arranging a kitchen with a countertop under the windowCozy interior
How to fit a dishwasher in a small kitchen
- KitchenDecorium is a simple and easy-to-use designer where you need to step by step choose products, their color, and sizes. At the end, you can fill out an application and calculate the cost online.
- Vardek Kitchens - online planner in Russian. Offers to make a layout without registration. The main advantages are a simple interface, the ability to design rooms of different sizes, as well as a wide selection of building materials.
- Bplanner is an online kitchen configurator that users can embed on their website. For example, there is a website for the sale and production of kitchen sets, and such a service would not be out of place.
- IdealKitchen is an online 3D kitchen designer, as well as a service that helps you create sliding wardrobes. Here you can arrange furniture and appliances according to appropriate sizes.
- Vivat Furniture is another service that allows you to create a project. The designer will help you calculate all the dimensions of the headset so that it fits into the room.
Attention! Use proven services that will not require payment for their services. To do this, before using, make sure that the portal is free.
Such portals will help put together a picture that popped up in your head, but could not be visualized. You can print out the finished project and start from it when ordering a headset.
Edging parts
Having received the necessary parts, it is important to properly process the edges, since they cannot be hidden with paint or varnish. For this purpose, the ends are edged. This involves sealing all visible areas throughout the thickness of the wood with melamine or plastic tape.
- Place the part vertically so that the cut is at the top.
- Melamine or plastic tape has one adhesive side.
- Apply the adhesive side of the tape to the cut.
- For the best adhesion, the cut with the melamine tape is heated with an iron at medium temperatures through a clean sheet of paper.
- To prevent the plastic tape from melting from the iron, use a hair dryer to heat it.
- If you need to remove all excess and protruding fragments, wait until the part has completely cooled.
- Use a knife or other sharp tool to trim off the unnecessary edge.
- Round the corners, remove cut unevenness and roughness with sandpaper.
It is very important to properly process the edges of wood parts.
How to plan a kitchen yourself online 3d for free: tricks
There are several tips and tricks for independently calculating the headset and planning the room. For example, some planners do not feature bar counters, but you can make them yourself by extending the countertop. Furniture and appliances can be moved by clicking on them with the mouse cursor. You can also design the dimensions of the corner kitchen yourself. To do this, you need to decide what the corner lower and upper cabinet will look like.
When creating a kitchen project from a photo, do not forget to design the back slats and side ends of the cabinets so that the project is complete. You also need to pay attention to the orientation of the refrigerator doors and cabinets. In some upper cabinets, you can change the front material to get it as close as possible to what you want.
What rules should you follow when measuring your kitchen?
When installing the headset, you must consider some rules:
- there should be no sockets, switches or open wires behind the oven;
- if the kitchen stove is connected to an outlet, the distance to it must be at least 30 cm to prevent the possibility of fire;
- If the upper tier of cabinets is equipped with a door opening system “up”, then the distance from them to the ceiling must be taken into account. Otherwise, the facades will hit the ceiling;
- all drawers, hinged doors, systems must open and close freely.
If insurmountable difficulties arise during the measurement process, you can turn to professionals for help.
When purchasing furniture in our online store, a specialist makes measurements and calculations for free. You just need to leave a request!
Selection of furniture material
Manufacturers most often use the following materials:
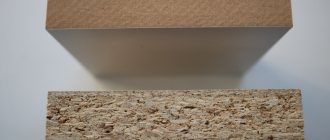
- Chipboard. Pressed wood with shavings. As a rule, it is covered with protective and decorative layers. This is the cheapest material, but not the most environmentally friendly, because it emits toxic formaldehyde. There is a type of laminated chipboard that has an additional protective coating.
- MDF. The most expensive among materials. Completely environmentally friendly and also suitable for various decoration options.
- Plastic. This material is used only as a decorative material, in the form of slabs 0.6-1.2 mm thick. Although it will add strength and durability to the main material of the headset (chipboard or MDF), since it will protect it from excess moisture. Also resistant to scratches and moderate mechanical damage.
- Frame facade. It also performs a decorative function with other base materials. The frame allows you to use the cladding of your choice - plastic, MDF or metal. After a certain period of use, you can change the design of the entire kitchen by replacing the plates in the frames.
Attention! Furniture made from MDF today is gradually approaching the economy class category in price, but still costs more than chipboard. Therefore, manufacturers often resort to cunning. The statement “furniture made from MDF” may hide a base made of chipboard with a façade cladding made of MDF.
Working with the viewing angle (camera settings) of the planner
To control objects and kitchen space, learn to change the viewing angle (camera).
Zoom in – Zoom out
Place the mouse cursor anywhere in the planner space. To enlarge (zoom in) objects, scroll the mouse wheel away from you. To reduce (zoom out) the space, scroll the mouse wheel towards you.
Rotate 360 degrees
To rotate the camera (room) as you wish, click on the left mouse button, and while holding it down, control the camera
Carry the camera
Hold down the right mouse button and, while holding it, move the mouse. Arrange the space as it suits you. Combine zoom in/out, rotation and translation for full-fledged work in the designer.
Menu of the “Room” section
Planning rules
To make the layout convenient, several points should be taken into account when designing:
- Room area. In a small apartment, such as a studio or Khrushchev, it is more ergonomic to use built-in appliances, shallow wall cabinets and functional furniture - folding tables and chairs.
- Correct headset height. When planning a kitchen, you should focus on the height of the person who spends the most time cooking. The height of the tabletop should be 15 cm below the elbow.
- Location of communications. This parameter dictates the placement of the sink and gas stove. On a previously drawn up close-up plan of the kitchen, it is necessary to distribute the location of sockets and switches.
When planning a kitchen, it is important to take into account the main criterion of its ergonomics - the rule of the working triangle. The hostess (or host) moves between these points while cooking:
- Washing. The main component of the food preparation area. Its location is dictated by engineering communications, so it is difficult to move them to another location. It is recommended to start designing with the sink.
- Plate. Like a microwave and oven, it belongs to the cooking zone. Ideally, there will be cabinets on either side of it. The distance from the stove to the sink should be from 50 to 120 cm, but some housewives prefer to place the stove closer, guided not only by the small dimensions of the room, but also by convenience.
- Fridge. The main item in the food storage area. The recommended distance from the sink is 60 cm: then you won’t have to walk far, and splashes of water will not reach the surface of the refrigerator. The corner is the most convenient option for its placement.
It is convenient when the listed zones are located nearby: the sides between the points of the triangle should not be more than 2 meters.
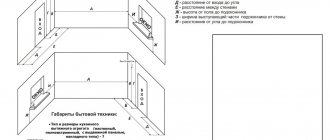
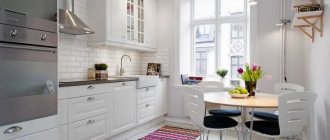
The diagram clearly shows the most popular options for proper kitchen layouts.
The photo shows a schematic representation of a perfectly aligned triangle, top view.
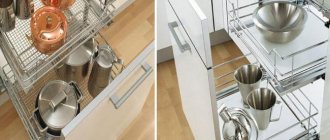
What to consider when designing a drawer
Roll-out boxes are functional and spacious. There are two types of such elements:
- the metabox drawer operates on a roller system using metal guides;
- a box made of chipboard, which is made to individual measurements.
Drawers come in two varieties.
It is also worth understanding the differences between ball and roller guides.
- Roller guides are attached to the lower edge of the bottom of the drawer or cabinet. This is a budget-friendly and durable option for fittings that does not need to be lubricated. The drawer doesn't slide out completely, so you don't get a full view of the contents.
- Ball guides are attached to the central part of the roll-out drawer. They allow you to roll out completely and provide a full view of the kitchen utensils.
It is necessary to decide on the type of guides.
What type of guides you plan to use must be known at the sketching stage. Because for roller ones there is a tolerance of approximately 1 mm.
Working with an object in the Catalog category
Before dragging the lower or upper section of the kitchen into a 3D room, you can select the standard size in height and width. Click on the dragged module with the left mouse button and a menu for editing will open.
In addition to the functions discussed above for working with a 3D object (resizing (4), position in space, choosing decor, replacing, rotating and deleting), new tabs “Components” (1), “Settings” (2) and adding hob or sink (3).
Section with sink
To change the type of sink, click on the “Accessories” tab (1), move the slider (2), click on the picture of the sink (3). From the wash catalog menu, select your option (4). If necessary, you can move the sink using the offset window (5).
How a kitchen is created
Saving a project
The planner has provided a function for saving the project.
Click on in the lower right corner. If you are saving the project for the first time, the designer will prompt you to log in.
Click “Register” and enter your name, email, phone number and password. This data will be sent to you by email
After authorization, click on again
to save the project. A link to the project will be sent to your email.
The link to the kitchen created in the planner is in the “Project Information” section, in the left column of the planner menu. To go to this section, click on
.
Open 3D designer
