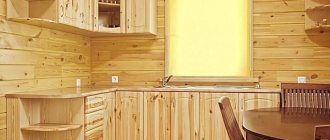
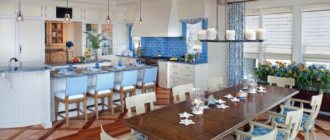
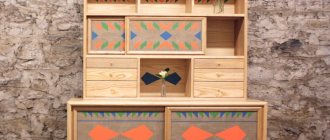
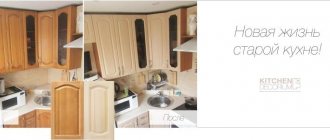
Good day everyone and good mood! Sometimes there is a need or a simple desire to change the facades in the kitchen. The current price for them is quite low. This is definitely more profitable than completely changing the kitchen set. Still, new and high-quality headsets cost a lot of money.
When the building is in good condition, but the external furniture is worn out, one of the most correct decisions would be to replace the facades with new ones.
You can find many specialists and websites of specialized companies on the Internet. They show what the furniture looks like in before and after photos. From personal experience I can say with confidence that often photographs fully reflect the real picture. That is, the transformation is fantastic. And all this is relatively inexpensive.
Advantages
You can order new facades from a workshop or furniture showroom, or you can restore them yourself. In any case, compared to buying a new headset, it is cheaper (even with hinges, locks, glazing and lighting). No additional work, only replacement of old facades with new ones or restoration. And you don’t have to limit your imagination in choosing the color and texture of materials.
Those who spend most of their time at the stove and sink will appreciate this approach - there is no need to change habits, master a new arrangement of dishes and products, or give up the convenience and coziness of the old kitchen.Decoration with ceramic tiles
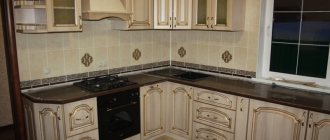
After renovation, almost everyone has leftover tiles. You don’t need a lot of material for this method, so even buying new tiles won’t break your budget. Naturally, not all facades are tiled. A fragment with a beautiful pattern can be glued in the center. This can be one tile or four smaller tiles laid out in a square or diamond shape. You can lay out the contours of the cabinets with small tiles. Often such decoration is used to decorate the lower or upper edge of the set. The image on the tiles should match the overall style of the kitchen.
The operating principle is as follows:
- It is better to remove the facades, dismantle the fittings;
- At a minimum, the surface must be washed and degreased with an alcohol-containing composition. If desired, the facade can be painted, following the tips described above;
- Place the tiles on the surface in advance, determine the ideal place for them, it is better to carefully trace them with a pencil;
- Prepare tile adhesive, apply it to the facade and start gluing the tiles. The principle is almost no different from the usual installation of tiles, only the glue will be needed so that it can hold the tiles on a wooden (or other) facade;
- when everything is dry, you can frame the tiles with molding to make the decor look complete.
Procedure
It is recommended to do the following:
- dismantle old facades;
- make a decision - complete replacement or partial restoration;
- take measurements of all parts;
- inspect handles, fasteners, closers, rollers on drawers, guide runners and other parts and assemblies - replace if necessary;
- choose material and color;
- manufacture or restore facades;
- install furniture elements and parts in place.
Decoration
At the end of the work, you need to secure the handles to the slats and doors.
There are quite a lot of paint options on the market, but not every composition is suitable for treating facades.
How to transform an old set
When the furniture has lost its visual appeal, but is still strong, without defects or breakages, you can decoratively update old facades without replacing them.
Replacement of facades: types of material
Dry, broken doors are often impossible to repair.
In this case, it is better to get rid of them and order new ones. How specialists do this is described here https://stoleshnica-fasad.ru/uslugi/zamena-kukhonnykh-fasadov/. It is worth considering separately what materials new elements can be made from. Chipboard, fibreboard. The material is budget-friendly and withstands heat, humidity, and mechanical loads well. Coating – film, enamel, paint; the most expensive is veneer. Can last up to 10 years. It is necessary to carefully check the manufacturer to ensure that the quality characteristics meet the standards.
MDF. The material is artificial, not subject to deformation, and is not susceptible to mold and mildew. Cheaper and lighter than wood. The material is pliable and easy to process.
Solid wood. The option is expensive, but noble and environmentally friendly. A wide variety of tree species can be used. On such facades it is easy to carry out restoration from time to time, changing the style.
Glass. It can be with patterns, corrugation or tinting, in an aluminum frame or without it, only on fastenings. A very attractive option in appearance, it can easily tolerate cleaning with chemical solutions, but does not tolerate brute force and requires careful care.
Metallic profile. Made of aluminum, lightweight and durable, has an anti-corrosion coating. Wide selection of colors.
Plastic, acrylic. Durable product, visually presentable. Does not react to changes in temperature and humidity, easy to clean. Optimal price-quality ratio.
Stone. Particularly durable material, can be artificial or natural. Perfect for any style.
Take note! The color of facades and furniture dominates in the kitchen - after all, this is the main part of all visible surfaces, so it is necessary to carefully select the combination of all shades.
You need to take into account the interior and decor that is already in the room. It is also important not to overwhelm a small room with dark tones, and to take into account possible nuances of caring for facades - light surfaces and textured coatings have to be washed more thoroughly. Bright colors look good in a spacious room, and pastel, light and cold colors make the volume of the room more airy and light.
What color to choose for the kitchen
If color harmony is achieved in the interior, we feel comfort on a subconscious level; if not, we constantly experience anxiety and irritation. It is quite possible that after some time the owner of the kitchen will want to change the facades. Of course, fashion influences the choice. However, closely following fleeting kitchen design trends is a tricky thing. After all, a kitchen is not a wardrobe item; it is not changed every season. Besides, as you know, there is no comrade according to taste.
For many Russians, the kitchen is not the largest room in the apartment. A correctly chosen color, creating a certain emotional atmosphere in it, performs another important function: it causes the illusion of expansion or contraction of space, that is, it visually adjusts the dimensions. Thus, in a compact room, kitchens made of solid wood, painted in dark colors, which seem to compress it, are not recommended. Light colors optically expand it. Warm shades are good in a work interior, but they are narrowed by too active shades: red-orange, bright ocher. Conversely, facades of light, cold or pastel colors (whitewashed) expand the space, making it light and airy. Facades, as a rule, occupy a significant, if not the main place in the interior, especially in a small area, which the owners try to fill as much as possible with cabinets. Therefore, the color of the furniture becomes dominant in the colorful palette of the kitchen, and this fact must be taken into account.
If in the “first life” of the kitchen you were unable to achieve a harmonious combination of colors and shades, and the holiday you were striving for did not work out, when updating, try to make it finally happen. Try playing with colors using contrast or nuances (shades of the same tone). Designers do not recommend combining colors in a 1:1 ratio. According to the rule of the golden ratio, the ratio of the primary and secondary tones should be 5:3. And one more thing - don’t go to extremes, because it’s so easy to overdo it when, after a calm and slightly boring kitchen, you suddenly want color!
Partial restoration methods
If you wish, you can put the facades in order with your own hands, renewing or completely changing their appearance. The work begins with the removal of all fasteners and fittings, but first you should choose the most acceptable option.
Note!
Do-it-yourself vegetable garden: new interesting garden crafts for the street at your summer cottage (photo/video review)
DIY ceiling installation: step-by-step description of how to make a ceiling. Review of modern structures and ideas for their design (105 photos)
Do-it-yourself garage doors - a detailed description of the construction of various types of garage doors (120 photos)
We restore the kitchen set with our own hands
During daily use, kitchen furniture experiences heavy loads. Cracks and scuffs appear on the surfaces, the decent appearance is lost and the kitchen unit needs to be repaired. We will tell you how to do everything yourself and no craftsmen are required to restore furniture.
Working with veneer
Depending on the degree of damage to the surface and the general condition of the facade, the veneer can be replaced or sanded. The surface is sanded on a machine until the old layer is completely removed, and a new one is glued. There are simpler options:
- A non-warped surface can be lightly sanded and varnished; 2) instead of veneer, you can cover the facade with PVC film.
- The swollen veneer must be pierced and PVA glue injected into this place using a syringe. Then a soft cloth is placed on top and a weight is installed. On a concave surface, you must use a bag with heavy filler (preferably hot sand).
- Scratches on the veneer surface can be painted over with iodine or a marker; deeper damage can be masked with furniture wax. The same rule applies when restoring a wooden surface.
Decoration with rattan inserts
The principle is the same as with ceramic tiles. Rattan inserts will look appropriate with ethno- and eco-style. Rattan copes well with moisture, which is why it is well suited for the kitchen. It can be used to replace glass inserts along with large-scale restoration of facades. Rattan inserts can be glued on top of blind cabinets. The variety of weaves and the presence of several shades will allow you to choose the appropriate insert option.
Working with rattan is easy:
- a fragment of the desired shape and size is cut out; you can use pruning shears or metal scissors;
- the segment can be attached to the facade with a stapler;
- Wooden planks pre-treated with an antiseptic are installed around the perimeter of the insert. You can use glue;
- The main thing with rattan is not to overdo it - small inserts on the largest cabinets will be enough to add the necessary notes to the interior.
Working with MDF
The outer layer of decorative film is removed. In case of a damaged area (burn-through, delamination, cracking), this place is cut out and replaced with a patch of similar width. The surface of the slab is covered with a new film.
Take note! It is MDF boards that are successfully treated with paints, varnishes, films, polishing, and glue. Therefore, experiments with design painting or decoupage are great with them.
Cover with fabric
This method gives a smoother, more textured look than wallpaper. It is better to cover large elements such as wardrobe doors with fabric, fasten them with a furniture stapler or with glue. It is interesting to choose leatherette as a fabric for a luxurious look.
Fabrics made from pieces using the patchwork technique will make your closet more comfortable and will help you fit it into a child’s room or into styles such as Provence and country. The style can be embodied with wallpaper or film if you cover the panels of the drawers with materials with different patterns.
Film
If the PVC film has come off, you can use one of the following methods.
In the case of a peeled corner or strip, the surface area must be cleaned of dirt, degreased, heated with a hairdryer, applied with glue and rubbed in tightly, adjusting the edges. Bubbles are also eliminated: they are heated, pierced with a syringe with glue and rubbed onto the surface.
When completely replacing the coating, the film is peeled off, the surface is cleaned and degreased. The polyvinyl chloride surface is heated with a hairdryer, quickly lubricated with glue and rubbed into the facade.
The easiest way is to use self-adhesive film. It already has a special sticky composition applied to one of the sides. All you need is to prepare the surface and carefully stretch the material onto the facade. There is no need to rush; If wrinkles or bubbles appear, you need to pull the film away from the surface and walk over this area again, with all possible care.
Note!
Insulate the foundation with your own hands - a step-by-step description of the use of the best materials and technologies (90 photos)
- Do-it-yourself pergola on a summer cottage: step-by-step instructions with photos and descriptions
Laying laminate flooring with your own hands: a detailed description of how to lay laminate flooring. Laminate calculation, step-by-step description and installation secrets (105 photos and videos)
Take note! This method is considered the best for restoring facades made of wood or veneered. Affordable price, ease of use, ease of operation, high resistance to various external influences, a large selection of colors - you can handle this material even without special skills.
Top 6 ways to transform your kitchen without renovation and high costs
Before you start updating your kitchen set, it must be carefully prepared for work. Glue and iron the peeling film, tighten or replace the fittings, polish the scratches, and fill any holes with furniture putty.
We offer the top 6 ways to update your kitchen without renovation:
- update facades; install new doors; make decoupage; update the kitchen apron; replace or update the countertop; replace floor and ceiling finishes.
Method 1 – update the facades
If the appearance of the facades is already boring, outdated or has lost its former beauty, you can update them in the following ways:
- Cover with self-adhesive film. ORACAL application film works well here. Before pasting, facades must be thoroughly cleaned of dust, roughness, and dirt. To do this, they must be cleaned and treated with a solvent or alcohol solution. For beginners in this field, it is better to stick the film wet, that is, after moistening the facades. This allows you to correct it and glue it. A sheet of film is pasted from the center to the edges, carefully smoothing it with a squeegee.
apartments for rent in Pokrovsk, Donetsk region
- Paint it. The brush application method is suitable, but with spray paint there will be fewer streaks and a more uniform coating will be obtained.
For facades, chalk paint is optimal, which has a thick consistency and high adhesive properties. In addition, this paint allows you to do without sanding and priming. After drying, the facades must be varnished on top.
Before painting, minimalist facades with a flat surface can be made classic by adding moldings or carved details.
Liquid nails and wood putty are suitable for gluing parts to the surface.
Painting instructions:
Video: master class on how to paint a kitchen
Method 2 - replace doors and fittings
You don’t have to renew the facades, but completely replace the doors. This is an economical alternative to completely replacing the headset. The outside of the kitchen will change, but the inside will remain the same. But here you need to pay attention to the fittings. For older headsets you have to change it too. In any case, you need to consider the weight of the new doors so that they are not too heavy, as this could weaken the overall structure of the kitchen.
Handles are a small but important detail of a kitchen set that can completely transform the look of the furniture. The advantage is that replacing fittings is easy and inexpensive. It is better to do this in conjunction with replacing doors or painting facades. The only difficulty is that you will have to choose a similar format: handles-brackets, railing handles, handles-buttons, handles-profiles, mortise handles.
Method 3 - make decoupage
Another way to update your kitchen inexpensively is to do decoupage. This is a type of decoration. Its essence is to cut out some image, stick it on the surface and secure it with varnish. Using this method you can also disguise minor damage in the form of scratches, chips or stains.
- three-layer napkins with an interesting pattern or special decoupage cards (their patterns combine perfectly with each other); flat squirrel brushes (3 pcs. – for applying glue, drawing on glue and varnish); pencil and scissors; PVA glue and acrylic varnish.
The main thing when choosing a pattern is to match the pattern to the overall style of the kitchen interior. Decoupage work is performed as follows:
Video: decoupage of kitchen facades
Method 4 – update the apron
Another option for updating your kitchen is to replace the backsplash. If it is a tile, then you need to remove the old one and glue the new one. In addition to it, you can use solid glass or plastic panels, as well as MDF panels, stone or laminate for the floor (you can additionally cover it with a transparent glass panel).
If it is not possible to replace the apron, you can paint the tiles or re-caulk the seams between them. Alkyd enamel is used for painting, and special tile grout is used to update the joints. For the backsplash to be harmonious, the grout must have the same tone as the main color of the tile.
Method 5 – replace or update the countertop
This method is especially relevant if the countertop has lost its appearance and has become unusable. In this case, it is better to contact a specialist, because if the tabletop is glued to the cabinets, it will be difficult to disguise the traces of dismantling. One quick and easy renovation option is to cover the work surface with a thin layer of wood veneer or stone. You can also cover the countertop with tiles.
Method 6 – change the finish of the walls, floor and ceiling
The latest trending way to cheaply update your kitchen with your own hands is to update the finishes. You can put up new wallpaper, finish the floor with tiles, laminate, cork or linoleum, and whitewash or paint the ceiling.
Source
Decoupage
This is the pasting of drawings - from newspaper or magazine clippings, photo printouts to pieces of wallpaper or fragments of paintings. The old coating is removed with sandpaper, the surface is polished, and varnish is applied (PVA glue is possible). When it dries “to the touch”, the prepared drawings are applied.
After the entire surface has been pasted over, the drawings are varnished again (for a glossy surface, several layers of varnish are applied successively, each time waiting for the previous one to dry).
Make old
Many styles, such as shabby chic, Provence and vintage, are furnished with artificially aged furniture. So if your closet is ugly old, you can make it beautifully old. We discussed the methods in this post, choose the most suitable one: “Aging techniques: an overview”
Potal
This is an imitation of gold leaf (there are also copper and silver sheets). The technique of applying it is similar to decoupage: PVA glue is applied to the treated surface - it is not recommended to do this in too large pieces so that the gold leaf lies evenly. You can apply glue along a pre-prepared pattern, or only along the contour of a pattern.
When the glue dries, you need to put sheets of gold leaf on it, gently press it over the entire surface of the glue with a soft brush, and then use a stiffer brush to sweep away the remaining gold leaf from the surface. The operation can be performed repeatedly until the desired effect is achieved. The final result is covered with 1-2 layers of varnish.
Make a slate surface
Chalkboards are all the rage right now, so why not make one out of cabinet doors? The slate effect can be easily achieved in two ways: buy a film or paint the chest of drawers with chalkboard effect paint.
Painting
The best material is automotive acrylic paint. It can be applied with a brush, roller or spray. The surface is sanded and degreased, painted carefully and evenly. It is worth applying the paint in several layers (each layer must first dry) - this will make the surface more resistant to external influences. Finally, you can apply varnish to make the surface more resistant to various damages.
Our house
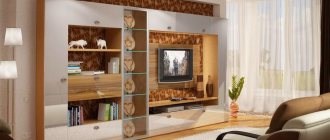
An old Soviet wall can be transformed into modern and stylish furniture. It is enough to repaint the visible parts with the facades and rearrange the blocks - it is better to move them apart by inscribing photo wallpaper or a picture with a perspective in the center, or maybe draw a perspective on the wall and insert a TV:
Such objects from the 70-80s of the twentieth century still live in many apartments.
They are made well, they stand strong, but the appearance has long been outdated. Many doors are lopsided and do not close well, the facades are scratched and scuffed.
Master class: how to repaint a Soviet “wall”
If you are not ready to completely get rid of old furniture, then you can remodel and update it. The work is not easy, but the result is worth it!
Step 1. First, we completely disassembled the furniture. All fasteners, fittings and decorative elements were removed. To avoid confusion, all parts were numbered in accordance with the diagram. And sent for restoration.
Step 2. Next, you need to remove all defects and irregularities (chips, cracks, scratches). This is done using special pastes and primers, which, after application, are dried and sanded to a perfectly smooth surface.
Step 3. Now the parts are painted in the selected color. In this case it is light beige.
For painting, a spray gun is used, with which paint from a container under pressure is distributed over the surface in a thin, uniform layer. Neither a brush nor a roller can achieve such an effect!
Step 4. It is important to pack everything carefully and securely, and then installation - putting the “wall” back together
During installation, it’s time to replace old fittings and fasteners with new and modern ones. And don’t forget to put hinges with closers on the doors!
Below is my idea for upgrading the repainted wall:
Insert TV and picture/photo wallpaper/wall painting.
You can even insert a chair between wall fragments:
By the way, the wall in the top photo was simply refreshed by me in a deeper mahogany color
Glass doors can be frosted or decorated with patterns:
Specifically for the wall model above - if the central pencil case is moved to the left, then the sides for the shelves with glass doors will have to be made from the top plate of the cabinet - my husband has already done this, with a little skill in working with a saw and a drill, and you will get this style:
More ideas for other wall models:
In general, a symmetrical arrangement for light furniture is the most profitable classic option!
To change the style of facades to classic, just use moldings.
Dear decoupage artists, do you know a way to style a marble box? Here it is used on the doors!
Great luck if your old wall-chest-display has a symmetrical shape from the beginning. Then you will get very effective alterations:
Or you can even remove the doors at the wall, as is proposed in modern facades! but then it won’t be as functional:
It's still better with doors.
Did you like the article? Subscribe to the channel to stay up to date with the most interesting materials
Make the doors mirror
Mirrors not only expand the space and add light to the room, but also hide surface imperfections. Any closet can be turned into a mirrored one by attaching one full-height or several small mirrors to its doors. This technique will help you create an Art Deco style cabinet.
An alternative option is a mirror mosaic, which will create wonderful highlights.
Stick rivets
To create a brutal effect for a loft or steam punk, cabinet doors can be decorated with metal rivets or staples. Nails with decorative heads will also work. Let the chest of drawers look like an old chest, and the wardrobe look like a door to a submarine. You can use other metal fittings for decoration, and support the style by painting or covering it with fabric.
