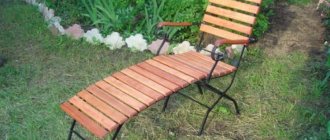
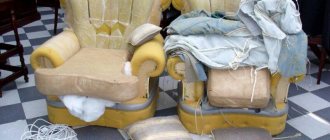
A chair is primarily ergonomic and functional: it is a piece of furniture for relaxing or creating comfortable conditions for long-term sedentary work. But at the same time, a chair in a living room or bedroom is prestigious and can be a luxury item, therefore it is aesthetically very significant. If curtains complete the aesthetics of the interior, the chair provides the key to its understanding. And if the curtains are simple, then it is the chair that brings all the furniture into a single ensemble. Of course, in the case when the interior design is carefully and competently thought out. Finally, a garden or country chair must fit into the landscape and withstand bad weather, wintering in a cold storage room, and careless handling.
Different chairs
Making a chair with your own hands is quite possible for a home craftsman. Amateur carpenters make their own chairs, sometimes of a very high level, see fig. However, we will leave works of high furniture art for later, and we will consider this publication to be an initial one and will limit ourselves in it to samples that require at most space in the garage, an ordinary woodworking tool and an average degree of skill to use it. For some, it will cost only sewing work. However, in the country of armchairs, the border between purely utilitarian and luxury pieces is very arbitrary, and some of the things described have a place in the living room. And the experience gained during the work will allow one to approach something exclusive over time.
How to make your own rocking chair from steel or plastic pipes
Some pieces of furniture can hardly be called necessary. But after a hand-made rocking chair appears in the house, the inhabitants will be surprised how they could manage without such a pleasant device before.
Rocking chairs are made both from modern available materials: plastic, cardboard, and from traditional ones - wood, rattan, metal. By giving preference to metal corrugated pipes (that is, steel pipes with an oval, round or rectangular cross-section), the master receives a product that has a number of advantages. Furniture made from such raw materials is lighter, stronger and, as a rule, inexpensive. After all, to create furnishings, remnants of materials that remain after other work are often used.
Several photo ideas for furniture design in the Adirondack style
Have questions about how to paint furniture? We will answer for free in the “Ask a Question” section on the website belinka.ru.
Types of legs
The main support of the chairs are the legs, which are also the base of the furniture. Legs have always been given special importance, so each master made them in his own way. The most popular types of bases are:
- Direct. All 4 legs will be smooth, without bends, with the same height.
- Curved. They have a double bend and are decorated with carvings. The turned legs are thin; in the lower part you can see a slight thickening, reminiscent of an animal paw. This base gives the product elegance and unique charm.
- Inclined. Mounted to the body at a slight angle. The legs themselves are teardrop-shaped or even. Compared to straight ones, they will be more massive; in some cases, they are made of chrome-plated steel.
- Combined. The pair of hind legs are straight, the front legs are curved. An English fireplace chair with such a base looks unusual, but looks most impressive from the side.
- Globular. Only used on bergeres. The elements are short and even, ending in a small hemisphere.
- Stand. The basis is relevant for designer products (egg and some other models). The chair has only one leg, which ends in a semicircular base, located in the center.
- Cross. Suitable for gaming chairs only. As in the previous case, there will be only one leg. The design rests on a five-pointed cross with several movable wheels.
This is interesting: Poufs with a back - features, models and choice
Impact on crops
Potassium chloride, while having a general positive effect on many plants, can have a negative effect on chlorophobic crops.
– chlorophobic crops that react negatively to excess chlorine in the soil (it leads to a decrease in yield). At the same time, they are very potassium-loving. The negative impact of the chlorine component is eliminated by adjusting the doses, timing and methods of adding calcium chloride.
– potassium-loving crops, less sensitive to chlorine. In England, in addition to potassium fertilizers, sodium chloride is also applied to sugar and fodder beets.
less demanding on potassium fertilizers.
Manufacturing options
There are many ways to make beautiful and comfortable chairs.
Let's take a step-by-step look at what options there are for making such pieces of furniture.
Soft
You can make an excellent soft chair at home. To do this you will need a plywood sheet and all the necessary tools. Let's take a step-by-step look at how you can make such a furniture design yourself.
- First you need to draw up an accurate drawing of the future product indicating all dimensional parameters - based on the diagram, it will be easier and more convenient to work.
- You need to cut out cardboard templates. In the future, they will be used to prepare the plywood parts of the future chair. It will be necessary to make crossbars; their inclination, bend and size should be determined in advance.
- All wood parts must be thoroughly sanded. The sides should be painted, and the end parts should be further strengthened with special metal rims.
- Foam cushions need to be glued to the seat and back of the product. If desired, the procedure should be repeated for the armrests. At the top, the foam rubber is strengthened with a stapler.
- To sheathe the structure, you need to make holes and secure the rims with screws. First of all, you will need to stretch the upholstery fabric over the back of the furniture, after which you can move to the remaining areas.
- Install all parts in their places and among themselves using a screwdriver and self-tapping screws. All joints, connections and fastenings must be coated with glue.
Bag chair
Modern chairs that resemble a large, soft bag in appearance are very popular today. Such things can also be done with your own hands, and there is nothing complicated in such work.
Excellent products can be obtained from 3 meters of satin, 1 m of woven material for the cover. You also need to prepare 1 m of zipper, scissors, padding polyester. The following tools will be useful: needle, pins, thread, scissors. The scheme of action here will be as follows.
- Using patterns, prepare fabric parts. You need to cut out a large bottom bottom, a small top one and 6 wedges. The latter will need to be stitched and sewn on both bottom parts. The top cover of furniture is sewn in a similar way.
- The zipper in the resulting workpiece will need to be carefully sewn into one of the wedges. To make the cover easy and convenient to take off and put on, 2/3 of the bag needs to be filled with filler, and then put it into the outer cover and simply fasten it.
Frameless
Many people like soft frameless chairs. They are comfortable and pleasant to the touch. They are often made for young users. Let's take a step-by-step look at how to properly make such interesting furniture using the example of a child's chair.
A similar structure can be made from timber or inexpensive chipboard. The front part is usually made of plywood. The rear component can be constructed from hardboard. In the interior of the furniture structure, all bends and uneven parts should be glued with cardboard. When the adhesive has completely dried and set, the unevenness will need to be carefully smoothed out using a special construction knife. You can safely glue a piece of foam rubber on top of the structure. After this, the homemade structure can be sheathed with the selected material.
Chair-bed
Modern chairs that can serve as a bed have long won the love of consumers.
The backs and seats of this furniture design can be constructed from simple plywood sheets. The action plan here will be as follows.
- All components will need to be firmly secured using self-tapping screws. The latter on the upper part will need to be properly fixed using a high-quality adhesive composition.
- All surfaces made of wood will need to be thoroughly sanded using a sheet of sandpaper.
- The side backs can be made from bars. Their design must include legs, a handrail and 5 racks.
- The seat is made of 3 main parts. Each of them must be equipped with a timber frame.
- The sliding mechanism operates due to special metal hinges. In order for it to work without jamming or malfunctioning, it is imperative to leave small gaps.
- The seats must be connected using self-tapping screws on a plywood sheet with bars. All 3 required seats must have the same dimensions.
- The seats should be attached using high-quality iron hinges. The right half will need to be securely attached to the side parts with bolts to make the structure as stable and reliable as possible. The parts must be held in one position when the chair is moved apart.
- The furniture structure will need to be coated with a good varnish or painted. A foam pillow in a nice case would be a nice decoration.
Partial restoration of the chair
It often happens that it is not necessary to completely restore a chair. For example, if it has well-preserved fabric or leather upholstery, but the legs are very loose, then a major renovation of such an item is not required - just take care of the legs.
Let's look at the most common cases of breakdown of chair components, the restoration of which will give a second life to the entire product.
Leg attachment diagram.
The first case: the legs are very wobbly. The simplest restoration option is to put the legs in their original places with glue. The main disadvantage of this option is the fragility of the glued legs. To eliminate it, it is recommended, in addition to gluing the legs to a horizontal bar, to additionally connect the parts to be fastened, for example, with dowels.
To do this, the entire unit being repaired must be slowly disassembled. It is advisable to replace the spike. In this case, the joints are covered with fresh wood glue, and the tenon is inserted into the seat. For a tight connection, the joint is tightened with a clamp.
After this, 2-3 holes are drilled in the leg, into which dowels are driven. These auxiliary parts, which are also coated with glue, should be made of hardwood and be slightly larger in diameter than the diameter of the through holes. Holes are drilled on the seat body corresponding to the location of the dowels on the legs. The legs are connected to the rest of the chair, the parts being fastened are tightly pulled together and left in this position until the glue dries.
Stages of attaching upholstery fabric to the chair frame.
Second case: the seat belts are stretched too much. Because of this, an impressive “pit” is formed in the seat. Another defect will have the same effect - the loss of nails that hold the belts in the seat body. If it's all about fastening the belts, it needs to be restored by driving in new nails. If the reason is stretched old belts, then replacing them with new ones is impossible.
When installing new belts, they must be tensioned. This can be done using a wooden block. In this case, one end of the belt is attached to the seat frame, while the other end is tightly tensioned with a block, clamping the belt between the block and the frame of the chair. Keeping the belt taut, nail it to the base.
This must be done so that after this there is a free section of the belt 30-40 mm long. It is bent and nailed for greater reliability. Gaps of up to 100 mm are left between the tensioned seat belts.
How to make the simplest life-size version?
We will look at making a simple folding chair without a back from plywood and fabric. Since these materials are easy to work with, they are characterized by high technical characteristics and low cost.
To manufacture parts and assemble the structure, we will need the following tools:
- drill;
- screwdriver;
- construction stapler;
- wood hacksaw;
- sander;
- milling cutter;
- scissors;
- jigsaw;
- pencil and ruler.
The materials we will use are:
- plywood, at least 2 cm thick;
- foam;
- cardboard;
- glue;
- self-tapping screws;
- upholstery fabric;
- paints and varnishes.
So, step by step the production and assembly of a simple model of a chair made of textiles and plywood will look like this:
First we create a template. It is drawn with a pencil on paper and cut out strictly along the contour. Next, using these patterns, we make blanks from plywood. It is most convenient to cut out the components of a piece of furniture with a jigsaw (if you don’t have one, you can use a hacksaw).
Next, we carefully polish all the parts so that they are free from roughness, defects and other flaws. For these purposes it is better to use a grinder. If you don’t have it, you can use sandpaper of varying degrees of grit. After all the parts are ready and cleaned, we begin to create the holes for the hinges. Here you need to check the drawing several times so as not to spoil the future product with unnecessary holes. It is best to use bolts and sleeves as hinges. For the strength of the product, it is additionally recommended to secure the sleeves with glue. Now we begin to form the holes for the tenons that it needs to hold it open. We make the seat from foam rubber and upholstery fabric. The seat is fixed to the frame with a furniture stapler. Then you can proceed directly to assembling the product
After assembling the chair, you only need to carry out finishing decorative work. The frame of the product, made of plywood, is treated with stain and covered with several layers of varnish. This will prevent its damage from negative factors and extend its service life. In addition, finishing the chair will make it more aesthetically pleasing. Instead of varnish and stain, you can use water-based paint of any shade.
Children's room
The room for the child should be spacious enough for games, cabinets, tables and chairs, toys and other accessories. And most importantly - a comfortable and functional place to relax. Installing a bed is not always justified, especially in small rooms. Frame products also do not always meet safety aspects.
Thanks to a creative approach, you can make safe upholstered furniture that a child can independently move, disassemble and assemble.
Making armchairs and chairs from foam rubber, polyurethane foam and mattresses is an excellent and profitable way to recycle old things. Old beds, wardrobes and sofas are used as starting materials. Their components are used as blanks for frames, sides, armrests and niches for things.
To make folding upholstered furniture, you will need:
- roulette;
- hacksaw;
- square;
- electric drill;
- screwdrivers;
- spanners;
- sandpaper;
- PVA glue;
- sewing machine;
- ruler;
- marker.
If a sofa is being disassembled, then the work uses a folding mechanism, corners, bolts and nuts.
Based on the availability of material for the work and the experience of the craftsman, a product design is drawn up. It can be folding or on casters with an insert.
Assembly is carried out in the following sequence:
- Dismantling old furniture into components.
- Cutting wood into blanks, making patterns for covers.
- Making frames and bases for pillows.
- Sewing covers, equipping them with removable zippers at the joints. Covering the soft part with fabric.
- Installation of folding mechanisms.
Finally, the chair is decorated.
Required materials and tools
Before you start working on a chair or stool, you need to properly organize the entire production process. This concerns, first of all, the organization of the workplace. It is how correctly the workspace is organized that will determine the result of the work. If you do not plan to create a commercially successful project and do not put work on stream, then a small workshop room with a large table and good ventilation will be enough.
A large table is essential for working with plywood. If you take a standard, uncut sheet of plywood, then the ideal conditions for drawing out all the elements will be a horizontal surface. In principle, it is possible to make a drawing on a vertically located sheet, but it will simply be impossible to cut it correctly with a jigsaw.
Otherwise, the list of minimum necessary tools for working on a highchair will look like this:
- Ruler, tape measure and protractor;
- Pencil, eraser, pattern;
- Jigsaw;
- Set of wood files;
- A grinder or grinder with an attachment for working with sandpaper;
- Electric drill;
- Wood drills;
- Screwdriver (if it has a drill function, then an electric drill is not needed);
- Screwdriver bits;
- Sandpaper of different grits from coarse, 100 - 120 grit units for roughing, to very fine grit - 1000 -1200 for finishing;
- Brushes, stain, varnish, paint (if the project requires multi-colored painting).
- Self-tapping screws of different lengths and head shapes.
And most importantly, you will need plywood. It is best to immediately take grade 1 material; it has no knots, it has the same color on both sides, and its surface is the smoothest. For load-bearing parts - legs, jumpers, armrests, it is better to use material with a thickness of 18-24 mm. For a large man weighing 120-130 kg, this will be just right. But for a back or seat, 12-16 mm is enough.
When choosing the size of a plywood sheet, you should focus on the following parameters - the seat height for an adult is 42-48 cm, for children it is usually taken 25-28 for younger ages, up to 5 years old, and from 28 to 35 cm for middle ages from 5 to 7- 8 years. If diagonal bends or long elements are provided, then the dimensions of the sheet are selected accordingly.
Receipt
Potassium chloride is obtained from sylvinite (a conglomerate of sylvinite KCl and halite NaCl) in two ways:
- The halurgical method is based on the different solubilities of sodium and potassium chlorides at appropriate temperatures. The solubility of potassium chloride doubles when the temperature increases from 20 to 100°C, but the solubility of sodium chloride does not change.
- Flotation method. The separation of sylvinite and halite is based on the different ability of the surface of particles of these minerals to be wetted by water. Flotation potassium chloride has larger natural pink crystals. Hydrophobic additives (fatty amines) used in the flotation process significantly reduce the hygroscopicity and caking properties of the fertilizer.
GOST 4568-95 Potassium chloride. Technical conditions. Official publication. Interstate Council for Standardization, Metrology and Certification, Minsk.IPK. Standards Publishing House, 1996. 15 p.
Korenkov D.A. Fertilizers, their properties and methods of use / Edited by D.A. Korenkov. – M.: Kolos, 1982. – 415 p.
Mineev V.G. Agrochemistry: Textbook. – 2nd edition, revised and expanded. – M.: Moscow State University Publishing House, KolosS Publishing House, 2004. – 720 p., l. ill.: ill. – (Classical university textbook).
https://www.youtube.com/watch?v=ytcreatorsru
Muravin E.A. Agrochemistry. – M. KolosS, 2003. – 384 p.: ill. – (Textbooks and teaching aids for students of secondary educational institutions).
Chemical Encyclopedia: in 5 volumes: Volume 2: Daffa - Copper / Editorial Board: Knunyants I.L. (chief editor) and others - M.: Soviet Encyclopedia, 1990. - 671 pp.: ill.
https://www.youtube.com/watch?v=ytpolicyandsafetyru
Yagodin B.A., Zhukov Yu.P., Kobzarenko V.I. Agrochemistry / Edited by B.A. Yagodina. – M.: Kolos, 2002. – 584 pp.: ill (Textbooks and teaching aids for students of higher educational institutions).
Create a drawing
Development of a drawing and modeling of furniture, as practice shows, is a process no less interesting and exciting than direct work with plywood
Here it is worth emphasizing two points - the first is the accuracy of the elaboration of all the details of the structural elements. The drawing is drawn down to the millimeter so that each leg, back or seat has all the calculated points
The second point is the rational arrangement of the pattern of parts on the sheet
This is important both for saving material and for cutting technology - the fewer cuts with a jigsaw, the better
The saying goes that you need to measure at least seven times. That is why, in order for a chair made of plywood, assembled with your own hands according to your own drawings, to be truly a chair and not require modification and modernization, it is recommended to use a method such as modeling. For the model, you can choose cardboard, paper or fiberboard. The model itself can be made in a reduced form, even on a scale of 1:5 or 1:7, it will show all the bottlenecks and miscalculations, saving a decent amount on real plywood.
The process of creating a drawing can be represented in the form of several stages - the first stage is a simple drawing, which embodies the concept of the future chair or stool.
Stage two involves drawing individual nodes or elements. Be sure to draw out all points and fastening points, places where individual elements will come into contact.
Stage three - drawing to scale with real dimensions. It is optimal at this stage to create a reduced model in order to make sure that the design direction is chosen correctly and the model does not require radical reworking.
Stage four - transferring life-size dimensions onto graph paper, searching for the optimal location on the sheet.
The last stage is preparation for transferring the drawing onto patterns for mass replication or directly onto plywood for a single copy.
Wooden chair for country kitchen
What distinguishes this self-made specimen from an ordinary chair is that:
- The back of the chair is tilted by 10 degrees, and the supporting strips are cut not from one board, but glued together from two, which reduces wood consumption
- Made from one piece of wood. The master set himself the task of making a chair from a single piece of 2x4 wood. You will find a diagram of cutting a piece in the photo below.
- In the back of the chair, the horizontal slats have decorative cutouts that you can draw to suit your taste. And also the ends of the back have attractive bevels.
Step-by-step photo master class. Blueprints
Here we see a swinging chair (or rocking chair) in the Adirondack style, which is quite an unusual combination. Pay attention to the height of the backrest, which is made long enough so that you can lean your head on it to rest.
READ MORE: Peony Julia Rose 18 photos description of a variety belonging to the Ito-hybrid group, features of its planting and care
It is very important to make a correctly shaped rocker arm that provides swinging. When making such a chair, carefully study its shape.
Instructions for performing the work
It’s quite possible to make a chair from plywood with your own hands. First of all, you need to make a drawing and decide on the dimensions. If you don’t want to fantasize, you can find a ready-made diagram on the Internet. As an example, consider a model of a rocking chair made from individual strips of plywood.
- According to the drawing, a template is prepared from paper, then applied to a solid sheet of plywood and each detail is drawn. The template is transferred to the working material as economically as possible.
- Every detail is carefully cut out with a jigsaw.
- The cut areas should be treated with sandpaper.
- All elements are coated with a special antibacterial solution using a brush. After drying, wood glue is applied to all surfaces, which will help prevent parts from falling apart during assembly.
- Holes for screws and nails are marked and drilled on the parts.
- The frame for the seat is assembled from the prepared parts.
- Plywood slats are attached to the frame.
- The same thing is done with the back.
- The runners (4 pieces) are cut with an arc.
- The seat and runners are fastened with connecting parts cut from plywood.
- Then the back is attached. It can be installed permanently or, using adjusting parts, made movable (able to change the slope).
- At the last stage, handrails are mounted to the seat frame.
When the main work on the chair is completed, the moment of finishing comes. It all depends on the purpose of the product. If it is intended for a gazebo in the garden, it should be coated with an antifungal compound and protected with a layer of paint. For indoor use, you can give the chair a more homely look: upholster it with fabric or leatherette, use filler for the seat and back, and add coziness with pillows.
Upholstery of the product should begin from the back, nailing the fabric with small nails. If you don’t want to deal with the arrangement, but comfort is necessary, we advise you to take a closer look at a ready-made European cover that is suitable in size; it will completely repeat the shape of the model. By making your own chair, you can not only produce a functional piece of furniture, but also save money and get a lot of creative pleasure.
How to make a rocking chair with your own hands, see below.
Application
Industry
Potassium chloride is used as a component for the production of complex mineral fertilizers. Granulated potassium chloride – for the production of mixed mineral fertilizers containing three main plant nutrients.
Potassium chloride is used in metallurgy, pyrotechnics, photography, as well as in textile, glass, soap, pharmaceutical, pulp and paper, leather and many other industries.
For the production of leather substitutes, synthetic rubbers, feed and baker's yeast, “fine” potassium chloride is used.
For the production of therapeutic and prophylactic salts, potassium chloride is used, not treated with anti-caking agents.
Required materials and tools
Before you start working on a chair or stool, you need to properly organize the entire production process. This concerns, first of all, the organization of the workplace. It is how correctly the workspace is organized that will determine the result of the work. If you do not plan to create a commercially successful project and do not put work on stream, then a small workshop room with a large table and good ventilation will be enough.
A large table is essential for working with plywood. If you take a standard, uncut sheet of plywood, then the ideal conditions for drawing out all the elements will be a horizontal surface. In principle, it is possible to make a drawing on a vertically located sheet, but it will simply be impossible to cut it correctly with a jigsaw.
Otherwise, the list of minimum necessary tools for working on a highchair will look like this:
- Ruler, tape measure and protractor;
- Pencil, eraser, pattern;
- Jigsaw;
- Set of wood files;
- A grinder or grinder with an attachment for working with sandpaper;
- Electric drill;
- Wood drills;
- Screwdriver (if it has a drill function, then an electric drill is not needed);
- Screwdriver bits;
- Sandpaper of different grits from coarse, 100 - 120 grit units for roughing, to very fine grit - 1000 -1200 for finishing;
- Brushes, stain, varnish, paint (if the project requires multi-colored painting).
- Self-tapping screws of different lengths and head shapes.
And most importantly, you will need plywood. It is best to immediately take grade 1 material; it has no knots, it has the same color on both sides, and its surface is the smoothest. For load-bearing parts - legs, jumpers, armrests, it is better to use material with a thickness of 18-24 mm. For a large man weighing 120-130 kg, this will be just right. But for a back or seat, 12-16 mm is enough.
When choosing the size of a plywood sheet, you should focus on the following parameters - the seat height for an adult is 42-48 cm, for children it is usually taken 25-28 for younger ages, up to 5 years old, and from 28 to 35 cm for middle ages from 5 to 7- 8 years. If diagonal bends or long elements are provided, then the dimensions of the sheet are selected accordingly.
Types and features of models
The strength characteristics of the material make it possible to make chairs from plywood for adults and children, to develop a lightweight and comfortable design for the garden, kitchen, garage, and fishing. The projects and drawings of the following models are in greatest demand:
- Traditional chairs-stools that have a place in any apartment or country house. A small number of parts, smooth straight lines of individual elements allow you to make such a chair with a minimum set of hand or power tools.
- A folding chair made of plywood can always be taken to the dacha or when going outdoors, because it will not take up much space in the trunk, or even when stored in the pantry. Compared to a stool, the design is more complex, but it can easily be implemented even by a novice craftsman.
- Transformable chairs are multifunctional and replace several household items, for example, a high chair for feeding a child and a full-fledged high chair with a separate table. They can have a folding or prefabricated design.
- A special direction is designer chairs and plywood armchairs. They are distinguished by the presence of parts with complex shapes and curves, more advanced and expensive methods of finishing and decoration. It is recommended to take on such projects only if you have experience; it is better to give preference to simpler options as your first job.
This is not a complete list of models, especially since many craftsmen prefer to make furniture themselves. It is worth noting that this exciting activity has a number of advantages:
- the ability to make a unique piece of furniture that meets all the parameters of the user’s needs;
- cost savings, since the cost of necessary materials is much lower than the cost of finished furniture;
- an invaluable experience that will definitely come in handy in life.
Stool
Folding chair
Transformer
Designer chair
Armchair
What is undesirable
Simple homemade chairs are enough; as you can see, there are many. But there are structures that it is better not to tackle, no matter how much desire or skill you have. This is, firstly, an office chair. The requirements for its ergonomics are radically different from those for a home for relaxation: it should create comfort that is not relaxing, but maintains performance for a long time. Technologically, this is achieved by using complex-shaped parts made from high-quality materials. And their production, in turn, requires industrial conditions with equipment for pressing and stamping, for plastic casting, TIG/MIG welding, etc. In addition, a gas lift, when purchased individually at retail, can be more expensive than a finished chair; Gas lifts are already made by machine-building enterprises with equipment for precision metalworking.
Note: a computer chair differs from an office chair essentially only in name, and everything said above applies to it in full.
Secondly, the chairs are made of cardboard. Packaging cardboard with internal corrugation is a wonderful material in many respects and finds the widest application. But not for chairs. In principle, building a chair from cardboard is not so difficult, see figure, and its overall strength will be very high. But - alas! – even cardboard reinforced in any way easily crumples at the end and the seat of the chair will sag very soon. And a push with anything hard, even a vacuum cleaner, will leave an irremovable dent.
Stages of making a chair from cardboard
Design and size of the structure
When choosing this or that model, you need to remember that even beautiful and unusual chairs should, first of all, be comfortable and safe. Therefore, you should start with the selection of suitable materials and design dimensions. Basic rules to follow:
- For the manufacture of load-bearing elements, plywood with a thickness of 18-24 mm is used; for backs or seats, 12-16 mm is sufficient. Only in this case will the structure withstand the weight of an adult; for children's models, the thickness can be reduced by 1-3 mm.
- The standard height of plywood chairs for adults varies from 42 to 48 cm; for children, the value decreases to 25-35 cm, depending on age. The main selection criterion is that the legs should be positioned at right angles and reach the support.
- If you plan to use the chair outdoors or in damp rooms, it is better to use moisture-resistant or laminated plywood.
- To obtain an aesthetically pleasing appearance of the product, it is necessary to use only grade 1 or grade 2 material; others will be extremely difficult to sand and paint with high quality.
- For use at home, stool chairs or designer models are more suitable, while for a garage or pantry it is better to give preference to folding or transformable products.
- The design of the manufactured interior item must correspond to the style of the living space. Simpler models with minimal decor are suitable for outbuildings and garages.
Use plywood with a thickness of 18-24 mm for load-bearing elements, for backs or seats - 12-16 mm
Standard chair height
For an aesthetically pleasing appearance of the product, use grade 1 or 2 material
The design of the chair should match the style of the living space
How to choose material and design
Modern models of rocking chairs are made from various materials, each of which has its own characteristics:
- Wood. Furniture made from various types of wood looks stylish, it is durable and reliable. The surface must be treated with a finishing protective compound.
- Sheets of plywood. The material is easy and comfortable to work with, it can take any shape, and is also suitable for the manufacture of small elements. However, it is better not to place such rocking chairs outside.
- Profile pipes. It is better to make individual parts from them, rather than the entire structure. The material is durable and easy to work with.
- Plastic pipes. A practical, budget-friendly and reliable option, the material is lightweight and easy to process.
- Rattan and wicker. The result is beautiful designer products, but the weaving technology is quite complex, and high-quality material for manufacturing is not easy to find.
- Metal. Processing parts will require skills and experience from the master. Metal chairs are durable and resistant to external influences.
Tips from the experts:
- Coniferous woods are the most comfortable when assembling furniture yourself, as they are easily amenable to any type of processing. However, they quickly react to humidity and swell, so rockers made of spruce, pine or alder must be treated with special protective solutions.
- Furniture can also be made from expensive and denser species, for example, oak, beech or ash. In this case, you can be sure of the strength and durability of the structure, since these types of trees do not have large pores.
- To create swinging products, it is better to use well-dried first grade wood blanks. If the chair is assembled from damp material, the entire structure may become deformed and deteriorate over time.
- The choice of material is often determined by the location where the rocking chair will be located. An outdoor structure (for a dacha or veranda) must have additional protection in the form of treating all surfaces with antiseptic agents that can minimize the effects of snow, rain and frost.
- Summer cottage products should not be covered with textiles and covers should not be placed on the body, otherwise the fabric may become damp and rot. In this case, it is better to use removable pillows and blankets.
- Wood can be combined with metal to create an even more durable structure. In this case, the frame should be metal, and the seat itself should be wooden.
- It is better to choose plywood sheets with good ductility for manufacturing; they are more convenient to process.

