Creating your own little house is a favorite activity for preschool children. During this lesson, imagination and ingenuity work, and hard work develops. To do this, children use all the things lying nearby as material for their construction plans. Here you can help them by lending your hand.
To do this, you need to remember one inexpensive, natural raw material for packaging containers. It is cardboard. It’s easy to find and use for your craft fantasies. A do-it-yourself cardboard house is one of the most interesting products for a child.
What materials will you need?
There are many master classes that tell you what you will need during the work. This may require a variety of materials, from wood to document folders.
However, if you look at the photo of a house made of cardboard, it looks beautiful and interesting and is easy to make together with your child.
For this you will need:
- cardboard for the base;
- cardboard for decoration;
- colored paper;
- pieces of fabric for decoration;
- scissors;
- pencil and eraser;
- ruler;
- stationery knife;
- brushes and paints;
- colored pencils and markers.
- other decorative elements.
All these materials can be found in any home and everyone has them. Therefore, a toy for a child, a cozy corner for a pet or a decorative piece will be made with love, to your taste and will not require additional investment.
Construction of a cardboard castle
A real “princess castle” made of cardboard will not leave any girl indifferent. Boys will also love it as a full-fledged “defensive structure.” A lot of cardboard will be needed here - two or four towers with a jagged edge, connected by the same lintel walls with teeth on top. If desired, the turrets are decorated with cone-shaped tops with flags. Small windows and an acceptable size entrance are also necessary. You can also make a miniature table lock - it is made from ordinary colored cardboard. Any number of turrets are made here, including round ones. Windows and doors are drawn with a marker. The structure can be placed on an “island” and equipped with a folding bridge-gate equipped with ropes for quick lifting – in case of an enemy attack. Sometimes the castle is a full-fledged model of a famous structure.
Decoration, house decoration
The finished house is decorated by hand - each brick is drawn, covered with colored paper, painted with acrylic, ink, and gouache. Children over six or seven years old are able to decorate a toy house on their own. The roof is decorated with tiles - semicircular “scales” are cut out of cardboard or fabric according to a template, which are glued step by step, from bottom to top, onto the side slopes. Each fragment can be painted with its own color. When the “building” has interior decoration, it is made of fabric and paper. The inside of the house is sometimes painted - the outlines of furniture and various interior items are drawn, and the mirrors are made of foil. They also make lighting inside - a battery-powered night light or LED strip are suitable for this.
How to make a cardboard house yourself
There are two ways to make a home for a pet or toys out of cardboard with your own hands. Take ready-made boxes or find a diagram of a cardboard house and redraw it on large sheets.
There are also many design options, you can make it with or without a roof, with closed or open walls to make it convenient to play.
Some decorate cardboard houses with twigs and other natural materials, and they already become a stylish piece of furniture. For example, a tea house is common in the kitchen. You can neatly store bags in it and beautifully serve them to guests. Construction of a doll house
If your daughter really likes to play with dolls, you can please her and give her a dollhouse. But don’t immediately run to the store; you can make a good game yourself.
Think about the size of the future home for toys and apply markings on sheets of cardboard. You can immediately draw a layout of one room with a floor and walls, or you can cut out each detail separately if you don’t have a large box. Remember that the front wall does not need to be made to make it comfortable for the child to play.
Carefully glue the house together and use a ruler to make a small groove at the fold for convenience.
We make partitions between rooms. They will help support the roof and maintain the structure and shape of the house.
Let's start decorating it and come up with the interior of the rooms. You can cut out windows and sew curtains from unnecessary fabric, hang wallpaper and make furniture for dolls with your own hands - this is not as difficult as it might seem at first glance.
The next method for building a cardboard doll house may seem a little simpler, since there is no need to fasten the walls together. You just need to choose the right boxes and figure out how best to connect them together.
You need to proceed from the height of the dolls and toys that need to be placed there. Each box is one of the rooms, so you need to think about how many of them there will be in your future home.
NOTE!
Play Charge KitThe Urals are a region of nature reserves and amazing natural landscapes
- Diaphragm Vacuum Pump
You need to put one box on top of another and connect them together using glue, a stapler or double-sided tape, this will create several floors. Next, you should make a roof and decorate the house in accordance with the child’s preferences.
Conclusion
Thus, summing up all of the above, it becomes clear that the manufacturing process is quite complex and does not require any special skills.
Even someone who has never done anything like this can handle the construction of such a structure. You just need to prepare everything in advance so as not to be distracted from work later.
Also try to follow each step of the above instructions with precision. We wish you good luck and success in building a house out of a box!
Creating a house for a pet
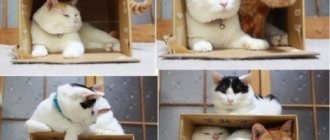
Many of us have pets, so we want to please them and give them comfort. They love to climb into ordinary boxes, so many are interested in how you can make a house for a cat out of cardboard yourself.
To do this, you need to take a cardboard box of suitable size and use a plate to draw a round entrance.
Carefully cut it out using a stationery knife. We use the upper part to create a roof. They just need to be connected and beautifully decorated.
You also need to make several round holes in the upper part of the back wall to ensure good ventilation. And then you need to use your imagination and decorate the house so that it looks good in the interior.
Child sized villa
To create a structure in which a child can fit, you need to use a large box or sheets of corrugated cardboard. Its foundation, consisting of four walls and a roof, is the work of adults or older children. And decorations and decorations can be done together with the owners.
The basic layout is a village house with four walls, a gable roof, two windows, and one entrance. To do this you need:
- Take a cardboard box of square format and meter dimensions. Fold back the edges. On the two upper sides of a smaller size, draw two triangles with a pencil and a ruler and make a cutout along the drawn mark.
- Leave the remaining edges on top in the same rectangular form. Cut off the bottom parts of the box and do not throw it away. They will be needed to complete the roof.
- The upper parts – triangular and rectangular – are glued together. Form a triangular frame from the bottom scraps and glue on top. The structural box is ready.
- Now you can make windows and a door. They can be a simple square shape, or with a rounded arched appearance. To do this, take a pencil and make the necessary marks, after which you carefully cut it out with a stationery knife. After removing the selected parts of the window, make a cutout along the outer outline of the door on three sides so that it opens.
- In the future, you can decorate in various ways and things. Cut out new figures or glue them. Color the outside with a marker or gouache. The child can come up with options for interior decoration himself.
Form and ideas
The shape of the house depends only on the wishes of your baby. Cardboard allows you to make any design, even round ones. You just need to stock up on hot glue, tape and a utility knife. And how easy it is to dispose of the toy later! I burned it and that’s it, there’s no trash in the house!
Another simple MK with step-by-step photos:
Connecting ceilings to floors
The ceiling of one floor is the floor of the next. To prevent peeling and sagging, the interfloor ceiling is secured to a support.
- For accuracy, it is recommended to draw a line along the perimeter of the frame at the level of the upper boundaries of the internal walls parallel to the floor of the floor.
- Cut long strips of cardboard no more than 1 cm wide. If the thickness of the material is insufficient, the strips can be cut twice as large and glued together.
- Glue the resulting parts with the wide side around the perimeter of the house, aligning with the control line. There should be a uniform protrusion that encircles the outer walls from the inside.
- Apply glue to the sections of all the parts on which the ceiling will lie, as well as the sections of the ceiling itself.
- Lay the ceiling piece, making sure the internal walls are perpendicular.
- Apply masking tape to the joints of the walls and floor of the upper floor, making sure that the tape goes all the way to the corner without deforming it.
Glossy box pasting
It is worth a separate discussion, since not every glue will lie on top. Although gloss differs from gloss: even thick PVA can stick to some surfaces, while others will only be taken by a gun.
You can cover it with white A4 paper, and then you won’t need primer for the decoupage, and moisture from PVA diluted with water won’t be a problem.
Photo: Instagram decupazh_j
The easiest way to decorate glossy things is with self-adhesive. It is not advisable to decorate ordinary cardboard with it, because if there is a need to tear it off and correct it, the Velcro will most likely take the top layer with it.
Film with tiny patterns is not easy to find (this is sometimes available in craft stores). You will probably have to use it either on larger models, or buy a one-color one.
Kitchen
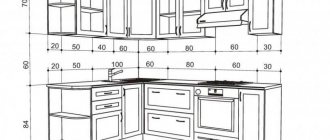
Room No. 4 is the kitchen , it is small but roomy. The kitchen set is a large cabinet in the shape of the letter L (photo 18).
The sink is a small plastic jam container, the faucet is made from modeling clay, and there is a small hanging cabinet:
The stove is electric with 4 burners (photo 20), its door opens.
In the kitchen we have 2 chairs (photo 21) and a table (photo 22).
Dishes were also made from small items (photo 23).
Photo 24 shows our kitchen after applying paint and varnish.
On the top floor we have a children's room and a toilet room.
common room
Room number 2 is a common room for watching TV. The TV in our house is flat - a large cardboard rectangle was covered with black acrylic paint, after drying, a suitable picture was glued and the whole thing was covered with acrylic varnish.
The main place in this room is occupied by a spacious sofa, which accommodates a large family of dolls.
The base of the sofa is a cardboard blank (photo 10).
The back and armrests are covered with paint and varnish, and the base is glued with padding polyester and fabric. My daughters already had a table - it was a wooden construction set, onto which we glued a piece of cardboard and painted it all together. We see room No. 2 in photo 11.
Video on how to make a cabinet:
On the second floor of our house there is a music room and a kitchen.
