A bottle of sparkling drink, decorated with your own hands, will decorate the New Year's table
The holiday season is approaching, which means it's time to think about how to decorate a bottle of champagne for the New Year. Like the Christmas tree, tangerines, gifts and Olivier salad, champagne is traditionally considered one of the main New Year's symbols; not a single celebration is complete without glasses of sparkling wine. It is a glass of champagne that each of us holds in our hands, making our deepest wish at the moment when the chimes count down the last seconds of the passing year. On the New Year's table, bottles of champagne take pride of place. Everyone strives to take care of the quality of the drink, but rarely thinks that you can effectively decorate a bottle with it, thereby adding ambiance and exclusivity to the feast. In addition, an originally decorated bottle of good champagne will be a wonderful accessory on the holiday table, as well as an excellent gift for family friends or colleagues, because, as you know, what is done with the soul is very highly valued.
Champagne decorated with a luxurious fur cape and brooch
Frozen champagne bucket with cranberries
Festive champagne decor with golden sparkles
DIY fairy-tale gnomes made from sparkling drink bottles
Bright colorful champagne decor depicting the symbol of the coming year
Safety precautions
Before you decorate a bottle of champagne with your own hands, you should definitely familiarize yourself with safety precautions. After all, if handled incorrectly, champagne can explode, causing dangerous injuries with fragments.
For the first experience, it is advisable to completely abandon the rather capricious champagne. It is better to start decorating experiments with safer bottles of non-sparkling drinks - since decorating bottles of cognac or wine is easier (the likelihood of being injured during the work is lower). Such drinks are not under high pressure and will not explode when decorated.
If it is necessary to design a bottle of champagne, then you need to follow a number of mandatory rules:
- Before starting work, you need to carefully inspect the workpiece . The slightest cracks, chips, uneven color of the bottle (glass thickness) indicate that it is not suitable for decoration;
- avoid sudden temperature changes . You cannot start working with a bottle recently removed from the refrigerator or brought from a cold street;
- Do not heat champagne while working (use a hairdryer to dry individual layers of paint, use a heat gun, etc.);
- Do not shake the contents of the bottle. Movements during operation should be moderately smooth and uniform; a sharp shake can lead to spontaneous opening of the plug.
It is worth noting that even strict adherence to all the rules does not guarantee one hundred percent safety, but only reduces the risk of injury to a minimum.
At the same time, decorating champagne with your own hands is an exciting and fascinating process; for many, such decoration becomes an original and interesting hobby.
How to surprise guests
Antique decoration will look unusual; a background of combined golden and brown colors will remind everyone of the magic and mystery of the festive night. Aerosol cans are quite convenient to use, paint is used sparingly, and nearby things do not get stained. Before starting, it is better to cover with oilcloth material the place where the application will take place if the surface is new and expensive.
Decoupage
You want to make your gift unique and unforgettable. Decoupage for beginners on a bottle is ideal for this. The process does not take too much time, and the set of necessary materials and tools is minimal.
For the first experiment, it is better to take a regular colored multi-layer napkin. Modern industry offers a huge selection of possible designs.
Not only banal floral motifs are suitable for decorating champagne bottles on March 8th. Images of jewelry and women's accessories or interesting ornaments look original.
Women will appreciate it
Fur clothes will add a touch of warmth and comfort to the design; in cold weather, one look at such a craft will have a warming effect. You need to pay attention to ensure that the structure does not move from the container; to do this, it is better to secure everything well at the base.
You can use glue or silicone, using a small cord when choosing it, you must remember the main color of the entire product, you should choose the most suitable tone. Small mistakes should not be made; they can attract very strong attention.
Candies
If the gift for March 8 includes not only champagne, but also sweets, the usual set can be combined into an original composition.
The most common design options for a bottle of champagne on March 8:
- bouquet. This design method includes a standard set of components. But if the banal three tulips and a box of chocolates with a bottle of champagne in a gift bag are perceived as boring routine, then champagne decorated with sweets will be a fresh idea that will make the giver stand out. When designing a composition, both the bottle and the candies can occupy any position. Champagne can be hidden behind the decor of sweets, or, on the contrary, brought to the fore. For a more finished look, the bouquet can be supplemented with ribbons, bows, flowers and other decorations that match the color and style;
- cake. In this case, a bottle of champagne is placed in the chocolates, becoming the central element of the composition. It functions as a kind of candle rising above the candy cake. In the classic version, long and narrow varieties of candies are chosen for the “cake”. They are evenly placed around the champagne (in circles), fastened together with glue. To make the composition more stable, it is permissible to form it on a cake base, or fasten it with beautiful ribbons or lace. A bow or flowers from the same braid can decorate the neck of the champagne. Such a gift is suitable not only for personal presentation, but also as an element of congratulations to a large group of women;
- a pineapple. If “cake” and “bouquet” are classic decoration options, then “pineapple” refers to more daring and original types of design. This finishing method turns a bottle decorated with candies into a kind of “Kinder surprise”. Under the layer of sweets, the base is completely invisible, and the secret contents of the “pineapple” can only be found out by picking it up. For this type of decoration, choose round candies in golden or yellow packaging. If the color of the wrapper of your favorite sweets does not correspond to the canon, they can be additionally wrapped in wrapping paper of the desired shade. Smooth glass and glossy wrapper do not always stick together well. To ensure that the champagne in the candies is hidden securely, the alcohol must first be covered with a layer of corrugated paper. And then attach the sweets to the paper base. The neck of the bottle is hidden under green paper “leaves”. If the joint is not very neat, it can be covered with original braid, lace or ribbon.
Such decoration options are among the simplest. In this case, all that is needed to decorate bottles with your own hands for March 8 is:
- champagne;
- candies. For a “bouquet” – from 0.5 kg, “pineapple” – about 1 kg, “cake” – from 1 kg and above (depending on the selected diameter);
- glue. Superglue works best (PVA won't give the desired adhesion, and a glue gun can melt the candy). Due to the harmful substances contained in superglue, when working with it, you need to ensure that the glue only touches the candy wrappers and does not get inside the wrapper. If the packaging is not foil, it is advisable to cover the candy with an additional layer of paper before use;
- additional decorations (optional).
When making a bottle with candy decor with your own hands, you should not get hung up on standard options and finishing schemes. Fresh design ideas have always been valued higher than repeated ones.
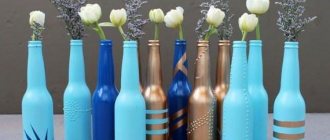
Textured decor
To give the bottle an interesting grainy texture, you will need the same salt or sand, scattered in an even layer on the paper. Clean and degrease the glass with alcohol, paint the surface with paint and wait until it dries. Cover the bottle with a layer of glue - solid or in patterns using masking tape. All that remains is to roll the bottle out over the salt or sand, and then carefully correct the gaps and irregularities by hand.
Photo: jenskiymir.com
10 ideas on how to make bottle decoupage with your own hands
Corrugated paper
This bottle decoration option is one of the fastest and most budget-friendly. For decoration, you only need glue and several sheets of corrugated paper in the desired shades.
Flowers
Making paper flowers is easy and interesting, but this decoration of a champagne bottle for March 8 should be used with caution. Not everyone likes to receive artificial flowers as a gift. Therefore, this method of decoration can be chosen only if there is one hundred percent confidence that the lady being gifted will be happy with such a gift.
If this style is suitable, then there are practically no restrictions for imagination. Roses, peonies, carnations, orchids and daffodils - whatever your heart desires.
After making the blanks, decorating the bottle by March 8 follows the standard scheme.
The container is wrapped or covered with corrugated paper, on top of which decorations are glued.
Not only artificial flowers, but also ribbons, beads, bows and candies can be used as decoration.
This method of bottle design is much safer than decoupage. Of course, you shouldn’t involve children of kindergarten age in decorating, but a teenager will be able to decorate a bottle for March 8th with his own hands in this way.
Dress
“Clothes” for champagne can be made either removable or securely glued to the glass surface.
The set of materials and tools for making a “dress” for a bottle is similar to flower decor:
- paper;
- glue;
- champagne;
- scissors;
- ruler;
- pencil;
- other decorations (if necessary).
If the outfit will be complemented by a playful hat, then you will additionally need a piece of thick cardboard or plastic (for the base) and a compass.
The scheme for making the outfit will depend on the final type of decoration of the bottles on March 8th.
In the simplest version, the neck is covered with shiny paper, and the bottom is covered with a cover with a high “collar”. To do this, it is enough to glue an even cylinder of the required diameter. The edges of the cylinder are glued two-thirds, and the remaining part is folded back and decorated (with beads, sequins, lace, etc.).
If a straight “skirt” is not suitable, then the bottom can be decorated with additional flounces or frills.
For the cap, a disk of the required diameter is cut from the base. A hole is made in the center for the neck (you should get a flat donut). Next, the workpiece is wrapped with corrugated paper tape.
The central part can be simply decorated with flowers and bows. Or you can make a full-fledged crown, walls and bottom, also by first wrapping them with paper of the desired shade. To do this, you will need a cardboard ribbon (its width should be equal to the height of the future hat) and a circle with a diameter equal to the bottom hole (for the bottom).
After decoration, the blanks are glued together in such a way that all joints remain inside the hat. All defects are hidden under the decor of beads and flowers.
No one forbids combining several ways to design bottles for March 8th. A dress made of corrugated paper can be combined with candy decor or decoupage of the open part of the glass surface.
champagne bottle design. decor of bottles
Materials and tools
To work with tapes, you will need a set of simple tools that can be found in every home. If this is your first experience in decorating bottles, then it is better to start with simple design solutions to get the hang of it. To work you will need:
- Sharp scissors.
- Glue that adheres well to glass. It's better to use "Moment".
- Braid, lace, scraps of fabric.
- Accessories: beads, beads, buttons, cabochons.
- Tweezers for creating miniature elements.
- Ribbons.
The basic material also has a number of variations:
- Satin. Most commonly used due to its pliability and elegant aesthetic appearance.
- Silk. Thinner and more slippery material.
- Satin. They have a denser structure, and the fiber pattern is visible to the naked eye.
- Jacquard. Decorated with original drawings.
- Organza ribbons. The material is translucent and airy.
- Cotton. They hold their shape well, so they are suitable for creating three-dimensional compositions.
Each of the above types is used by needlewomen to decorate bottles, but the most popular material is satin. It combines the optimal ratio of quality and price.
Complex compositions made from combined materials look original. For example, cotton flowers surrounded by satin petals or the same background.
Kanzashi
Kanzashi is more common when decorating champagne for a wedding, but no one forbids using this method to decorate bottles on March 8th.
The set of tools and materials required for work is almost standard:
- ribbons;
- champagne;
- scissors;
- sewing centimeter;
- Super glue;
- pencil for marking;
- additional decorations (if necessary).
Some designs may require an open flame (when finishing edges) - a regular candle will work for these purposes.
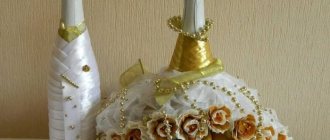
There are several ways to decorate a bottle beautifully using colored ribbons. The most popular option is a variety of outfits.
Dresses made using the kanzashi technique look more impressive than suits made of corrugated paper. They are more elegant and neat, but not everyone succeeds in creating such an outfit on the first try.
Most often, difficulties are caused by two points:
- edge processing. Ribbons tend to unravel quickly from the ends. Such edges look very untidy. They can be hidden by carefully tucking them, but this method is not suitable for every scheme. If it is not possible to hide the edges, they are treated with open fire. Thin threads are soldered and the ends are sealed. The method is quite effective, but requires some skill. Without the proper skills, you can burn too much or end up with an edge that is too thick and uneven;
- smooth surface. The tape slides both when forming elements of the composition and when in contact with the glass surface. It is not always possible to securely fix the edges in the desired position on the first try. You can get rid of excessive smoothness of the bottle by opening it with acrylic primer or a thin layer of PVA. It’s not so easy to deal with the slippery surface of the tape; only gained experience will help here.
Before decorating the bottle with various decorations, it needs to be “hidden” under a layer of ribbons.
This is quite simple to do - the main thing is to strictly follow all the steps.
First of all, you need to cut the tapes into the required lengths. For a flat part, a piece of tape should be equal to the circumference of the container plus an allowance of 0.5–1 cm.
The cone-shaped part is decorated at an angle, so the ribbons should be longer. In this part, each segment must be measured directly against the bottle, taking into account the allowance.
You need to start decorating the neck from the very top row (from the foil), connecting the edges at an angle (as in the photo) in the front part of the bottle. The joints are glued together with an overlap and glued to the glass surface.
Each subsequent layer should cover the previous one by half the width of the tape. This way the entire narrowed part of the bottle is closed. Depending on the brand of champagne, a different number of rows may be required. All layers can be the same color, or tones can be alternated.
Decoration of the flat part of the bottle begins from the very bottom row (from the bottom). The tape is glued so that the edges are either on the back of the container or on the front (not on the side).
The joints are glued together overlapping, but it is better not to attach them to the bottle or to grab them just a little bit, so that later they can be peeled off from the glass (this will be needed for the final decoration of the edges).
The next rows are attached in the same way, overlapping the bottom layer by half the width of the tape.
After the entire glass part of the container is hidden under a layer of tapes, you need to hide the edges of the horizontal layers. This will require an additional piece of ribbon or lace. It is placed vertically, covering untidy joints.
The edges of the vertical tape are folded up and hidden under the horizontal layers (for this they did not need to be firmly glued to the bottle).
After the blank has acquired a beautiful and neat appearance, you can proceed to decorating the champagne bottle.
For decoration, you can choose spring motifs (flowers, butterflies, etc.), make a dress for the bottle, or implement any other design.
It is not at all necessary to use only ribbons for decoration. Lace, beads, buttons or ready-made decorative elements - all this is suitable for decorating champagne.
All decorations are attached to the base using glue (you can sew them on, but there will be more hassle).
Experienced craftswomen can try to make the entire decor of a champagne bottle in the kanzashi style. Delicate flowers made from ribbons look very elegant and sophisticated. Such a gift for March 8 will definitely be appreciated.
Decorative bottle for the kitchen with sand
Take a transparent glass bottle. Remove labels and sterilize. Prepare colored sand.
Instead of colored sand you can use:
- Colored salt;
- Cereals;
- Spices;
- Bright M&M's candies.
Operating procedure:
- Fill the sand in layers, lightly compacting it.
- If desired, you can get waves by adding more sand to one edge of the bottle.
- You can create a specific pattern by pouring sand through a tube.
- You can, after pouring the sand, pierce it with a knitting needle and get interesting transitions from one layer to another. Close the lid.
If desired, decorate the neck of the bottle with jute thread, hang or stick labels.
Leg-split
This method of decorating a bottle for March 8th is suitable for bright personalities who cannot tolerate routine and banality.
This decor looks fresh and bold. The coarse thread contrasts sharply with the spring festival, making this decoration method unique.
Both thick and thin twine (almost a thread) look beautiful. Such a rope can cover the entire surface of the bottle, and only part of the container. In case of partial wrapping, you must first remove the label from the bottle.
To dilute the severity of the twine, the wrapped surface can be decorated with flowers or delicate lace.
Decorated containers can be stored after using the contents, using them as an element of interior decor.
What to use
Having chosen the right one, it will be clear what materials will be needed; for simple processes they usually use:
- Tinsel of different colors.
- All kinds of sparkles.
- Serpentine.
- Thematic attributes.
The main works do not require fixation and are easy to perform; ready-made garlands are used to wrap a vessel or form a lush bow. Great for corporate parties, the event will not last long, and a large number of colleagues can lead to additional purchases of alcohol. Elements from one will smoothly transition to the other, quite convenient and practical in such cases.
Note!
DIY wall clocks - the best clock designs for children
Crafts on a military theme: how to make a tank, a soldier, various patriotic models of military equipment
What is a Candy bar - decorating a sweet table for a girl or boy for a birthday and New Year
Thanks to such features, beautiful decanters from the family sideboard will find their place on the table. A very practical approach, and most importantly, without unnecessary harm to household dishes.
Sequins
Glitter decorations can be considered a form of decoupage. Before decorating a bottle of champagne using this method, it is advisable to cover the work surface with oilcloth and remove carpets and textile tablecloths.
The decoration technology is the same. The glass surface is removed from the label, primed, and after drying, covered with a layer of PVA. Then the container is generously sprinkled with glitter (or dumped into it).
After complete drying, the surface must be varnished in several layers, otherwise everything and everyone will shine.
It is worth noting that this decoupage of bottles for March 8 is easiest to do with your own hands. It is one of the fastest and safest.
When decorating champagne for the New Year, decoupage the bottle with salt in the same way. The result is the effect of a frost-covered surface.
Decorative bottle for the kitchen with vegetables
- Take a transparent glass bottle.
- Remove labels and sterilize.
- Prepare food. These could be vegetables, fruits or flowers. We recommend choosing different vegetables in bright colors.
- For example, yellow corn kernels, orange carrots, green capers, white garlic, onions, etc.
- Wash and dry vegetables, chop if necessary.
- Arrange the vegetables in the bottle in layers or arrange compositions. In this case, you can use a knitting needle.
- Prepare a preservative.
Option 1. Mix vinegar and glycerin in a 1:2 ratio.
Option 2. Mix a liter of water and a tablespoon of 70% vinegar.
Pour preservative over vegetables. If necessary, straighten the vegetables with a knitting needle. Close the lid tightly.
If desired, decorate the neck of the bottle with jute thread, hang or stick labels.
Fabric bag
Ready-made fabric bags for bottles can be found in many stores or ordered on AliExpress.
In most cases, factory products are produced in one color or with unobtrusive thematic patterns (snowflakes for the New Year or hearts for Valentine's Day). This design in most cases looks rather monotonous, but ready-made bags are very convenient to use as blanks for subsequent decoration.
You can, of course, make such a decor from start to finish, but in this case you will have to get a sewing machine and stock up on fabrics, needles, threads, cords and other similar attributes.
A purchased or sewn piece can be decorated with flowers, lace, ribbons, buttons or beads.
Non-standard decor can also be used: coffee beans, legumes, painted pasta, etc.
If a bottle of champagne is not the only gift for March 8, then you can combine all the elements of the gift set into one composition. For example, by making a pseudo bag from a gift napkin or towel.
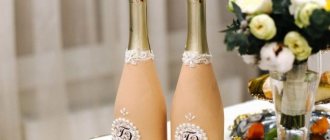
We decorate champagne with our own hands: use ribbons and beads
A bottle of champagne, decorated for the New Year with ribbons and beads, looks impressive: the satin ribbons sparkle provocatively, the beads also wink in their appearance. There is nothing left to do but relax and have fun!
What material to prepare
Based on your idea, the color, length and width of the ribbons, size and number of beads and other decor are selected. A hot-melt gun is used for gluing. You can make different designs from ribbons, the main thing is to understand the principle of operation.
We cut the ribbons with any sharp scissors.
Work process
Let's look at the best examples of design and get acquainted with the principle of decoration.
The ribbon should not be very wide - on the contrary, medium in width will create interesting scales. Narrow ribbons are only suitable for decoration, and not for braiding a bottle
One principle, many options
Feathers
One of the freshest ideas for decorating bottles for March 8 with your own hands is feathers.
This design will definitely become the highlight of the gift. Delicate and soft feathers look impressive and exclusive.
This bottle does not require additional decoration. The maximum that can be added in this case is a piece of ribbon or lace to hide the joint between the feathers and the label. And then, such decor may be needed only if the edge is not very neat.
To decorate your bottle yourself, you'll need feathers, glue, champagne, and maybe some ribbon.
Feathers are glued in rows, starting from the bottom edge of the bottle. The first row should be at such a distance from the bottom that the feather completely covers the container and extends 1–1.5 cm to the bottom edge.
It is better to use soft, downy feathers - if there are only hard flight feathers, then they should protrude beyond the edge by 0.5–0.7 cm. Otherwise, the bottle will be unstable.
It is advisable to hide the edge (the sharp edge that was used to write in the old days) of the top row under the label. If this is not possible, it is hidden under a layer of braid or lace.
How else can you decorate champagne for the New Year?
We offer other ideas that people have implemented and were satisfied with the results.
Rhinestones make the decor royal
You shouldn't always rush to get rid of an old sweater
Tinsel and candies: it makes a funny Christmas tree
Using tinsel and a wide ribbon, the bottle is turned into an elegant spruce
The fur will be easy to remove and look chic
Shall we sew a coat for the Snow Maiden?
Poinsettia is made from foamiran and serves as a real New Year's decoration.
