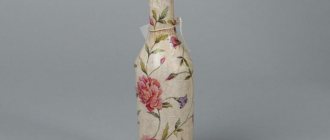
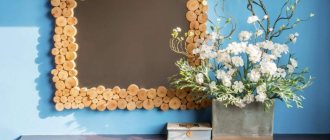
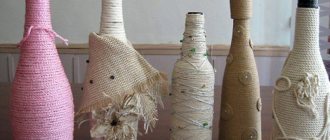
Photo: topdreamer.com Beautiful bottles of alcohol, juice or yoghurt are often so sad to throw away. As a result, they simply accumulate in the closet, but there is absolutely nowhere to put this collection. It takes up space, but the hand still doesn’t rise to throw it away. Sound familiar? Then we’ll tell you how beautiful and interesting it is to breathe a second life into unnecessary bottles with your own hands!
What you need for decoration
So where to start? You should choose accessories for decoration based on the size, shape and presence of inscriptions on the “experimental”. First, treat the bottle with alcohol or nail polish remover.
Afterwards you will need acrylic paints, napkins with beautiful patterns and various ribbons, beads, even cereals will do. Stock up on PVA glue in advance. To fix the work, you need acrylic varnish.
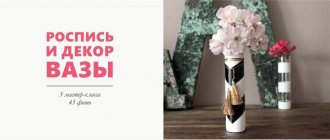
Master class No. 4: Hand painted bottles
If you have accumulated several bottles that you hate to throw away, you can turn them into vases with a unique design. You don’t need to use strong-smelling aerosol paints for the job, so you can do this even at home.
Tools and materials
You will need:
- glass bottles;
- acrylic paints;
- brushes or kitchen sponge;
- adhesive tape;
- pen for painting on glass;
- glass primer or sandpaper.
Operating procedure
- Wash the bottles thoroughly outside and inside, remove the label from them, and dry.
- Since glass is a fairly slippery material, the surface should be prepared before applying paint. Coat the walls with primer or sand them with sandpaper .
- Now you have to come up with a design that will decorate the future vase. If you are not very good with a brush, you can draw simple lines or stripes .
How to draw even stripes
ADVICE! Use a little trick to draw even stripes. Using a tape measure, mark several points on the side of the bottle, and then connect them by drawing a straight line and sticking duct tape along it.
Now you can paint: the lines will have a clear outline, and the paint will not extend into neighboring areas.
- Remember that after applying the paint it will take time to dry. Only after this can you begin painting the next area.
- Prepare the paint, use adhesive tape to delimit the area on which you will work (if the drawing does not have a background, but consists of various elements).
- It is most convenient to paint with a foam sponge. For small areas, you can cut thin strips or use a sponge brush . An ordinary brush may leave traces of strokes on the glass.
- Until the paint has dried, it may not look very smooth; traces of sponge pores remain on the surface, but after drying all imperfections will disappear.
- The first strokes after dipping the sponge into the paint should be applied as far as possible from the borders of adjacent areas, since the paint may flow onto them.
- If the first layer is not enough to obtain a bright and even coating, apply a second one. When the first section is dry, move on to the second, then the third, and so on.
- When the drawing is completed and all the paint is completely dry, you can add small details with a glass painting pen .
Decor of bottles with salt
You will need fine salt and crayons (you can use paints) of different colors. Salt is repainted in a certain color using crayons. In this way a mixture of different colors is obtained. Next, salt is poured into the bottle one by one.
It is important not to move the bottle or allow the colors to mix. It turns out to be a rainbow-colored piece of the room’s interior.
Decorating a bottle with toilet paper
There is an amazing technique for decorating a bottle with toilet paper. It is better to use dark paper and for ease of use, you need to stock up on tweezers.
The surface of the degreased bottle is covered with white acrylic paint. In this state, wait for the layer to dry completely.
Small pieces of paper are impregnated with glue and applied to the painted surface of the container. Its outer walls become embossed with small tubercles. Again, wait for the glue to dry under the layer of paper.
The bumpy surface of the bottle walls is covered with paint of a different color. The bottle is additionally decorated with rhinestones and beads.
The last layer applied will be varnish.
Eggshell decor
The shell is often used in decoration; it creates irregularities and adds sophistication to a seemingly ordinary shell. You can glue it with PVA glue, but you shouldn’t be sorry, otherwise the whole picture will deteriorate and the shells will fall off. It is better to use hot glue or construction adhesive. Unusual shimmers are created with a brush and pearlescent paint.
Decoration with threads
If you have a lot of unnecessary colored threads left, you can use them to transform the bottle beyond recognition. Take a plastic container with PVA and pull the thread through so that it comes out on the other side immediately soaked in glue. Wrap the entire bottle up to the neck, and when dry, glue the decor of buttons, flowers, bows, rhinestones and other little things onto the glue gun.
Photo: pinterest.ru
Unusual items at work
A metal pendant will create an interesting pattern. After dipping the pendant in paint, lay out a spiral on the bottle. Then they slowly pull out the iron and get a pattern that resembles a tree. You can do this twice, for example, white and pink, and then draw tree branches, draw a bullfinch or another bird.
They use old wires, electrical tape, and broken balloons. All this is decorated. Mini-pictures are made from wire, electrical tape is used as recycled material, and bottles are covered with rubber from balls, creating amazing surfaces.
Note!
DIY furniture decor - 145 photos of exclusive and modern design ideas
- DIY pot decor step by step: simple decorations and decor options for pots made from different materials
The main feature here is the acrylic coating. This must be done carefully, fixing with varnish. Then the works will become beautiful, regardless of what they are made of.
Master class No. 2: Vase with stickers
Triangles are a rather old, but still relevant theme in decoration. I use them for finishing furniture, dishes and other interior items. Decorating a bottle or other container using triangles is very simple, and the products will look impressive. Try turning an ordinary bottle into an original vase with geometric patterns.
Materials and tools
For work, prepare:
- glass bottles;
- white paint (aerosol or regular);
- scissors;
- black self-adhesive paper;
- sandpaper or primer for glass surfaces.
Operating procedure
- First you need to clean the bottle - wash it inside and out, remove label residues. To make the process easier, you can pre-soak the bottles in a hot soda solution to soak the paper.
- After this, dry the cleaned containers.
- Before you start painting, treat the glass - this is necessary so that the paint lays evenly on the surface and adheres firmly to it.
- To do this, use one of two options: sand the outer walls of the bottle with sandpaper or cover the surface of the bottle from neck to bottom with a primer (any form of primer is suitable - liquid, spray or varnish).
- While the bottles are drying, cut triangles out of black paper. Their size and quantity will depend on the size of the containers to be decorated and what kind of design you plan to make. However, all triangles must be the same. It is most convenient to cut out one first, and then use it as a stencil for all subsequent ones.
- Decide exactly how you want to decorate the bottle. Then you can start gluing the triangles as planned. Attach the paper to the glass carefully so that it fits tightly to the surface and does not form wrinkles.
That's all, the product is ready. For the next bottle, if you decide to decorate several containers with triangles, you can come up with a different scheme for gluing decorative elements, or you can make all the vases in the same style.
Decoration with ribbons and beads
Apply acrylic paints (with a sponge or brush) to the prepared glass and wait until dry. Bows, flowers, etc. are made from ribbons. Beads are painted and glued. If you want to add an antique look, you should paint the entire beaded bottle a dark color and make an accent with white, silver or gold.
Another way is to wrap ribbons around the bottle and sprinkle beads on the glued areas. You can teach your child how to decorate bottles with ribbons; it’s a simple and quick way that doesn’t require much effort.
Internal filling
A glass bottle can be decorated not only on the outside, but also on the inside. Anything that can fit inside the container is suitable for filling. The following components have gained particular popularity:
- Salt. It needs to be mixed with acrylic paint, heated for an hour at 100 degrees, sifted through a sieve. Repeat this procedure with different colors. Using a funnel, pour all the resulting salt into the bottle one by one.
- Dye. To decorate, pour the desired shade inside the bottle and shake it. Then let the rest drain off. If necessary, the procedure is repeated until the desired result is obtained.
- Small pebbles or stones for an aquarium. They make an excellent filler for a clear bottle. They can be mixed with sand or colored salt. The vessel is filled randomly.
- Fresh flowers and dried flowers. They will help you create a colorful craft. To do this, you need to select small buds that can be lowered to the bottom of the vessel without damaging them.
You can fill the bottle with different objects, even models of ships and airplanes. Such work requires certain skills, since the elements are quite fragile.
Paint Krupa
Salt
Flowers
Cereals on a bottle
Are you used to storing cereals in containers, but what about storing them outside? For example, peas are glued onto hot glue using a stencil (it can be a shell, a spiral, or clear lines).
Then they tear up napkins and glue them, creating unevenness. All this is covered with acrylic paints and the process is completed with acrylic varnish. This is important, if you do not varnish, after a while the paint will fade and the grain will begin to fall off.
New Year's ball in a bottle
If you are not afraid to cut off the bottom of the bottle, then inside it you can make a beautiful snowy New Year's ball with figures, artificial snow or sparkles. Candlesticks with a candle inside are made using the same principle, but they need to be used carefully so that the glass does not crack from overheating.
To cut the bottom, you will need a dense and thick woolen thread, alcohol, a lighter, sandpaper and two containers of different sizes. Fill the basin with cold water and ice so that the bottle can be completely submerged. Wind a thread moistened with alcohol in several layers along the cut line and tie the ends.
Put on gloves, light the thread, take the bottle horizontally and continuously rotate it along the axis until the fire goes out. Immediately after this, put it in ice water - and if everything is correct, the bottle itself will burst along the line. All that remains is to carefully sand the edges with sandpaper so as not to get hurt.
Photo: mirrukodelija.ru
Photo: tr.pinterest.com
Gift for a friend for the New Year
Giving a decorated bottle is a good move if you don’t want to spend money on gifts. Last year you drank champagne together, and this year the bottle pleases with its beauty on the shelf. The bottle needs to be painted with acrylic paints.
The necessary parts are cut out from the napkins (or carefully torn off with your hands): Santa, Christmas tree, etc. Glue the parts cut from the napkin using PVA glue with a brush (you can add a little water if the glue is thick). The finished decoration of a champagne bottle will evoke positive feelings in a friend.
How to decorate a bottle: 10 ideas and master classes
How to decorate a bottle with glitter / sparkles
One of the most spectacular ways to decorate a bottle of champagne with your own hands is to decorate it with sparkles or glitter. You will need spray adhesive and glitter itself. Protect your work surface with paper and your hands with gloves. Spray the bottle with glue and immediately add glitter. All you have to do is wait for the glue to dry completely and shake off the excess.
Photo: ideas.evite.com
You have a letter: DIY gift wrapping in the form of an envelope
How to Decorate a Bottle with Spray Paint and Ribbon
Another way to beautifully decorate a bottle is to use spray paint. Like the previous method, this one is perfect for decorating bottles for a wedding. For a champagne bottle with gold or silver foil, metallic paint in the appropriate color works well. You can cover the bottle with one type of paint, or you can, as in this case, create an ombre effect by taking one smooth paint and the second with a glitter effect. Paint as shown in the diagram below. Once the paint is dry, add a ribbon decoration and/or bow.
Photo: celebrationsathomeblog.com
Lavender charm: simple DIY gift wrap decor
How to decorate a bottle with paper, labels and ribbons: master class
This decoration method requires thin wrapping paper. It is primarily suitable for decorating wine bottles. Wrap the bottle in paper as shown in the photo. The label can be drawn or printed and cut out. Cut two holes on the sides of the label and insert ribbon or braid into them. Wrap the ribbon around the bottle and glue the ends together. Wrap the neck over the paper with braid or ribbon, and cut the ends of the paper into fringes.
Photo: inmyownstyle.com
How to wrap a gift beautifully: 22 ideas
Bottle decoration made from napkin and ribbon
How to beautifully and quickly decorate a bottle with your own hands? Use a cloth and tape. Lay out the napkin, place the bottle in the middle, lift the edges of the napkin and tie with ribbon. The method is suitable for decorating a bottle of any shape - a bottle of wine, champagne, cognac, and so on.
Photo: cremedelacraft.com
How to decorate a gift bag with embroidery
How to decorate a bottle with fabric
The good thing about this method is that by choosing the right fabric, you can achieve different effects. Delicate fabric or lace is suitable for decorating bottles for a wedding, something more cheerful, as in this example, for decorating a bottle for a birthday. If you choose a checkered or strict striped material, you can decorate a bottle intended as a gift for a man (for example, for February 23, birthday, and so on). It is better to take fabric that does not fray. Cut out enough pieces to wrap around the bottle. Wrap the bottle and glue the fabric. Tie the neck with cords, adding a label.
Photo: northstory. ca
DIY gift bag
Bottle decorated with candies
This delicious decoration is suitable for a bottle of champagne, cognac, liqueur, and so on. You will need a sufficient number of round candies in foil, a glue gun, paper for the pineapple sheets and material for the bow. Starting from the bottom, glue the candies to the bottle, following a checkerboard pattern. Decorate the neck with leaves cut out of paper. Tie a bow on top. If necessary, add more candy.
Photo: redefinedmom.com
How to decorate a gift box with your own hands
How to decorate bottles with homemade labels and bows
This idea is about how to decorate bottles for a wedding. But the same method can also be used to decorate bottles of wine for other celebrations or for gifts. Download label templates here. If you are familiar with graphic editors, add the necessary labels using them (or make labels yourself). You can simply print the labels and add signatures manually. Complex bows made from several parts are used here; you can also cut out a bow of your own design from colored paper. Paste the finished labels onto the bottles, sealing the original labels. Gather bows, add rhinestones and glue them to the necks of the bottles.
Photo: somethingturquoise.com
DIY fabric gift bag
How to decorate a bottle: gift bag
A method that gives room for imagination. Sew a simple bag of the desired size. You can decorate it with inscriptions, embroidery, stencil painting, and so on. Add string, braid or ribbon ties.
Photo: blog.consumercrafts.com
Original gift packaging made of fabric
How to decorate a bottle of champagne with ribbons and straws
The method is suitable for small bottles of sparkling wine. Tie a ribbon bow around their necks and add a pretty straw.
Photo: tasteofhome.com
Maxi bow for a gift
How to decorate a bottle with paper and flowers
A simple, but beautiful and cute way to decorate a bottle of wine with your own hands. Wrap the bottle in craft paper (see photo from idea 3). Secure the paper with small pieces of tape, and use them to secure one or more flowers. Use fresh or artificial flowers. Instead of flowers, you can decorate such a bottle with ready-made ribbon bows.
Photo: allgiftsconsidered.com
Decor of bottles with inscriptions
The question immediately arises: what and how to make inscriptions from? The same fantasy still helps out. Cut the napkins along the entire length, 2 cm wide, using a wet towel, twist them into a spiral and put the inscription on the bottle. Other options are beads, matches, threads. Instead of a regular, boring postcard, use a bottle and “write” a congratulation on it.
After the work has been done, the decor of the bottle with the inscription “New Year” and a gadget in the form of a miniature bottle (which can be made from putty), a Santa doll or a spruce twig will really surprise you.
Decorative conservation
This is a more interesting way to decorate bottles, which you have probably seen many times in restaurants and cafes. Ordinary home food preservation is rarely truly decorative. But it can be done on purpose without long and painful hours spent at the stove.
You will need fruits, vegetables or berries and any available preservative - strong saline solution, alcohol, pharmaceutical formaldehyde, vinegar or acetic acid. For decoration - star anise, chili peppers, sprigs of herbs, cloves of garlic - whatever.
To ensure that the contents retain their original appearance longer, we recommend spending 5 minutes sterilizing the bottle. After that, put all the filling there, as you please, and fill it to the top with preservative. If the bottle cannot be rolled up like a jar, first fill the neck with wax, and only then screw it on or close it with a stopper.
Photo: kasvs.ru
Crafts from plastic bottles: 90 photo ideas
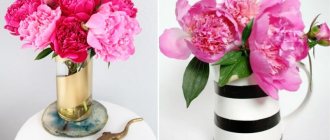
Vase made from a decorated bottle
An ordinary photo of the decor of a dead bottle is not impressive, but an unusual vase with fresh flowers is. And the whole secret is that the bottle is a vase. The main thing is to find a bottle with a wide neck.
If you don’t like ordinary vases from the store, then start decorating yourself. What inspires you? Maybe you won’t have any ideas, but once you start working, the process will begin and inspiration will appear, the main thing is to start.
If you are a seasoned designer, but have run out of ideas for a long time, take a closer look at ordinary pasta. They really do hide a secret. Come up with your own ornaments and don’t be afraid to make mistakes. Masters look for old things no one needs, trinkets, and find such uses for them, why are you worse?
Now you can not only give your master classes, but also record a video of decorating bottles.
Flowers in a bottle
A bottle filled with flowers looks very impressive. Of course, it is almost impossible to carefully place pre-dried buds into a narrow neck. But you can fill in small flowers that are still fresh and pour formaldehyde on top of them - this way they will remain intact.
Of course, formalin is a specific material and will need to be purchased separately. It requires careful handling, protection of hands, respiratory tract and compliance with fire safety. But the finished result looks so impressive and delicate that it will not only be a good decoration for your home, but also an unforgettable gift for loved ones.
Photo: diariamentepensante.blogspot.com
Photos of bottle decor
Glass bottle paint
You should be very careful about the choice of paint, since the final result will depend on this.
- Regular waterproof paint works well , as well as acrylic paints, which come in matte and glossy, transparent and dense, they are sold in cans and sprays
- Acrylic paints can be used in the form in which they are sold, or they can be diluted with water, it all depends on what effect you want to achieve.
- universal paints on sale that are perfect for painting glass and plastic bottles.
General job description
Many interesting subjects, ideas and techniques can be chosen for painting bottles with paints. Decorator tips will help you do this job well. They claim that it is quite easy to draw on the bottle. The container can have different shapes. Its advantage is good stability. The workpiece does not need to be secured to apply the selected image.
Experienced designers claim that anyone can cope with this task. You don't have to have any special skills. It is enough just to have the desire to create an interesting, original thing. Design ideas can be found in various sources.
To create an interesting and durable decor on glass containers, you can attend a master class on painting bottles with acrylic paints or read advice from experienced designers. This will inspire you to create a real masterpiece. Finding a use for old bottles or other glass containers will be much easier.
