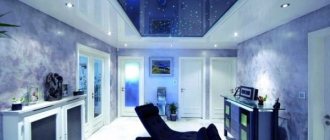
The time when the ceiling was left without attention during renovation is already in the past. This is a huge field for creativity, and at the moment not only the walls are being decorated, but also the ceiling. And this solution looks very advantageous in any room. You have the opportunity to use any base and show your imagination 100%. And we will help you understand all the nuances and offer finishing ideas.
Ceiling decor in the room
Ceiling decoration
Idea for decorating the ceiling in an apartment
We decorate the ceiling with our own hands
When decorating this part of the space, you have two options: trust the professionals or decorate the ceiling yourself. Doing this work yourself will be the best option. It will cost less and will reduce the possibility of various incidents to a minimum. By supervising the work of professionals or doing everything yourself, you will get exactly what you intended.
Of course, without experience in decorating, you have fewer decorating options. The most common is painting the ceiling. In this case, you can paint it, creating your favorite image.
Another available option is wallpaper. You can combine different types of them, cut out any surface shape (for example, create artificial waves). You can choose a neutral background and use ceiling stickers. Or buy photo wallpaper.
Next we will look at more complex ideas that are best left to experienced craftsmen, however, you can do it yourself.
Ceiling design option
Ceiling decor
See also: Stretch ceilings photos for the living room
Briefly about the main thing.
Ceiling plinth is an important element of finishing the ceiling surface, which simultaneously plays a decorative role and masks visible defects in the interface between the floor slab and the vertical structures of the room. This element is made of polystyrene foam, PVC, wood or gypsum. When cutting, you will need a special portable bench - a miter box, or a cross-cutting machine. In the absence of such a tool, a miter box template with diagonals at 45 degrees can be drawn on paper.
Selecting the color scheme
The choice of colors in the room must be approached with all responsibility. The same applies to the arrangement of the ceiling. A correctly selected range will favorably emphasize the chosen design and design of the space as a whole.
Light colors will visually expand the room, “make” it taller, and create a fresh atmosphere. Warm, light colors work well in a small kitchen, making it feel more spacious and maintaining a warm, appetite-friendly backdrop. Cool light shades are best left for the living room. This option is suitable for both large and small rooms.
The use of dark colors is also acceptable. They can be used in the living room (both cold and warm) creating the desired mood. Dark warm shades are a good alternative for the bedroom. They will help create a calming, relaxing atmosphere.
When choosing a color for the ceiling, rely on the range of other details.
Ceiling decor in the room
Ceiling decoration
Idea for decorating the ceiling in an apartment
See also: Ceiling design: selection criteria.
Design secrets
When choosing a ceiling finishing option, you should always focus on proven techniques, which will become especially fashionable in the coming season.
Expert opinion
- Light neutral shades on the ceiling will visually make the room appear larger and taller. If you want to add bright accents, it is recommended to focus them on a small area, which will not allow you to overload the room with unnecessary color details.
- The glossy surface, which diffuses light well, creates the amazing effect of endless three-dimensional space.
- If you decide to make them on a plasterboard frame in a room with high ceilings, it is recommended to place LED strips around the perimeter. Their flickering creates the illusion of increasing the overall volume of the room.
The completeness of the overall style of any room will depend on how fashionable and beautiful the ceiling design looks. If you decide to make your ceiling plan extraordinary, bright, modern and fashionable, you should think through all the decorative elements down to the smallest detail.
Choosing material
When thinking about how to decorate the ceiling, you have the opportunity to choose any base. Wood, drywall, paper, polystyrene foam, paint and many others are acceptable here. The choice depends on your preferences and imagination. Start from the design of the room as a whole. The selected material should be in harmony with the rest of the details.
Let's consider several variations using different materials in decorating the ceiling with your own hands.
Ceiling design option
Ceiling decor
See alsoCeiling design in the hall
Cut without a miter box
If you don’t have a miter box on hand, you can also easily cut the ceiling plinth at an angle of 45 degrees using two possible methods:
- Application of a cross-cutting machine with a circular saw and an electric drive:
- To correctly cut a pre-marked element, you only need to place it on the frame of the power tool and set the position of the protractor at the desired angle.
Cutting the element on a cross-cutting machine
- Next, the installation is connected to the network, the circular saw blade begins to rotate at high frequency.
- The master gradually lowers the handle of the tool along with the disk onto the plinth, and the sharp teeth instantly cut a part from any material.
Working of a cross-cutting machine
- The cut can also be made on a table using a regular hacksaw:
- To achieve the desired result, you just need to mark the element correctly.
- It is known that in a right triangle, acute angles of 45 degrees are formed when the legs are equal.
Marking an element manually
- This means that to mark such a diagonal on the surface of the plinth, you need to measure a distance equal to the thickness of the element with a ruler or caliper.
- Next, two points on the plinth are connected diagonally, and this line will ensure cutting at the desired angle for subsequent joining of the material.
- The cut is made with a fine-tooth hacksaw on a smooth, hard surface where you can safely place the entire plinth.
Cutting the baseboard without a miter box
If, after cutting, the orthogonal parts do not fit well with each other due to small errors in cutting and marking, the edges are processed with a grinding disc or finished “by eye” with a construction knife.
Textile
Recently, this type of decor has been gaining popularity. It is inexpensive (compared to some others) and at the same time unusual and uncomplicated.
This base is environmentally friendly and easy to use. However, it is more difficult to care for: dust settles here, like on the curtains, so it is worth thinking about ways to clean it in advance.
As for the types of fabric, anything from velvet to silk will do. Heavy dark ones will give a feeling of solemnity and royal luxury. Whereas light and light will make it airy and light. But it is better to use lighter fabrics.
Important! Decorating the ceiling with fabric visually makes the room much smaller, so it is suitable mainly for spacious rooms.
Ceiling decor in the room
Ceiling decoration
Idea for decorating the ceiling in an apartment
See also: Design of suspended ceilings.
Applications
Also the most relevant solution for a child’s room, but also suitable for other rooms, for example, a bedroom. There are a lot of different stickers on sale. Applications not only stylize the ceiling, but also cover its imperfections, such as dirt and scuffs.
You can also make homemade applications from plasterboard or vinyl. The stickers leave virtually no traces on the ceiling, so they can be removed or replaced with others if necessary. In addition, children can be involved in the process of creating and gluing applications.
Family vacation: how to choose a resort for a trip with children?- How not to lose money when selling an apartment?
- Bathroom curtains: review of popular models and new designs
Styrofoam
Mainly used in suspended ceilings. It has its pros and cons.
- ease of use and care;
- mildew resistant;
- good sound insulation;
- keeps warm;
- goes well with other materials.
However, foam doesn't offer much room for creativity.
- not moisture resistant;
- turns yellow over time;
- not environmentally friendly.
This base is well suited for the kitchen and office.
See also Photos of plasterboard suspended ceilings for the living room
Coloring
Even an inexperienced craftsman can paint the surface. This is the simplest decor option.
Its advantage is the possibility of additional decoration with stucco elements, stencil painting, vinyl stickers, etc.
Before applying paint, the ceiling should be leveled and primed.
Here are some recommendations:
- A good solution would be to decorate the ceiling tiles in the same pastel shade as the walls.
- For high ceilings, you should choose paints that contrast with the wall decoration.
- For a nursery, you can organize a structure made of plasterboard with figured decor, painted in a tone different from the general background.
- For the bedroom, a soft, calming color scheme is preferred. It is better to refuse patterns.
Drywall
Unlike the previous one, drywall opens up great scope for creativity and imagination. With it you can create any shape. It is not as environmentally friendly as wood, however, it is moisture and fire resistant and does not darken over time. One of the advantages: it does not require special care and is easy to use. Recently it has become increasingly popular.
Let's move on to the design. Drywall is flexible in processing: you can create any shape, many protrusions and steps. It even allows you to create different shapes and silhouettes.
With it you can adjust the lighting. By including spotlights in the ceiling and creating projections in the right places, you will get the desired result in dividing the light zones of the room.
Ceiling design option
Ceiling decor
See also Concrete ceiling in the interior: photos, tips
Lighting options
The choice of light source and the correct placement of the light determines what kind of room you find yourself in: small and dark, large but cold, or warm and welcoming.
Chandeliers and lamps
The classic lighting option is a chandelier in the center of the ceiling. It gives a lot of warm light, fits perfectly into almost any type of interior, and gives the room an elegant coziness.
Be aware of the weight of the lamp! It is not safe to mount a heavy chandelier on light drywall; it is better to mount it on the concrete base of the ceiling.
Unfortunately, this type of lighting is not very suitable for modern countertops and countertops, so it is gradually being replaced by recessed lighting.
Spotlights
- They allow you to create the necessary lighting around the perimeter of the entire ceiling and make a certain pattern out of it, if provided by the designer;
- Easy to install lamps and replace light bulbs;
- Safety. Spotlights do not heat the ceiling;
- Rotating models allow you to change the direction of lighting if necessary;
- This is a relatively inexpensive method of lighting.
LED strips
LED strips are a very non-standard and non-trivial approach to room lighting. You can not only choose an unusual lighting color, but also create a real light show at home, thanks to dynamic lighting effects: smoothly changing colors, light music, waves, etc.
Stucco molding
Decorating the ceiling with stucco will bring aristocratic notes of the 18-19th century into the room and make it more official. Suitable for a spacious living room with high arches, as it visually weighs it down and makes the room smaller.
Its elements are made of polyurethane, as a result of which they are light, moisture-resistant and do not turn yellow over time.
Stucco molding is mainly placed around the perimeter, around the chandelier. Paintings framed with stucco are often found. This material is easy to use, you can use it to decorate the ceiling with your own hands. By combining different parts of stucco molding you have the opportunity to create various figures and shapes.
Ceiling decor in the room
Ceiling decoration
Idea for decorating the ceiling in an apartment
See also Ceiling design in the bedroom. What should you pay attention to?
Varieties of ceiling surface decor
The modern approach does not oblige owners to seek help from professionals. Some options are easy to do yourself. Using one type of finish or another, it becomes possible to completely transform the room. The familiar design will become unrecognizable even to the owners. Among the many available, the following types of decor are considered the most popular:
- Stretch and fabric ceilings;
- Painting;
- Photo wallpapers and applications;
- Decoupage and painting;
- The use of polyurethane stucco;
- Drywall;
- Decorative plaster;
- Skin;
- Foam tiles;
- Parquet;
- Bamboo decorations.
Dye
Can be used in various variations. There is also a large field for creativity: any pattern, color and texture.
One of the common options is painting. It can be made on any base in a variety of colors. This type will have to be entrusted to professionals if your artistic abilities leave much to be desired. However, you can paint the surface yourself, which will highlight your individuality and talents.
Art decor is the second type of paint application. It is used for suspended ceilings. Its essence is to apply a bright pattern to a PVC surface. Such images are obtained with a three-dimensional effect. For this design, computer processing of the drawing is used and then applied to the prepared area.
The next choice is the use of stencils. A simple alternative for DIY decor. You can choose any stencil you like or make it yourself. Next, use a roller or brush to create an original look.
Ceiling design option
Ceiling decor
See also: A niche in the wall: how to design it functionally and beautifully
Decorative plaster
In fact, it is ordinary plaster, but with a designer texture and texture. The plaster can have an original relief that stands out on the main plane of the ceiling. Special combs and rollers are used for production.
Making such plaster is quite difficult; not only experience and skills are important here, but also artistic abilities. Decorative plaster can be painted and processed mechanically.
Tree
This base is the most environmentally friendly and safe to use. Natural wood looks much better than various imitations, without vulgarizing the interior, but giving it nobility and warmth.
The downside is its high cost, and the need to monitor the temperature and humidity of the room.
You can make wooden beams or patterns. A ceiling made entirely of wood also looks good and does not require any additions.
Ceiling decor in the room
Ceiling decoration
Idea for decorating the ceiling in an apartment
See alsoThe design of the ceiling in the hall is crucial
Photo wallpaper
A simple, stylish and inexpensive way to decorate the ceiling. You can buy ready-made wallpaper or make unique ones to order with your own photo. Modern technologies provide high quality printing, so the ceiling looks very stylish and solid.
The ceiling can be designed as a neutral background on which your personal photographs will be placed. Photo wallpaper is especially suitable for a children's room. On the wallpaper you can put, for example, your child’s favorite cartoon characters, or just bright, fairy-tale pictures.
Let's sum it up
As you can see, there are many materials to use, each of which has its own pros and cons.
| Material | pros | Minuses |
| textile | environmental friendliness, ease of use, unusual decor | difficulty in care |
| Styrofoam | low cost, ease of use and maintenance, thermal insulation | not environmentally friendly, turns yellow over time, poorly resistant to moisture |
| drywall | easy to use and maintain, waterproof, provides ample opportunities for creativity | expensive, not environmentally friendly |
| stucco molding (polyurethane) | easy to use, does not require special care | may change color over time (but lasts longer than foam |
| dye | low cost, large field of use, combines well with other raw materials | may cause an allergic reaction, the pattern fades over time and requires updating |
| tree | natural base, creates an ecological background in the room | high cost, requires special care |
Ceiling design option
Ceiling decor
Ceiling decoration is an art. A wide variety of materials and ideas makes it possible to make the most of your imagination and decorate the ceiling yourself, or get the room of your dreams with the help of specialists.
See alsoHow to use chandeliers in the interior
Art printing technology
Art printing is a specific process that requires specialized equipment and materials. A wide format printer must be designed to print an image of sufficient width. Another required component is solvent ink, which is quite expensive.
The technology is as follows: the canvas is inserted into the printer and the image is sent for printing. If the printer is not designed to print a picture of the required width, the picture is printed in several parts. Then the canvases are combined into one whole.
An art print will make the ceiling the highlight of the interior, which everyone will certainly pay attention to.
Correct angle of ceiling plinth using laser level
In modern conditions, many home craftsmen already have a laser level in their tool arsenal. The latter is great for checking the right angle and marking the baguette when forming both internal and external corners.
Work order
To achieve the correct angle of the ceiling plinth using a laser level, you can do this:
- First you need to accurately position the laser level itself.
- The same distance is laid from the corner along the joint lines of the floor and walls, for example, 300 mm. The marked points are connected to each other by a diagonal line.
- After this, its middle is found and marked.
- The laser level must be installed on the floor. Then turn it on, and then place it so that the vertical plane it sets (its projection in the form of a line) passes through the middle marked on the diagonal and coincides with the corner of the room. The beam should pass vertically along the corner line - this will also show how smoothly the corner of the room is formed.
- In essence, a plane is specified that cuts the corner of the room exactly in the center. It is in this plane that the junction of the skirting boards should be located.
- Moreover, the level should be positioned so that the projection of this plane is displayed on the ceiling.
- You can fix the resulting bisector line with marks made with a pencil. But it’s even better - don’t put the device away. Because it will help to more accurately display the desired cutting line on the plinth placed at the site of future fastening.
- It is probably clear that the next step is to install one baguette at the installation site. The plank must be rested with its end side against the wall. The beam from the laser builder will pass along the surface of the plinth, even along all its relief protrusions and accurately show the cut line.
Cut line
After the above manipulations, a cut line is drawn along the beam line with a pencil or thin marker. A corner is cut along the marked line using a knife. It is impossible to make a mistake in this case. Then, in exactly the same way, the cutting line is marked and the second plinth is cut. Now that both parts for forming the corner are ready, they need to be connected to each other at the site of future fastening. If the joint is neat, then you can glue the baguette. If a small gap has formed between the planks, the ends of the plinth must be adjusted with a knife.
Why does the vacuum cleaner suck up dust poorly?
Installation
When installing a ceiling plinth, the strips that form the corner are first glued. And even areas of finishing are fixed last. If, during the fitting of the corner side of the baguette, its other end falls on an already fixed section of the plinth, you should immediately mark the required length in order to cut off its excess. In this case, the smooth edge is simply cut at a right angle.
External corner finishing
To correctly cut the molding for the outer corner using a laser level, you must also start marking from the floor. There is a slight difference in the primary construction here:
- First, lines are simply drawn along a ruler, which are continuations of the walls.
- Then an equal distance is laid on them from the corner. These points are connected by a diagonal on which the center is determined.
- The beam is directed to this mark at a protruding angle. Taking into account the projection of this plane on the ceiling surface.
- Pieces of baguette are alternately applied to the wall and the protruding corner so that the beam passes through them.
- Marking is carried out along the projection line, and then the end part of the plinth is cut.
- Then you need to try on both sections at the installation site, aligning the cuts. If necessary, the ends of the planks are adjusted.
- If everything is done well, they move on to fixing the fillets on the surface.
The advantage of using a laser plotter is that its beam shows an accurate cut line. The latter clearly passes over all the relief irregularities of the surface of the baguette. All that remains is to make the correct markings and a neat cut.
Ceiling decoration: interesting ideas and materials
As a rule, ceiling decoration is done using:
- decorative plaster;
- imitation stucco;
- stencils;
- lists;
- applications;
- photo wallpaper;
- imitation beams;
- fabrics;
- bamboo wallpaper;
- baguettes
Decorative plaster
Plaster mixture is a material that allows you to decorate the ceiling with your own hands. It can be textured and structured. The latter is used for decorating walls and ceiling surfaces. The material is sold in the form of a white mass, which does not require additional preparation. However, decorative ceilings created using structural plaster do not necessarily have to be white. If you wish, you can give them a different shade. To do this, before applying it is enough to add color.
Just apply the prepared mixture to the surface, then create the desired relief using a spatula, plaster roller or combs. A handy tool allows you to give the surface the texture of natural stone, marble or wood.
Decorative plaster is an effective way to decorate a ceiling
However, for inexperienced craftsmen, working with structural plaster may seem difficult, since it is necessary not only to evenly distribute the material, but also to set the extypy. In this case, it is better to choose a textured composition. When using it, the pattern on the surface is formed independently after the final drying of the layer. The advantages of textured plaster include:
- ease of application with a spatula;
- possibility of painting in any color;
- the appearance of the texture declared by the manufacturer without human intervention.
Imitation of stucco
Another way to decorate the ceiling space is to use imitation stucco. Previously, palaces, country residences, and mansions of aristocrats were decorated with stucco elements. Nowadays, gypsum decor is also used in rooms designed in a classical or baroque style. However, it is quite difficult for an untrained specialist to apply stucco, so ceiling decoration is often done using polyurethane elements. Externally, they resemble plaster products, but they differ:
- less weight;
- flexibility;
- increased moisture resistance;
- ease of installation - to fix polyurethane stucco molding, use special glue or liquid nails.
Another advantage of imitation stucco molding is the ability to decorate the ceiling with your own hands cheaply.
Most often, polyurethane elements are presented in the form of rosettes, moldings and borders. Ceiling sockets are installed in areas where lighting fixtures are installed. Moldings are used to hide the gaps between the ceiling and walls. They come in different sizes and shapes. With the help of borders, effective patterns are created on the surface.
Imitation of stucco on the ceiling
Stencils
Stenciling is another way to decorate the ceiling with your own hands. With its help you can create any patterns on the surface. The size, shape and detail of the stencil depends solely on your imagination, which means that upon completion of the work the ceiling will be truly unique.
To create a stencil with your own hands, you need to take a sheet of plastic or thick cardboard and apply an image. Then cut out the workpiece and fix it on the surface, after which apply acrylic-based paint using a regular sponge.
When choosing a stencil and an idea for the ceiling, it is important to consider the theme of the image. Drawings in the form of fairy-tale or cartoon characters are suitable for a children's room, plant and animal patterns are suitable for the bedroom and living room, and marine patterns are suitable for the bathroom.
Painting with paints
If you want to make the ceiling original, you can paint a picture on its surface. Even if you lack artistic talent, it is not difficult to turn the ceiling into the summer sky. For this you will need a paint brush or spray gun and water-based paint.
The work consists of several stages:
- Blue paint is applied evenly across the entire ceiling.
- After the surface has completely dried, apply a second layer of paint.
- After complete drying, clouds are randomly painted on the ceiling with white paint using a sponge. The drawing is applied with neat poking movements.
Painting the ceiling with paints is a simple way to decorate a room
Application
Applique is another way to decorate a ceiling, which allows you not only to decorate the room, but also to hide small flaws. You can make an application yourself from polystyrene foam, drywall or thick paper. In this case, the structure is attached with glue.
However, it is much easier and more profitable to use ready-made vinyl stickers of a suitable theme. They are attached to any surface, and if necessary, they are easily removed and replaced with new ones.
DIY application using vinyl stickers
Photo wallpapers and 3D
Photo wallpaper is another popular way to beautifully decorate a ceiling. They are realistic and fit different room styles. For registration, you can give preference to photo wallpapers:
- textile;
- velor;
- non-woven;
- 3D.
Textile photo wallpapers consist of a paper or fabric base, with a top layer of silk, linen, and polypropylene fibers. The material is distinguished by its resistance to moisture and sunlight, a variety of textures and patterns, therefore it is often used when decorating kitchens.
The surface of the velor wallpaper is covered with soft fibers. They look beautiful in the interior and shimmer in the sun, but are afraid of moisture, therefore they are suitable for decorating the ceiling of bedrooms, children's rooms and living rooms. The material is resistant to wear and fading.
Non-woven photo wallpapers are distinguished by their lack of shrinkage after drying, air permeability, ease of sticking and durability. With their help, you can easily disguise small cracks or irregularities on the ceiling. Non-woven wallpaper is also considered environmentally friendly, therefore they are recommended for use in children's rooms and bedrooms.
3D photo wallpaper is one of the modern ways of interior decoration. They are glued to walls and ceilings. The main advantage of this decor is the three-dimensionality and realism of the image. With the help of such wallpaper, you can not only decorate the room, but also, due to the volumetric appearance, visually increase the space.
3D photo wallpaper is one of the modern ways of interior decoration
Imitation of beams
Some interior styles use ceiling beams. Previously, beams played a functional role - they served as a support for ceilings. However, now they are an element of decor.
If your house is made in the style of grunge, country, Provence or chalet, pay attention to the imitation of beams. For it, easy-to-care and durable materials are used, which are relatively light in weight - gypsum, polyurethane and polystyrene foam. Modern beams can be decorated to look like wood using painting and veneering.
Decorative beams in the kitchen look luxurious and make the room cozy
Fabric
Draping with fabric is an unusual but effective way of decorating a living space. If you want to use it and decorate the ceiling with your own hands, the ideas are presented in the photo.
Advantages of draping with fabric:
- Easy to install. No special skills are required for registration.
- Possibility to disguise ceiling defects - cracks, stains, irregularities.
- Simplicity of preparatory work - the ceiling surface does not need to be leveled and cleaned, since the mounting frame is fixed under the ceiling.
- Possibility of placing ventilation ducts, wires and other communications above the drapery.
- Fabric strength.
- Possibility of quickly replacing drapery if necessary.
There are several options for decorating the ceiling space with fabric - it can be draped in the form of a tent, waves, or you can choose a simpler design. Jacquard, linen, cotton, velvet, silk or chiffon are suitable for interior decoration.
Draping with fabric is an unusual but effective way of decorating a living space.
Bamboo wallpaper
This natural material is used in the design of residential and office buildings, hotels, and restaurants. They are used to decorate walls and ceilings. Bamboo wallpaper is combined with other modern materials - laminate, parquet, porcelain stoneware and decorative plaster. They are solid canvases 1-2.5 meters wide, which consist of thin bamboo slats secured to a dense fabric base. The raw material for the production of wallpaper is the top cut of bamboo.
The material differs:
- durability - service life is 30-40 years;
- ease of care - it is enough to periodically remove dust from the surface;
- ease of surface finishing;
- plasticity - bamboo wallpaper masks minor defects.
In addition, bamboo sheets allow you to reduce the noise level in the room. Of course, they will not replace soundproofing materials, but they can muffle external noise, which is why they are often used in bedrooms and children's rooms. In the kitchen they also look original and organic.
Bamboo wallpaper stickers consist of several stages - preparation and application. First, the working surface is prepared for gluing and all finishing is removed. Then the wallpaper is brought into the room where it will be used for 2-3 days. This is necessary to adapt the bamboo fabric to the microclimate of the room. After this, you can start working. To do this, it is better to refuse water-soluble materials, since bamboo wallpaper is heavier than its paper counterparts. For fixation, glue on a polychloroprene base is used, but it is necessary to work with it in a respirator.
Baguettes
You can decorate the ceiling with your own hands using baguettes or moldings. They are easy to install and can transform the atmosphere in the room. Depending on the material of manufacture, baguettes are:
- aluminum;
- wooden;
- polyurethane;
- foam plastic.
Aluminum structures are both durable and lightweight. They are attached to the surface using screws or liquid nails. Wooden models, despite their significant weight, are used in the design of classic interiors. However, they have a rather high price. If you want to reduce repair costs, you can choose polyurethane moldings. They are practical, available in various colors and configurations, and are also affordable. Foam baguettes are the lightest and can be attached to liquid nails. The main disadvantage is fragility, so you need to fasten it as carefully as possible.
When choosing baguettes, consider not only the material of manufacture, but also the height of the premises. Tall moldings look better in high rooms, and narrow ones in low rooms. Also pay attention to the price. If you want to save money, choose plastic and foam structures. If environmental friendliness and durability are important, choose wooden or aluminum ones.
Decor of suspended ceilings: features and tips
Stretch ceilings can be made in various colors. They are not afraid of temperature changes and sun rays. Also, a canvas made of PVX film allows you to create a perfectly flat ceiling space and is characterized by elasticity.
Even if you are flooded by your neighbors upstairs, you don’t have to worry about the repairs being ruined - the stretch ceiling can withstand up to 100 liters of water per 1 m2. In case of flooding, you need to call a repairman who will drain the water, and the appearance and shape of the film will be restored in 2-3 days.
Stretch ceiling - interior decoration and practicality
To decorate a stretch ceiling, use LED strips and spotlights, create a multi-level system or select an original chandelier.
To decorate a stretch ceiling with your own hands, you can choose phosphorus, vinyl or photo stickers. They stick easily and are removed without consequences. Phosphorus stickers decorate the ceiling not only in daylight: having accumulated sunlight, they glow softly in the dark. You can choose stickers in the form of stars, monograms, flowers.
Decorating with stencils
The easiest way to decorate the ceiling is to use a stencil. It’s easy to create a ceiling stencil yourself. You just need to draw a pattern on whatman paper or a piece of linoleum and, having cut it out, fix it on the ceiling and apply the desired paint using a sponge.
By applying paint of different colors alternately to individual areas of the pattern, you can create a picture with a specific plot. This option is convenient for decorating a nursery. All you need is time, imagination and desire.

