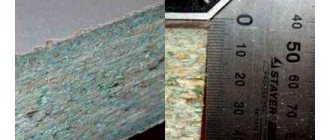
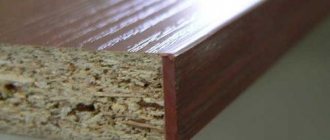
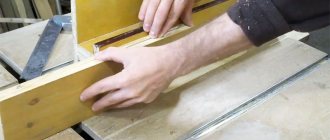
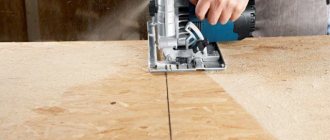
In my work, I sometimes have to use laminated chipboards to fill niches, make shelves and custom furniture. I prefer to buy ready-made furniture panels in stores. They are available in several standard sizes, have factory edges, and if you adjust the future product to these dimensions, then assembly is quick and without problems. But it’s not always possible to do without cutting, so you have to think about how to cut the chipboard so that the cut is even and smooth, and chips do not form on the decorative surface.
Source tildacdn.com
Tools and accessories
When cutting laminated chipboard at home, both tools and auxiliary devices are used. Auxiliary materials include: tape, masking tape, pencil, sandpaper, measuring tape.
Tools - hacksaw, router, circular saw, jigsaw, formatting and cutting machine.
Cutting programs
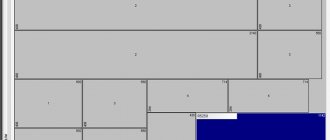
You can make a cutting map for laminated chipboard from a sheet using special programs on a computer. Among the most famous of them: “Astra Opening”
In the program file is an order, which may contain several products that have their own set of parts, the parameters for which are specified by the user. Based on information about cutting the edge of the slab, type of cutting, cut width, through cuts, etc., the program will generate a cutting map. Then a specification, sketch and other technological documentation will be automatically generated. The program includes reference information about materials, operations, edges and parts.
"Master-2"
Suitable for those who are constantly engaged in cutting chipboard. This program:
- supports multi-user mode;
- systematizes and sorts information;
- sorts orders into archived, planned and active;
- saves information about materials, etc.;
- takes into account the remaining material.
In the editor you can see which part is laid correctly and which is not, and the remainder, both significant and not so significant. The user can change the settings for ease of use.
Instructions
First of all, we mark points on the edge of the slab following the required dimensions. Initially, we determine how the part will be sawn - straight or curved.
- Next, draw a line with a pencil along which the cut is planned, substituting some kind of bar to draw a straight line. If a curve is outlined, you can use a piece of fiberboard.
- Then we stick paper tape along the line of the planned cut. This will prevent chips from forming on the laminate when cutting at the exit.
- We cut the slab. The tool at hand that will be used to make the cut must be placed at an acute angle to the surface of the chipboard to avoid severe chipping.
- You need to cut smoothly, without strong jerks or pressure. Finally, the edges can be smoothed with sandpaper or a file.
In order to prevent the poorly processed edges of the end of the slab from being visible, they are covered with a PVC edge or melamine tape. This improves the aesthetics of the part and increases its service life.
You can start cutting the slab only after all the tools have been prepared.
Which jigsaw file to cut chipboard, laminated chipboard
The quality of cutting a board is largely determined by the type of blade. First of all, you need to choose the right blade according to the size of the teeth. Files are divided into several types:
- A and B - such blades have the smallest teeth with small pitches;
- C - the teeth of the equipment are medium in size;
- D - nozzles have the longest teeth.
You can quickly and roughly saw chipboard and wood using the latest type of blades. But if you need to make the cut as evenly as possible, it is better to take tooth sizes C, A or B - they allow you to work with the material more accurately. The pitch should be 2-3 mm, and the length of the file should be about 75 mm.
Standard jigsaw equipment has straight teeth pointing in the same direction. To cut laminated chipboard smoothly, it is better to give preference to reverse blades. Some of their teeth point upward. During the reverse movement, they cut the material, which allows you to avoid chipping along the edges.
It is necessary to saw laminated chipboard using a jigsaw with attachments made of steel grades BM, CV and HCS
Before sawing chipboard with a jigsaw, the selected blade must be carefully inspected. A good canvas should have no traces of corrosion or defects. The high quality of the attachment is evidenced by clear inscriptions and emblems on the surface, as well as perfectly smooth turning on all sides. If the equipment has slightly rounded edges, oblique or blurry prints, then it is made of counterfeit material.
Cutting methods
The best option for obtaining a high-quality cut is to make it on a format cutting machine, which is designed specifically for these purposes. But it is very expensive to buy.
If we are talking about home use and plus he needs a large room for work. Therefore, there are other ways in which you can use a hacksaw, jigsaw or circular saw.
Cutting with a hacksaw
To cut laminated chipboard with a hacksaw you will need to put in a lot of effort.
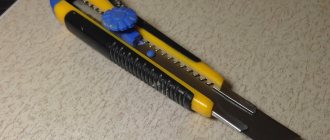
- Initially, the laminate on the slab must be cut along the cutting line with a stationery knife and the line taped with tape.
- Next, place the hacksaw at an acute angle of 30 degrees. Also, the tool must be taken with the finest teeth.
Upon completion, the cutting line must be treated with fine-grained sandpaper, and then a flexible C-shaped profile must be applied to the end.
Electric jigsaw
When cutting with a jigsaw, you must choose files with the smallest teeth. They usually cut short distances. The cutting is carried out at low speeds, moving smoothly forward.
If you had to use this tool for the first time. there may be small chips on the reverse side. By trying different cutting speed modes, you can come to the disappearance of chips.
Circular saw
It is a small table with a toothed disk. The disk must be installed specially for laminated chipboards. Unlike a jigsaw, it cuts much faster and better, but you can get chips on the reverse side.
Fraser
This type of tool is designed for cutting through wooden parts. Can be used for cutting grooves, shaping, drilling. In order to cut a part from the slab with a router, you need to step back 3 millimeters from the cutting line.
To draw a straight or curved router line, you must first attach the template on top of the chipboard using clamps. Such a cut will be very labor-intensive, but there will be no chips at the ends of the parts.
Cutting pipe at an angle of 45 and 90 degrees
If you need to cut a pipe at an angle of 45 degrees, which is often required when laying water and heating pipes. Often steel and cast iron pipes that have a cylindrical shape are used. In installation work, rectangular or profile pipes are used. However, you should cut the pipe correctly with a grinder so that you can easily connect it later. Therefore, you should carefully mark the pipe.
Some craftsmen try to mark the cutting area using a tape measure, but we warn you that the result will most likely be negative. And for a positive result, consider the following recommendation from professionals.
Take a sheet of paper or cardboard, preferably A4, fold it diagonally and wrap it around the pipe where you plan to make an even cut. The edges of the paper must be absolutely aligned with each other. And the side of the paper that is closer to the end of the pipe was perpendicular to the axis. Then mark a cutting line in a circle.
If you need to cut exactly at an angle of 90 degrees, then solve the problem quickly using paper or masking tape. Wrap it around the pipe so that the ends match. Make an even mark and saw off.
How to cut a profile pipe evenly?
Craftsmen advise using a square when cutting a profile pipe. To do this, apply the square to the sides one by one, and turn and apply marks with smooth movements. After the steps, secure the pipe and cut. Prepare yourself a template that will be useful in the future and will save time. It is better to carry out the action with a grinder, so the cut will be smoother.
How to cut a cast iron pipe?
When working with cast iron pipe, keep in mind that it is a fragile material. Therefore, we will find a way to cut such metal without damage.
Before starting work, make notes for the cut, as you would when working with steel pipes. Place a wooden beam for support. Run a grinder around the circumference of the pipe, making small cuts. Then take the chisels, insert them into the groove and hit them hard with a hammer. Please note that Bakelite-based cutting discs are used to cut cast iron pipes.
If you don’t have a grinder at hand to cut a cast-iron sewer pipe or other purposes, use a hacksaw, chisels or special pipe cutters.
How to cut a gas pipe?
Cutting a gas pipe is a dangerous action, so it is best to leave it to professionals. But if you are confident in your abilities, then use a grinder, welding, hacksaw, or gas welding to cut metal.
Trimming instructions:
- Before work, turn off the gas supply riser. Then release the rest of the gas from the pipe. To do this, light the gas in the burners and wait for it to go out.
- After these steps, cut. Using a welding method, the metal base burns when exposed to high temperature. The result is fast and effective. But remember that cutting or rooting gas pipes again requires experience.
Methods for cutting large diameter pipes
For cutting large diameter pipes, such as sewer pipes, there are a number of reliable tools available. Next, let's look at some of them in detail:
The grinder is an inexpensive and accessible option, but it is considered not the safest when working with such materials. If you decide to use this method, be careful and use protective equipment. A roller machine (pipe cutter) is a tool adapted for such manipulations. The device is attached and material removal begins. The clamping force is adjusted using mechanical devices
It is important to note that machine models differ in shape, so before use, consider the size relationship with the pipe. Gas cutting is the most popular option for cutting larger diameter pipes and sheet metal. The cut occurs due to the action of a high intensity flame, the metal melts and leaves the cut area with a gas flow
This method is convenient and effective.
How to cut a pipe lengthwise correctly?
A quick way to cut a pipe lengthwise using a grinder:
Pay main attention to the markings. For this case, use painting thread, which is widely used when marking walls. Before starting work, secure the pipe and, using small movements, carefully saw the pipe. It’s better not to rush, but delicately and slowly process the parts of the pipe, so that the cutting disc does not jump off the marking lines. Remember safety precautions... How to cut thin-walled pipes?
How to cut thin-walled pipes?
Thin-walled pipes are made of non-ferrous metals: aluminum, copper.
Sawing with a format saw
To cut on a machine, you need to prepare a cutting map in advance (you can use a computer program or manually). We place the laminated chipboard sheet on the machine, correctly resting it on the movable part of the table.
- First, a 5 mm cut is made from the edge of the sheet. This is done to remove the damaged end of the sheet (damaged during transportation).
- Then, using a ruler, set the required size on the table and cut the strip.
- When cutting on a machine, the sheet is sawed to the end along the cutting line. Because you can't drag it back.
- Therefore, it is necessary to place the parts on the sheet strictly along one line.
Let's sum it up
In today's article, we looked at 4 ways to use a jigsaw to cut a piece of plywood or chipboard with a minimum number of chips and burrs. Choose the method that suits you best and try it!
You can also combine several different methods to achieve the best and highest quality results.
Design of a panel saw
Bed - the entire structure is installed on it. The more weight it has, the more stable the machine will operate. The stability of the device is an important factor when cutting.
- A saw unit is a device consisting of two circular saws. The first saw makes a cut on the back side of the chipboard, that is, it only removes the laminate so that there are no chips. The second saw makes the final cut through the slab.
- Work tables. All three are directly involved in the work. On the first there is a sheet of wood material. The second one is movable. with its help the part is fed to the saw unit. The third one gets a sawn-off part.
Carriage - it helps the movable table move. When moving parts to the saw unit, the machine has the necessary set of stops and rulers.
Rules for the safe operation of an electric circular saw
When purchasing this power tool, you should also pay attention to safety criteria. Absolutely all conscientious manufacturers of such equipment “swaddle” the cutting disc with a protective casing, which can protect fingers, parts of gloves or other materials from getting under the cutting device, preserving the health of its owner
The casing always covers the upper part of the disk, facing the face of the person working with the circular saw, and the lower part is “exposed” only during direct cutting.
The first quality of protection can also protect the face, body and other parts of a person’s face from chips.
Another safety measure is to protect the device from accidental activation. Only after pressing the start button and disabling this option will the saw begin to work.
You should not be afraid of a circular saw jamming, since almost all modern manufacturers have provided a similar possibility in their equipment, when the cutting disk stops rotating, but the engine does not turn off, after which the saw can be removed from the problem area of the cut and start working again.
Photo instructions on how to cut laminated chipboard
Safety precautions at work
In general, a jigsaw is safer in its design features than angle grinders and circular saws. The real danger when working with a jigsaw is getting your hand or other part of the body under the working saw. This is most likely under the workpiece, where the end of the file, invisible from above, comes out.
We recommend reading more about the selection and design of a jigsaw in this article.
Therefore, the main safety rule when working: during any operation, the hand should not approach the working saw at a dangerous distance.
Do not cut small workpieces while holding them with your hand near the saw. The workpiece must be fixed by any means: clamps, vices, screws, clamps, etc.
Other dangers:
- A saw blade breaks off with a sharp piece rebounding to the side in an unpredictable direction . Happens extremely rarely. More often, the file simply breaks into two parts, one of which remains in the workpiece, the second in the rod. If a part does bounce, it does so with little force, since the speed of the blade is low, from 500 to a maximum of 3200-3500 up-down strokes per minute. This is significantly less than 12,000 rpm for an angle grinder disk and up to 5000-6000 rpm for a manual circular saw. At the same time, the jigsaw blade has only reciprocating movements, but not rotation. This means that there is no centrifugal force, which is formed only during rotation and throws the released particles to the side.
- Getting sawdust into the eyes . Often the operator leans towards the saw to check the alignment of the cut marking line and the position of the blade. In this case, the air flow from the electric motor cooling fan or a random draft can bring sawdust into the eyes. To protect against this, the jigsaw bodies are equipped with folding transparent protective covers. Sometimes they interfere with the view and are thrown back. Then you should wear safety glasses or at least not lean too close to the work area.
Sawdust that gets into your eyes is a nuisance. And metal, sawdust from adhesive resins of sheet material, plastic, can damage the eyes. Therefore, you should not neglect the protective casing or glasses.
In the photo the operator is wearing glasses, at a safe distance.
Electrical safety rules for jigsaws are the same as for any electrical appliances.
- Do not use bare wires;
- the contact between the plug and the socket must be tight, without sparking or heating;
- during operation, the extension cord socket should not be under your feet;
- It is necessary to exclude the possibility of the wire getting under the working saw.
From a fire safety point of view, a jigsaw is also safer than other cutting tools. It does not generate a stream of sparks, as when working with a monkey (angle grinder) and an open flame, as when cutting metals with gas/electric welding in the cutting mode.
Tool preparation
First of all, a file suitable for the material is selected. Do not use heavily worn, bent files with chipped or worn teeth. If a jigsaw does cut with them, it will do so slowly, with the engine overloaded, and with a lot of movement to the side.
We also recommend reading a useful article about choosing a jigsaw file.
If the file is already standing, it is sometimes useful to check the tightness of the screws or the reliability of the auto-clamp. It happens that during operation the canvas becomes loose.
The saw fastening screws should be tightened tightly, but not excessively, so as not to strip the threads or splines of the head.
Before cutting business material, it is advisable to make a test cut on an unnecessary workpiece. Wherein:
- the behavior of the jigsaw, the quality and speed of the cut, and the presence of chips are determined;
- by adjusting, the optimal frequency of the blade strokes (motor revolutions) is selected;
- on the wood, a pendulum stroke is activated (the swing of the saw) with an assessment of how the jigsaw cuts, better or worse. On metal, laminate, fragile plastics and hard materials, the pendulum stroke is not turned on.
After adjustments and test cuts, they begin cutting business material, already knowing the capabilities of the jigsaw, the speed and quality of cutting.
Preparation of the workplace
It is more convenient to cut with a jigsaw, placing the workpiece on the work table. (Except when you have to saw on the floor). In any case, the workpiece is positioned so that the file is guaranteed not to touch the floor, edge of the work table or other foreign objects.
The cutting line should be as close as possible to the support (table top, workbench, blocks placed on the floor, etc.). If the cut is too far from the support, the workpiece will jump and vibrate, which is incompatible with a normal, even cut and can lead to blade breakage.
Placing the cut line too close to the edge of the support is also risky, as the saw may catch the support. Optimal - 5-7 cm for thick, rigid materials, 2-3 cm for fiberboard, thin plywood, etc.
Before you start cutting, you need to look under the workpiece and make sure that there are no foreign objects under the cutting line , and that the blade will not catch the edge of the workbench.
The workpiece must be secured by any means (clamps, clamps, screws, stops, etc.) You cannot hold it with one hand, as this is unreliable and limits the operator’s movements, distracting from the main operation - cutting.
In the photo the workpiece is correctly secured.
When making a long cut, it is necessary to consider how the wire will be pulled. Will it be enough until the end? Or you will have to turn off the jigsaw in the middle and throw, for example, an extension socket with a plug onto a sheet of material.
The light should fall from the front of the jigsaw onto the cutting line. If the light bulb is hanging from behind, you may not be able to see the marking line in the shadows. Especially on jigsaws without backlight.
What materials can be cut
This tool can be used to cut all materials for which saw blades are produced. Its purpose is usually indicated on the canvas in one English word.
Specifically:
- soft wood - Wood;
- hard wood - Hardwood;
- aluminum - Alu;
- stainless steel – Inox;
- other metals - Metal;
- cellular polycarbonate, plastics similar in density and structure - Acrylic;
- dense fiberglass - Fiber&Plaster;
- rubber, foam plastic, cardboard, leather, other soft materials – SoftMaterial;
- ceramics, slate, tiles – Special diamond-coated saw blade.
Also on the packaging there may be a picture depicting the material for which the file is intended. The purpose of the file can also be determined by its markings.
For example, in the code on the file - T118G and T318BF, the second and third digits indicate the size of the teeth and the purpose of the file itself. It is deciphered using a special table. In this case, 18 are fine-tooth files for metal.
For your information! Some manufacturers identify their products by color. For example, gray for wood, blue for metal. But such an identification is imprecise. Since, for example, black files can be made of different materials, from soft drywall to heavy-duty ceramics.
The thickness of the workpiece should not exceed the depth of the maximum reach of the saw blade. When cutting, its end should extend outward by at least one tooth. This is necessary to ensure the ejection of sawdust from the cut, reduce friction and provide cooling.
If the blade does not come out of the workpiece, the cut will become clogged and the end of the file will hit the bottom of the cut. As a result, the blade will overheat, start sawing to the side, or break.
By the way, we recommend reading a useful article about what to do when a jigsaw cuts crookedly.
In practice, with a jigsaw you can cut non-ferrous metal up to 20 mm thick and steel up to 10 mm thick.
Thicker metal is sawed if required, for example, to cut a circle, oval or complex shape. It is more efficient to cut in a straight line with other power tools.
The thicker the material, the more powerful the jigsaw should be. A weak jigsaw can cut through wood about 50 mm thick or a little more, but it overheats, works at the limit and wears out quickly.
How to hold the instrument correctly, where to stand
These jigsaw technique tips are for beginners. Those who have already tried sawing quickly appreciate the behavior and capabilities of this tool.
The workpiece should be positioned conveniently, so that you do not have to reach the end of the cut without controlling the cut line. It is more convenient when the workpiece is at waist level plus/minus 20 cm, and cut at arm's length. If the cut line is long, the jigsaw is turned off, the workpiece is moved across the work table, or moved to a new place to continue.
Correct cutting position
The jigsaw is held without excessive force “until your fingers turn white.” It is enough that it does not bounce above the surface of the material; a small amount of hand effort is enough for this.
The tool is moved smoothly, without jerking. You can’t rush, the saw must have time to make the cut and throw the sawdust out of the slot.
The cutting line is controlled by preliminary marking with a pencil, marker or mounting knife. The last option is the most accurate; according to thick markings with a marker or chalk, the cut can deviate plus/minus 1-3 mm.
Rough floor finishing
DIY vacuum pump at home
Subfloors are installed from hardboard quite often; this material is especially suitable for leveling old plank floors if dismantling work is not expected. In addition to resulting in a perfectly flat surface, the fiberboard layer will serve as a good heat insulator, which is especially important for residents of private houses or first-floor apartments in old high-rise buildings.
For laying the subfloor, untreated fiberboard with increased hardness or soft fiberboard is used as a soundproofing pad. Despite the abundance of hydrophobic additives in the production of modern fiberboards, experts advise that they be further processed before installation. Impregnation with hot drying oil in 2-3 layers gives good results. After complete drying, the sheets can be laid.
Fiberboard floor ready for further processing
If the old base for the floor is quite flat, the hardboard is laid directly on it. If there are significant level differences (more than 10 mm), you will have to level the old floor or lay joists. In any case, the surface for laying fiberboard is pre-treated with an antiseptic primer.
We cut hardboard
Many modern enterprises that sell building materials offer their customers cutting fiberboard to individual sizes upon purchase. Special high-precision equipment guarantees that the work of cutting material and processing edges will be done with high quality, without chipping. In this case, your main task will be to accurately take all measurements. If you are so unlucky, you will have to cut the hardboard yourself at home.
In principle, a hand saw with a fine tooth will be suitable for this work. After all, small irregularities formed at the cutting site are of no importance for laying the material as a subfloor. When there is a significant amount of work, cutting fiberboard is much faster and easier using the following devices:
Jigsaw
- a jigsaw or circular saw, preferably with a laser guide;
- saw blades of a special brand, suitable for cutting hardboard;
- trestles with an inclination of 20-25% from the vertical, allowing you to fasten a large-format fiberboard sheet;
- metal ruler
- marker.
If you have to cut fiberboard for the first time, in order not to spoil the material, first practice on a small piece, placing the jigsaw blade to the right of the marking line. Be sure to first familiarize yourself with the techniques of experienced craftsmen, for example, by watching thematic videos, one of which is presented below:
How to lay fiberboard?
If after laying the fiberboard it is planned to lay linoleum, the hardboard is laid with the wrong side down. In other cases, the corrugated surface will provide better adhesion of the fiberboard to the finishing materials, so it is turned upward.
Installation usually begins from the corner opposite the front door. Fiberboards are fastened using special staples, nails or screws, or glued with mastics. Before nailing or gluing, they try to fit the sheets together with a minimum gap to make puttingtying the seams easier.
By the way, there is no need to seal cracks near the walls; on the contrary, be sure to leave technological gaps that will allow the fiberboard to “play” without deformation when expanding with temperature fluctuations.
The easiest way to cut fiberboard when going around a heating pipe is with a regular knife. More accurately, such work can be done using a specially created template made of thick cardboard, using a jigsaw.
After laying fiberboard, if you plan to finish the floor with linoleum or paint, it is necessary to seal the seams. In addition to having high adhesive properties, the mass with which we will putty the fiberboard must certainly be plastic, since fiberboard floors are somewhat springy and are capable of changing their linear dimensions. If you putty the floors with a hard and monolithic putty, then it can either bend and deform the fiberboard sheet, or itself tear at the junction of the seams.
Final stage
In the last step you need to use another tool. You will need a spray or file, sandpaper, GOI board, adhesive tape and a decorative duralumin corner.
First of all, you need to polish the wood. To do this, you can use a spray or a file to remove the excess. Then use a sander or regular sandpaper (no sanding) to keep the wood looking good. It is recommended that you do this work even if you don't intend to do anything else afterwards. Due to the torn elements of the wood, the material will attract moisture much faster, which will cause faster wear of the material.
Having restored the tree to normal, it is necessary to bring the plastic to the same condition. Usually it is enough to use special polishes. But if this is not available, you should not buy a new one, because you will need very little of this tool to finish one tabletop, and then throw away the AL-KO varnish, which is not economical.
The ideal option for plastic recycling is GOI paste. It is available in almost every home, and is a completely versatile tool and quite effective.
Even if the cut was successful and of high quality grinding, it is better to play on it safely so that even small millimeters do not make themselves felt in the future. Therefore, for finishing it is recommended to use a special furniture corner made of duralumin. It needs to be secured in place until the appearance is neat.
