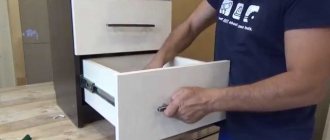
This section of our website is dedicated to those who would like to make furniture with their own hands.
Many will say, why would I make furniture myself, because there are a huge number of stores, I came, chose and bought. Yes, this is true, and the cost of this furniture will be cheaper than if you even decide to make it yourself, since furniture sold in stores is produced in huge quantities with the same standard sizes, and the choice of laminated chipboard decor is usually limited to three or four colors.
Let’s say you need a cabinet 1540mm wide, 2650mm high, 800mm deep, in a color (decor) so that it doesn’t stand out from the overall design of the room.
After long trips to ready-made furniture stores, you did not find this cabinet, since the cabinet depth of 800 mm is not standard, and it is not profitable for large manufacturers to make this cabinet.
Then there are a huge number of furniture manufacturing companies where you can order ready-made furniture according to your dimensions and they will deliver it to you and install it. Let’s not argue, ordering ready-made furniture is much easier, but:
1. It will cost you a lot more.
2. There is a chance that you will receive something that is not what you wanted or of poor quality.
3. No company will make you one small chest of drawers or one bedside table.
And if we have convinced you to make furniture yourself, then we will tell you what will be required of you, and what services and work you can order from us
Preparing for furniture assembly: marking and adding chipboard with your own hands
After the furniture parts have been cut to size and all visible ends have been glued with edges, you can proceed to the stage of preparing the furniture assembly.
It consists of two parts - marking the holes and adding laminated chipboard with your own hands. This is a rather important stage, the accuracy of which determines the appearance of the furniture and the quality of the assembly. Strictly speaking, many craftsmen neglect marking and adding chipboard, preferring to use clamps and drill straight away. But this requires having several corner clamps in your arsenal and skill in handling them. Constantly pulling parts together at right angles in order to accurately drill and tighten them onto confirms, and then unscrewing them is quite labor-intensive and time-consuming. It is much more efficient to first mark the parts for fasteners, drill holes, and then assemble the furniture.
Instructions for assembling a kitchen by modules
At the stage when the parts of the headset lie in a threatening stack, you think about how not to miss and not make “spare” holes. You should pick up a tape measure and put the sketch and details of the furniture in front of your eyes. You need to learn to read details.
Namely, to highlight parts that are identical in functionality. The set consists of modules. Which have basically the same design. The structure always consists of a bottom, sides, horizons, planks and shelves. They almost always have the same additive.
Kitchen layout
First of all, using a tape measure, I arrange them by name, while not forgetting to mark each detail in the document:
- sides of upper cabinets
- horizons
- bottom
- sides of the lower cabinets
- slats
- boxes
- removable shelves
Within walking distance of you, there is a service for calculating cabinet furniture.
Then, making sure that all the parts are available, I begin marking. I briefly described how to do this in this article. The topic is worthy of a separate article, subscribe to updates and you will be one of the first to receive it.
Kitchen Additive
Now I load 5k and 8k drills, and add all the parts according to separate layouts. This allows us not to make the same movements many times, assembling each module separately.
I keep checking the sketch of the headset. I try to minimize holes on visible furniture panels. If the design allows, eliminate them altogether, replacing them with decorative corners or furniture dowels.
Additive of parts made of chipboard, laminated chipboard
Additive (drilling) is the drilling of blind and through holes for connecting furniture parts to each other, using standard fasteners, as well as drilling or tapping mounting holes for installing furniture fittings or mechanisms. Neva Furniture Corporation has sufficient production capacity to provide high-quality chipboard additives. By additive, or drilling, we mean drilling various holes (through and/or blind), which provide reliable connection of various furniture parts using standard fasteners, as well as the installation of various mechanisms and/or furniture fittings. The precision of adding chipboard and laminated chipboard guarantees the highest quality of assembly, strength and durability in the use of any furniture products.
Furniture production is distinguished by a lot of nuances and features, the knowledge of which directly determines the quality, aesthetics and performance indicators of manufactured furniture. The chipboard additive is one of the most important production processes, ensuring impeccable assembly accuracy, which implies the ideal appearance and performance characteristics of the finished furniture.
| Price list for additive work (machine additive) | |
| Type of work | cost (rub/piece) |
| Confirmat 7/50 | 35 |
| Confirmat 7/70 | 40 |
| Eccentric coupler VB d=20 mm | 45 |
| Eccentric coupler MFX d=15 mm | 65 |
| Eccentric coupler MFX d=15 mm double sided | 130 |
| Eccentric coupler MFX d=20 mm double sided | 90 |
| Eccentric coupler MFX d=15 mm corners. | 130 |
| Eccentric coupler For a table d=35*2 | 180 |
| Shelf holder d=5 mm | 15 |
| P/loop 35 mm | 90 |
| P/loop 26 mm | 80 |
| Self-tapping screw marking | 10 |
| Dowel 8 mm | 22 |
| Lamp 52 mm | 120 |
| Countersink | 7 |
These prices are valid only if the additive pitch is 32 mm. between holes (calculation from the center of the hole). If this requirement is not met, the price of filler work increases by 100%
The most common furniture fastenings
Various eccentric couplers
Corner connection
Dowel connection - classic
Features of additive work
- Typical additives are used primarily in the manufacture of cabinet furniture.
- Individual additives are used when creating products not based on standard samples. To order such work, it is necessary to provide the company with a detailed marking drawing indicating the type designations of the holes, their diameter and depth.
| Confirmat (europrop) |
| Additive for hinges |
The perfect fit is possible!
Our company carries out professional chipboard additives on high-precision machines, so we guarantee an ideal additive for any furniture. The company’s specialists scrupulously monitor the process, minimizing the possibility of an error of even one or two tenths of a millimeter. Unconditional quality, speed and reasonable prices are the main three pillars on which the work of the Nevsky Furniture Corporation is based.
Installation of handles on furniture facades
Assembling furniture yourself is not difficult - this is what many consumers think when ordering a set. Despite the simplicity and clarity of the designs, many encounter difficulties in the process of installing fittings. Handles that require marking and drilling are especially difficult to install correctly. If you make a mistake in this process, the handles may subsequently interfere with the opening of drawers and adjacent cabinets.
Installing handles on facades involves using the following available tools:
There is a large selection of products, the most common of which are staple or rating models. They can be placed vertically, horizontally or combined. In general, fastening handles can be divided into two types: using a template and without a template.
Installing handles without a template step by step
1. First you need to draw a line where we will mark the distance from the edge. Place the façade on a flat surface.
We apply a tape measure.
We retreat 45-50 mm, depending on the facades.
2. Shifting the tape measure to the left, draw a straight line without lifting the pencil.
3. The next step is to mark the centers of the handle.
To do this, measure the distance between the holes in the handle itself.
The distance is measured strictly from center to center of the hole.
I got 128 mm.
There are generally accepted standards for central holes; the distance between them is always a multiple of 32 mm.
They are:
5. Pick up a calculator.
From the total width of the facade, subtract the distance between the handle holes and divide in half.
500mm - 128mm /2 =186 mm.
6. We measure 186 mm from each edge and get exact marks for drilling holes.
Let's check the result.
Before drilling, it is recommended to “punch” or pierce future holes with an awl, preventing the drill from slipping.
To simplify the installation process, a cardboard template will help, in which you should pre-drill holes for fastenings. Having correctly measured and made the markings, you will only need to adjust the template to the facades of the set.
Chipboard, laminated chipboard additive
This service is necessary in several cases:
- Assembling the product using standard fasteners. Blind or through holes are drilled into the parts.
- Installation of furniture fittings and mechanisms. The mounting holes are drilled and tapped.
The chipboard and laminated chipboard additive itself comes in two types:
- Typical additive.
Produced according to sketches of the entire product. Usually all drawings are provided by the customer.
- Individual additive.
In this case, diagrams are provided for individual parts with more detailed markings and symbols.
If you do not have the necessary drawings or simply find it difficult to draw up specific diagrams, we advise you to contact the Raspilen company. Our specialists will help you draw up the necessary sketches, give some professional advice, and also solve other problems related to the addition of chipboard and laminated chipboard.
Installing handles on drawer fronts
In general, we have already discussed how to drill holes for furniture handles in our publications. But furniture handles in drawers are a topic that I simply cannot ignore. For it is the variety of technologies for installing furniture handles that shows the degree of sophistication, as well as the perversity of the imagination of some of our colleagues in the furniture business.
For example, the peculiarity of screwing a furniture handle to the front of a drawer is that if you want the bolt to pass through the front wall of the drawer and the front, then its length should be about 40mm. But the problem is that the handles come with shorter bolts. Personally, I just bought long bolts and calmly screwed the handles to the fronts of the drawers. I advise you to do the same.
But in production there are not always long bolts. So what should a furniture maker do? After all, running to the store for bolts is not his job. And if the supplier has not provided the production with bolts, and the order must be submitted urgently. So what should we do then? This is where the “perversions” begin. They make a recess in the facade, grind off the bolts, begin to adjust everything, and so on. In general, there are a lot of problems, and the supplier is to blame for everything. And it’s good if the supplier is as much a forced bird as the collector himself.
Sequential stages and sizes for additive
The additive scheme consists of several successive stages. First you need to do some preparation. The working surface must be flat and free of dirt. You can place a rubber sheet, stretch film, or polyethylene foam under the door. To prevent the facade from changing position, you can use clamps. Before applying the additive, you should take care of safety precautions. It is important to wear protective gloves and goggles.
Marking
Next comes the marking. This is an important event that determines the accuracy of installation and functionality of the door. You can take a ready-made drawing of the door for the hinges or independently calculate the position of the fittings.
If you calculate the dimensions for the additive yourself, you need to rely on several rules. So you need to retreat 1.1-1.2 cm from the edge. This is an important accuracy criterion that must be observed. The first and last fasteners should be located at a distance of 7-15 cm from the sides of the doors. The number of hinges is determined by the dimensions of the facade.
Installation
After marking is completed, they proceed to drilling. It is prohibited to use high speeds when performing manipulations. The optimal amount is 1500 rpm. Otherwise, the material will begin to burn and the cutter will become dull. If a hand drill is used, the movements should be smooth and of small amplitude. This will help improve sampling efficiency.
The depth of the hole can only be controlled manually. For this reason, you need to periodically stop the drilling process to measure the depth. The optimal depth is on average 1.2 cm.
Then they move on to the simplest stage - fixing the loops. The fastener is inserted into the prepared hole. Then the bowl is leveled using a square. Places for fastening are marked with a marker. Fixation is carried out with two self-tapping screws. It is necessary to perform core punching first.
If there are minor inaccuracies, you should not pay attention to them. The permissible error is up to 1 mm.
If you have experience with additives, you can screw on the fasteners without preliminary marking. An experienced craftsman can use a square for work.
This primitive, simple additive can be done with your own hands in a quiet home environment. Mechanized work requires special equipment and skills to work with professional tools. You can make a special machine for additives yourself or purchase a cheap vertical type option. Working with such equipment will reduce time and labor costs. It will be possible to perform the additive faster and better.
Furniture handles for the kitchen - everything you need to know about them
We get: 600-128 = 472/2 = 236 mm. It is necessary to leave 236 mm on both sides to the center distances of the handle. At the bottom you can leave a distance equal to the width of the ruler, this is approximately 20 mm - 30 mm, depending on the type of square. To do this, you need to align the outer edge of the ruler flush with the horizontal edge of the facade.
When placing furniture handles vertically in the kitchen, you can also use the width of the ruler. Place the outer edge of the ruler flush with the vertical edge of the façade. In this case, you can immediately use a ruler to measure the distance from the horizontal edge of the facade, for example, 20 mm. If you install handle rails vertically on kitchen facades, consider the distance from the horizontal edge of the facade to the edge of the handle, and not to the first mounting hole, as with the handle bracket.
horizontal and vertical installation of handles
Handle Installation Tool
For a wooden kitchen facade or MDF facade, use sharp step or core drills with a diameter of 4 mm or 5 mm. A drill with a diameter of 5 mm is used in the case when the shape of the handle during installation can block the hole, this gives more accurate positioning of the handle, the bolt can be slightly shifted in the hole. But there are forms of handles that do not cover the hole; in this case, it is better to use a 4 mm or 3.5 mm diameter.
If the hole in the facade for attaching the handle is quite deep that it is impossible to tighten the handle, pour sawdust into this hole so that the furniture handle can be tightened.
To make holes in glass at home, use special diamond-coated drills. You can also make holes in the glass using molten tin, this will help prevent accidental cracks from appearing on the glass. This method requires tin used for soldering and sand. Markings are made on the glass and sand is poured. Make a funnel of the required diameter in the sand and pour molten tin into this funnel. After a few seconds, when the solder has cooled, it can be removed along with the sand and glass tube.
Also, do not forget that when installing handles on glass facades , it is necessary to install an additional washer on the bolt side. The washer will protect the glass from cracking and prevent the fastening from becoming loose.
Calculation, production and assembly of drawers
Ill.1. Options for placing handles on cabinets with different heights of facades
I think you will agree that a non-standard approach will look no worse than a traditional one. Apparently, any of the presented methods has a right to exist. - A matter of taste. But we also need to take into account the height of the cabinets in other cabinets. After all, the whole kitchen should look harmonious. The only thing is clear: only when the fronts of the cabinets on different cabinets are of unequal height, the handles in the middle - there are no options.
There is only one general conclusion . The option of arranging handles on floor kitchen cabinets can be successful not only “in the middle”. And when designing a kitchen, you need to try both, and not blindly follow existing stereotypes. The unequivocal opinion of furniture makers on this matter – “in the middle of the facade” – can be explained simply: it’s easier for them, less labor intensive.
I used a non-standard method in my kitchen. And I decided to place the handles at equal distances from each other. At the same time, the set of drawers on different cabinets is the same.
Actually, this “non-standard” approach was born at the design development stage.
Ill.2. Floor cabinet handles with non-standard arrangement
Types of additives and their characteristics
The main difference between one drill and another is the type and complexity of the work performed. So, if the client is ready to independently provide his own plan for the placement of all points, this will be an individual addition, and if the holes are made according to a standard pattern, then such drilling will be considered standard.
- When the customer specifies the locations and diameter of the holes that he needs, this work is called individual and involves clarifying several nuances, namely: the type of holes, depth and size.
- In the production of ready-made cabinet furniture from chipboard and laminated chipboard sheets, standard drilling is more typical, when it is necessary to receive only a general drawing of the product from the client. The cost of such work is less, but the first option has its undeniable advantage: an individual additive allows you to implement much more daring design solutions in your work.
Furniture addition
Nowadays, many people make furniture to order, because it is much more practical than purchasing ready-made options in regular stores.
High-quality furniture additive
Custom-made furniture is assembled the way you want it to be, so everything turns out at the proper level. But it is important that the addition of the furniture is correctly designed so that no problems arise with further assembly. This is an excellent solution for those who prefer practicality and efficiency in everything.
Furniture addition
Need for use
To begin with, it is worth telling what a furniture additive is and why it is necessary to use it. This is a process during which basic holes are drilled into finished furniture so that standard fasteners can later be installed in them. This makes the assembly process as easy as possible in the future, and people do not have problems with this process. Therefore, it is important that everything is carried out exactly according to all the characteristics of standard furniture, and that everything turns out at the highest level.
We are pleased to offer our services in this process, which are in particular demand. Because our specialists are professionals who know a lot about what they do and can provide excellent results. The most important thing is that the efficiency of work has been tested over a long period of continuous work, therefore, every person is interested in cooperating with us. We find an individual approach to each project, so everything turns out to be of high quality, practical and very convenient. Our clients are satisfied, and we are glad that we can cater to your individual wishes.
High quality and reliable
Our furniture addition is a professional service that is convenient and practical to use. We are always happy to offer optimal opportunities and excellent results to ensure that every person is satisfied. At the same time, our company is a specialist with extensive experience; we have been working with orders of this type for a long period of time and always provide optimal results. We use modern materials, excellent equipment, all this helps to speed up the process of our work and at the same time achieve durability and strength. Our work is:
- Practicality;
- Efficiency;
- Durability of the result.
Entrusting the work to specialists of this type is an excellent solution for anyone who prefers reliability and practicality. You should not refuse this opportunity, because our work is also distinguished by its affordable price range. Usually, people think that using this type of service is too expensive, so they try to purchase ready-made furniture. Together with us, you can save money and arrange everything in the most attractive way, easily and simply!
Additive
- Furniture manufacture
- Cutting laminated chipboard
- Measurer services
- Design services
- Assembly services
- Delivery
- MDF facades
- Chipboard colors
- Egger chipboard
- Chipboard edges
- Milling of chipboard, laminated chipboard
- Additive
Advantages
Performs additives on furniture parts. What is this?
During the corresponding technological procedure, blind as well as through holes are drilled in furniture parts. This process is required in order to further assemble the structures with the installation of fasteners.
The process involves drilling or tapping mounting holes, which are subsequently used to install fittings and various mechanisms.
How to place an order for an additive?
- Write by email or
- Submit your application online
- Its typical variant is when the process is carried out on the basis of sketches of products provided by the client;
- Individual additive - when the customer’s drawings are used for each part, the marking dimensions are applied, and all the necessary holes are marked.
Production address: St. Petersburg, st. Kirishskaya, 2a Opening hours: 10-18 (weekdays, no lunch)
Furniture additive: types
There are 2 types of additive services:
A typical additive is used for the manufacture of cabinet furniture frames. To order the appropriate service, you will only need a dimensional and assembly sketch with notes on the desired types of fasteners and their location.
The second type of additive is possible only if the client has a sketch for each part being added with markings indicating the type of hole, its diameter, and depth.
Why is an additive needed?
Any modern furniture requires the presence of fasteners and fittings. Both elements require additives. Without it, it will simply be impossible to assemble furniture. But the procedure must be performed at a high-quality level, for which special machines are used that make holes with an accuracy of 0.1 mm. Poor quality of the additive will lead to sad results - you won’t be able to assemble beautiful furniture. Petrostil LLC, having the necessary equipment and a staff of qualified craftsmen, guarantees that the additive will be performed at the highest quality level.
Limited Liability Company Petrostil LLC 195299, St. Petersburg, Kirishskaya st., 2-a
vote
Article rating
The New View furniture factory has been providing services in Krasnodar for more than four years:
- Cutting laminated chipboard. (we will bring it to our workshop and cut the chipboard without chips from any base in Krasnodar)
- Edged chipboard. (we will finish with high-quality edges using any of your or our edges)
- Additive for laminated chipboard (we add kitchens, cabinets, any cabinet furniture)
- Furniture assembly. (we can assemble Kitchens, Wardrobes, Sliding Doors, Cabinet Furniture)
Our ten advantages:
- We draw up cutting maps (you only give us the dimensions of the parts indicating where to cut)
- We do the detailing from your drawing (we only need a drawing with the general dimensions of the furniture from you)
- We assemble Kitchens (with your or our fittings and facades)
- We assemble compartment doors (all components are yours or ours)
- Delivery of material to the workshop (we can purchase chipboard, edges, fittings, etc.)
- Loading and Unloading in the workshop (takes place in a warm and covered room)
- Production takes 2-3 days on average (we don’t charge for urgency)
- High-quality cutting and edging (always sharpened saws, chipboard without chips)
- Eco leather sticker, chipboard gluing, production and edging of any radii
- Reasonable prices for all types of work
