Today it is difficult to imagine a modern kitchen without a modern sink to match it. Now it not only serves as a place for washing food, dishes or other kitchen utensils. An important role is played by its placement relative to other equipment and furniture, issues of design and ergonomics. Therefore, when choosing a kitchen sink, in addition to its aesthetic appearance, you should first of all pay attention to its functionality and ease of use.
In order for the sink to be comfortable to use, it is necessary to install it both taking into account the manufacturers’ recommendations and taking into account a number of tips from practicing installers and designers.
There are some general installation rules for any kitchen equipment, as well as some specific ones that will only suit certain groups of products. Therefore, we will first consider general recommendations for the placement of kitchen sinks, then their main installation types, and then the installation nuances for each of them.
Types of products and installation methods
There are several options for installing a sink into a countertop. The choice of installation method depends on the design features of the sink. The most common types of sinks are:
| Types of products | Advantages | Flaws | Installation principle |
| Invoices | Budget price category. Easy to install. | Small material thickness. Formation of a gap between the countertop and the sink. | The sink is placed on a free-standing cabinet so that it becomes an extension of the worktop in the kitchen. |
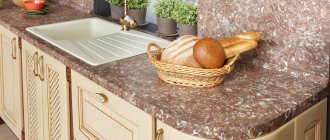
| Mortise | Ease of use. Practicality and durability. | High price. | Inserting the sink into the countertop, into a specially made hole, provides for fastening with clamps and brackets to the inside of the module. |
| Under-desk | Aesthetic appearance. Noise insulation. Durability due to reliable sealing of joints. | Inaccessible due to high cost. Not suitable for all countertop materials. | The sinks are mounted in a cut-out hole, but are fixed below the countertop, forming a single whole with it. |
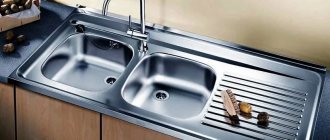
Overhead two-section sink Source vseme.ru
Kitchen sinks are traditionally made from stainless or enameled steel, as well as from artificial stone and composite materials, which are resistant to external influences and sudden temperature changes.
Initial data
There is a lower kitchen cabinet-table. Its depth is 405 mm. It is covered with a tabletop 600 mm wide. The task is to build into the countertops a round sink with a bowl diameter of 400 mm and a total size of 490 mm.
Difficulties
When assembling the lower cabinet, upper tension strips 8 cm wide were used (see picture). The distance between them is 230 mm and it is clear that the sink does not fit into this distance. Therefore, the closet had to be rebuilt somewhat.
After the rebuild, the top rear bar was sawed off and moved down. The strength of the structure was not affected, and space for installing a sink was freed up.
First closet remodel
The cabinet front brace was also rotated and corners were added to attach the countertop.
Second closet remodel
How to install a countertop sink
The method of installing overhead products has its own peculiarities. The sink is mounted on a separate kitchen module so that its upper part is completely covered. This work is usually not difficult even for beginners. The sink is fixed using L-shaped elements with oblique slots.
Before installing an overhead stainless steel sink on the cabinet, you need to complete the following preparations:
- Purchase at least 4-5 parts for fastening, as well as 15 mm self-tapping screws.
- Connect the mixer in advance.
Instructions for installing an overhead sink:
- Take the prepared fasteners. Attach them to the inner surface of the cabinet. Place marks.
- Focusing on the markings, tighten the screws. They should be located 5 mm above the markings.
Installation on a wooden frame Source remontkit.ru
Treat the end part of the cabinet with sealant. This will make the sink mounting location more reliable and protect it from moisture and dirt.
Place the product on the screws. Before attaching a stainless steel sink to the countertop, you need to check that it fits as tightly as possible to the cabinet.
Fasten the fasteners firmly. If excess sealant appears, clean it from the cabinet. Connect the water supply.
See also: Companies specializing in decorative forms and engineering communications.
Wash basin
All types of ceramics and polymer concrete are quite fragile, which, willy-nilly, has to be compensated for by the significant thickness of the bowl walls. The practical consequence is solid weight: when you turn the tap or mixer handle, the sink does not move and does not come off the edges of the cabinet. That is why the standard mount for the washbasin is often not included in the factory configuration.
Sealant
The easiest way to prevent a sink from moving horizontally is to seal it with silicone sealant; It also seals the seam between the washbasin and the back wall.
A couple of tips regarding choosing a sealant:
- It is worth purchasing not a universal one, but a plumbing one. As a rule, this type of sealant contains antibacterial additives that prevent the development of fungus and the appearance of black spots on the seam.
- It is better not to buy the cheapest types of silicone sealants from little-known manufacturers. In our case, a high degree of adhesion to a smooth surface is important. It is adhesion that is primarily affected by price: cheap sealants adhere to difficult surfaces much worse than expensive ones.
High-quality sanitary sealant from Ceresit
Nageli
Most washbasins are equipped with mounting grooves designed for fixing to brackets. As a rule, these grooves fit exactly at the ends of the side walls of the cabinet. In order to prevent horizontal movement of the sink, it is enough to provide the cabinet with several protrusions in the appropriate places.
How can I do that?
- Wooden dowels are seated with glue in pre-marked and drilled holes. A nuance: it is better to make dowels of variable diameter, thinner at the bottom and thicker at the top. The instructions are due to the fact that the thickness of the laminated chipboard in the walls of a standard cabinet is only 16 millimeters, and a thick dowel with significant lateral force can easily be torn out along with the meat.
- Improvised dowels can be made by screwing screws into the ends of the walls (with pre-drilling, of course). Previously, two plumbing gaskets for screw mixer taps are put on each of them; If it is necessary to reduce the outer diameter, the rubber is trimmed with a sharp knife.
For such fastening, the grooves in the washbasin must be at the ends of the walls
Mounting a mortise sink
Inserting a sink into a countertop involves a number of successive steps.
Preparing materials and tools
Before proceeding with the installation of the sink, check the complete set of the sanitary ware. The kit must contain all the necessary fasteners and seals. You should have on hand: silicone sealant, tape measure, level, Phillips screwdriver, screwdriver, electric jigsaw, drill.
Carrying out markings
The method of applying markings on the tabletop depends on whether the kit includes a cardboard template. Its presence greatly simplifies the work. The outer and inner contours of the sink are cut out using the template. Then it is placed on the tabletop, secured with tape and outlined with a pencil.
The template is applied to the upper surface of the tabletop Source remontu.com.ua
If the template is not included, marking the hole is a little more difficult. First, trace the edges of the sink, positioning the sink so that its bowl faces down. Then the sink is turned over and placed on top of the countertop in the same way as it will be installed when finished. Secure with tape. Align and trace the outline. The correct installation of the product and the ease of its operation depend on how accurately the markings are made. A cutting line is drawn inside the contour.
To make markings, it is better to use a pencil Source berkem.ru
Cutting a hole
Before cutting a hole for the sink in the countertop, take an electric drill and make 2-3 holes one after another on the cutting line to create a single gap. Its length should be such that an electric jigsaw can easily fit inside. With its help, slowly and very carefully cut out a hole.
If the jigsaw deviates a little from the marking line, it’s okay. A discrepancy of 2-3 mm is allowed. The cut site is cleaned of dust and the product is “tried on”. It should fit freely into the hole, but not cling or “walk around”. If the shell does not fit completely into the hole, it is slightly widened using a jigsaw.
The tabletop should not be turned over from the front side during cutting, otherwise chips may form. Source stopdacha.ru
Video description
Watch the video on how to embed a stainless steel sink into a countertop:
Connecting communications
At the final stage, communications, cold and hot water are supplied to the plumbing product. First, use a fixing screw and a rubber seal to secure the tap. Experienced craftsmen assemble the faucet before cutting out the countertop for the sink, connect hoses to it and fix it to the bowl.
Water hoses are pulled to the water supply system. Check the reliability of all connections. If necessary, use fum tape. Start the siphon and connect it to the drain corrugation.
After the communications are connected, it is important to check whether there will be a leak Source rudmar.ru
Professional advice on installing sinks: what to look for
Experienced installers share the following secrets of their work:
- When installing a mortise sink yourself, you need to check the dimensions of the hole several times. It should not be too large, otherwise the sink will “walk” in the groove and the fastenings will not provide the required strength.
- When installing a stainless steel sink, do not overtighten the screws. This may cause damage.
- Instead of the seals that come with the sink, you can use sealant. You shouldn't save it. It’s easier to carefully remove excess than to deal with leaks later.
- When using a screwdriver, it is important to be careful not to bend the hardware. If you don’t have much experience with this tool, you should give preference to a Phillips screwdriver.
Silicone sealant should be checked for hardening speed before use. Source mtdata.ru
Connection to water supply
To connect to the central water supply, special flexible hoses are used. It is better to give preference to reinforced ones, since they are able to last a longer period of time without changing their characteristics or failing.
Connection occurs using flexible hoses.
It is important to calculate their length so that it is enough from the place where the tap is fixed to the point of connection with the central pipeline. The hoses will be secured using nuts. They must be supplemented with washers with a seal to prevent leakage.
The hoses are secured with nuts.
When this method of connecting to a water supply is carried out, when tightening the nut, try to feel the moment when it is necessary to stop applying force in order to prevent damage to the thread. In addition, it is important not to overtighten the nut so that if the connection begins to leak, there will be a thread left to tighten it more tightly and eliminate the leak.
Installation features depending on the shape and material of the sink
The insertion process may have its own nuances depending on the selected sink material and its shape.
Installing a corner sink
An important point when installing such a product is cutting out a right angle. In order for an electric jigsaw to easily pass through the corners of the tabletop, several holes are first made in them with a drill, one after another, and they are combined.
You should also pay attention to the fact that the corners of the sink and the connection lines between the inner and outer corners of the cabinet coincide.
Installing a square sink
Installing a sink into a countertop begins with drawing a line that runs parallel to the edge of the countertop. Then make an indent to the width of the sink and draw a second line. In a similar way, two perpendiculars are measured and laid.
Mark the intersection point of the segments that connect opposite angles. The siphon is located in this place.
Square shaped sink Source userapi.com
Installing a stone sink
Sinks made from natural stone, such as granite, do not have faucet or drain holes. The first can be mounted separately to a tabletop or adjacent wall. And it is impossible to do without a siphon.
Carefully making such a hole in a natural stone sink yourself, without sufficient knowledge and experience, is a very difficult task. For this you need an electric drill with diamond bits. For this reason, it is better not to install expensive granite sinks yourself, but to trust specialists.
Exploitation horror stories
The two most common misconceptions during operation:
I'll get an electric shock when the disposer is running
accidentally sucks your hand into the hole and tears off your fingers
What can you say about this? Firstly, as mentioned above, all electrical connections must be made through an RCD.
You are not afraid when you wash your hands or dishes under hot water from a running water heater. The same applies to wall-mounted boilers.
Well, the start button has no electrics at all. Everything runs on air pressure.
Regarding injuries. Let's explain it on our fingers
Mistake #25 Make no mistake, the disposer does not work like a garden shredder for grass and plants.
There are no sharp blades inside it. There is a smooth rotating disk with cams on the edges.
When lowering leftover food, the cams throw them onto a stationary perforated ring around the perimeter (like a grater). It turns everything into a homogeneous mush.
That is, placing your fingers in the center of the hole in the shell will not cause them to be cut off. The distance to the rotating parts is chosen with a margin (about 20cm).
To reach them, you will need to stick your entire palm inside and somehow manage to bend it.
If you still have a psychological barrier, then there are special pushers for safe work with the disposer. They can come as a set or be purchased separately.
In general, to summarize all of the above, if your budget allows you to purchase a household waste shredder (today prices for good models start at 20,000 rubles), buy it without hesitation.
Proper installation and following our simple tips will forever rid you of a bunch of bad-smelling garbage in the kitchen. Plus you will never have such awkward situations with the opposite sex
https://youtube.com/watch?v=L_0b356dfNw%3F
Video description
Watch the video on how to embed a stone sink into a countertop:
We install ceramic products
Ceramic sinks have the following feature: one part of the sink is overhead, the other is cut into the countertop. Such models are fastened using a combined method. To ensure the reliability of the structure, both sealant and mechanical fixing devices are used.
In addition, to secure the sink, load-bearing structures are made from wooden blocks. You can do this yourself. Wood should be treated with antiseptic agents.
Products made of ceramics and natural stone are very heavy, so when installing them, durable countertops and cabinets are required Source www.build2last.ru


