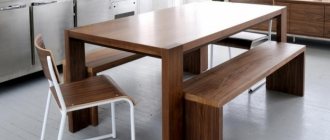
To make your kitchen truly unique and unique, you can make your own countertop. Nowadays, stores offer many ready-made countertops for the dining table, but they are characterized by high cost and often low quality. A product assembled with your own hands will be distinguished by its reliability, originality, and pleasant appearance. You can make a countertop using concrete, epoxy resin, wood, porcelain stoneware, tiles, natural or artificial stone.
An easy way to create a countertop
A countertop made of chipboard is a less labor-intensive option for making a countertop compared to other materials.
Today's market provides a large selection of particle boards. It is possible to choose a material suitable for the kitchen set.
You need to stock up on tools:
- to work with self-tapping screws you need a screwdriver;
- for working with chipboard and plastic sheets - a grinder and a jigsaw;
- hacksaw;
- electric drill;
- to check the evenness of the surface - a level;
- surface grinding machine;
- construction tape and ruler;
- mixer;
- set of spatulas;
- brush;
- construction knife.
Materials
Among the most common materials for making a kitchen table are the following options:
- Chipboard
- laminated chipboard
- Solid wood
- Wooden beam
- Boards
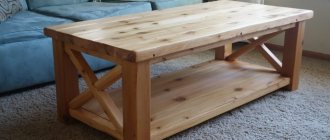
Of course, the most ideal, but expensive material for a table is oak, which is incredibly strong and wear-resistant. For those new to carpentry, pine is the best wood to use as it is easy to work with. A detailed drawing of a kitchen table is needed if the design of the table is complex.
Step-by-step making of a tabletop with your own hands
Measurements are taken and the estimated dimensions of the future countertop are recorded.
Sheets of chipboard and plastic are purchased, which will be needed to decorate the finished product, which will give it a finished look. Chipboard thickness is at least 2 cm.
Using a grinder or an electric jigsaw, blanks for the table top are made according to size. The ends of the prepared sheets are treated with sealant.
At the base of the tabletop there will be 2 sheets of chipboard, which are connected to each other with self-tapping screws. Plastic sheets are cut slightly larger by 3 mm than the size of the chipboard base.
The plastic is placed using epoxy glue onto the prepared chipboard base.
It is necessary to wait time for the plastic to dry completely. Now the extra mm are cut off with a knife. The ends are decorated with strips of plastic. The product for your kitchen is completely ready.
Natural stone – durability and status
A stone countertop is good in all respects, except for the high price - it is beautiful, solid, stylish, and fits into a classic or modern design. This option for finishing a kitchen is recommended by technologists and designers of leading brands in Europe and Russia. A stone countertop will last for tens or even hundreds of years. But this could be the second disadvantage after price if the owners are active and dynamic people who are prone to frequent changes of place of residence and interior. Changing a kitchen countertop made of stone or transporting it with you will be troublesome and costly.
If the financial side of the kitchen design issue is not important to you, check out the characteristics and features of the three most popular types of natural stone that are suitable for making kitchen countertops.
Marble
It is difficult to resist the cold beauty of this material, especially the white varieties. However, if you decide to install such a countertop in your kitchen, be prepared for the fact that you will constantly have to protect it from contact with pigmenting products and chemicals. And if the marble countertop gets dirty, you need to invest in a special cleaning agent.
Marble is beautiful, but requires additional care Source of myrrhstone33
This is because marble is a porous and loose stone; it does not tolerate careless and rough handling. To ensure that the marble coating suffers less, the surface must be coated with a special protective compound every 2 weeks.
Granite
Kitchen countertops made of granite are highly durable, reliable and stable, as this stone is dense and fine-grained. It will be difficult to scratch it with a knife, and it will not suffer from contact with hot dishes. The main disadvantage is the heavy weight; the installation of a stone countertop for the kitchen will have to be doubly carefully thought out, calculated and coordinated with the location of drawers and household appliances underneath.
Light granite countertop Source dreamstone
Onyx
Like marble, onyx easily absorbs dirt and grease. But it is not recommended to use aggressive cleaning agents on this material - you can ruin the beauty and elegance of natural stone.
Onyx countertop with backlight Source clerys
Artificial stone - practicality and reliability
A countertop made of artificial stone is an alternative for those who, for some reason, are forced to abandon the use of natural material in the kitchen. But at the same time I would like to get similar external and operational characteristics. It is not entirely true to believe that synthetic options are cheaper than organic material.
The square meter of artificial material itself is often more expensive than natural material. But the production of countertops made of artificial stone ultimately costs less than products made of natural stone. As a result of processing and polishing real granite, marble or onyx, the finished countertop acquires a higher value. Whereas acrylic stone and composite quartz require significantly less processing costs.
Acrylic stone - aesthetics
Acrylic stone is made on the basis of acrylic resins; it must contain at least 50% mineral chips, but not more than 65%. As a result of the use of complex technologies, a homogeneous, fairly durable material is obtained, visually almost indistinguishable from natural stone. A layer of stone mass is applied to a frame made of chipboard or plywood, resulting in artificial stone cladding. This manufacturing technology allows you to create slabs of any configuration. This is a big plus for lovers of non-standard design solutions.
White countertop made of artificial acrylic stone Source top-acrylic
But! The thickness of the chipboard cladding does not improve or degrade the performance characteristics of the countertop. Artificial stone does not absorb odors, does not mold, does not rot, and repels moisture. But it scratches easily and can melt. To eliminate defects, the tabletop should be sanded. And in this case, thick skin will be beneficial - it can be sanded many times.
Main advantages of acrylic kitchen countertop:
- Hygienic – does not absorb moisture, dirt and does not form fungus;
- Environmental friendliness - the material does not release toxins upon contact with moisture or exposure to high temperatures (provided that the manufacturer did not use formaldehyde resins);
- Easy to process - you can make rounded edges and ends;
- A huge selection of colors, textures and patterns - artificial acrylic stone is easy to paint and tint; today countertops are available in more than 600 different shades, matte, semi-gloss or glossy.
The most significant disadvantage of acrylate is its tendency to scratch the surface. Also, you should not place dishes that have just been removed from the stove on an acrylic countertop - the surface may melt and become deformed.
Working on a concrete countertop
The process of making a concrete countertop, of course, takes longer and is a more difficult task. But the result is worth it.
In the photo you can see countertops made from concrete with your own hands. The product will serve for many years.
Required material:
- wide board;
- plywood sheet;
- to create the formwork, it is necessary to prepare bars 6 cm high;
- sealant;
- medium grain sand;
- small crushed stone;
- aluminum profile;
- wire, choose a section of 8 mm;
- drying oil solution;
- construction adhesive;
- fine-grained discs and vice versa coarse-grained;
- 2 types of spatula: serrated and regular;
- mixer;
- Master OK.
- with a power of more than 1 kW grinding machine;
- building level;
- for ease of use: screwdriver and grinder.
Instructions on how to make a countertop correctly
The expected size of the tabletop is drawn on a sheet of chipboard.
The sides are installed along the drawn contours. A sealant is applied to the places where they are attached to the chipboard. This eliminates free spaces for concrete to flow into the cracks.
The entire internal part of the formwork is lubricated with drying oil so that the concrete does not stick to its structure.
It is necessary to prepare a reinforced wire grid. Its cells will be approximately 50x50 mm. in size it should be 15 mm away from the walls of the formwork.
For concrete mortar it is necessary to have: sand: cement: fine crushed stone in a ratio of 2:1:2, to give concrete strength - a plasticizer. It is used in doses strictly according to instructions.
To give color to a concrete structure, you need a dye - 200 g. per 10 kg of concrete solution. Acid dyes are recommended. They do not harm human health and retain the brightness of colors for a long period of time.
The solution should resemble thick sour cream. The formwork is half filled with it.
A reinforced grid is laid on top. We distribute the remainder of the solution evenly throughout the formwork structure.
The surface of the poured solution is leveled. Everything is covered with a film on top to protect it from dust.
It is left in this state for 7 days until the concrete hardens completely. A grinder with a coarse-grain disc is used to process the surface of the frozen structure.
You can achieve a perfectly flat surface using a fine grain disc. With polishing paste and a chamois pad, all work is completed.
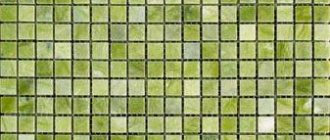
A concrete structure can be decorated with tiles. From which we can conclude that this is another opportunity to create a beautiful tabletop.
Curved table tops made of epoxy resin
You can make beautiful countertops with your own hands from epoxy and liquid resin. The preparation of resin plays a big role in the work. Different manufacturers recommend different proportions of the constituent elements, so it is important to read the instructions.
The mixture is prepared in steps as described by the manufacturer. The mixture should look like a homogeneous mass. This factor is important because it affects the solidification process of the material in a qualitative sense.
The prepared mixture is left for some time to thicken further. After that it can be used.
Work algorithm:
The mixture is used in different states, and the result will be different:
- The liquid mixture is used for shaped countertops.
- “Liquid honey” - perfectly forms the shape of a tabletop in the form of a drop.
- “Thick honey” - such thickness is not suitable for pouring, it is used as glue.
- The thick mixture is not used at all in the work or is left to thicken even more until it becomes rubber.
- Thick as rubber. Outwardly it resembles plasticine. This is how they work with the material.
The solid state indicates the finished structure of the countertop.
Nuances at work:
- The base for pouring the resin is used in a dry state.
- If the base is made of a material that has the ability to absorb, then it must be treated with resin, covered with paint on top, and then completely filled with resin.
- Bubbles from the surface of the resin are removed after 15 minutes of pouring.
- After 48 hours, the surface is ground and polished.
- For complete hardening, you need to wait a week.
There are quite a lot of materials that can be used to make the best handmade countertop ideas come true.
Kitchen table restoration
There are many methods that can be used to restore this piece of furniture. If you don't want to buy a new table, then try breathing new life into old furniture.
- Traditional coloring.
- Applying decorative tiles to the countertop. This will make it as wear-resistant as possible; you can place hot dishes on such a table.
- Updating the table using decoupage technique.
- Pasting with a special self-adhesive film.

