Home \ Accessories \ Accessories for glass... \ shelves \ Russia
Order a sample
* Your personal data is used solely to communicate with you, without transfer to third parties.
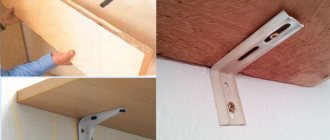
| Bracket 3.01 Used to attach shelves to the wall. Wall material: concrete, solid brick, natural stone. Maximum load per pair is 20 kg. Shelf thickness 6...8 mm. Recommended shelf width up to 200 mm. Brass. Price 100 rub. Version: 01 - nickel 04 - matte, nickel |
| Bracket 3.02, S= (8)10 mm Used to attach shelves to the wall. Wall material: concrete, solid brick, natural stone. Maximum load per pair is 10 kg. Shelf thickness: - for (01) and (04) - 6..8 mm or 8...10mm - for (02) - 6...8 mm Recommended shelf width up to 200 mm. Price 160 rub. Version: 01 - nickel 02 - gold 04 - matte, nickel Material - Brass |
| Bracket 3.03; S=10(12) mm Used to attach shelves to the wall. Wall material: concrete, solid brick, natural stone. Maximum load per pair is 20 kg. Shelf thickness: - for version (01) - 8...10 (10...12) mm - for version (04) - 8...10 mm Recommended shelf width up to 250 mm. Brass. Price 190 rub. Version: 01 - nickel, 04 - matte, nickel |
| Bracket 3.06 Used to attach shelves to the wall. Wall material: concrete, solid brick, natural stone. Maximum load per pair is 10 kg. Shelf thickness 4…6 mm. Recommended shelf width up to 150 mm. Brass. Options: 01 - silver, 02 - gold, 04 - matte, nickel Price 180 rub. |
| Bracket 3.07.ChM Used to attach shelves to the wall. Wall material: concrete, solid brick, natural stone. Maximum load per pair is 10 kg. Shelf thickness 4….6 mm. Recommended shelf width up to 150 mm. Duralumin. Price 180 rub. |
| Bracket 3.08. L=30 Used to attach shelves to the wall. Wall material: concrete, solid brick, natural stone. Maximum load per pair is 10 kg. Shelf thickness 6….8 mm. Recommended shelf width up to 200 mm. Duralumin. Version: SM - silver moire, FM - black moire. Price 200 rub. |
| Bracket 3.08. L=100 Used to attach shelves to the wall. Wall material: concrete, solid brick, natural stone. Maximum load per pair is 10 kg. Shelf thickness 6….8 mm. Recommended shelf width up to 200 mm. Duralumin. Version: SM - silver moire, FM - black moire. Price 300 rub. |
| Bracket 3.08. L=600 (800) mm Used to attach shelves to the wall. Wall material: concrete, solid brick, natural stone. Maximum load per pair is 10 kg. Shelf thickness 6….8 mm. Recommended shelf width up to 200 mm. Duralumin. Version: SM - silver moire, FM - black moire. L-600 mm - Price 500 rub. L-800 mm - Price 650 rub. |
| Bracket 3.09; L=24; S=8-10 mm Used to attach shelves to the wall. Wall material: concrete, solid brick, natural stone. Maximum load per pair is 15 kg. Shelf thickness 8….10 mm. Recommended shelf width up to 250 mm. Brass. Version: 01 - nickel, 04 - matte, nickel. Price 200 rub. |
| Bracket 3.09, L=48, S=8-10mm Used to attach shelves to the wall. Wall material: concrete, solid brick, natural stone. Maximum load per pair is 15 kg. Shelf thickness 8….10 mm. Recommended shelf width up to 250 mm. Brass. Version: 01 - nickel, 04 - matte, nickel. Price 415 rub. |
| Bracket 3.20 Used to attach shelves to the wall. Wall material: concrete, solid brick, natural stone. Maximum load per pair is 8 kg. Shelf thickness 6….8 mm. Recommended shelf width up to 200 mm. Brass. Version: 03 - nickel Price 120 rub. |
| Bracket 3.20, L=24 Used to attach shelves to the wall. Wall material: concrete, solid brick, natural stone. Maximum load per pair is 8 kg. Shelf thickness 6….8 mm. Recommended shelf width up to 200 mm. Brass. Version: 03 - nickel Price 210 rub. |
| Bracket 3.20, H=24 Used to attach shelves to the wall. Wall material: concrete, solid brick, natural stone. Maximum load per pair is 8 kg. Shelf thickness 6….8 mm. Recommended shelf width up to 200 mm. Brass. Version: 03 - nickel Price 210 rub. |
| Bracket 3.21, H=30, S=8-10mm Used to attach shelves to the wall. Wall material: concrete, solid brick, natural stone. Maximum load per pair is 15 kg. Shelf thickness 8….10 mm. Recommended shelf width up to 200 mm. Brass. Version: 01 - nickel, 04 - matte, nickel. Price 290 rub. |
| Bracket H22 (SK38) The bracket is designed for attaching shelves to the wall. The glass shelf is connected to the bracket using UV glass-to-metal glue. Wall material: concrete, solid brick, natural stone. The maximum load per pair is 6 kg, when using glue with a tensile strength of 23 N/mm2. Stainless steel Price 450 rub. |
| Bracket N30 (SK38) The bracket is designed for attaching shelves to the wall. The glass shelf is connected to the bracket using UV glass-to-metal glue. Wall material: concrete, solid brick, natural stone. The maximum load per pair is 10 kg, when using glue with a tensile strength of 23 N/mm2. Stainless steel Price 580 rub. |
| Bracket 3.10 Used to attach shelves to the wall. Wall material: concrete, solid brick, natural stone. Maximum load per pair is 20 kg. Shelf thickness 8….24 mm. Recommended shelf width up to 350 mm. Metal, plastic MX-matte chrome - Price 350 rub. Silver - Price 440 rub. 02-Gold- Price 480 rub. |
| Bracket 3.11 Used to attach shelves to the wall. Wall material: concrete, solid brick, natural stone. Maximum load per pair is 20 kg. Shelf thickness 8….34 mm. Recommended shelf width up to 400 mm. Metal, plastic MX-matte chrome - Price 790 rub. 01-chrome - Price 1070 rub. 02-gold- Price 1190 rub. |
| Bracket 3.13 Used to attach shelves to the wall. Wall material: concrete, solid brick, natural stone. Maximum load per pair is 20 kg. Shelf thickness 8…34 mm. Recommended shelf width up to 350 mm. Metal, plastic Price 395 rub. |
| Bracket 3.14 Used to attach shelves to the wall. Wall material: concrete, solid brick, natural stone. Maximum load per pair is 20 kg. Shelf thickness 8…19 mm. Recommended shelf width up to 350 mm. Metal, plastic Execution MT-metallic Price 290 rub. |
| Shelf support 6.01 The shelf holder is designed for attaching shelves to the wall, with the possibility of alignment in the horizontal plane within 2 mm. Wall material: concrete, solid brick, natural stone. - drywall. Brass, rubber ring. Brass, rubber ring Version : 03 - nickel Price 95 rub. |
| Fencing 9.01 Designed for installation on glass shelves. Shelf thickness - 4...6 mm. Shelf length - 500 mm. Shelf width - min 115 mm. Brass. Version: 03 - nickel, 04 - matte, nickel Price 520 rub. |
| Shelf support 911 Designed for installation on glass shelves. Shelf thickness - 4...12 mm. Execution: gold, chrome Price 200 rub. |
| Shelf support 912 Designed for installation on glass shelves. Shelf thickness - 4...12 mm. Version: chrome Price 200 rub. |
| Shelf support 913 Designed for installation on glass shelves. Shelf thickness - 4...12 mm. Finish: chrome, matte chrome Price 250 rub. |
| Shelf support 914 Designed for installation on glass shelves. Shelf thickness - 4...6 mm. Execution: chrome, gold Price 250 rub. |
Usually, installing glass shelves does not require great qualifications, but you need to know some rules and techniques. And if you decide to install it yourself, then below are some practical recommendations to help you. Having decided on the geometric dimensions of the shelf, it is worth choosing stylish limiters for it.
Where are glass products installed?
Glass products can be mounted in any room of the house. It can be in the bathroom, or in the bedroom above the dressing table. The most common mounting location is a full-length hallway mirror. In addition, some people prefer to decorate their home with all kinds of glass shelves that are mounted along the walls.
Glass shelf
Of course, large glass will be much more difficult to install than small glass, which can be easily attached with tape to the surface. Regardless of the size of the item and where you plan to install it, you must first prepare the selected surface for fastening: clean it of dirt and grease deposits. In some cases it should be leveled.
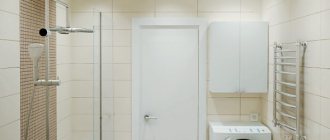
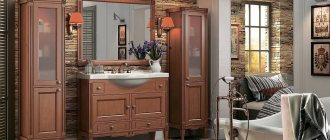
How to hang a bathroom cabinet on tiles?
The role of the bathroom in a modern apartment cannot be overestimated. In the morning we gain vigor and strength in it, and in the evening we relax, relieve stress and fatigue after a hard day. To fully enjoy the comfort of your bathroom, you need to carefully consider its interior.
You can’t do without a good, practical and high-quality cabinet, and a shelf for bathroom accessories wouldn’t hurt. But many apartment owners may have a question about how to hang a cabinet in the bathroom on tiles, because such work requires a special tool, and special fasteners for the cabinet are needed.
Today we will tell you how to hang a shelf on the wall in the bathroom so that it is reliable and beautiful.
Basic requirements for bathroom furniture
The bathroom has its own special microclimate, which is different from other rooms. High humidity, sharp temperature changes and lack of space have left their mark on interior items. Bathroom furniture must have the following characteristics:
- High resistance to moisture.
- Endurance to sudden temperature changes.
- Durability of the material.
- Compactness.
Important! Materials such as glass, plastic, metal, MDF, chipboard can be adapted to the conditions of the bathroom, and special types of cabinets will help cope with the lack of space.
Types of bathroom cabinets
The following types of furniture are suitable for a special room:
- Cabinet-pencil case. The rectangular shape and small width of the furniture fit perfectly into the interior of a small room.
- Corner cupboard. To save space in your room, make use of the corner space by installing a corner cabinet there.
- Hanging cabinet. If the floor space is occupied by household appliances (washing machine, plumbing fixtures), then you need to hang the cabinet in the bathroom on the wall in any convenient place.
Important! The hanging cabinet can be either corner or flat (in the form of a pencil case).
- Mirror cabinet. This unique piece of furniture saves space by combining two main pieces of furniture - a mirror and a cabinet. A universal piece of furniture can be a full-height pencil case, a corner or hanging option.
Bathroom furniture can be purchased in a store, ordered in a special workshop, or you can make it yourself. Next, we will tell you how to create a cabinet or shelf yourself.
Adhesive fastening method
For adhesive mounting, you can use either double-sided tape or glue. There is also a mechanical method of attaching glass to the wall, but we will return to this a little later.
Connecting the product to the surface using tape is the simplest method. However, with this type of fastening, use only double-sided tape. First you need to peel off one protective layer from it and secure the tape along the wall. Then you apply the glass to the wall, remove the top protective layer from the tape, releasing the adhesive side, and press the glass firmly.
Although this method is simple, it also has a number of disadvantages. Often the object being strengthened is placed unevenly, and it will be very difficult to tear it off the surface and reattach it there. If this is a corridor, then you risk tearing off the wallpaper along with it; the sight will not be the best. To prevent this from happening, after gluing the tape to the intended fastening location, apply a thin layer of sealant along it. But when working with it, remember: it should not go outside. By applying a sealant, you can take into account possible gaps before securing the glass object and fix it straight and level.
If you want to use glue when attaching glass with your own hands, then we advise you to choose a silicone-based glue of the “liquid nails” type. The algorithm for working with glue will be as follows:
- Apply glue to the entire glass product in a thin layer around the perimeter. Then, having assessed all the risks, eliminating the possibility of a crooked arrangement, we sharply press the surface against the wall;
Adhesive fastening method
- It is necessary for the glass to dry to the surface. To do this, it is advisable to press something weighty against it for some time (perhaps even up to a day). If we are talking about a tall mirror or glass product from floor to ceiling, then it is better to find a large box, for example, from a refrigerator and press it tightly against the wall;
- After the glue has dried, the remaining gap between the glass and the wall should be treated with sealant around the perimeter of the glass.
The surface on which you plan to mount the glass must first be cleaned not only of dirt, but also of wallpaper. Outline the area with chalk around the perimeter of the glass and work it thoroughly.
Mechanical fastening method and its advantages
Most often, glass is attached to the wall using tools without the use of glue. This method is time-tested, and you won’t have to worry about the glass falling over time. But in practical terms, everything is much more complicated here. This method is used when fastening hanging shelves and large glass, which simply cannot withstand any glue, much less adhesive tape.
This method of fastening is much more reliable, but there is another side to the “coin” - this is the need to make holes in the walls. Therefore, if you have chosen a place for a mirror or a designer glass shelf, then it is advisable that they remain in this place in the future, because a hole in the wall is not the most aesthetically pleasing sight in the apartment. If, of course, the surface can be puttied, the holes can later be eliminated, but not in a tiled bathroom.
Here, the empty space with a hole in the middle will have to find a new use.
Fasteners for mounting products to walls
Assortment of fittings at our glass factory
Here you will find a large assortment of serial furniture products and original models that will help you achieve the desired result: everyone will be able to choose the option they like best, which will be most suitable for use in a particular setting. Chipboard shelf holders are reliable, durable and low cost. For example, the metal shelf holder RK 5x16 came from Soviet industry, but, despite this, it still holds its position. There are many more different shelf supports, but which one to choose is up to you.
A modern shelf holder for glass should be double-sided, have gaskets or tubes made of soft plastic or rubber, have protection against accidental falling out of the product’s mounting hole, fixing suction cups or other devices and clamps.
How to attach a shelf to a wall
Using it, you can calculate the diameter of the holes that will need to be drilled in the glass. An approximate set will be like this: a dowel, a self-tapping screw, a decorative nut and a bushing made of brass on plastic.
In some cases, it is noted that a glass object is attached to the wall by pressing the protrusion on a metal sleeve, and the brass nut begins to rest directly on the glass. Close contact between glass and metal is formed, and this often leads to the appearance of cracks. In such cases, pay close attention to the fastening. This applies, first of all, to mirrors whose decor contains metal elements.
When installing a glass shelf, you can choose one of the types of fasteners - a glass holder or an aluminum profile. They differ from each other in the methods of glass installation.
In addition, the holder is distinguished by its versatility: with its help you can attach glass to the wall, regardless of its thickness. Profiles made of aluminum do not fit every glass size. But on the other hand, this profile has another advantage: you can insert an LED into it so that the glass has internal lighting. Such profiles, in turn, also have many configurations - depending on the diameter of the glass, the type of backlight (if necessary) and other factors.
The regular profile is very easy to use and consists of only two parts: the wall fastener and the top support. The parts are easily separated by detaching the fasteners from the support. When you have taken it apart, make markings on the wall to ensure that you attach the glass as accurately and evenly as possible. The base is marked with dowels, which are sold together with fastening devices.
To mount one glass shelf on the wall, you only need two special holders. Attach the glass shelf with its end to the wall; on both sides, the distance from the shelf to the edge should be at least five centimeters. But the number of holders can be increased if the shelf is longer and the planned load on it is greater. So, if your plans include putting a vase weighing several kilograms on a shelf, then you obviously won’t get by with two holders.
At the present time, point-mounting of glass to the wall is especially popular. When implementing this fastening, special fittings are used, including special holders for glass shelves, indents for glass objects, guides, brackets, hinges, stops and much more, intended exclusively for fastening glass products.
There are different types of fasteners. But regardless of their type, they must be of high quality and reliability.
Assembly and installation of a suspended structure
Scheme of a hanging shelf made of slats.
We assemble the holder frame from the prepared bars. Using self-tapping screws, we attach side bars (250 mm) to the long beam at the ends, and shortened bars (170 mm) in a row between them. All frame elements must lie in the same plane. We will attach the front strip in place to make it easier to attach the holder to the wall.
Using a drill, drill holes for the screws in the rear frame bar. Using them, we make level marks on the wall where we plan to hang the shelf.
Then we drill holes in the wall according to the marks and insert dowels into them. The assembled part of the frame is attached to the wall using a screwdriver. The front block is attached to it with self-tapping screws, completing the fastening of the shelf holder.
The procedure for installing an anchor in a plasterboard wall for mounting a wall shelf.
The frame of the shelf itself is made of 3 bars (without the back) with the same cross-section as that of the mounting frame. We attach the prepared plywood strips to the frame with a stapler or self-tapping screws, depending on the thickness of the sheathing. The surface of the frame can be coated with wood glue. We cover the end parts of the shelf (except for the back) with strips of plywood or decorative trim.
The width of the U-shaped frame must ensure that the hollow structure can be placed on the holder.
The joints of the box elements and above the heads of the screws are puttied, the surface is cleaned with fine-grained sandpaper, primed and painted. After drying, the shelf box is placed on the holder frame. At the wall, the plywood is screwed with self-tapping screws to the back plank. Using a similar assembly principle, you can make shelves with side walls and a top.
What do you need for work?
Before you begin, make sure you have the necessary items for the job. Below is a list of what you will need to attach the glass to the surface yourself:
- roulette;
- pencil;
- bracket;
- electric drill;
- insulating tape;
- special glass-to-wall connector;
- fasteners such as screws, screws and self-tapping screws.
Glass wall decor
Now that you have everything you need to get started, turn your attention to the wall itself. You need to have confidence that it is able to hold all the elements intended for fastening, the shelf itself and what will stand on it. We do not recommend attaching the shelf to a plasterboard partition.
Universal tips for making shelves with your own hands
Beginning craftsmen should familiarize themselves with some recommendations that will simplify the process of making shelves from wood or MDF:
- It is necessary to carefully inspect the material before purchasing - there should be no cracks or various chips on the surface of the bars. In addition, they require preliminary grinding in order to remove all burrs.
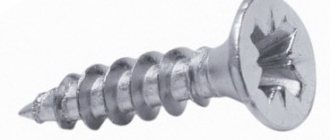
- To install a self-tapping screw, it is better to first drill a hole of a smaller diameter and then widen it. Otherwise, a crack may appear that will be difficult to repair. Some experts even recommend replacing the usual self-tapping screws with special confirmants - they greatly facilitate the assembly process.
- Wooden elements can be easily fixed into a single structure using shaped protrusions - choppers and glue. It is recommended to use only durable types of wood - oak, birch, etc.
- Self-tapping screws are not always easily screwed into wood (especially hard wood). Therefore, experienced craftsmen recommend using soap for such purposes. You just need to rub the screw with a small piece.
Fasteners
Before starting work on the manufacture of the shelf, you should prepare all the tools and make a preliminary drawing of the parts. In addition, it is not always necessary to purchase material in a store, because the structure can be built even from old boxes or a TV case.
You can read about how to make shelf fasteners with your own hands in our article.

