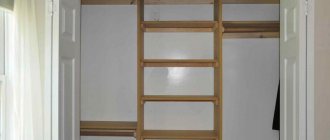
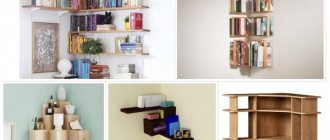
Hi all! Quite often in apartments and houses you can find niches in different rooms. They are found in the bathroom, often along with sewer pipes, in the kitchen and hallway, less often in the living room and bedroom. And if you make shelves in a niche, this will maximize its practicality.
Agree that simply covering an existing niche, or leaving it without shelves, storing all things only on the lower edge, is an extremely irrational way to use this interior element.
Yes, a niche is a kind of recess in the wall. Therefore, the shelves will be built-in and not protrude beyond the walls of the toilet, bathroom, living room or other room.
The only question is how to make a shelf and what material to choose from.
Where are glass products installed?
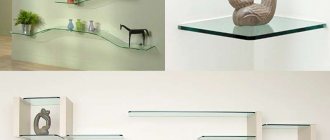
Glass products can be mounted in any room of the house. It can be in the bathroom, or in the bedroom above the dressing table. The most common mounting location is a full-length hallway mirror. In addition, some people prefer to decorate their home with all kinds of glass shelves that are mounted along the walls.
Glass shelf
Of course, large glass will be much more difficult to install than small glass, which can be easily attached with tape to the surface. Regardless of the size of the item and where you plan to install it, you must first prepare the selected surface for fastening: clean it of dirt and grease deposits. In some cases it should be leveled.
Features in drawings and accurate calculations
When you come up with the idea of creating a niche with shelves, you need to decide what it will be like? Where will it stand? Why is it needed? When all the answers to these questions have been received, you need to start designing, drawing and drawing. In order to design a drawing on which the entire installation will be based, it is initially better to draw a drawing with the number of shelves, the color of the light, and the installation location. To install shelves, you must take into account the interior of the room.
So, for the drawing you will need: a ruler, a pencil, a square, an eraser, a meter. Accuracy in calculations is required, because they will be transferred to the walls. All the numbers must be put on the sketch: depth, width of the shelf, height, location of the shelves in the niche. If you plan to install lighting, you should draw the wiring and the places where the lighting device is planned, as well as the location of the switch.
Diagram showing the dimensions of a niche with plasterboard shelves. In some cases, it is necessary to mark on the drawing the location of the socket in the plasterboard or the cable connectors. After completing the sketch, you should carefully check everything again, down to the smallest detail.
Adhesive fastening method
For adhesive mounting, you can use either double-sided tape or glue. There is also a mechanical method of attaching glass to the wall, but we will return to this a little later.
Connecting the product to the surface using tape is the simplest method. However, with this type of fastening, use only double-sided tape. First you need to peel off one protective layer from it and secure the tape along the wall. Then you apply the glass to the wall, remove the top protective layer from the tape, releasing the adhesive side, and press the glass firmly.
Although this method is simple, it also has a number of disadvantages. Often the object being strengthened is placed unevenly, and it will be very difficult to tear it off the surface and reattach it there. If this is a corridor, then you risk tearing off the wallpaper along with it; the sight will not be the best. To prevent this from happening, after gluing the tape to the intended fastening location, apply a thin layer of sealant along it. But when working with it, remember: it should not go outside. By applying a sealant, you can take into account possible gaps before securing the glass object and fix it straight and level.
If you want to use glue when attaching glass with your own hands, then we advise you to choose a silicone-based glue of the “liquid nails” type. The algorithm for working with glue will be as follows:
- Apply glue to the entire glass product in a thin layer around the perimeter. Then, having assessed all the risks, eliminating the possibility of a crooked arrangement, we sharply press the surface against the wall;
Adhesive fastening method
- It is necessary for the glass to dry to the surface. To do this, it is advisable to press something weighty against it for some time (perhaps even up to a day). If we are talking about a tall mirror or glass product from floor to ceiling, then it is better to find a large box, for example, from a refrigerator and press it tightly against the wall;
- After the glue has dried, the remaining gap between the glass and the wall should be treated with sealant around the perimeter of the glass.
The surface on which you plan to mount the glass must first be cleaned not only of dirt, but also of wallpaper. Outline the area with chalk around the perimeter of the glass and work it thoroughly.
Technology of covering a niche with plasterboard
Before you start covering the niche with shelves, you need to prepare the gypsum board. To do this, plasterboard sections are cut to size. You can cut gypsum board sheets either with a hacksaw or a construction knife.
The edges of the cut part should be processed (sanded), after which, using self-tapping screws, each part should be attached according to the planned plan in its place.
If you plan to backlight, you should make holes in the places of the lamps, but so that the diameter of the lamp matches the diameter of the hole.
Mechanical fastening method and its advantages
Most often, glass is attached to the wall using tools without the use of glue. This method is time-tested, and you won’t have to worry about the glass falling over time. But in practical terms, everything is much more complicated here. This method is used when fastening hanging shelves and large glass, which simply cannot withstand any glue, much less adhesive tape.
This method of fastening is much more reliable, but there is another side to the “coin” - this is the need to make holes in the walls. Therefore, if you have chosen a place for a mirror or a designer glass shelf, then it is advisable that they remain in this place in the future, because a hole in the wall is not the most aesthetically pleasing sight in the apartment. If, of course, the surface can be puttied, the holes can later be eliminated, but not in a tiled bathroom.
Here, the empty space with a hole in the middle will have to find a new use.
Fasteners for mounting products to walls
Creating a metal frame
There are 2 ways to install a frame from profiles:
Step-by-step creation of a niche with plasterboard shelves
Now that the frame is ready, you should do the wiring. All wires are insulated in a special corrugation so that the wire does not have contact with the metal base. The video shows the process of creating a frame for a plasterboard niche.
How to attach a shelf to a wall
Using it, you can calculate the diameter of the holes that will need to be drilled in the glass. An approximate set will be like this: a dowel, a self-tapping screw, a decorative nut and a bushing made of brass on plastic.
In some cases, it is noted that a glass object is attached to the wall by pressing the protrusion on a metal sleeve, and the brass nut begins to rest directly on the glass. Close contact between glass and metal is formed, and this often leads to the appearance of cracks. In such cases, pay close attention to the fastening. This applies, first of all, to mirrors whose decor contains metal elements.
When installing a glass shelf, you can choose one of the types of fasteners - a glass holder or an aluminum profile. They differ from each other in the methods of glass installation.
In addition, the holder is distinguished by its versatility: with its help you can attach glass to the wall, regardless of its thickness. Profiles made of aluminum do not fit every glass size. But on the other hand, this profile has another advantage: you can insert an LED into it so that the glass has internal lighting. Such profiles, in turn, also have many configurations - depending on the diameter of the glass, the type of backlight (if necessary) and other factors.
The regular profile is very easy to use and consists of only two parts: the wall fastener and the top support. The parts are easily separated by detaching the fasteners from the support. When you have taken it apart, make markings on the wall to ensure that you attach the glass as accurately and evenly as possible. The base is marked with dowels, which are sold together with fastening devices.
To mount one glass shelf on the wall, you only need two special holders. Attach the glass shelf with its end to the wall; on both sides, the distance from the shelf to the edge should be at least five centimeters. But the number of holders can be increased if the shelf is longer and the planned load on it is greater. So, if your plans include putting a vase weighing several kilograms on a shelf, then you obviously won’t get by with two holders.
At the present time, point-mounting of glass to the wall is especially popular. When implementing this fastening, special fittings are used, including special holders for glass shelves, indents for glass objects, guides, brackets, hinges, stops and much more, intended exclusively for fastening glass products.
There are different types of fasteners. But regardless of their type, they must be of high quality and reliability.
Types of niches with plasterboard shelves
A niche with shelves can be different:
If the niche is illuminated, it uses spotlights and LED strips. Sometimes both are illuminated, creating an extraordinary range of light. When decorating a niche with shelves, various materials are used for decoration. Wallpaper or painting, wood or plastic, metal or glass.
Design options for a niche with plasterboard shelves
What do you need for work?
Before you begin, make sure you have the necessary items for the job. Below is a list of what you will need to attach the glass to the surface yourself:
- roulette;
- pencil;
- bracket;
- electric drill;
- insulating tape;
- special glass-to-wall connector;
- fasteners such as screws, screws and self-tapping screws.
Glass wall decor
Now that you have everything you need to get started, turn your attention to the wall itself. You need to have confidence that it is able to hold all the elements intended for fastening, the shelf itself and what will stand on it. We do not recommend attaching the shelf to a plasterboard partition.
Materials used
First, let's talk about what kind of shelves there are.
There are actually several options:
- Tree and its derivatives
. This is natural wood in the form of boards, as well as chipboard and MDF. The most common options. There is no need to spend money on wood. In addition, modern shelves based on MDF and laminated chipboard have an extremely attractive appearance. I would advise choosing natural wood if the shelves will be subject to a large load. If these are shelves for photographs, figurines and several books, MDF and laminated chipboard are quite sufficient. If this is a shelf for seedlings, then a durable wooden board is required; - Drywall
. As an independent material, it does not have the necessary decorative properties. But it is very practical, easy to process, easy to install. Such shelves are then decorated; - Glass
. Beautiful and original, but many are afraid to use glass shelves. Because of their supposed fragility. In fact, modern glass, properly treated, can withstand very heavy loads. But glass will require more careful care.
Mainly used are plasterboard shelves, as well as wooden and glass structures.
You can make them yourself, buy them from the manufacturer, or take them to order if you need something very original and individual. For example, you want to install a dozen shelves in a narrow niche.
Installation of glass fittings
Fittings for glass tables, doors and other similar items must be installed with great care. If there are no special skills in this matter, then it is best to entrust it to a professional
To perform this operation you will need a tool, as well as other items. The list of them depends on the type of mounted fittings.
The set of necessary tools includes:
- screwdrivers (phillips and slotted);
- hexagons;
- drill;
- a set of drills for wood, metal, reinforced concrete;
- dowels;
- special glue.
Adhesive for glass and metal
Items such as hexagons and screwdrivers are necessary in order to disassemble the mechanism into its component parts before installation. Of course, a drill and drill bits are necessary for drilling.
If fittings for glass doors are installed, you will need to secure the hinges to the door frame. This must be done using sufficiently long dowels. If it is necessary to install mechanisms for lightweight glass sheets and drilling is not required, glue is used to connect the fittings and the glass sheet.
It is necessary to remember one very important nuance when choosing glue. It must retain its transparency after drying.
Especially if fittings for glass shelves are attached. Otherwise, the appearance of the furniture may be spoiled by the appearance of ugly dried glue.
Dried glue that has changed color
Installation of fittings with glue
Fittings for glass cabinets, as well as other similar furniture and objects (doors, display cases) are most often attached with ordinary glue. In most cases, this process does not cause difficulties even for people who have never performed such operations. Installation of fittings on glass doors is carried out as follows:
- the floor or walls are marked (to secure the hinges);
- the door leaf is being tried on with the fittings not yet attached;
Trying on a door leaf with unglued fittings
fittings are being prepared;
Preparation of fittings - rubber gaskets and other elements are inspected
- special glue is applied to the surface of the fittings at the fastening point and to the glass;
- using the included mechanisms present in the device or a clamp, it is necessary to firmly press the surface to be glued;
- After drying, the fittings are attached to the door frame.
It is very important to remember that when using a clamp or other similar devices you should be as careful as possible. Excessive force can simply lead to the appearance of a crack in the glass or even to its splitting into several parts.
All operations must be performed with extreme caution
Installation of fittings with drilling
Most often, fittings for glass display cases require drilling during installation, since the weight of such structures is quite large and the glue may simply not hold it. To perform this work you will need the following tools:
- drill with adjustable speed;
- special drills for glass;
- soft surface with a large area;
- a set of screwdrivers and hexagons for working with the mechanism.
Particular attention should be paid to the drill and drill set, since the success of the work being performed greatly depends on the quality of these items. The drill must maintain a low enough rotation speed so as not to damage the glass or heat it.
The drill must maintain a low enough rotation speed so as not to damage the glass or heat it.
Set of drills for glass and mirrors of different diameters
The process of installing fittings with drilling is as follows:
the door frame is prepared - places for attaching hinges are marked, the door itself is tried on in place;
Preparing the box and fitting the door leaf in place
The door is marked and the locations for making holes are marked;
Making holes in glass for installing fittings
The mechanism is assembled and the door leaf is installed in the frame.
Glass door hardware installation completed
The process of installing glass elements in furniture is quite complicated
Maximum caution must be taken, as it is very easy to damage or even break the glass. It is best to first familiarize yourself with the video manual, which covers the process of installing hinges, handles and other accessories in as much detail as possible.
Types of plasterboard shelves
There are several main parameters by which such designs differ. Before choosing one option or another, you should familiarize yourself with them.
Table No. 1. Types of gypsum plasterboard shelves
| View | Description |
| Open | Such shelves mainly have a decorative appearance; they are placed to display various souvenirs, cups, photographs and other decorations. |
| Closed | These are already more functional shelves, so they are often made deep to accommodate many items. |
Table No. 2. Types of shelves by type of placement
| Accommodation | Description |
| In the center of the room, a large structure consisting of many shelves is most often installed. This option will best fit into the interior of the living room. | |
| Such plasterboard structures will fit perfectly into the interior of a small room. Moreover, they are not only decoration, but also perform a functional task. Quite often, a bookcase is placed in the corner. |
Position of shelves in the corner
In this case, any plasterboard structures can be designed as follows:
LED lamps are often used for lighting
Shelves made of gypsum plasterboard are:
An unusual version of plasterboard shelves
Video - Shelves made of gypsum plasterboard: original ideas
Finishing a plasterboard niche
First, finishing should begin to mask the fastening points. They are carefully plastered using putty.
Final plastering of the plasterboard niche After which you need to begin finishing the plasterboard joints and corners. For this, reinforced mesh is used. It is secured with glue or a thin layer of plaster. After each step taken with putty material, you should wait until it dries completely. As a result, you need to putty the entire surface of the drywall and, after drying, go over it with grout. This can be a special mesh or sandpaper - zero. It removes all the errors left during putty (small pebbles, stripes).
An example of finishing a niche made of plasterboard with stone. If you plan to decorate a niche with stone or facing tiles, then special adhesives are used. Before applying the adhesive, in some cases it is necessary to use a primer. This is also used when covering drywall with wallpaper. If painting is intended, then after the putty has dried, the paint of the desired tone is diluted.

