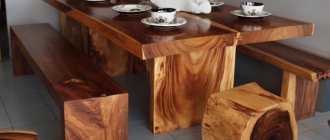
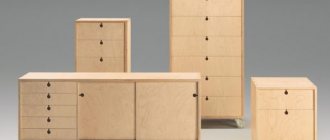
Recently, the loft style has been in great demand in modest-sized apartments. Why is he so interesting? It turns out that it is attractive because it allows you to use very simple things, which, moreover, look very organic.
And it’s easy to make loft-style furniture with your own hands, and this again means saving money on your home budget. Let's find out what you can do for an interior in this style yourself in a matter of hours, what pieces of furniture can be made even by a novice craftsman?
DIY loft style furniture
A few words about the loft style
Before we present detailed instructions for making homemade loft furniture, we should introduce readers a little directly to the style itself. Why is it so interesting and why, despite the fact that it appeared back in the 40s of the twentieth century, does it still remain popular?
History of the loft style
Loft style furniture
The birthplace of the loft style is the USA . It was in the land of the Statue of Liberty that this simple, but nevertheless attractive style appeared. It originated in New York, in its industrial areas. During that time period, land prices were rising rapidly, and many property owners sold or completely abandoned their industrial premises just because of this. And these same premises gradually began to be used by other people to create residential buildings. Moreover, such housing was inexpensive, and, as a rule, furnished “cheap and cheerful.” But, oddly enough, it turned out tastefully. This is how the loft style was born, which remains popular to this day. Gradually the style reached Russia.
Decoupage furniture in loft style
Moreover, both a living room and an office can be furnished in this style. Nowadays even restaurants or hotels are decorated in this way, and many modern hotels prefer to furnish guest rooms in a loft style.
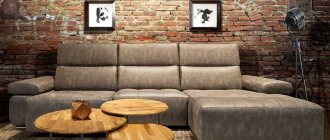
Loft style interior
In order to embody the loft style in the interior, you do not need to spend money on expensive souvenirs, luxurious armchairs or antique cabinets. It is enough to use what in most cases was previously thrown away.
Loft style does not require large financial expenditures
On a note! Of course, in order to furnish a room in a loft style, it is not necessary to collect “garbage” and do something with your own hands. You can just go to the store and buy everything you need. However, things in the loft style are not cheap.
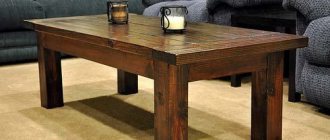
Beautiful coffee table
Drawings and diagrams
This subsection will help you understand the design features and detailing of bar stools:
Diagram of a standard bar stool
Size chart
Bar stool diagram with dimensions
Chair drawing
Drawing of a bar stool with a back
Did the article help you?
The main features of the loft style
It is easy to determine that a person is looking at a room decorated in this style. It is enough to pay attention to some signs.
- The room should have a lot of free space, and there are usually minimal partitions in it. In general, only the toilet and bathroom can be separated in the apartment. That is why the loft style is often used in studio apartments, where even the sleeping area is located in a common area.
About the characteristic features of the style
- The windows should be large and preferably from floor to ceiling . This is the main source of light in the room. Moreover, curtains are used extremely rarely.
- The presence of various beams in the ceiling area is welcome , the ventilation does not need to be closed, and iron fittings add charm, but do not in any way spoil the appearance of the room.
- You usually cannot see wallpaper or other decorative material on the walls of a loft-style room.. Brickwork or concrete is often imitated or left completely as is. Also, plywood, metal, etc. can be used for finishing. It’s funny, but to achieve the desired effect, sometimes you sometimes have to purchase quite expensive materials.
Typical loft style interior
- Option for the floor - concrete, board or marble . No complex designs or anything pretentious or extravagant.
And the main highlight of the loft is the furniture. It may be somewhat unsightly in appearance, made of simple materials, and does not have any decorations or monograms. Its charm lies in its simplicity and functionality. At the time when the loft was born, everyone had no time for luxury.
Loft bedroom
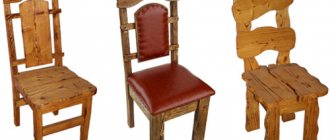
To make loft furniture, you can use simple boards, iron pipes and some modern materials. It is best if they have a somewhat aged look.
On a note! Those elements that are considered defects in most other styles are welcome in the loft. These could be rust stains, some roughness of the wood, or simplicity of design.
Loft style kitchen
Although, despite the apparent simplicity, to decorate a room in a loft style you need to have a certain taste. In general, with a successful combination of circumstances, a loft can harmoniously combine the incongruous. For example, a brightly colored modern sofa and an antique chest of drawers. So this style can be very, very different.
There are several loft style trends
Table. Loft style directions.
| Direction | Characteristic |
| Bohemian | This option is chosen by artists and poets, in a word, creators of beauty. Moreover, they can use the style not only at home, but also when organizing their own personal exhibition or show. Here the walls and ceilings are left almost without decoration, but other interior items or decorations are selected with a special sense of beauty. The walls may be decorated with paintings, there may be musical instruments, some sculptures, etc. in the room. |
| Glamor | This is a rather delicate loft, in which the same iron beams and beautiful chandeliers or sofas in the Baroque style can be perfectly combined. Here, much attention will be paid to lighting and directly to chandeliers and shades. The colors used for decoration will be gentle and pleasant (for example, it could be lilac). |
| Industrial | This is the most popular loft option, as it is the simplest and does not require anything special from the designer. It is enough to create the appearance of a moderately lived-in space. Furniture made by yourself is ideal for this type of loft. Even if it is a little unsuccessful, it will look no worse in almost industrial conditions than furniture from a store. Here any decorations are unnecessary. |
Bedroom in loft style
Popular manufacturers
“Danila-Master” – “CHAFT/Loft Furniture”
The Crimean factory uses European equipment, which allows it to produce high-quality furniture without chips or cracks. Wood, slabs, plywood, and fittings are supplied to the workshops from the best manufacturers.
Production of designer furniture "I am LOFT"
Over the 7 years of its existence, the company has created 30 thousand types of furniture, designed 700 interiors according to customer orders in different parts of our country.
IKEA
It is not surprising that the famous Swedish company IKEA also did not leave the loft theme aside. In its assortment you can find some pieces of furniture of this style. Simplicity and minimalism are characteristic of the products of this brand.
Moonzana
The distinctive features of the Russian Moonzana factory are good design and high quality. The team itself develops new models of industrial style
It is important for her to make designer furniture accessible to a large number of Russian consumers. At the factory you can purchase furnishings for a loft-style home made of metal and solid oak, hornbeam, pine, and adjust the dimensions to a specific room, but orders based on personal sketches are not fulfilled in production
Loft Look
A team of talented creative people opened their workshop for making loft furniture in Arkhangelsk. They create unique furniture in small volumes, selecting the best slabs from catalpa, mountain poplar, pink acacia, elm, and cherry for their masterpieces.
MyLoft. Me
A rare production of original models (Rostov-on-Don), which uses materials with history rather than new wood for its furniture. Barn boards made from tropical acacia, sheesham, mango and other valuable wood are purchased in India. Products have a warranty period of up to 2 years.
What materials are suitable?
Loft style furniture is very easy to make, since you don’t even have to worry about selecting materials. This style is ready to “tolerate” plastic, metal, wood, leather, and all kinds of fabrics. If you think through the design wisely, you can use anything. The main thing is that everything fits together in the end.
On a note! It would be great if the room had wide beams and the furniture was equipped with wheels. This will only emphasize the presence of a loft style in the apartment. Moreover, wheels can be on tables and chairs, or on shelves or anything else. Their presence can significantly increase the functionality of most furniture, and this is precisely the quality that is valued in the loft style.
Loft style and its features
When making furniture, you don’t have to worry too much about neatness. Of course, you shouldn’t do everything completely carelessly, but you also don’t need to cling to the slightest drawback. Let this flaw become the highlight of a homemade piece of furniture.
Shelves and tables made using metal pipes or metal profiles look great in this style. The wood may be a little old and the fabric may be worn. Barrels, cable reels, pallets, old window glass - something that can be safely used in creating loft furniture. You just need to put in a little effort and these items can turn into real works of art. You can also use new materials, but it is recommended to artificially age them, giving a slightly careless look. The main thing is that everything must be done carefully and tastefully.
Furniture design in loft style
Photo
Plywood bar stools
Standard bar stool without backrest
Steel bar stools
Wide bar stool
Bar stool stepladder
Another option with a stepladder
Bed made from pallets
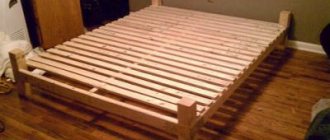
Let's look at how you can make a simple bed from pallets that are used for transporting goods. It will cost mere pennies, or even almost free, which will save a lot of money. Moreover, such a bed will look very harmonious. The biggest expense for creating such a bed will most likely be a mattress, which, like it or not, you will have to buy.
Types of pallets
Step 1. The first thing you need to do is purchase the pallets themselves. You can buy them new, paying only 150-200 rubles per unit, or you can even find them for free by asking around in warehouses or trading companies. Often used pallets can be picked up "for pickup".
Finding pallets is not a problem
Step 2. Old pallets usually require drying. If possible, it is better to leave them outside in the sun for a few days so that they dry out a little.
It is advisable to dry the pallets
Step 3. After drying, the pallets need to be sanded and painted or varnished. Sanding can be done with regular sandpaper, but the work will be faster and easier if you use a special machine. You may also need a timber that will be used as a base; it also needs sanding and painting. However, you can simply put one row of pallets on top of another and thus make the bed higher.
Wood preparation
Step 4. Having chosen the place where the bed will stand, you need to lay either the first row of pallets on the floor, or a beam around the perimeter of the bed, creating a base.
Laying the base of the structure
Step 5. Next, you need to lay a row of pallets on top and secure them to the base using self-tapping screws. It is better to use them, since nails will not make it possible to create a monolithic structure - the joints may become loose.
Pallet stacking
Step 6. The next stage is sheathing. Usually only the top side of the pallets is sheathed with some kind of material. You can attach it to the tree using a construction stapler.
Sheathing material is secured with a stapler
Step 7. Then you need to put a mattress on top of the pallets sheathed with material.
The mattress is being laid
Step 8. The final stage is the selection of bed linen and bedspreads. The bed is ready.
Ready-made pallet bed
How to choose?
You can get confused not only by the variety of sofa models, but also by their prices. Of course, you want to buy quality furniture at a reasonable price.
It is important not to forget that the materials used by the manufacturer directly affect not only the price of the sofa, but also its quality. That is why, first of all, you should carefully study the three main components of any sofa, which will play an important role in its comfort and service life
Frame
The frame for sofas can be made of steel profile, or it can be wooden. A metal frame made of steel, the seams of which are processed by welding, gives the product strength and durability. Any upholstery will suit it and can be easily replaced if necessary. The wood frame is a natural and hygienic material. It can be just as durable if made from oak, beech, ash or walnut, but will be quite expensive. A frame made of coniferous wood or birch will cost less. The product will be of high quality if there are no knots on it, and the wood is dried properly. If this is not the case, then your sofa will squeak throughout its life.
The cheapest, but less durable combination of wooden beams and chipboard
Here it is important to ensure that the chipboard is treated with paint that protects the body from toxic substances that this material can emit. Finally, in a high-quality wooden frame, all parts must be bolted together; if this is not the case, then the product will very quickly begin to loosen
Filler
Comfort and healthy sleep will be provided by a sofa on a block of independent springs; it will support your spine in the correct position without the effect of a hammock or creaking. Latex has the same properties: this material does not cause allergies, is resistant to moisture and fungi, strong and durable, it has good orthopedic qualities and elasticity. But sofas with such filling are more expensive. A high-quality and budget option is sofas filled with high-density polyurethane foam. This material is hypoallergenic, breathable, waterproof, not susceptible to fungi and mold, and quite durable. Installed on a metal frame with wooden slats, as in many models of sofas with an accordion mechanism, it will create a perfectly flat sleeping surface with good orthopedic properties.
There can be several layers of fillers: at the bottom there is a harder one, at the top there are softer layers to give the product elasticity and at the same time comfort. The more layers of filler, the more expensive the product. Foam filling will be the cheapest, but be prepared for the fact that your sofa will quickly sag.
Upholstery
The most expensive sofas are with leather upholstery, although it is durable and practical. Leatherette models are just as practical, but much cheaper. “Accordions” very often come with removable covers. When buying a sofa, you can choose the fabric for them according to your taste and capabilities. Popular materials are chenille, tapestry, jacquard, microfiber, flock - they are durable, protect furniture well and come in many colors.
The cost of upholstery fabric will also affect the final cost of the sofa. The one with a removable cover will cost more, but you can always remove it if it gets dirty, wash it or take it to the dry cleaner. This is especially true if the sofa is constantly used.
So, after all that has been said above, we will draw conclusions about what is important to consider when buying a sofa with an “Accordion” transformation mechanism:
- Decide what function your purchase will perform: during the day your family will relax there, and at night you will sleep on it, or it will serve as a temporary shelter for guests. In the first case, choose a model with a metal frame with a block of independent springs or latex (more expensive, but it will last longer and bring health benefits). A linen drawer would be a useful addition. In the second case, you can buy an option made from cheaper materials (frame, filler, upholstery).
- Think about what type of accordion sofa will suit you best: straight, corner, or maybe you will choose the option with an ottoman.
- Choose the place where you will put the sofa, estimate the dimensions of the future purchase so that they fit into the space of the room. Do not forget that the accordion system folds forward, so there should be enough free space in front. For a small room, for example a child’s room, compact models are suitable - mini ones without armrests.
Making a loft chair from a metal profile
Using a square profile and a couple of boards, you can make a very simple and interesting chair that will fit perfectly into a loft style interior. However, this will require a little more effort than when creating a bed, and will also require some welding work.
Step 1. The first step is to draw a diagram of the chair and mark all its dimensions on it.
Scheme of the future chair
Step 2. Then, in accordance with the diagram, you need to apply markings to the profile along which the pipes will be cut.
Markings are applied to the profile
Step 3. Next, you need to cut the part from the square section metal profile to the required length. It is important to understand that not all parts will have straight cuts - they may also be beveled. This is necessary to make it easier to join them when assembling the chair frame.
Metal profile cutting
Step 4. Each section must be processed to remove burrs and other defects.
Sections are carefully processed
Step 5. Next you need to carry out welding work and connect the elements of the chair frame into a single structure.
Carrying out welding work
The parts are connected into a single structure
Step 6. Now the welding areas need to be processed so that they are even and do not stick out. A simple grinding with a grinding wheel is sufficient.
Processing of weld seams
Grinding wheel used
Step 7. After this, you need to assemble the back and seat of the chair from two boards of the same size. They can be immediately connected to each other. Or you can attach it to a chair separately.
You will need 2 boards of the same size
Chair back and seat
Step 8. In the metal frame and in the wooden blanks for the back and seat, you need to drill holes of the same diameter, which must coincide with each other when fitting the same seat to the frame.
Drilling holes in wooden pieces
Drilling metal elements
Step 9. Now you need to sand the wooden elements and varnish them, and the metal frame of the chair needs to be painted. Work cannot be continued until the paint and varnish materials have dried.
Painting the metal frame
Sanding wooden elements
Step 10. All that remains is to assemble the elements together, that is, screw the back and seat to the frame. And the chair is ready, you can use it.
Screwing the backrest
Ready-made chair in loft style
Video - Simple pipe shelving
Height
Chair height
Bar stools have their own standard sizes, which are based on the principles of ergonomics. In most cases, their height range ranges from 75–85 cm. Although some manufacturers produce products in smaller sizes. In general, the height will directly depend on the height of the rack. Below are tables for the ratio of tabletop to chair height:
Table to Chair Height Ratio
So what should you consider when determining your bar stool height? Let's consider the main factors:
- Sitting pose.
- Height.
Making a table from pallets
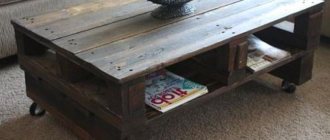
From the pallets from which we made the bed above, you can make other furniture. These can be large and small tables, sofas, armchairs and much more. Now we’ll look at the option of creating a simple table with metal legs that will look very organic in a loft-style apartment.
Step 1. First you need to prepare. To create such a table, it will be enough to take one pallet, and you will also need to make or buy 4 metal legs of the same height. You will also need a saw, screws, a screwdriver, a brush and varnish. Sandpaper for sanding or a sanding machine will also come in handy.
Preparing everything you need
Step 2. The pallet needs to be partially disassembled. It is very large, and we are making a small table. Therefore, the excess pallet needs to be sawed off, and several boards need to be detached from the remaining piece of the pallet - they will be needed to create supports for the legs.
The pallet is disassembled
All excess is cut off
Step 3. It is recommended to sand all workpieces with sandpaper so that they are not prickly and dangerous. Next, you need to screw along the right and left ends along the board from those pallets disconnected from the rest. You should get flat platforms to which the legs themselves will be attached.
There should be flat areas
Step 4. To attach the legs to the corners, you need to screw metal corners at a short distance from the edge.
Screwed metal corners
Step 5. The free spaces between the boards on the “front” side of the table need to be filled with other boards from the rest of the pallet. They can be nailed, or they can be screwed onto self-tapping screws. There should be a solid surface.
All voids are covered with boards
Step 6. Next you need to fix the legs on the back of the table.
Metal legs installed
Attention! Don’t forget to varnish the sanded table. Otherwise it won't last long.
The table is varnished
Step 7. When the varnish is dry, the table can be used for its intended purpose. Namely, use it as a coffee table, a small dining room table, or put some things in unique shelves.
Ready-made table in loft style
Advantages of furniture made from pallets
Video – Loft style table
How to choose?
To make it comfortable to spend time and relax in a bean bag chair, you need to take the choice of this upholstered furniture seriously.
Before purchasing a beanbag, pay attention to the following points:
- The presence of an internal cover - over time, the outer upholstery may become dirty and the cover will have to be washed. If the inner cover is missing, you will have to figure out where to store the filling while the fabric dries. In addition, there is a risk of scattering all the contents around the apartment and taking a long time to collect it. If the frameless chair is made of eco-leather, then there is no need for an inner cover, since dirt can be removed with a damp cloth.
- Has a long clasp. If it is too short, you may tear it in the process of pulling out the inner bag. The optimal length should correspond to the diameter of the chair.
- The filler has different densities. For example, when polystyrene foam granules have a low density, this leads to rapid shrinkage and the beanbag loses its original appearance. The optimal density should be at least 25 kg per m3. Some manufacturers may also add polystyrene foam to the base polystyrene foam granules to reduce the possible risk of shrinkage of the filler.
- The dimensions must correspond to your anthropometric measurements. If the room is small, then you can purchase a model one size smaller, but if the room is large, then you can buy a size larger. The most important thing is not to buy a very small option. For example, for a teenager with a height of 150 cm, a beanbag up to 70-80 cm is suitable. And for a tall person whose height exceeds 170 cm, the best option would be a chair with a diameter of 90 cm.
- Resistance to moisture will allow the outer cover to prevent moisture from entering the filler and to dry quickly. Thanks to this feature, you can take such a bean bag chair with you out of town, fishing or to the country.
When purchasing a beanbag, check whether there is a special carrying handle, so it will be more convenient to move it around the apartment.
Shelves
Rope shelves are a very simple design. All you have to do is sand the pieces of wood, drill holes in them, pass ropes through them and tie knots. The ropes are secured to a rod or special fasteners.
A chain is a great alternative to ropes. All that remains is to select clamps/brackets, threaded rods and nuts.
The most stylish shelves can be made from slab. Buy a beautiful slab from us, cover it with oil and hard wax or varnish, secure the corners and your chic shelf is ready.
DIY wooden folding rack
It is convenient to make a stepladder-type structure from pine bars. You will need blanks with a side size of 20x40 mm for the legs and slats of any section for the shelves.
Assembly sequence:
- We cut 4 blanks from the block for the legs. You should get two paired elements with a difference in length of 90mm. Rear pillars – 1800 mm, front – 1890 mm.
- We saw off blanks 400 and 445 mm long for the lintels of the rear and front walls. The shelves will rest on 445mm long lintels. The number of blanks depends on how many shelves are provided. Optimal for a stepladder-rack - from 3 to 5 pieces.
- We apply markings to the rear pillars (length 1800 mm). We mark from above in the following sequence: 200 mm, 540 mm, 940 mm and 1400 mm. In the marking places we draw the contours of the bars for the convenience of precise drilling of holes.
We mark the installation location of the bar on both sides.
4. Using a drill with a diameter of 3 mm, drill 2 holes on each marking.
Drilling holes.
5. Between the racks we lay bars 400 mm long and tighten them with self-tapping screws. It turns out the back part of the stepladder is in the form of a ladder.
6. Using a similar example, we assemble the front part of the stepladder-rack. We use lintels with a length of 445 mm.
7. We retreat 30 mm from the upper edge of the front and back of the stepladder and drill holes with a diameter of 9 mm for an M8 furniture bolt.
Assembled stand.
8. We assemble a frame from two racks and connect the racks to each other with an M8 furniture bolt. We place an enlarged washer8 between the posts. This way the racks will not rub against each other.
M8 bolt with nut and oversized washers.
We connect the two racks together.
9. We assemble the shelves themselves from slats. We fix the longitudinal blanks with self-tapping screws to the jumpers.
We assemble the shelves.
10. Place the shelves on the crossbars of the front part. We fasten the shelves to the racks of the rear part of the rack with one self-tapping screw, driving it into the jumper. On one hardware they will rotate, which will make it possible to fold the stepladder.
All that remains is to polish the finished structure and test how it folds and unfolds freely.
The rack, assembled with your own hands, is decorated. The wood is treated with an antiseptic, the metal is degreased and primed. Painting will not only add beauty, but will also extend the life of the rack.
Drawings of a folding wooden rack
Click to enlarge.
Front pillar drawing
Drawing of the rear pillar.
Shelf drawing No. 4. The remaining shelves are assembled in the same way.
Book rack
To make a rack you will need a square steel pipe, a metal saw, a welding machine and wooden boards. Start by making a drawing of the future rack, calculate the dimensions and height of the shelves you need, then calculate the length of the pipe required to make the frame.
Metal hacksaw SPARTA 300mm
- Cut the pipe into pieces of the required length, connect the structure using a welding machine.
- Sand down the welds.
- Paint the frame with black varnish.
- Saw the shelves so that their length protrudes slightly beyond the rack posts, and sand the surface of the wood with sandpaper.
- Lightly burn the boards with a blowtorch to create an aged effect, cover with several layers of clear varnish.
- Place the shelves on the rack.
The work is finished, you can arrange books and other items.
Collection by Vladimir Yudin • Last updated: 11 weeks ago
97
pins
•
67
subscribers
Table basses
Table basse en verre, bois ou métal, les tables basses rondes, carrées ou modulables font partie intégrante du design de vos pièces.
Miniature sofa tables | Homemade hand-made
Often in a small living room or one-room apartment there is not enough space for a table. But there is a solution - these are miniature sofa tables. The simplest version of the table is a wooden structure with the letter “P”, ...
Herb Wheel Planter
180279 views on Imgur: The magic of the Internet
Bedside Tables & Nightstands | Temple & Webster
Shop bedroom furniture online at Temple & Webster for bedside tables and furnitures. Fast Delivery to Sydney, Melbourne, Brisbane, Adelaide & Australia wide.
Terrarium en forme de dodécaèdre et plaques de verre pentagonales pour plante Transparent, claire, Taille
Achetez Terrarium en forme de dodécaèdre et plaques de verre pentagonales pour plante Transparent, claire, Taille: Amazon.fr ✓ Livraison & retours gratuits possible (voir conditions)
MIRA Home XXL Garderoberek – Kapstok met zitbankje en schoenenrek – 12 haken -…
MIRA HOME staat voor het leveren van stijlvolle en duurzame meubelen die voldoen aan jouw wensen door functionaliteit met kwaliteit te combineren. Deze kapstok heeft een combinatie van een industriële stijl met een vintage look en is gemakkelijk te combineren met andere meubelstukken.VULT ELKAAR AAN:Het zwarte ijzeren frame en de rustieke houten accenten van deze kapstok vormen een harmonieuze combinatie die dit functionele garderoberek iets heel bijzonder s maakt . Echt een aanvulling…
Table basses
Table basse en verre, bois ou métal, les tables basses rondes, carrées ou modulables font partie intégrante du design de vos pièces.
Park lamp Integral.
“Temnote-net.ru” offers everything for garden lighting: street lamps and lamps, garden LED lamps and components at affordable prices.
Metal firewood holder for a fireplace from the manufacturer. Firewood stand for home and cottages.
Firewood stand available as standard or to order. Metal firewood holder for fireplace wholesale and retail with delivery throughout the Russian Federation.
GUI Seat Chair-Bar Chair Retro with Footrest Bar Chair Iron + Wood Creative High Stool Leisure Bar Barstool Coffee Chair -Sponge + Leatherette/Solid Wood Chair Surface,363870cm
Buy GUI Seat Chair-Bar Chair Retro with Footrest Bar Chair Iron + Wood Creative High Stool Leisure Bar Barstool Coffee Chair -Sponge + Leatherette/Solid Wood Chair Surface, 363870cm: Barstools – Amazon.com ✓ FREE DELIVERY possible on eligible purchases
Meuble TV – Meuble TV design, blanc, d'angle
Meuble TV, élément central de la pièce, le choix du meuble television est crucial. Envie d'une touche très classe? Choisissez un meuble TV en bois. Envie de raffine et de design? Faites votre choix parmi tous les modèles en verre.
Handgemaakte industriele tafelpoten, model matrix (3d kruispoot) thermisch verzinkt tafelonderstel
Handgemaakt Industrieel tafelonderstel Matrix tafelpoot Zwaar (3D kruispoot) VERZINKT
Handgemaakte industriele tafelpoten, model twist tafelonderstel
Handgemaakt Industrieel tafelonderstel Twist 8×8 tafelpoot
BuzzFeed
BuzzFeed has breaking news, vital journalism, quizzes, videos, celeb news, Tasty food videos, recipes, DIY hacks, and all the trending buzz you'll want to share with your friends. Copyright BuzzFeed, Inc. All rights reserved.
Folding flower stand
A simple and functional device will help you stylishly arrange flower pots with indoor plants - a DIY bookcase with a folding mechanism.
Note!
- Do-it-yourself screen: a step-by-step master class for creating it yourself. Types of screens, manufacturing materials + design ideas
- Do-it-yourself installation of interior doors - preparation of the structure, selection of doors, installation step by step + instructions from professionals
- DIY shoe rack - types of designs, manufacturing materials, step-by-step master class with simple diagrams and drawings
Drawings of the rack are freely available on the Internet. Dimensions can be adjusted to fit space parameters.
Assembly sequence:
From a 2.5x3.5 rail we cut out the rear support posts and the front folding ones. In this case, the front pillars are approximately longer than the supporting pillars. The difference in length affects the folding level of the structure and the size of the bottom shelf.
We lay out the racks on a horizontal surface and mark, drill and install the cross bars at the same level.
Stacked shelves are assembled from slats onto two transverse beams of the required width. The lowest shelf has the maximum depth, and the highest one has the minimum depth.
Note!
- Do-it-yourself sliding wardrobe - manufacturing manual with a full description of the stages, types of structures, choice of manufacturing materials (photo + video)
- Do-it-yourself carriage screed: step-by-step instructions for creating it yourself, diagrams and drawings for beginners, selection of materials and tools (photo + video)
- DIY stool - types of stools, manufacturing materials, step-by-step master class with simple diagrams and drawings for beginners
The racks are connected to each other with furniture ties, allowing the structure to unfold.
The shelves are attached to the rear shelf using furniture ties to make them easy to stack. When disassembled, the opposite edge of the shelf is fixed on the transverse strip of the front pillar.
The finished product can be painted to your liking.

