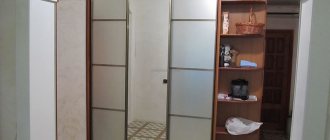
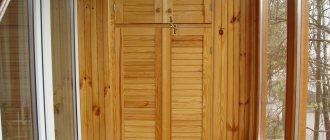
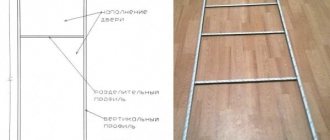
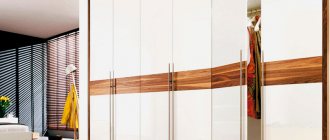
The question of how to make a cabinet with your own hands sooner or later arises in every person who wants to save on new furniture. Not everyone has the opportunity to purchase a cabinet in a store, because such a purchase can be very expensive. There is another obstacle - choosing an item for your garden or home, which can be especially problematic due to the lack of the required model. Therefore, self-production is an excellent alternative to expensive store-bought furniture and additional savings on the family budget.
Cabinet parts and their preparation for assembly
Fittings and components, except for the door opening system, are purchased in regular stores that sell products for furniture assembly. These are self-tapping screws and confirmations, rod holders and rods themselves, which can be immediately adjusted to the size of the cabinet, shelf supports and special nails for hardboard.
If sawing parts at home is quite a labor-intensive task, then decorating the edges can bring real pleasure to the home craftsman. To paste them, you only need an iron with the steam mode turned off and the device power set to ¾.
At the end of this stage of work, each edge is processed using fine-grained sandpaper.
There is nothing complicated in assembling a wardrobe if you fully adhere to the recommendations and follow the sequence of each stage.
DIY wardrobe at home with photo
Product Features
IKEA and other furniture stores have a wide selection of three-leaf cabinets: with a mezzanine, hinged and sliding doors, drawers, and corner ones. They differ from other types of similar furniture in their convenient, compact design.
Three-door wardrobe option with dimensions
All the details are thought out here:
- shelves;
- freely extendable drawers;
- comfortable height;
- depth.
Comparison of costs for a ready-made and homemade cabinet
Making your own wardrobe built into the wall will cost approximately 5-10 thousand rubles, taking into account the cost of sawing work (information for 2022). If you have minimal skills, you will have to spend 4-6 days. If you have at least some experience in making furniture, then it will take 2-5 days to build a wardrobe.
It’s hard to find a ready-made wardrobe for less than 20 thousand rubles. The standard lead time for an individual order from the manufacturer is two weeks.
Homemade cabinets and partitions are cheaper than factory ones. But such work will require higher level skills. Furniture craftsmen with an established workflow will cope with such an order much faster. Converting a niche into a wardrobe is a great way to turn empty space into a useful functional area.
Provence style wardrobe
Sometimes you get tired of everyday life and want to update your interior. In this case, a Provence style wardrobe is what you need. It is the French who are its founders. A distinctive feature is light colors and laconic forms. There are no modern forms - this is an old grandmother's design.
Such furniture should be made from natural materials. The decor is distinguished by its carved handles, sides, legs and other details. It also decorates with ornaments and modeling. This furniture should give the impression that it is from antiquity. A do-it-yourself hinged wardrobe in Provence style will impress many.
Kinds
Before you start, you need to decide what kind of cabinet you need. Depending on the location, there are two main types:
- Built-in models, the main advantage of which is the presence of a floor, ceiling and some walls. This condition significantly reduces the cost of the project. Such options are convenient, since they can be adjusted to any existing niche: recesses in the walls, under the stairs. Oddly enough, this is also a disadvantage of built-in models, since they are built for a specific location and changes are no longer implied. In addition, the curvature of the load-bearing surfaces greatly affects the quality of the cabinets, so they must be leveled before starting the project.
- Freestanding cabinets are a classic option. Models can be used in any type of premises. Can be disassembled and moved from place to place. In addition, crooked walls, floors or ceilings will not affect the installation. Among the disadvantages, one can note the high consumption of materials, compared to built-in modifications, and the associated increased cost. However, with proper selection of components, the cost can be reduced.
- Partially built-in models are a cross between the first two options.
6 photos
Depending on the type of doors, cabinets are classified as follows:
- Sliding wardrobe with sliding doors and rigid frame. There are two subtypes: with a roller door movement mechanism and with a monorail. After appearing on the market, such options gained popularity due to the variety of models, designs, and internal contents. In addition, the advantages are multifunctionality and space saving in the room.
- Models with hinged doors. Long service life is the main advantage of such options. As well as practicality and durability.
- Options with lifting door leaves.
- Open, doorless cabinets.
Designers also divide cabinets according to how they are assembled and style. The style is diverse: folklore, high-tech, baroque, empire, modern, rococo.
In terms of equipment, the following models can be distinguished:
Standard options are typical for large productions; they are manufactured to standard sizes, without any frills. Practical and functional furniture. Most often used for offices.
- Serial production is a mass option. It is the release of products in one line, with certain characteristics within the framework of one concept.
- Modular cabinets have always been popular. Their advantages are mobility and functionality. Such structures can be divided into separate sections, easily dismantled, rearranged, and combined with each other.
If we consider cabinets by shape, the most common options are:
- Linear, in other words, straight.
- Corner (depending on the shape of the corner, L or U shaped).
- Round. Rounded side or front panels.
- Rectangular.
Depending on the number of doors, there are double-leaf, single-leaf, three-leaf or open doors without doors. Of course, combined options are also popular.
The most important characteristic of cabinets is functionality. Only after a decision has been made on the purpose of the structure, all of the above classifications are taken into account. According to the purpose of use, cabinets are:
- For clothes. This includes dressing rooms, wardrobes, which are characterized by hangers for dresses, suits, ties, and trouser holders.
- For storing things. Here you can note bedside tables and chests of drawers.
- Book. Various modifications are used, from open to combined.
- In the hallway. These models are characterized by shelves for shoes and hats, hangers-hooks, umbrella holders, a mirror, and built-in sections for outerwear.
- For kitchen. Often, such cabinets are equipped with specific mesh or pull-out shelves for kitchen utensils and dishes, hooks for towels and other small items.
Varieties
Three-leaf structures can be of different designs. Eat:
- straight;
- corner;
- radius.
By placement method:
- free-standing;
- built-in
The latter are often installed in apartments.
According to the door opening mechanism, models can be:
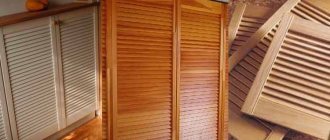
- swing;
- sliding;
- with folding doors.
The most common are three-leaf cabinets with drawers on the outside or a mezzanine.
Cabinet plans
Cabinet drawings, regardless of their shape, size and where they will be installed, play a very important role. They will be the basis on which you can rely in the manufacture of all components of the cabinet.
Regardless of the features, it is important for all drawings to adhere to clear dimensions. The length, width and height of the external parts and the dimensions of the internal components, transferred to paper, must be strictly observed when manufacturing cabinets
The product will not turn out the way it was intended if the dimensions of at least one part are violated. This will lead to deformation of the entire structure and poor quality results.
How to make a wardrobe with your own hands: drawings and stages of the device
You can make a headset yourself, but this will require knowledge about design features. Sliding wardrobes are not so easy to make with your own hands, even if there is a description, drawings and step-by-step instructions. But don't rush to get upset. Let's look at all the intricacies of the workflow.
Measurements of the room and calculation of the dimensions of the built-in wardrobe with your own hands
It is especially important to take accurate measurements. First, it is better to sketch a sketch on paper, and mark all the dimensions on it.
The Aristo program will help you design and calculate sliding doors.
Options for placement and sizes of furniture structures
The following measurements must be taken:
measurements are taken at a distance of 15÷20 cm from the rear wall; at a distance of 30 cm from the first measurements, the second ones are taken; you need to measure the distances to ledges, doorways and sockets; it is important to measure the distance from the floor to the ceiling; calculations of cabinet dimensions are performed; Of all the obtained values, you should choose the smallest one. This will allow you to calculate the width of the future structure; It is also necessary to take into account the value of the error, which is influenced by the curvature of the walls, the number of measurement points and the design of the cabinet. Options for built-in models
Built-in Model Options
To calculate the depth of the cabinet, you need to calculate the usable space, and also take into account the maximum allowable dimensions. 100 mm must be taken into account when planning a sliding system for sliding wardrobes. The height of the furniture should be 100 mm less than the distance from floor to ceiling.
Drawing of the built-in headsetCutting and fittings
Before you make your own wardrobe, you first need to write a list of all the parts on a piece of paper. With the list, you can contact the workshop, where they will cut and cut the material. You can make the cut yourself, but this is a more difficult option. It is necessary to lay out the parts and calculate the number of laminated chipboard sheets.
It is important to choose high-quality fittings; the correct adjustment of wardrobe doors depends on this. Doors should not jam or slide
Sliding systems consist of a profile and a sliding support. Roller mechanisms can be axial or bearing-based.
Accessories for wardrobes
Choosing cabinet filling
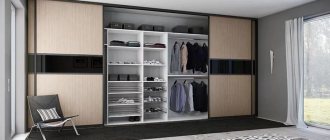
The internal content helps decide what the layout will be. You should not place the section for outerwear in the center, as moisture from it can spread to the sides. It is better to place this compartment on the side. Boxes for bed linen are not recommended to be placed directly above the floor.
Design filling option
How to correctly arrange the elements and how to assemble a wardrobe with your own hands can be seen in the video below:
Watch this video on YouTube
Number and sizes of doors, guides, rollers for wardrobes
When choosing guides for a sliding wardrobe, pay special attention to the material they are made of. The plastic profile has the lowest cost, but it is characterized by low reliability and short service life
The best solution would be to use combined rail guides, in which the supporting surface for the rollers is made of metal.
Homemade videos
The steel profile for sliding doors has increased reliability. Rail supports for furniture of famous brands are made from aluminum.
When planning doors, you need to calculate the width of the leaves. In this case, when closed, one handle should be visible, but it should not cover the door leaf.
Profile options
The rollers are made of metal, since plastic is not durable. The roller contains a ball-bearing internal mechanism that allows the door to move freely in the horizontal direction.
Do-it-yourself wardrobe and compartment door assembly
We invite you to familiarize yourself with the process of assembling a sliding wardrobe with your own hands in the table below:
| Photo | Description of work |
| To assemble the wardrobe, you need to apply markings. It is necessary to note the dimensions of the cabinet in width and the location of the vertical rack. The heights at which the shelves will be fixed are noted. | |
| Drill holes for dowels. | |
| The profile is put on before installation. | |
| Install a vertical stand. | |
| We mark the mezzanine shelf and install it. | |
| The side wall is installed. | |
| The shelves are marked and installed. | |
| The clothes rail is marked by size and installed. | |
| False panels are installed. | |
| One panel is fixed at the bottom. | |
| The supporting upper part is attached. | |
| The bottom guide is secured with a screw. | |
| The top guide is attached in the same way. | |
| Doors are being installed. |
The process is presented more clearly in this video:
Watch this video on YouTube
Dimensions of a double door wardrobe
Placing clothes on hangers requires a certain amount of internal space in both the length and width of the sections. The dimensions of the cabinet itself may vary, depending on:
- Is this clothing for children or adults (different hangers are used),
- Underwear (blouses, dresses, shirts) or outerwear (jackets, sheepskin coats, fur coats),
- Men's or women's (men's, as a rule, have wider shoulders),
- Long (dresses, raincoats) or short (shirts, jackets, jackets).
Height and width standards for two-door wardrobes
There are no strict standards for cabinets with two hinged doors. When designing, they are guided solely by common sense considerations and some nuances of ergonomics.
- For children's and teenagers' rooms, wardrobes are made lower in height so that it is convenient for the child to use. Usually within 1.6-2 m.
- If the cabinet is under the ceiling, higher than 2.2 m, then a separate mezzanine is allocated. Prefabricated design makes assembly easy. And the bulk of laminated chipboard sheets have dimensions of 2440x1810.
- The shortest wardrobe for clothes on hangers is from 1.2 m. You can only hang short clothes and children's clothes in it; in appearance it will look like an ordinary two-door cabinet.
The width of two-door cabinets starts from 550-600 mm. For smaller sizes, dividing the facade into two parts does not make much sense; one sash will be enough.
For the same reasons, the maximum width of the cabinet for two doors is limited to 1000-1100 mm. If you need more, it makes sense to install three doors. Or make a two-door wardrobe, where the principles for calculating overall dimensions are somewhat different (more on them below). Swinging facades that are too wide are simply inconvenient to use.
What determines the depth of a cabinet with two hinged doors?
Hangers for clothes can be positioned lengthwise and crosswise using a 25 mm diameter pipe with appropriate flanges and rod holders or a special retractable rod.
The last option is a solution for narrow hallways, where a wardrobe with a standard depth of 500-550 mm simply cannot be installed; it will take up too much space. Retractable hangers are also used to equip office closets, where too much space for storing outerwear is not required.
The retractable hanger is available for sale from 250 mm in length to 450 mm. Accordingly, the depth of the wardrobe varies from 300 mm to 500 mm. At the same time, pay attention to the size of the wardrobe width! In order for the hangers to “stand” across, the cabinet must be about 500-600 mm wide.
Making a built-in wardrobe at home: a step-by-step guide
- The assembly of the cabinet begins with the manufacture of the bottom. To increase the reliability of the structure after assembly on the basis of working drawings, it is advisable to fix the bottom to the floor. You can use anchor bolts for this.
- During the following operations, the frame is assembled, and the shelves are installed at the same time. They connect the side sheets together, thus ensuring the rigidity of the cabinet as a whole. If you are going to build a built-in wardrobe, it makes sense to attach the side walls to the walls.
- After assembling the frame, you need to check the angles between the walls and shelves. They must be strictly equal to 90 degrees. Otherwise, the product will begin to warp, and the door will jam when moving along the installed guides. As a result, you will have to repair the cabinet, and this is quite an expensive undertaking. That is, when working, you need to use a measuring tool that allows you to control the angles.
All selected fittings can be installed on an already assembled cabinet. To install it, you must follow the requirements and assembly instructions, which are supplied along with the fittings.
Where to begin
To make a cabinet yourself, you need to make a drawing. First of all, it must be simple and understandable to the master.
- When drawing up a drawing, it is important to take into account the dimensional parameters of the room and the location of the cabinet, and think about what will be stored in it.
- Due to this, it will become clear how many shelves will be needed and at what distance from each other they will need to be placed.
- Having a drawing can greatly simplify the task of assembling the cabinet.
For high-quality processing of elements, you can use a manual electric milling cutter. Then all the work on assembling the cabinet will be done efficiently.
Drawings and detailing
If you have the skills and abilities, draw your wardrobe yourself using a special computer program. This will allow you to work in more detail and clarity. If this is not possible, draw sketches manually, taking into account all previously performed calculations. This is called “detailing”, that is, working on furniture in detail. Be sure to indicate in the sketch the thickness, width and depth of shelves and partitions, the length of the rods and their position, etc. Put all the information in a table to better organize it.
In general, whether we design our wardrobe on a computer or draw up a diagram by hand, we carefully take measurements, organize them and proceed to purchase the materials and tools needed for construction.
Coloring and decor
Three-leaf cabinets come in matte, glossy, dark and light colors, and are decorated with various elements. When choosing, it is important to maintain the style in which the apartment is decorated.
The most commonly used colors are shown in the table below.
| Interior type | Design |
| Classical | Restrained colors, but a wide range of materials - wood or its imitation. Strict forms |
| Scandinavian | Light wood or its imitation. Contrasting inserts of dark tones are possible. Simple shapes, straight lines |
| Modern | Lots of mirrors, glass, glossy surfaces, curved planes, three-dimensionality, metal elements |
Calculations and cutting of material
In any business, stages are important. You need to calculate your strengths and draw up a clear plan of what you can do yourself and what you will have to order from workshops.
A list of works or stages that are not labor-intensive, do not require specialization and certain skills, which can be carried out with your own hands. For example, take measurements of the part of the room where you plan to install a wardrobe.
Measurements of the area for installing a built-in wardrobe must be taken from various points on the surface. It is advisable to have paper and pencil with you, and immediately display the obtained measurement results.
DIY wardrobe drawings and description
The length of the opening is measured three times:
- the lower vertical line will pass at a distance of 0.8 m from the floor;
- the next horizon should be located at a height of 0.6 m from the bottom line;
- the last measurement is carried out at a distance of 0.8 m from the second horizontal line.
In a similar way, the depth of the future structure is measured and displayed in three-dimensional drawings, or the data is entered into a design computer program.
The relative complexity of measurements should include the curvature of the walls. If the built-in wardrobe is installed in a niche made of plasterboard, such an error can be neglected. In the case of an autonomous design, the width of the cabinet is reduced by a distance equal to twice the wall curvature error.
Choosing a location and size
It’s great if the room in which you plan to install a wardrobe has a niche - in this case, you will only have to mount the “filling” of the cabinet, attaching shelves and hangings to the walls of the niche, and also install sliding doors; the back and side walls will be missing. If you don’t have one, you can build a corner wardrobe, or simply attach it to the selected wall. Please note that after assembly this structure will be motionless and cannot be moved; Therefore, carefully choose the location of your cabinet.
Next, start designing. Start by measuring your future cabinet using a tape measure. Measure several times and write down on a piece of paper the desired height, length and width of the cabinet. This information will be useful when purchasing materials. Draw a drawing to scale, mark on it all the necessary additions that you plan to insert into your closet. These can be shelves, drawers, baskets, mezzanines, hangers, etc.
Designing a wardrobe yourself is not so difficult, the main thing is to conscientiously take its measurements, take into account the scale when making a drawing, and pay attention to every little detail
The length of the cabinet should not exceed 3 meters, the maximum is 5 meters. The length of each door is no more than a meter. This is directly related to the load on the “rails” of the cabinet and on the structure as a whole. Make a full calculation of the necessary materials for your individual project. Double check and recalculate several times. Remember the “golden rule” - measure seven times, cut once. It will be very unpleasant if you have to redo something during the construction stage.
How to build a drawing of a wardrobe with your own hands
After preparing the tools, choosing the material for manufacturing and the type of cabinet, it is necessary to draw a drawing. Without this component, it will not be possible to build good furniture.
We take measurements of the space for the closet
Measuring the space for this product is an extremely serious operation. As a rule, furniture of this type has right angles. Except for those cases when the room has oblique or curved elements.
The most difficult place in the room, it can be considered that the most difficult element for normal installation will be the niches. In addition to the distance between the walls, you must also make sure that the walls are installed strictly perpendicular to the floor and ceiling. Even a slight curvature of the walls can lead to difficulties during the assembly and installation of furniture.
The algorithm for measuring a room looks something like this:
- the first measurement between the walls is carried out either at the floor level or at the ceiling level;
- then, with a certain step, similar measurements are taken along the entire height of the wall;
- According to the same scheme, measurements are taken between the floor and the ceiling;
- The results obtained are recorded on paper in the form of a sketch.
To draw a sketch, you can use computer-aided design programs, such as AutoCAD or Compass 3D. The use of these software systems allows you to create three-dimensional models of both the room and the future closet. Such models will serve as the basis for creating working drawings of parts of future furniture.
Making a drawing on paper
As already noted, the basis for the development of sketches and drawings will be the obtained dimensions of the room in which the product will be installed. When making drawings, you can be guided by the following parameters:
- the maximum height is equal to the height of the room where it will be installed;
- the depth consists of two dimensions - the depth of the shelves, it is about 500–700 mm and the distance that will be required to install the guides along which the door will move.
How to make a drawing of a built-in wardrobe
To develop a drawing of the future cabinet you will need to know:
- Cabinet dimensions.
- Dimensions of its individual parts.
- Materials from which individual parts will be made, for example, sidewalls.
- How the cabinet will look from the inside, that is, or by hand, you will need to divide the cabinet into sections located both horizontally and vertically. Determine their sizes.
Before developing working documentation, you need to know where the necessary fittings will be installed. Mark the ends that will need to be edged. Using computer programs will allow you to print out the details and assembly order, but developing assembly technology will require the use of special subroutines. By the way, there are programs that specialize in designing such products.
Preparing parts
If you have previously looked at photos of the preparation of parts, then you understand that in the case of such large-scale structures it is very important to strictly follow the drawing. It is mandatory to pre-mark the parts
When cutting, do not forget to take into account the fact that the cut may take away the required millimeters and then the shelf or other part will be smaller than necessary, step back a little from the edge
In the ideal scenario, cutting is done on high-precision machines in a furniture workshop. Ordering cutting of the canvas is the best solution, which will save time and money, because in case of an error, you will have to purchase additional material. Having collected the parts, number them in accordance with the drawing, so that the assembly of the sliding wardrobe with your own hands will be organized as required by the description of the algorithm - horizontal or vertical.
We produce the entire set of parts. In addition, some craftsmen recommend making a guide with an angle of strictly 90° for assembly.
Then, with the help of it, you can connect the body parts much faster so that there is no distortion, which is especially important if you have chosen a horizontal type of cabinet assembly, that is, assemble it on the floor, and then lift it and install it
Assembly and installation of wardrobe doors
Let's see how the process of installing sliding doors for a built-in wardrobe takes place. In this case, the interior of the furniture has already been assembled and installed; to use it, you only need to install the doors.
Step 1. The first step is to buy or rent all the tools. In this case, you will need a screwdriver, an aluminum saw (a miter saw will be used here), and a hammer drill equipped with a drill. Scissors and tape measures, drills and hexagons, etc. may come in handy.
Tools required for work
Step 2: The first step is to install the top rail of the coupe system on the ceiling. To do this, you first need to measure the width of the opening (for example, from wall to wall).
The width of the opening is measured
Step 3. Next, you need to measure with a tape measure and cut off the required piece of aluminum profile with a saw.
The required length of the profile is measured with a tape measure
Aluminum profile cutting
Step 4. Now you need to drill holes in the profile to mount it on the ceiling. There are three pairs in total, at the beginning of the profile, in the middle and at the end. But there may be more.
Holes are drilled in the profile
Holes are drilled in pairs
Step 5. Together with an assistant, you need to lift the profile and align it along the end of the cabinet, and then screw it using self-tapping screws. This will not be easy to do without the help of another person.
The profile is aligned along the end of the cabinet
Screwing the profile
Step 6. Now you can proceed to installing the bottom rail for the doors. Just like with the top rail, first you need to take measurements.
The width of the opening is determined from below
Step 7. Again, you need to mark the desired size of the rail on the metal profile, and then cut off the section with a saw.
Another piece of profile is cut off
Step 8. Next, in the place where the rails will be mounted, you need to lay the prepared section of the profile, without fixing it yet. At this stage, you need to insert compartment doors into it and make marks on the bottom rail in the places where the stoppers will be installed.
Laying the prepared profile
Places for installing stoppers are marked
Step 9. Then, after fitting, you need to install stoppers on the rail in the right places and then screw the bottom rail to the floor or bottom of the cabinet. The bottom rail can be fixed with double-sided tape. Then, before applying the sticker, you first need to degrease the surface, and only after that glue the tape itself.
Surface degreasing
Using double-sided tape
Fixing the bottom rail
Step 10. After this, you can install the doors in place. The wheels on the bottom of the doors should fit into the corresponding grooves.
Door installation
In this case, the wheels are already installed on the doors themselves. But how to fix them correctly if they were separate? There is nothing complicated here either.
Step 1. The cabinet must include special fittings. If the cabinet is made by hand, then such accessories can be purchased separately in the store. It consists of metal elements of different types - with and without a wheel. Those that do not have wheels are mounted at the top of the door at a short distance from its side edge, but flush with the top end. The fittings must be screwed on using self-tapping screws.
The fittings are screwed on
Self-tapping screws are used for this
Step 2. The second type of hardware, which has wheels, needs to be fixed at the bottom of the door so that the height is optimal. Two pieces of each type of element must be attached to each sash.
How to attach fittings with wheels
Step 3. Next, you just need to screw on the handles, and you can install the doors on the cabinet body.
All that remains is to screw the handles
Step 4. First, you need to insert the sash into the far upper rail, and then, carefully lifting the door, install the wheels on the lower rail. The remaining doors are installed in the same way, but on the nearest rail, etc.
Cabinet door being installed
Video - DIY wardrobe
It is not difficult to assemble the doors of sliding wardrobes, as well as the cabinets themselves of this type. In factory versions, as a rule, there are special instructions, following which you can easily complete all the work. If you make the cabinet and doors yourself, then you can follow the instructions above. With a careful and attentive approach to work, everything will definitely work out!
Sliding door options
Any built-in furniture with your own hands should have not only beautiful, but also practical doors. They must work correctly and at the same time be durable.
The most practical, cheapest and most durable option is the “Bottom Rail”. In this version, the rollers are located at the bottom, and at the top there are only guides that simply prevent the door from falling out. This solution will suit you best.
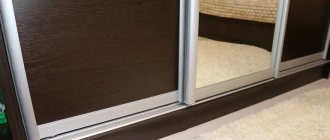
The door material itself and the decor can be very diverse. The most important thing is that it meets several requirements, namely, it is durable, strong and beautiful, since the doors will become part of the interior, so they must fit into it. Even mirrors can serve as material for doors, especially if the closet is in the hallway, but making this option yourself is quite problematic.
Rules for assembling furniture
It is already clear that the most difficult part of assembling a wardrobe will remain the process of assembling its doors itself. Everything else is done simply and clearly. However, before we talk about working with doors, it is worth remembering the general rules of work during the assembly of cabinet furniture.
- If the furniture was purchased in a store, it usually comes in several boxes. Each of them will have parts for a specific part of the same cabinet. First, you should always read the instructions, and then unpack. You need to unpack the boxes in stages - you don’t need to do everything at once, otherwise you can get confused in the details.
- You should immediately see that all the necessary fittings are in place. It also happens that the manufacturer miscalculated and something is missing. Likewise, you need to make sure of the amount of fittings when creating a cabinet yourself - it’s inconvenient to run to the store in the middle of the assembly process if something is missing.
- You need to assemble the cabinets section by section - first one part, then the other. Moreover, if the cabinet is a cabinet, then it is worth assembling the cabinet itself first, and only after that move directly to the doors.
- If the cabinet has a mirror, then it should be fixed to the wall or door last, in order to reduce the risk of damage to the mirror surface.
Sliding doors
Probably the most difficult stage is installing a sliding door system. But if you prepare well and buy all the materials for the opening mechanism, then there should be no problems.
The first thing you need to do is secure the top door track. You can see how to secure it yourself in the instructions, since such systems usually come with an installation diagram. The easiest way to fasten is with dowels or anchor bolts.
The second stage is attaching the lower rollers to the doors. The rollers themselves should be chosen very carefully, since they are the ones that hold the doors on them. They should not wear out quickly and have a reliable mechanism. Since the breakdown of at least one roller will make using the cabinet difficult.
Once everything is ready, you can install the bottom rails and put the doors in place. The lower guides should be exactly under the upper ones. To accurately measure their location, it is best to use a plumb line. If the door is skewed, this will lead to increased wear of the fittings, so you need to be very careful when making doors.
If you carry out all the work yourself, then you should be as attentive and careful as possible so that the cabinet you make does not break and is comfortable. Wardrobes are a must-have attribute in every home, and if it is possible to build it into the wall, this will significantly expand the space in the house. Even small cabinets hidden in the wall will be very useful in the house.
Step by step instructions
Assembling a sliding wardrobe in concise instructions
Along a blank wall
- Initially, the outer walls are assembled in a horizontal position, which are attached to the top cover and bottom using confirmations or corners. To ensure the perpendicularity of the walls, use a square and clamps. Dowels mounted on PVA glue will provide greater reliability of fastening. You should immediately attach the legs to the bottom with self-tapping screws. The back wall, if available, is attached using a stapler, self-tapping screws or nails.
- The base of the structure is placed in a niche or in a place provided for by the project. Using a building level, the correct installation relative to the horizontal and vertical axes is checked.
- At the next stage, partitions and shelves are assembled using confirmations or corners. If there are no side walls, the outer shelves are attached to the walls of the niche using corners and dowels. In the same way, vertical partitions are attached to the ceiling and floor.
- After this, the fittings are fastened using self-tapping screws.
- At the final stage, the upper and lower guides for sliding doors are installed and the doors themselves are hung. If door mirrors were purchased separately, before hanging they should be glued using “liquid nails” of a special composition.
Guides for sliding doors are installed after assembling all other elements of the cabinet
DIY wardrobe in a niche
- When installing a cabinet directly in a niche, when its walls are used as load-bearing structures, assembly begins with attaching the main vertical partitions with transverse shelves to the floor, ceiling and side walls. Chipboard sheets are attached to the walls and ceiling using metal corners using anchor bolts or dowels. The parts of the sections are connected to each other with confirmations or using corners.
- During assembly, the correct installation relative to the horizontal and vertical axes is checked using a level.
- The subsequent stages of assembling such a cabinet model, that is, assembling the remaining partitions, attaching fittings and installing sliding doors, are carried out in the same order as the previous model. Only door guides are mounted not on the top and bottom planes of the cabinet, but on the floor and ceiling.
A sliding wardrobe made by yourself will not only save money, but will also fully correspond to the tastes, desires and needs of the owner. It's worth losing some time and effort. At the same time, the owner will eliminate doubts about the quality of his furniture, the materials from which it is made and other components.
Manufacturing materials
Various materials are used to make such furniture structures. Namely:
- Expensive options are made from solid natural wood. Their value lies in their durability. The surface of the finished cabinet retains the natural texture of wood. Such specimens are mainly made to order.
- The mid-price category includes models made from MDF and medium-density fiberboard. They are inferior in properties to natural wood, but will be optimal in terms of “price-quality”. Are in demand among buyers.
- The budget option involves laminated or film-coated chipboard. Such products are not durable, but are affordable.
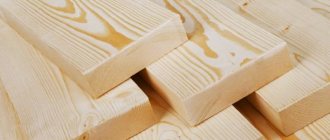
The listed materials are fully or partially used in the manufacture of load-bearing structures and facades. Combinations with mirrors, glass and various decorative elements are popular.

