- How to remove using stencils
Stencils
What you need to remove a crack on a mirror with your own hands
If a mirror cracks, it always upsets the owners. The search for a solution to the problem begins. There's just one caveat. It will not be possible to completely remove a crack in the glass. At home, not a single available remedy will help with complete restoration.
The question often arises - how to decorate a crack in a mirror with your own hands.
It is dangerous to carry out complex work at home, since a mirror is a rather whimsical object and only loves careful professional handling. But you can always find a way out of any situation.
If you can’t remove the crack, you can decorate it beautifully. This will not only save the mirror, but also refresh the interior. This may require various materials.
The most common techniques used for decorating a reflective surface are stencil designs, or their framing, the craquelure method, applying various designs and interesting frames. As you can see, there are really many ways and each of them is good in its own way.
What are the advantages of do-it-yourself mirror restoration?
Not everyone immediately decides to restore a mirror with their own hands. This most often occurs due to ignorance of all the advantages of this process. But independent mirror restoration has a lot of positive aspects that can encourage you to carry it out. These include such aspects as:
- In small towns, or even villages, you can rarely find a master who can properly repair a mirror. Not everyone can restore amalgam. Decorating small flaws yourself is much easier than looking for a specialist restorer of this profile.
- Repairing damage to a cracked mirror is not a cheap pleasure. Most often, such a procedure will cost more than buying 3 new mirrors. And decorating with your own hands involves spending only on a minimum set, which often consists of one stencil.
- If a crack on a wooden surface can be easily covered with wax and this does not require special skills, then restoring glass is a completely different matter. Therefore, again, it is much easier to repair the crack with an interesting pattern that would match the interior. This definitely doesn’t require any special skills or knowledge, just paint and desire.
- It's no secret that a small scratch can turn into a big chip. This most often happens due to the transportation of the mirror to the workshop. And when the piece of furniture has already been delivered, it turns out that it cannot be restored. It is for this reason that it is better to leave the structure in its original place and take advantage of interesting ideas for independent restoration.
How to repair a crack in a mirror with your own hands
Not everyone knows how to repair a crack in a mirror with their own hands. There are several ways to fix the problem. To do this, you will need a minimum set of tools, a little time and desire to bring the mirror into proper shape.
You can try to disguise the crack using various decorative elements.
Important! Since the methods involve the use of decor, you need to choose the right one for your interior.
How to remove using stencils
Stencils are a universal thing that can save you in different situations, and a crack in glass is no exception. There are many variations of stencils and they will suit every interior. To bring the idea to life, you need to purchase brushes of a suitable size, acrylic paints, a simple pencil, a regular sponge, masking tape, acetone (you can use nail polish remover) and, of course, a patterned stencil.
One of the most effective and simple ways to disguise small cracks in a mirror is to cover them with paint.
You can use this method as follows:
Stencils
As you can already see, the method with stencils is quite simple and effective. Under a layer of paint, cracks and even small chips will become less noticeable. The advantage of this method is that the stencils can be different, from flowers to cartoon characters. No special drawing skills are required, since the task will only be to paint a finished drawing.
This is one of the most effective and inexpensive ways. An undeniable advantage is that the drawings can be changed whenever you want. They can be easily washed off if you use acetone.
In order for the pattern to be clear and not smudged during the process, the stencil must be firmly glued to the mirror with masking tape.
Important! If the stencil is attached to the mirror with ordinary tape, then traces from it will have to be wiped off for quite a long time and using chemicals. They, in turn, can erase the applied drawing.
Craquelure
Craquelure is one of the most popular and beautiful methods. In addition to mirrors, it is also used for aging furniture. The method is suitable for those who are not afraid to add more cracks to the mirror surface, only this time artificial ones.
As you know, it is best to hide something in a visible place. You can also hide defects on the mirror in this way.
The craquelure technique is to give the mirror texture in the form of small irregularities. This way you can not only hide the resulting flaw, but also add an independent object to the interior, which gives it its own peculiarity and sophistication.
This is done using craquelure varnish and acrylic paint. The color of the paint should harmonize well with the wall or mirror frame. Although the technique does not involve complex machinations, it still requires caution in performing all actions.
This decoration technology is quite simple, but it must be performed with special care.
The first layer of paint is applied to the mirror surface. It must dry completely. Only after this the second layer of craquelure varnish is applied. The two components will begin to interact, forming artificial cracks. The mirror is not damaged in any way. It looks very beautiful, since the mirror surface will look out through the new irregularities, reflecting the light.
Removing a crack using a drawing
The method with a pattern is almost identical to the method with a stencil. Only here you will have to come up with the plot of the picture yourself and draw it.
Anything can be depicted on mirrors. These could be trees, birds, flowers or ordinary geometric patterns. If you used acrylic paints before, now you will need stained glass ones. They are made specifically for painting mirror surfaces.
You can also cover a crack or scratches on a mirror using a drawing.
Frame
If a crack appears on the side, then it can be covered in an original way using a frame. She can be anyone. There are no restrictions in this type of decoration. The main thing is to build on the possibilities of the mirror surface. It is better to refrain from decorating with large massive objects. And they won’t look very nice on a light reflective surface.
Materials such as buttons, beads, shells, decorative stones, clothespins, textured rope threads and even antique coins are often used. The pattern is arranged in such a way as to cover all defects. For fastening, it is better to choose reliable glue.
An original frame will help hide the damaged area on the mirror.
How to remove scratches from a mirror
In addition to decorative designs, you can also use the good old traditional methods of getting rid of cracks. True, as has already been said, they will not remove it completely either, but will only disguise it.
You can use toothpaste and flannel cloth. The product is carefully rubbed into a shallow scratch. Then it dries and polishes. And for deeper cracks, colorless silicone sealant or foil is suitable.
It is quite possible to hide problem areas on your own.
Beautiful ways to decorate a mirror
A beautiful mirror decoration will not only cover cracks, but will also interestingly complement the interior. For this you can use any means and materials. You can often find ways to decorate using shells. They look beautiful next to the mirror surface and give it a special mood.
They are not attached to the mirror itself, but to a specially made frame that will match the shape of the mirror.
Additional Information! By decorating with filled frames, the mirror can be visually enlarged or reduced. Its dimensions will depend on how exactly to place the beautiful frame.
In addition to shells, wine bottle corks can also be used. They are also placed on the mirror in any order, creating beautiful patterns. If you want to add a little depth to the mirror surface, then the plugs are attached in their original form without cutting. A mirror framed with hemp rope looks beautiful in all interiors.
In this process, it is important not to get carried away and not to overdo it with the number of elements so that the frame looks organic.
Mirror care rules
The rules for caring for the mirror must be followed. Otherwise, there is a risk of re-appearance of various cracks and chips. It is important to follow the following rules:
- The mirror surface does not like humidity.
- It is better not to place mirrors in direct sunlight.
- Mirrors can only be wiped with soft, lint-free cloths (it is better to purchase a specialized one, this will reduce the risk of scratches).
- There is a thin layer of silver on the mirror, so the surface should never be wiped with products designed to clean glass. They contain ammonia, which harms the surface.
After familiarizing yourself with all the possible ways to decorate a mirror, everyone can easily repair a crack in a mirror with their own hands.
The result can pleasantly surprise and even bring some novelty to the design of the room.
Video: do-it-yourself resuscitation of a broken mirror
A cracked mirror is a sign
Almost every person knows that mirrors have mystical powers and are often a magical tool in various kinds of rituals, acting as guides between worlds. That is why they should not be perceived as ordinary interior items. There are many rules about placing mirrors in different parts of the house and they should be followed. If the mirror cracks on its own, this is a very bad omen. It means that there is a lot of negative energy in your home. Perhaps there is an evil spirit living in the room. Some consider a cracked mirror a harbinger of severe damage. It is believed that to some extent a mirror can protect its owner from negativity, but if the object cannot withstand an energy attack, it may become unusable.
Decorating a mirror
If the frame of the mirror is wooden and has lost its shine, you can update it by applying varnish of the required color. Or change the look of the mirror by decorating it with jewelry, shells, bamboo sticks or broken dishes. It all depends on the owner’s imagination.
Read also: How does a diesel engine work?
Restoring mirrors is a rather painstaking task, the result of which should be the preservation of the original surface, especially if the mirror is antique.
Benefits of DIY restoration
Do-it-yourself mirror restoration has its own special advantages:
- It is not always possible to find a master in your city who can restore amalgam.
- Repairing the surface of a mirror will require patience and an investment of money, so turning to a specialist will require a large investment.
- It will take a lot of time to find a craftsman; in addition, during transportation, the interior item may break. If the damage is small, then it is easier to do everything yourself.
Prevention measures
Caring for a mirror surface should include the following points:
Carrying out regular cleaning using special products or homemade compounds;- exclude exposure to abrasive or other surfaces, including the hard sides of sponges;
- It is advisable to have complex damage and chips repaired by a specialist;
- mirrors do not tolerate constant moisture well, so mirror surfaces that fog up in the bathroom must be wiped dry regularly;
- Rubbing the mirror with shaving foam will help prevent the mirror from fogging.
Any dirt that gets on the mirror must be removed immediately.
Is it worth trying to repair?
The question is really important and relevant. First, assess the extent of the damage. An impressive proportion of windshield defects make it possible to avoid the need to replace the product. Many windshields can be restored.
When the damage is serious, the crack has spread across almost half of the glass, or the chip is more like a hole, the repair will be pointless and useless. You shouldn't even try to restore such defects. You will waste your energy, time and money on materials. And even if someone undertakes the repair, the price will be higher than the cost of a new windshield for your car. Therefore, think twice and objectively assess the situation.
If an assessment of the car’s condition makes it clear that it makes sense to buy a special product, pour in polymer and restore the surface, then get to work.
The mirror cracked
Is the mirror cracked ? Don’t rush to get rid of the item; you can always replace the mirror cloth. There are times when it is more advisable to restore a damaged item rather than part with it forever. Masters will come to any address in Moscow and the nearest Moscow region and perform all the necessary work to replace mirrors. We accept applications for visiting specialists by phone or online.
If deep damage
More difficult work awaits if the scratches on the glass are deep. Simple rubbing in this case will be ineffective. A recipe using GOI paste and epoxy glue will come to the rescue.
Work order:
- Clean the mirror using glass cleaner. This will degrease the surface and prepare it for further processing.
- Dry the mirror.
- Fill the cracks with epoxy glue. When filling cracks, the epoxy should be distributed evenly, without air bubbles or unfilled cavities.
- Excess filler should be removed with a cotton swab or carefully cut off with a utility knife.
- Leave for 4 days.
- Polish the surface using GOI paste.
How to close a door with glass?
How to darken glass in an interior door
- Cover it with self-adhesive film, which can be purchased, for example, at a wallpaper store. ...
- Use film to tint car windows or windows (the downside of this method is that it is not cheap).
- Buy glass paints at any office supply store.
Interesting materials:
How to cook raw milk mushrooms? How to use iodine during radiation? How to take amino acid tablets? How to take BCAA before training? How should girls take BCAA capsules? How to take coenzyme q10? How to take collagen in liquid form? How to take Leuzea? How to take lysine for herpes? How to take melatonin tablets?
Advantages of do-it-yourself mirror restoration
Given the desire and time, any home craftsman can carry out the restoration himself, extending the life of his favorite mirror.
- restoration in a specialized company can be expensive, because it is a labor-intensive and responsible process;
- Not every city has a person who professionally restores reflective surfaces;
- it will take a lot of time to find a restorer, deliver the item to him and back;
- During transportation there is a serious risk that the glass will break.
Let us once again draw attention to the fact that you can repair minor damage yourself, but entrust major repairs to professionals. We’ll talk more about how to improve a reflective surface with your own hands below.
Why cracks may appear
Poor quality glass
The first reason for the appearance of cracks is the use of low-quality or non-tempered glass. Indeed, unlike tempered glass, raw glass is not subjected to repeated temperature influences during the manufacturing process and is not able to withstand constant temperature changes during operation. Therefore, even banal cooking can cause cracks to appear on ordinary glass in the temperature-affected zone (the area of the hob).
Special means
To perform work to improve the condition of the mirror surface, special preparations can be used.
Paste GOI
GOI paste is a special composition for grinding work . The main component is chromium oxide. The paste is used very widely - not only for caring for mirror surfaces, but also for polishing:
- glass,
- ceramics,
- metal alloys, etc.
How to use:
- grind the substance into powder;
- using a cotton swab, apply the drug to the damaged areas in a thin layer;
- rub and polish each area for at least a quarter of an hour.
Polishing with GOI paste must last for 15 minutes for there to be a visible effect; the exposure time cannot be shortened. The price for 20 grams is on average 50 rubles.
Cerium oxide
Cerium oxide is a chemical compound that can be purchased in powder form . This substance is used in ceramics, for processing jewelry stones, removing scratches on mirrors, etc. The product is available in packaging of various weights.
To repair a mirror and eliminate defects, cerium oxide is diluted to form a paste. The surface requiring treatment is moistened and the prepared composition is applied.
Periodically moistening the surface, polish with a felt cloth. Adding water helps prevent premature hardening of the mass. If necessary, add “gruel” and continue rubbing. Price for 0.1 kg is about 500 rubles.
How to glue broken glass or glue one glass piece to another?
They resort to gluing glass products or parts in the process of repairing or making structures such as an aquarium or other products with their own hands. Quite often, car windows, cooktops or oven doors suffer and need gluing. Each case requires an individual approach. This applies to both the choice of adhesive and the method of working with it.
Surface preparation
In order for the glue to hold parts or fragments together well, their surfaces must be properly prepared for the gluing procedure. The presence of dirt or foreign inclusions often nullifies the result. Preparation for gluing consists of the following steps:
- wear rubber gloves (they will not only protect the skin of your hands from caustic chemicals, but will also eliminate the possibility of contamination of work areas with sweat and sebum);
- remove small fragments from the surface of the future seam (defects that appear in their place during the gluing process will be filled with hardened glue);
- degrease the glass (gasoline, acetone, white spirit, universal solvent 646, ethyl alcohol are suitable for this);
- dry using heating (since at room temperature condensation remains on the glass, which prevents good adhesion).
Selecting an adhesive
Glass is a complex material, so the adhesive for repairing it must be chosen especially carefully. The following factors must be taken into account:
- nature of the surface (smooth, matte, rough);
- transparency and color (opaque and colored glass poorly transmits UV rays necessary for the polymerization of light-curing compounds);
- the size and nature of the defect (liquid glue is preferable for filling narrow cracks, and thicker glue for wide cracks);
- expected load on the future seam;
- possible contact with liquid;
- possible contact with food or drinks (use of toxic materials is prohibited);
- the likelihood of heating (for example, the glass of a hob or oven will have to be glued with heat-resistant glue).
Examples of glass glue:
Glass gluing kit
Operating procedure
install the fragments in the desired position, if necessary, using special devices (magnets, suction cups, tape, plasticine, etc.); carefully heat the glass to 40°C (since
glue works better when heated); when using glue with a viscous consistency, lubricate one of the surfaces intended for gluing with the adhesive, accurately match the fragments and press them tightly against each other (if the glue is liquid, then it is more convenient to pour it onto the seam area of pre-composed fragments); leave for polymerization for the time specified according to the instructions (if UV glue is used without using an ultraviolet lamp, then it is necessary to ensure access to direct sunlight to the glass); After drying, remove excess glue protruding along the edges of the seam with a sharp stationery knife, scalpel or razor.
Excess UV glue is removed before irradiation, since in its hardened form it is difficult to clean
Another important condition is that light exposure must be carried out simultaneously along the entire length of the seam, because
With uneven polymerization, areas of stress arise that reduce the strength of the bond.
Causes of wear
Sometimes, after several years of service, we notice that the mirror does not reflect well and some spots appear. Turning the canvas over, it turns out that the coating has been torn off from the back side. It's called amalgam.
This coating can come off for various reasons. And these are not necessarily the consequences of scratches and mechanical stress. Amalgam also begins to slip if normal air circulation on the inside is disrupted. If you see transparent spots on the reflective side, you should think about gluing the mirror correctly or choosing a different place for it.
The production of mirrors is technologically quite complex. To create a reflective surface, a thin layer of metal, supplemented with special additives, is applied to the reverse side. Metal microparticles are gradually applied to the surface, often in several layers.
It will not be possible to achieve the same effect at home without special industrial equipment. Therefore, if your antique mirror in a wooden frame has worn out and lost some of its reflective properties due to peeling amalgam, partial restoration will be required.
No one is stopping you from giving the product to a special company, where they will do professional restoration. But it is very expensive and not every city has such specialists. The cost of the service sometimes exceeds the price of the mirror itself. First, you should try to perform the procedure yourself, at home.
Practice clearly shows that it is possible to restore a surface using available materials, and the result often exceeds expectations.
Safety rules at work
- The first and most important rule is to cover your body with clothing so that if something happens, the fragments do not cut your skin.
- The second rule is to work in an open place, preferably on the street. If this is not possible, it is necessary to thoroughly clean the room in which all work will be carried out, and to prevent any residue in the form of small fragments on the floor.
- The third rule is not to allow children to approach the tools or touch the door with the mirror, as the child may accidentally push it off or cut himself.
- The fourth rule is to regularly check your hands for small fragments and stop working if you notice that fragments have gotten into them.
- The fifth rule is that it is advisable to work in protective glasses so as not to injure yourself.
Removing mirrors at home is an activity that requires patience and the ability to take your time, as well as increased safety in working conditions. If you are not sure that you have sufficient skills for dismantling, and you do not know whether you can do it yourself, it is better not to tempt fate and call a specialist, paying, but saving your nerves and health.
However, using the methods described above and taking into account safety precautions, you can do it yourself in a short time, without losing money, which you will certainly succeed with the step-by-step help provided.
How to restore a mirror yourself
Experts note that any mirror must be carefully looked after, then its restoration will not be a problem for you. In a high-humidity room like a bathroom, you should purchase special reflective glass designed for use in such conditions so that it does not become stained over time. You can make amalgam more wear-resistant yourself using folk recipes. To do this, it is treated with melted wax and turpentine in a ratio of 1:2. In addition, you need to properly clean the mirror surface so that it does not lose its attractive appearance:
- remove dust with a soft, dry cloth;
- Having gotten rid of dust, the mirror is treated with a special glass cleaner;
- At the end, the product is polished with newspapers, removing stains.
If, despite observing all the conditions, small defects still appear, try to eliminate them using available means. The choice of materials and working methods will depend on the specific situation - large areas are restored with foil and glue, and for small scratches, silicone sealant is used. To carry out the procedure, you should prepare a workplace and the necessary tools in advance.
Required materials and tools
To carry out repairs you may need:
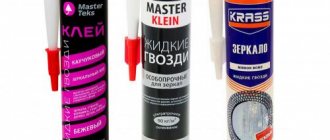
- special glue designed for glass and metal;
- brush with stiff bristles;
- foam sponge;
- soft napkins or cloth;
- glass cleaner;
- composition for degreasing surfaces (gasoline or alcohol-containing product);
- foil;
- scissors;
- brush;
- silicone sealant.
REFERENCE! Small restorations can be easily done at home. Even if it is not possible to completely eliminate minor damage, they will at least become less noticeable.
Instructions for mirror restoration
When the workplace and all the necessary materials are ready, begin the repair. If there is visible damage to the amalgam, first you need to carefully remove the product from the frame and place it on a table, which is best covered with a soft cloth. Next, you should adhere to a certain algorithm of actions:
- clean the damaged area with a brush with stiff bristles;
- Next, you need to wash the mirror with glass cleaner and dry everything;
- degrease the surface with an alcohol-containing product and wipe everything thoroughly, let the product dry again;
- cut out a piece of foil of the required size with scissors (it should be slightly larger than the damaged area);
- we apply special glue, apply the cut-out foil to the mirror with the glossy side down and press it properly (some craftsmen use transparent tape instead of glue);
- carefully level the foil with a clean, dry cloth or napkins and wipe off excess glue;
- When the glue has completely dried after a few hours, the restored mirror can be inserted into the frame.
ATTENTION! If the described method does not help remove visible defects, this may mean that the damaged area is too large. In this case, it is unlikely that anything will be fixed.
If desired, the gluing area can be coated with a thin layer of colorless varnish for greater reliability, but this is not necessary.
How to restore a mirror if there are scratches and chips
A sealant is used to repair small scratches and chips on fragile amalgam. To do this, we also first clean and degrease the damaged area, wipe it dry with soft napkins. Next, carefully fill the existing cracks with silicone; for convenience, you can use simple toothpicks. Then let the product dry well and remove all excess.
Replacement of damaged elements
This method of spot restoration of the finish is the most labor-intensive of all those used, but it allows you to repair the coating with virtually no traces. This is exactly the case when a few tiles left over after a major renovation will come in handy.
First of all, it is necessary to remove the damaged sheet (or several) from the base without damaging the adjacent finishing elements. To do this, one of the methods is to remove the grout from the seams. To facilitate the process, you can first apply a cement softening agent (Lugato, EK-100 Super, Lepta KhimFrez) to the joints, but be careful, since they are acid-based.
Ways to remove old grout
Having freed the joints of the defective sheet from the grout, it is better to further weaken it for safe removal - make 1-2 cuts on the tile crosswise with a grinder, or drill several holes with a drill. After this, with careful blows of a hammer on a chisel, the tile easily splits into small pieces and is removed from the socket.
Eight ways to remove scratches from a mirror
- Foil. Before the procedure, remove the mirror and remove it from the frame, if it is framed, or from the cabinet door. If necessary, unscrew the screws and remove the nails. Take a piece of foil slightly larger than the scratch and smooth it out. Turn the mirror over and place the foil over the defect. Smooth out the piece and tape it to the surface. Turn the product over to the front side and check the result. If the foil has moved a little, adjust it;
- Toothpaste. Apply the product to the surface and gently rub into the mirror in a circular motion using a soft flannel cloth. Leave to dry and then polish until shiny. This method is suitable for removing small scratches;
- Mustard and vinegar. Take mustard powder and table vinegar 9%. Mix the components in equal proportions and apply the composition to scratches or chips. Remove excess with a napkin or soft cloth. After the procedure, polish the mirror;
- Cerium oxide is an effective product that will visually hide scratches on a mirror and smooth out surfaces. Mix the powder with a small amount of water to obtain a creamy paste. Apply the solution to the affected areas and polish the product with a damp cloth. Repeat the procedure if necessary;
- Clear nail polish is suitable for removing deep scratches. To do this, fill the grooves with the product, remove the excess with a napkin or cloth and wait until it dries. Then polish the surface with a soft cloth until shiny;
- Colorless silicone sealant is excellent against scratches on home and car mirrors. First, degrease the scratched area with alcohol or glass cleaner. Dry the surface and then fill the cavities with sealant. Leave the product to dry for a day. Carefully cut off the excess product with a knife. To avoid damaging the surface, hold the knife at a 45-degree angle. After processing, the mirror is polished with a flannel cloth or a grinding machine;
- GOI paste is a modern and effective product that is also used to repair scratches on watch glass. Crumble the paste into a powder and apply a thick layer to the damaged area using a cotton swab. Rub the product in for 1.5 minutes and then wipe with a dry, clean cloth. Then you need to do the procedure a second time, but now polish the surface for 15 minutes. Rub the paste carefully and gradually, otherwise the treated areas will fade over time and become different from the other surface;
- A mixture of GOI paste and epoxy glue will eliminate deep chips, cracks and scratches. First you need to degrease the area using alcohol or glass cleaner. The dried grooves are filled with glue so that no air bubbles remain. Excess product is removed with a cotton swab or carefully cut off with a knife. Leave the product to dry for four days, then polish the surface with GOI paste.
Home Recipes
You can smooth out microcracks and make them less noticeable using simple home recipes. To do this, you will need simple tools that you already have in your household.
Silicone sealant
To carry out the work you will need:
- glass cleaner;
- silicone colorless sealant;
- toothpick;
- stationery knife;
- lint-free cloth or rag.
Procedure:
- Apply glass and mirror cleaner to the surface of the mirror.
- Rub the liquid in with a lint-free cloth until the surface is clean and dry.
- Using a toothpick, carefully apply the sealant precisely along the cracks.
- Let the product dry.
- Carefully remove any remaining sealant protruding onto the surface with a knife.
- Treat with glass cleaner.
Walnuts
Walnut kernels will help camouflage the defect. For treatment, you can use a piece of the nucleolus to rub the area with the crack.
But the best result is achieved when the kernels are ground into flour . Enough to work a small quantity. Just a little olive oil is added to the resulting powder so that the composition becomes paste-like. And the resulting paste is rubbed into the mirror.
Vegetable oil
To rub a mirror with cracks, any available vegetable oil can be used. Just a few drops are enough to treat a scratch.
The oil must be rubbed into the affected surface using a soft, lint-free cloth.
Vinegar and mustard
To work, you will need table vinegar and mustard powder. Both ingredients are taken in equal proportions and rubbed into the mirror surface. Polishing completes the treatment.
Toothpaste
To polish the mirror, white toothpaste without colored inclusions can be used. A small amount of paste is squeezed out of the tube onto a sponge and rubbed into the surface that requires restoration. The rubbing movements should be clockwise.
Nail polish
Use clear nail polish to disguise scratches. To hide the defect, varnish must be carefully applied to the damage and rubbed in.
Foil
If the surface damage has affected the back of the glass, a different approach will be needed to repair the defect and restore the reflectivity of the mirror.
For restoration work, ordinary foil can be used . When preparing the surface for work, it must be cleaned, and the mirror itself must be removed from the frame and free access to the back side.
You will need a small piece of foil - a little larger than the scratch itself, which requires masking. The mirror is turned over with its back side up and wiped. Using tape, secure the foil to the area where there is a scratch on the front side. The piece of foil must be absolutely even.
Step-by-step instruction
How to restore a mirror with large amalgam damage?
You need to carefully remove the mirror from the frame and place it on a table covered with a soft cloth. Thoroughly clean the damaged surface with a brush. Then wash with glass cleaner and dry. Now degrease the damaged area with gasoline or alcohol and dry again. Using scissors, cut a piece of foil slightly larger than the size of the damaged area. Apply glue to the treated area of the mirror, apply the foil with the shiny side down and press. Use a napkin to smooth the surface of the foil from the center to the edges. Carefully remove excess glue with a sponge and dry the mirror for several hours. Place the restored mirror back into the frame.
Repairing a mirror coating is labor-intensive and requires investment, so mirror restoration will probably not be cheap.
To restore the surface of a mirror that has minor damage, grinding and polishing are used.
Preparation of glue
You can buy glue at the store, but I made it myself.
I poured four cups of cold water into a saucepan, put in one and a half cups of cornstarch (you can use potato starch) and put it on low heat.
Stir for five minutes until the consistency becomes soft and smooth, like sour cream. After removing from heat, I continued stirring until the glue cooled.
How to remove scratches from a mirror
In addition to decorative designs, you can also use the good old traditional methods of getting rid of cracks. True, as has already been said, they will not remove it completely either, but will only disguise it.
You can use toothpaste and flannel cloth. The product is carefully rubbed into a shallow scratch. Then it dries and polishes. And for deeper cracks, colorless silicone sealant or foil is suitable.
It is quite possible to hide problem areas on your own.
Pros and cons of homemade restoration
Having discovered minor defects on a bathroom mirror, many people prefer to carry out the restoration themselves. This procedure has a number of advantages and disadvantages. The advantages of self-restoration include:
- Minimum costs. For processing, you only need to buy cleaning products, without spending money on the services of professionals.
- Use of available materials. Most defects can be removed using household products.
The main disadvantage of doing the work yourself is that you can only remove minor scratches. To remove deep defects, you will need the help of specialists.
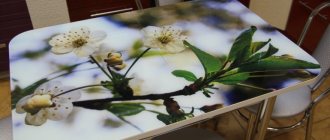
Wardrobe decor with full color posters
Wardrobe doors with photo printing are not a cheap pleasure. Color posters based on vinyl film are much more affordable and often look much better. This is achieved through high quality printing. You can paste a poster on one of the doors or make a composition on all panels of the wardrobe.
Drawings on color posters can be very diverse: from abstract figures to your own photographs of memorable places. They should be applied like regular vinyl stickers.
