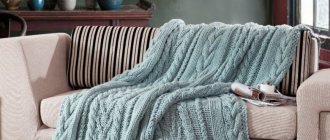
True home comfort is created by the hands and soul of the housewife. All interior items, accessories and small details reflect the character and habits of their owners. The most pleasant atmosphere in the house is when every little thing in the interior brings aesthetic pleasure and gives home peace. The warmest and most welcoming interior items will be knitted square bedspreads. They warm you up in the literal and figurative sense of the word!
Combination of styles
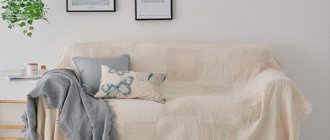
A crocheted square blanket is such a versatile item that it can harmoniously combine with almost any style in the interior. It is important to choose the right colors, sizes and patterns at the initial stage.
- For modern modernism or minimalism, a bedspread of restrained colors and not too pronounced texture is suitable. You can use synthetic or cotton yarn. Wool next to an abundance of metal and plastic will be inappropriate.
- Textured styles such as boho, Provence or country will perfectly accept a patchwork style bedspread with original floral motifs and fringe. Yarn made from natural and synthetic materials is suitable.
- Classics love luxury and grandeur in everything – the bedspread is no exception. Complex and intricate patterns, the addition of gold or silver threads, beads, beads and other chic are real attributes of luxury. A classic style bedspread will become the central element of the entire interior.
- Simplicity and conciseness are the loft style. Cotton or wool yarn and soft monochrome colors.
What you will need
People planning to knit such a product for the first time, and who do not have the dexterity, should establish the basic materials used in the process:
- The predominant participant in the process is a set of knitting thread. Any variety of it will do.
- The general equipment of any craftswoman is a crochet hook. For knitting, it is better to choose number three, or number 3.5. We recommend purchasing not a whole set, but a numbered tool.
Choosing the color of the bedspread
A harmonious combination of colors is one of the basic rules of the interior. Therefore, before purchasing yarn and starting to create your masterpiece, you need to thoroughly think through the color scheme.
Several standard combination variations:
- Blue curtains, snow-white tulle and blue-green pillows on the sofa or bed. The color scheme of the bedspread can be any of the above colors or differ by several tones.
- Beige color for pillows and curtains, chocolate carpet with black edging on the floor. A dark bedspread or beige with a pattern to match the edging of the carpet is perfect.
- Contrasts are allowed, but they are appropriate and harmonious. For a white room - blue, red, blue, wheat. For beige - the color of ripe berries and rich shades of fresh greenery.
How to connect
In addition to the skill of creating such an ornament, it is also important to be able to crochet squares and get ready-made knitwear from them. There are several joining methods used depending on the specific parameters and characteristics of the future pillowcase or bedspread. It is recommended to start from a larger area and gradually move towards smaller elements. There are four combination techniques in total:
- With the use of loose columns.
- Use of original half columns.
- Openwork.
- Stitching with a needle.
Optimal size
The correspondence between the size of the product and the dimensions of the furniture for which it is intended is very important. The bed should be covered almost to the floor, otherwise the look will be unfinished and even clumsy.
For armchairs and sofas, options are possible when only the back and seat are covered, or the furniture is completely covered, including the armrests and even the back.
The standard bedspread size for a double bed is 220*240 cm, for a chair 130*170 cm, a small sofa 150*210 cm, a corner sofa 240*260 cm, a crib 170*240 cm.
All parameters are strictly individual and depend on the dimensions of the furniture. It is very easy to adjust the size of a blanket knitted with squares. If necessary, you can always add a few more missing squares to the almost finished product.
Classic
The simplest way to weave things is to place different sections from the center to the circle. To start, you need to understand how to tie several lifting loops, and then move on to using the throw-on columns. The number of required repetitions of such an operation is determined by the dimensions. Please note: to create smooth edges, you need to connect them with a yarn over.
This option is not the only one. On the Internet you can find many different manipulations that both professional and novice craftswomen can use. Finished products are decorated using all kinds of elements and shapes. Such works differ only in terms of appearance. With their help, you can decorate any items of home textiles, or, for example, knit a cardigan from square motifs or a regular shawl.
Basic principles of knitting
The “granny square” pattern itself, as it is commonly called, is not very complex. Even a novice needlewoman can quickly master it. The basis of any crocheted square is a simple single crochet. Having mastered this technique, you can proceed to more complex elements with several yarn overs and air loops.
The symbols in all crochet patterns are basically the same. It won't be difficult for you to figure out any pattern. But before you jump into complex patterns, be sure to fully master simple, basic knitting techniques. Otherwise, from a pleasant process, creating an exclusive bedspread will turn into a tedious and endless process.
Basic patterns make no less attractive bedspreads than complex and textured ones.
Plaid with openwork squares
This blanket is knitted by sequentially adding elements.
Dimensions: 82 cm x 82 cm
To work you need:
- mixed yarn -300g;
- circular knitting needles No. 4 with long fishing line.
Knitting density: when knitting sp. No. 4 22 p. x 30 r. correspond to 10 cm x 10 cm.
Openwork element:
Cast on 9 loops.
From 1 p.m. row 4: knit;
5p.: 2 knits., * knit 2 loops in 1 knit., 1 yarn over * - twice, 3 knits.;
From row 6 to row 8: knit;
9p.: 1 knit, * 2 pets. knit in 1 person, 1 yarn over* – three times, 2 persons;
From 10 p.m. 12 rubles: facial;
From 13 p.m. for 16 rubles: repeat from 5 rubles. 8 rows each.
Crocheted bedspreads with patterns
Several patterns of knitted squares for beautiful and original bedspreads.
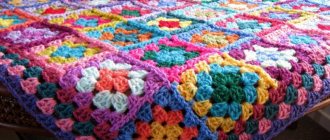
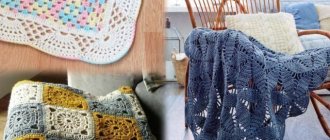
Knitted patchwork bedspreads look original and fun.
Delicate blanket for a baby crib. It can also be used as a soft, warm blanket.
Pillowcases on sofa cushions, curtains on windows or a tablecloth will look harmonious with the bedspread.
Crocheted pillow and bedspread patterns
Your product will be even more beautiful and sophisticated if you decorate it with knitted flowers and trim the edges with openwork frills.
Don't forget about the reverse side. Of course, if you are knitting an openwork blanket and sometimes plan to use it as a thin blanket, you can leave the reverse side as is. But it is better to sew fabric to the wrong side of the furniture blanket. Choose material with appropriate colors and soft texture. The lining should not deform the product, but look like a natural base.
The entire process of making a bedspread usually takes from one to three months. Spend at least 1 hour a day knitting while watching your favorite movie or TV series. Time will fly by and very soon your home will have an exclusive interior detail created with your own hands.
Of course, such a bedspread can also be purchased to order, but it is much more pleasant to make it yourself - by investing your soul, love and painstaking work.
Spiral
For women who have become skilled at assembling such an image as a quadrangle, or for people who want to knit it in a new way, we offer a spiral design. This method, called the “Afghan” method, is not particularly complicated: it does not require a high level of skills, you just need to follow the model and take into account some of the nuances, which we will discuss in detail.
To begin with, we prepare yarn of at least four different colors, as well as the main tool - a hook. It's better to take number three, or number 3.5. For a test run, it is recommended to use the remnants of the thread, which will require very little.
The opening row, with fibers of the 1st color, is made in the form of two loops. The primary row, with the same skein, consists of one single-over, half-over and two over-cap columns. A similar design is prepared in the starting model, consisting of weightless loops. Next, you need to pull out the hook and remove it from the loop. The fibers of the second, third and fourth colors are knitted in exactly the same way, in the same first loop.
After completing a full circle, you should move to the second phalanx. It is knitted in the following sequence: two yarn overs placed in the starting district of the previous line. Next you need to place one more in each subsequent row. The loop is pulled out, the tackle is removed - we begin to use other threads, from the first to the fourth. By following these simple recommendations, you can easily knit with a spiral.
Note!
How to crochet a beautiful scarf: video master class on creating unusual, beautiful, simple scarves for boys, girls, men and women
How to knit a hat with a lapel using knitting needles or an elastic band: step-by-step instructions for beginners
How to crochet a winter hat: 95 photos of new models of warm, fashionable, original knitted hats with a lapel and a beautiful pattern
Unusual knitted square blankets
The imagination of interior designers and craftsmen knows no bounds. New ideas for knitted square blankets are constantly emerging.
Knitted bedspread
Bedspreads knitted with knitting needles look very stylish and beautiful in the interior . A huge number of simple and complex motifs allow you to create unique products.
Original version
A budget and original option is a blanket made from old woolen sweaters. Everyone probably has a couple of knitted items in their wardrobe that are outdated or out of shape. A sweater or cardigan is a bulky item and takes up a lot of space in the closet, and if the family is large, the problem becomes more global.
There is no need to throw things away - sew a blanket. Open up the sweater and cut out squares. The size is not fundamentally important; you can use the same parts or combine small and large ones.
Sew all the details by hand or on a sewing machine. You can carefully sew along the edge, braid, fringe, simply bend it or process it with an overlocker. The bedspread is ready! Minimum investment of time and money.
Bright drawings of animals
When creating a blanket for a nursery, you can deviate a little from the traditional “granny square” knitted in a circle. Use original and fun motifs. For example, squares with colorful animals. All elements are knitted with a single crochet, the color of the threads is selected taking into account the pattern. Plain and patterned squares are sewn together in a checkerboard pattern. Your child will definitely love this blanket!
Blanket blanket with a cheerful face
Design one of the corners of the children's blanket in the form of a cheerful and good-natured face of a bear, kitten or other animal. The product will be an excellent bedspread and blanket at the same time, and the bright convex elements will be very interesting for a newborn baby.
Creating an interior yourself is always pleasant and exciting!
Spanish version
Very different from the typical version. To create textiles using this technique, it is worth using eye-catching fabrics in bright colors. A plain heel would also work. The “Spanish style” technique does not differ exactly until the moment you finish knitting the 1st stage of the classics. Next, the differences between this technique begin.
The introductory column is prepared in exactly the same way - lifting ears are created, then the transition is made to alternating them with columns.
Please note: we recommend that you remember and memorize this sequence of actions. This will help you make your work on any textile product easier. With this skill, you will forget about problems with patterns or the use of knitting needles, with which it is difficult to knit beautiful openwork patterns.
After completing the fourth line, it's time to start using another layout: you have to perform broaches. At this stage, it is better to choose a different color, if the format allows. The broaching is performed as follows - three lifting buttonholes are created, then two columns are knitted and again a pair of loops. Next, the actions are performed in a circular manner: the initial semi-column is tilted, forming a semicircle, the tool is also located below the loop, and then broaching is carried out. When performing it, it is important to knit the ornament using two ears.
Note!
Patterns for knitting overalls for a newborn: step-by-step master class
How to crochet a mouse and a rat: video master class on crocheting the 2020 symbol
How to knit a warm hat with ears for a newborn boy and girl - video tutorials with patterns, instructions for beginners
When weaving using various patterns, it is important to remember that the corner parts of the image must be knitted using a typical technique. After the first stretch, there will be a transition to the next phalanx, which is fifth in a row. The stage is performed in a similar way, with one difference: the ears are extended to a higher level - this allows for a shift of exactly one border. After completing 3-4 lines, you can start using another skein. No one limits you in the number of circles: use effective combinations.
Technique for performing motifs
The imagination of creative designers and craftsmen is limitless. New ideas arise for crocheting a blanket from squares. You can bring to life not standard, but original patterns.
Master class on a simple square
Designers use the “Granny” square in the production of canvases. The element is knitted with a double crochet (DC) from the middle of the future product. The base is a ring of three loops (HL). During operation, the workpiece does not need to be turned in the opposite direction - the transition is made in the corner.
Description of the pattern for crocheting a blanket from squares:
- Cast on 3 VP and make 2 dc, knit into a ring. Then make 2 VPs, 3 stitches in the middle. Repeat three times. Create one rise, hdc into completed ch to complete.
- Raise 2 VPs, knit 2 DCs into the arch formed by the PS. Raise VP, 3 columns in the center from 2 VPs of the finished row. Two VP, 3 Dc in the same middle, one VP. Make a report three times, three st. with nak. into the VP arch. The rise and row closes with PSN.
- Knit 3 VP, 2 tbsp. with a double crochet in the arch from PSN, one VP, three columns in the center of the VP row. One VP, three dc from two loops of the bottom row. Three VP, 3 Dc in the same arch. One loop, three columns in the VP arch. One VP - do rapport three times, three stitches in the VP ring, close the row with a half double crochet in the VP.
- Cast on three VPs, two dcs in an arch made from a half double crochet. One loop, three stitches in the center of the VP of the completed row. One loop, three dc in the middle, one ch and three dc in the center of three ch.
Close the square with a stitch in the last loop. The regular element is ready. You can knit the required amount and then combine it into a common fabric.
Harness
An interesting way to tie the edges of a product - shells
Having finished the blanket with knitting needles, it is advisable to crochet it. This is necessary to increase service life.
To do this you will need a short hook (3 mm) and yarn that matches the fabric.
1st row: tie the perimeter of the product st. b. n.;
2nd row: alternate 2 air. p., 3 tbsp. b. n.;
3rd row: knit 5 tbsp into the ring formed by air loops. n., then fasten 1 tbsp. n. (continue to the end of the row).
Beautiful edge trim with small pompoms
A simple but effective way to finish the edge - with beads
To ensure that the blanket retains its original appearance, follow these tips.
- Do not store knitted items in tight piles, otherwise the yarn will fray.
- Before putting the blanket in the closet, do not forget to wash it. Sweat and dirt attract moths.
- Put moth repellent in your closet.
- Always wash knitted items by hand. The washing machine harms the products (stretches, confuses the wool).
- Wash with warm, but not hot water.
- Do not dry blankets in front of radiators. It is better to lay it out on a flat surface and leave it there until it dries completely.
Sectional patterns
The lightest of all types is a plaid with sectional patterns. A common variation is "grain".
Scheme of a simple pattern “Grain”
This practical blanket is knitted from several colors of yarn in a simple pattern.
Before creating it, mentally mark your plaid into equal sections, measuring 20 by 20 loops. Alternate the squares in a checkerboard pattern using purl and knit stitches until a pattern is formed.
Scheme of a simple pattern “Chess”
To knit such a blanket using knitting needles you do not need to be an experienced craftswoman. If desired, you can make multi-colored sections using uniform knitting. There are no restrictions on the size of the squares, change them as you wish.
Even a novice knitter can knit a beautiful children's blanket with a checkerboard pattern.
To choose the correct size, cast on twenty loops and measure them with a ruler. Divide the desired length and width by the resulting number. This is how you calculate how many stitches you need to cast on in the first row.
Calculation of loops for knitting
The history of the appearance of patchwork in Russia
From time immemorial, in Rus' they sewed patchwork blankets, potholders, mittens and many other beautiful and useful things. The patchwork type of needlework existed mainly among peasants.
In Rus', at the end of the 17th century, factories for weaving linen appeared. In those days, the width of one cloth was slightly more than 70 cm, which means that after cutting the clothes, small scraps remained. Even today you can see patchwork handicrafts in the Historical Museum of Moscow.
Patchwork first appeared in Russia in the 18th century. At the end of the 19th century, this technique began to be widely used among peasants. Women and girls sewed blankets, runners, and round rugs. After 1917, patchwork became an applied art.
Before the Great Depression in America, quilting was a national form of creativity. Then they forgot about him. And in the 70s of the 20th century it again became fashionable among US needlewomen.
With the advent of sewing machines, this type of needlework moved into another category. It has become easier to create unprecedented patterns. An ancient technique - patchwork, the best needlework for beginner seamstresses and knitters.
