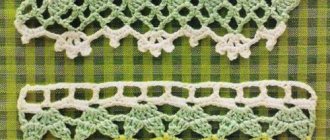
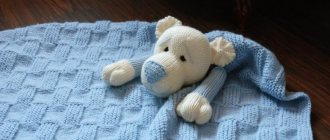
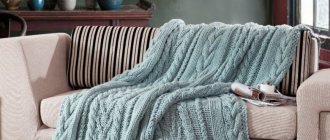
The zigzag pattern when crocheted is obtained in several variations, but in any design such a pattern is invariably interesting. It is especially convenient to use this pattern to use a hook to knit items that widen downward, but if the number of loops remains the same, the fabric will be even and there is no need to change the size of the hook.
Can you crochet? Publish your work on kru4ok.ru
Crocheted zigzag pattern: what products is it used for?
Variants of zigzag patterns crocheted are considered universal, but are most often used when knitting such products:
- skirts;
- blouses;
- cardigans;
- dresses;
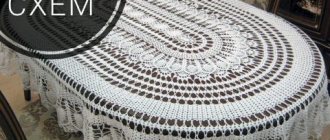
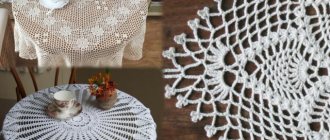
- napkins;
- shawls, scarves;
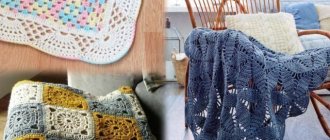
- and even blankets.
A zigzag pattern is crocheted with different angles: the zigzag becomes sharper when the stitches are added gradually. The zigzag pattern can resemble a wave if the columns are added at a rapid pace and the depth of the peaks is shallow. The edge of the product always comes out wavy and no longer requires tying.
What yarn is used to crochet a zigzag pattern?
A product crocheted with a zigzag pattern looks impressive in any case. The type of thread depends on the functional purpose of the knitted item. Any yarn for the zigzag crochet pattern is suitable:
- cotton, linen;
- wool or wool blend;
- acrylic, polyamide or other synthetic thread;
- silk, viscose;
- from mixed fibers, etc.
It is not recommended to use yarn with fluff or long pile: in this case, the pattern becomes blurred and loses the geometric clarity of the lines. Particularly interesting is the zigzag crocheted pattern made from yarn of different colors. The brighter and more contrasting the colors, the more clearly the zigzag can be seen. The knitted fabric of the product looks as if zigzags of one color are immersed in the valleys and peaks of another color. You can add a row of textured yarn, but no more.
With a skillful selection of colors, the item turns out to be bright, catchy, and positive, while a single-color item looks more solid and rich.
The zigzag pattern is especially often crocheted when knitting summer children's and youth clothing in multi-color variations. Women's knitted clothing looks good with a striped zigzag pattern on skirts, blouses, tunics, if the top or bottom, worn in pairs, is made in a single color. In any case, items crocheted with a zigzag pattern are unique and unique.
Detailed description and patterns of knitting zigzags
The wavy zigzag pattern is obtained by the fact that after a certain number of columns in one repeat, we first reduce the number of columns (we knit 3-5 columns together, with a common vertex), and then after the same number of columns we increase their number (from one column - one injection point - knit 3-5 stitches).
1. An example of a pattern made with single crochets:
There are 14 loops in the repeat. On the sides for an even edge we knit a half decrease.
Cast on a chain of air loops (arbitrarily, longer than necessary) and knit:
2 tbsp with a common top, * 5 tbsp. b/n, 3 tbsp from one vp, 5 tbsp. b/n, 3 tbsp. b/n with a common top * - repeat until the end of the row, finish 5 tbsp. b/n, 2 st b/n from one vp.
2. An example of a pattern made by CH. Blue arrows - increase lines, knit 2 dc in one ch, 2 ch. and 2CH in the second loop of the base (hereinafter we knit arches from the vp around the vp) in the front ones, i.e. odd rows of work and add 1CH + 2CH + 1CH over the arch of two chains. bottom row in all even ones, i.e. purl rows
Green arrows are decreasing lines. We knit 2CH with a common top, skip 2 ch. in the base chain, we knit 2 dc with a common vertex (then we skip the vertices of the dc of the lower rows) - for front, odd rows of work.
In even (purl) rows we knit one DC at a time, skipping 2 vertices of the bottom row of the pattern:
Stacked starting row for wavy patterns such as “zigzag”, “peacock feather” - a regular starting row. Curves in the fabric are formed after knitting groups of stitches with decreases and groups of stitches with increases.
However, such patterns create a zigzag edge at the end of the fabric, which is beautiful when designing hems but is awkward when designing shoulder seams and necklines when knitting such patterns from the bottom up.
When working with zigzag patterns to design a round neck, armholes, or sleeve caps, on a knitted piece of the part (for example, the back), use a contrasting thread to lay the expected line of the round neck along the contour of the pattern in full size. We look at the canvas and count how many repeats in width/height our neck line takes up. Let's draw this line on the diagram, because According to the diagram, it is more convenient and clearer to see how we will need to knit.
Zigzag crochet patterns are loved by many needlewomen because they are easy to knit and the results are amazing. The canvas turns out original and multifaceted if you use multi-colored threads. The zigzag crochet pattern is also suitable for using up leftover yarn.
You can crochet a zigzag pattern by simply knitting double crochets and chain stitches alternately.
Knitting a dense pattern
In this case, a zigzag crochet pattern was described, the pattern of which includes minor openwork elements. The holes are formed when the craftswoman knits the VP at the peak and skips stitches in the valleys of the pattern. However, the basic ornament can be slightly modified.
If necessary, you can get a completely solid or, conversely, openwork zigzag crochet pattern. The pattern of a continuous ornament will include adding a DC by knitting 2DCs from the 1st one located at the peak (there is no VP in such a pattern). The reduction of the dc in the hollows will occur when knitting 2 dc with a common top.
Expert opinion
Smirnova Ekaterina Anatolevna
7 years of experience in interior design, professional architect
Please note that tight knitting requires more yarn. This technique is used to make coats, hats, warm sweaters and other products.
Crochet zigzag pattern: diagrams with description
1. We knit a chain of VP (chain loops), the number of which is a multiple of 14 + 3 rises.
Crochet a row with double crochets
2. Knit 5 single crochets, then 2 times 2 unfinished stitches
3. Let's get the first clove pattern
4. Making a hollow: knit 4 stitches from each stitch of the cast-on row, knit 2 stitches from each of the next 2 stitches
5. This will be the diagram of the first row.
6. The second row is knitted according to the same pattern.
The third row can be knitted with a different yarn.
7. Fasten off with a thread of a different color by pulling its tip through the loops of the previous row. We continue to knit according to the pattern of the 1st row.
You can change the thread every 2 rows.
Now you know how to crochet a multi-colored zigzag pattern.
If you want a more delicate zigzag crochet pattern, make double crochets by threading the hook through the loop and alternating with chain loops.
The zigzag pattern is rightfully one of the most popular patterns on crocheted products. When choosing thick threads of contrasting colors, this technique can be used to knit a textured coat; thin yarn allows you to decorate sweaters or shawls with a delicate openwork option. By crocheting a zigzag pattern, novice authors will master the method of increasing and decreasing loops, which will be useful for creating products with a more complex pattern.
The principle of pattern formation
Any zigzag crochet pattern (the diagram below clearly illustrates this) is based on the sequential reduction and addition of single crochets or double crochets.
Due to the fact that two air loops are knitted at the highest point of the peak, and two stitches are not knitted in the valley, the total number of stitches in each row is kept at the same level.
The steps listed below will allow you to correctly crochet a zigzag pattern (diagrams with descriptions and samples of fabrics are also given in this paragraph).
- The initial row is a chain of 24 air loops (VP), plus three loops for lifting. Next, at the beginning of each row, you need to perform the same number of loops for lifting.
- The first double crochet (dc) is knitted into the 4th loop of the base,* then knit 5 dc, skip two loops, knit another 5 dc, 2 ch*. The description from * to * must be repeated until the end of each row.
- The second row begins with 1dc, knitted into the last dc of the previous row. thus, the number of CCHs is added. Then perform *5DC, 2DC of the previous row remain unknitted, 5DC, 2VP*.
- All other rows (both knit and purl) repeat the third row.
Simple zigzag
Rapport is the easiest version of the “zigzag” to perform - just one row, 14 loops, its description is given below. When knitting, stitches with only one crochet are used.
The first row begins with three columns connected in the same warp loop. They will form the top point of the zigzag. In the next three loops, three stitches are knitted (one in each). Then in three loops you need to knit along the column, connecting their vertices into one. This is the lowest point of the future pattern. Knitting three stitches with a common top continues in the next three loops. In the last loop, you need to knit two columns with one base, and then a rise (three air loops). At this point the zigzag line rises again. In the middle of the row, accordingly, instead of two columns and lifting loops, you need to knit three columns with one base.
Subscribe to our groups on social networks
In subsequent rows, the knitting is similar, except that the columns will be attached not to the air loops, but to the loops that formed at the tops of the lower columns. The direction of the zigzag changes in those places where upward or downward bundles of three columns are knitted.
To maintain symmetry, it is important to ensure that they are attached to the right loops: two bundles with one base are knitted into adjacent loops of two similar bundles in the bottom row, and bundles with one vertex are knitted to the top of similar bundles of the previous row and two columns on the right and left from them accordingly.
How to knit an openwork ornament
The crochet zigzag pattern looks very interesting when replacing simple DCs with “bushes” of 3 stitches.
In fact, the principle of forming the ornament remains unchanged, but the holes become larger and clearer. Such fabrics are suitable for making summer dresses, skirts, tops, bags or interior items (bedspreads, rugs, pillows).
It must be said that “zigzag” serves as an excellent basis for expanding skirts and dresses. To do this, in some cases it is worth not shortening the columns. It is better to do this according to pre-made calculations in order to obtain a product of the planned size.
Openwork option
This pattern is a little more complex, but is also suitable for knitting from yarn of any thickness and, therefore, can be used to create blankets and ponchos, as well as light dresses and cardigans of any model. Pattern repeat - 16 and eight more loops for symmetry, two rows. Below is a detailed master class on how to create it.
In this, as in the previous version of the zigzag, all stitches should be knitted with one crochet. In the first auxiliary row you need to knit three lifting loops. Then in the first two loops of the base chain - along the column, which should have one vertex. The next five loops contain one column with different vertices. Next, knitting the pattern repeat begins. Five stitches are knitted into the eighth loop of the warp. In the next five loops - one column each. Then in five loops of the base - columns with one vertex. In the next five - in a column. This is where the rapport ends; to complete the row, you need to tie three stitches into the remaining free loop of the base. This row will not be repeated when knitting a zigzag; the second and third alternate.
The second row begins with four lifting air loops. Then - a column, the basis of which is the first column on the left of the bottom row. After this, knit another chain stitch and a stitch connected to the top of the third stitch below. Next, the rapport of the row begins.
At its beginning there is one air loop, another column (in the fifth column of the first row) and another air loop. Next are three columns with one base, which are connected in turn with 7, 9 (the top of five) and 11 columns of the bottom row. Afterwards, the columns separated by air loops are again knitted (at the tops of 13, 15 and 17 columns of the first row, respectively). Next, an air loop and a column alternate twice, and the base of both columns should again be the top of the 17th column of the bottom row. As a result, three columns of the top row should be tied into this vertex. Next comes an air loop and a column to the top of the 19th column of the first row. This is where the rapport ends, the row ends with another chain stitch, a stitch at the top of the 21st row, a chain stitch and two stitches with one base at the top of the 22nd and 24 stitches of the first row.
In the third row, two lifting loops are knitted, and then columns, which this time will be attached both to the tops of the columns of the previous row and to the air loops connecting them. You should start with two posts with one base, which are attached to the first chain loop of the previous row and to the top of the post to the left of it. In the next five loops of the row - along the column. Then rapport begins. In the next loop, knit five stitches with one base. Next come five stitches in each loop. Then five stitches with one vertex are knitted in five loops. The rapport is completed by five stitches in each loop. The row ends with a bunch of three stitches with one base, for which you should use the second from the right of the four chain stitches of the bottom row.
When knitting with thin threads, you should remember that this pattern turns out to be openwork (the second and all subsequent even rows). Zigzags are formed from two rows, so when creating a multi-color pattern to alternate lines, you need to knit two rows with the same color. Changing the color on each row will create an interesting gradient effect.
Basic pattern
Patterns based on adding and shortening stitches are a crochet classic. For their successful implementation, a highly qualified knitter is not required, only diligence and attentiveness are enough. The canvases made with their help have a special texture and color (if materials of different colors are used):
- Consistent repetition of rapports contributes to the appearance of vertical even stripes and horizontal zigzag stripes.
- The boundaries between the color stripes are not smooth, but wavy. This effect allows you to make a smooth transition from one color to another; for this you need at least three colors. Also, craftswomen often use very bright colors to obtain a variegated fabric.
- The pattern is very convenient for combining with others. Between the stripes of the zigzag pattern, you can include openwork patterns or just several rows of columns.
Scheme
Option 1
Tight zigzag for warm items. Here is an example of a blanket knitted with this pattern. The frequency of the waves can be changed by adding the number of chain stitches or double crochets.
Option 2
More “airy” zigzag. Not as dense as the previous one, since through the row the double crochets alternate with air loops that add lightness.
Option 3
Less dense, more measured zigzag. Better suited for summer clothes.
Simple elastic band
If you want to knit the product with a denser and more stretchy pattern, you can decorate it with an elastic band in the form of a zigzag. It is somewhat more complicated than the openwork one, but the result is worth the effort.
In the first row you need to knit a purl stitch, then skip the next one without dropping it from the knitting needle, knit the second knit stitch behind the back wall, then knit the skipped stitch with a knit stitch behind the front wall, then slip both stitches. This alternation continues until the end of the row.
In the second row, the purl and knit stitches are swapped - first knit the knit stitch, then purl them in the same order as in the first row: knit the second loop on the knitting needle, then the first, discard both.
The result is a small zigzag in the form of an elastic band, which holds its shape well and does not stretch. That is why this pattern is popular in decorating the edges of products and when knitting hats.
Tight zigzag crochet
In a tight zigzag crochet stitch there are no air loops at all. It is a single canvas without “gaps”, and the “wave effect” is achieved through timely increases and decreases according to the pattern.
From squares
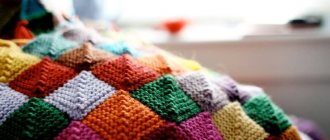
Blankets made from multi-colored squares, knitted from the corner.
Perhaps the most popular type of blanket. The main advantage is that it consists of small squares sewn together with thread. That is, you can knit while sitting in a traffic jam and visiting. Compared to traditional methods, knitting small sections does not require much time, space and effort.
Video tutorial
There are many modifications of the zigzag. You can choose the severity of the zigzag based on your goals and tastes. This master class uses a slightly different scheme from those given above, but all the basic principles are followed.
Zigzag crochet patterns are loved by many needlewomen because of the simple technique and beautiful pattern of the fabric. This multi-faceted pattern can be dense, openwork, plain, embossed and perfectly combines different colors of yarn, creating colored waves.
zigzag pattern can be used to knit excellent items for the home: potholders, napkins, coasters, warmers for glasses and teapots, runners, pillows, blankets, using various leftover yarn.
Description of knitting pattern for a napkin and a glass warmer. The repeat of the pattern is 16 air loops + 2 lifting loops. Having dialed the air chain, knit the 1st row: two lifting loops, 2 st s/n with one vertex, * 5 st s/n (side part), 5 st s/n from one loop (outer corner), 5 st s/n n, 5 st s/n with one vertex (inner corner)*, repeat from * to*, required number of times, finish 5 st s/n, 3 st s/n from one loop. Knit the next row like the first in reverse order. When changing colors each row, start as row 1, joining the yarn to the last instep stitch, and work in one direction only. When finished, tie the sides of the napkin together with the ends of the threads.
To expand the fabric, make additions in the repeat of the pattern along the side lines; depending on the pattern, make the additions in rows of double crochets, knitting two double crochets from one loop.
Iridescent bright zig-zag colors are very popular.
Creating crocheted products captivates with its simplicity and beauty of the finished products. Zigzag patterns using crochet hooks are especially loved by craftswomen of different levels of knitting technique. They are popular due to the fact that knitting in this method and pattern is quite simple, and the products turn out to be very original and beautiful in their design. The canvas is obtained with a noticeable relief pattern, an openwork base and a clear pattern.
Using the original and unusual zigzag pattern, you can create unique interior items for your room. So you can knit beautiful oven mitts, openwork decorative napkins, coasters for hot dishes, floor runners, decorative pillows and blankets.
Decoration
A striped blanket will look good if you choose the right colors
To give your project a more colorful look, use colored yarn.
A knitted baby blanket in gray, white and red colors is suitable for girls and boys
Blue, white and gray colors go well together. The following shades also look good.
Shades of purple, blue, green and pink for a delicate baby blanket
White, pink, raspberry and gray are perfect for a warm and not boring blanket
A chic handmade wool blanket with beautifully selected threads and patterns.
The width of one strip can vary from three to five. If you insert new yarn less often, the colors will begin to merge. It is important to alternate them in the same order. When finished, hide the protruding threads between the zigzags.
Pattern for a bright colorful blanket made of yarn of different colors
After a little practice, try making an openwork blanket. In the second row between the double crochets, knit one chain stitch. n. Similar knitting is typical for a children's bedspread. I advise you to try a hook with a larger diameter, so the product will turn out lighter and airier.
The wavy edges of the blanket can be left as is, or you can even it out by knitting the last row differently
Attach tassels to the edges. To do this, cut the remaining thread into 30 cm pieces, gather it in half and sew along the edges of the zigzags.
Blanket with a Zigzag pattern, decorated with tassels
Learning to crochet different zigzag patterns: basic principles and recommendations
For beginning needlewomen, the process of mastering the basic techniques and principles of knitting zigzag patterns with your own hands may seem quite complicated. However, we will try to describe the entire process of knitting such a fabric pattern in as much detail and as accessible as possible. As an example, we will describe to needlewomen the process of making round coasters for hot dishes and napkins using the openwork technique.
To repeat the main pattern, you need to cast on sixteen air loops, and also add two loops to lift the work. Next, cast on one chain stitch and begin knitting in the round the first row of your fabric. You need to make two loops to create the rise in your fabric. Next, knit two single crochets, then five single crochets. This will be the side of your knitted piece. After this, form five single crochet stitches from one loop, then another five single crochet stitches on the hook, then five more single crochet stitches with one top. Repeat the steps we described above as many times as necessary on the canvas. Complete according to our description using five single crochets, then three single crochets from one loop.
The next row of fabric must be knitted like the first, only in reverse order. When changing colors in each row, start the knitting principle as in the first row of the product. At the same time, attach the thread to the last lifting loop, and knit all the time in only one direction. Having completed the manipulations, tie the sides of your napkin along with the ends of the threads.
To expand the knitted fabric, it is necessary to make additions to the repeat of the main pattern along the side lines. Depending on the characteristics of the pattern, perform increases in rows of double crochets, knitting two double crochets from one loop.
General recommendations for knitting a blanket
Having decided what the blanket will be, it is important to choose the right yarn. It should be remembered here that the thinner the yarn, the longer it will take to knit a blanket, and this is quite important, given the volume of the finished product.
By the way, experienced knitters often use leftover yarn of the same thickness to make a blanket; skillfully combining them, they get incredible patterns. Those who do not have enough experience will need a detailed description with calculations of the number of threads and a pattern for knitting a blanket.
The hook size is selected in accordance with the recommendations on the yarn label, if any, or based on your own preferences and convenience.
You can knit a blanket either as a whole or in small “pieces” - motifs. Due to its significant size, a solid fabric can be quite heavy and bulky; knitting it can seem long and tedious.The hook must grip the thread well and completely; this will ensure quality workmanship, evenness of the loops and a certain density in accordance with the design of the finished product.
Small motifs are easier to knit; in addition, such knitting can be taken with you, but assembling the finished product may seem tedious and time-consuming.
Let's consider the areas of application of the zigzag crochet pattern: tips
When knitting the original and popular zigzag pattern, it is customary to use bright combinations of fabrics and threads. Combinations of yellow, green, red and blue shades of knitting threads look quite advantageous and original. You can use threads of various components and components in your work. Then your product will have unusual combinations and reliefs. In this case, the craftswomen are completely unlimited in color choice and design.
The undoubted advantage of this pattern is the fact that you can create a knitted product from the remains of various threads and yarn.
The zigzag pattern using crochet is also very popular in knitting summer tops, T-shirts and dresses. Thanks to their openwork and uniqueness, products with such a pattern look very original and beautiful. It is also appropriate to use this pattern of fabric in the manufacture of scarves, hats, and shawls.
Patterns with light waves, knitted using plain knitting yarn, look very beautiful and original. In this type of knitting, rows with concave double crochets should be used. As a result, you will get beautiful relief waves on the surface of your product.
In order to make the zizgag pattern very delicate, you can knit double crochets by inserting your crochet hook not into each of the loops of the previous row, but through one loop, alternating them with each other using air loops. By changing the number of columns between the teeth of your zigzag pattern at your discretion, you can make it more wavy or straight.
Materials for a future masterpiece
- To create the work, you will need a hook. Its size should not exceed 3 mm.
You need to choose the right size crochet hook
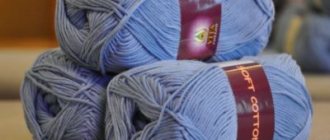
- Yarn. Recommended composition: 55% cotton and 45% acrylic. A rope consists of several threads twisted together. The material is dense, pleasant to the touch and comfortable to knit. To create a pattern, it is advisable to purchase several colors.
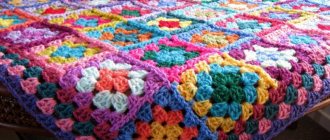
Multi-colored yarn for a beautiful bright blanket
- Scissors are required to cut the thread.
Simple utility scissors - Buy a dozen pins to make calculations easier.
Auxiliary pins for knitting
Color, pattern, texture: what to focus on?
Beautiful blankets can have different designs. The emphasis can be placed on the pattern, texture or color scheme used in the product. The choice is always individual.
Much depends on the preferences of the owner of the item and the features of the interior in which it will be used.
It is not recommended to use several options at once. Having everything piled up can look tacky.
If a product has no bright accent details at all, this does not mean that it will be inappropriate. Sometimes the simplest options are better than any complex, fancy ideas.
Pattern ideas for a blanket
When choosing a pattern for a blanket, first of all, pay attention to your own skill. If you want to knit an item urgently, but there is no opportunity to understand the intricacies of the knitting method you like, then it is better to prefer a simpler option.
- When you have enough time, you don’t have to give up on your dreams, you should always try to learn new things, increasing your level of skill.
- If it’s difficult to decide, then you need to look at photos of finished products, scroll through diagrams and samples of different patterns.
There is no need to look for an exact description of the execution of a certain option. In the case of a blanket, there are no particular difficulties in adjusting the pattern you like to the desired parameters of the product.
