Correct placement of doors on furniture ensures long service life and ease of use. From time to time it may happen that the doors are sloping or do not open well. At such moments, the mood deteriorates sharply. That is why it is worth paying much closer attention to the correct installation and design of furniture hinges. Installation must take place in accordance with the rules, because all subsequent use depends on the quality of the installation.
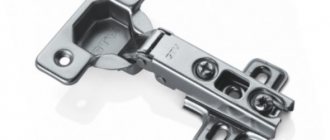
In modern conditions, there are a great many varieties of furniture hinges, each of which is popular with customers in its own way. For example, more modern cabinets use a four-hinged type of hinge. In Europe, such loops are called “hidden”.
Features of furniture hinges in the kitchen
The choice of kitchen set must be based on the functions that the cabinets will perform.
Thanks to this, it is possible to accurately determine the type of loops. One of the main selection criteria is the material of the fittings. For the kitchen, it is best to choose hinges made of high-quality stainless steel. It is necessary to exclude cheap hinges for kitchen cabinets, since there is a clear relationship between quality and price. The priority for the kitchen is hinges with a closer. They regulate the closing and opening of doors, slamming is eliminated, and furniture can last longer. To protect yourself, you should purchase products from trusted manufacturers. Such fittings come with a guarantee; they are more durable and will last longer.
What types of cabinet hinges are there?
The purpose of door hinges in the manufacture of a cabinet can be different.
They are available for fastening doors at different angles, and for installing overhead or internal facades. There are special inverse loops, and loops for placement in a metal profile.
According to its purpose, a four-hinged hinge can be:
- Invoice
- Half waybill
- Internal
- Inverse
- Corner
- Reverse
These are all adjustable hinges that take their position in the cabinet structure. As nice additional details, the four-hinged hinges also have the Clip-on function and a closer.
Clip-on – connection of two hinge elements by simple snapping. The closer is part of the hinge structure, which facilitates the smooth closing of the door.
Door hinges with a closer are very convenient for using the cabinet. They help eliminate the annoying slamming of doors and protect glass facades from possible damage.
What are awnings with closers?
Furniture closer hinges have a rather complex design. A shock absorber filled with a viscous substance (oil or silicone) or gas is built into the canopy body. It is thanks to it that the sash closes smoothly, without a sharp blow. In addition to the absence of annoying sharp sounds, the advantages of such furniture fittings include a significant increase in the service life of cabinets. After all, smooth slamming prevents damage to both the door and the walls of the furniture.
Furniture hinges with a shock absorber have found their application in the manufacture of furniture for the home, office, retail space, etc. They are gradually displacing ordinary canopies from the market. And this is despite the higher price, since ordinary furniture hinges without a closer have a drawback - due to frequent and strong impacts, not softened in any way, the fastening is destroyed and the door falls off.
Closers for kitchen cabinets
Closers are installed on most modern furniture models. Having the instructions at hand, it will not be difficult to independently install the mechanism on any model of kitchen facades.
The hinges are designed to hold the doors closed. This means that the doors are not protected from sudden closing (strong bang, surface damage). If there is glass inside the door or the door is completely glass, then strong impact on it can lead to cracks.
Operating principle of furniture door closers
The operating process of door closers is simple. The mechanism is a spring, which is securely hidden inside a special metal capsule filled with oil or liquid with silicone. The door closing speed is controlled using special valves.
Pressure is applied to the solid wood facade door, and it begins to close under the influence of its own weight. In turn, the door begins to act more and more strongly on the closer’s emphasis. The liquid that covers the spring flows into the capsule sleeve (its rear part). It is held in the sleeve by a double system of seals. A special adjustment element that narrows and expands the outflow channel allows you to control the speed of closing the doors. This occurs by adjusting the speed of the piston movement with this element.
When closing, the door has a stronger effect on the closer. The adjusting element expands more and more and the piston outflow channel becomes smaller because of this. The piston slows down, allowing the door to close smoothly and quietly.
Gas closers are often installed in cheap kitchens. The principle of their operation is as follows: the door closes at maximum speed until a certain moment. At the end of the closing cycle, the door acts on the closer, which uses the gas contained in the capsule. Thanks to this, the furniture door closes silently and smoothly.
Advantages and disadvantages
Pros worth knowing:
- Smooth closing of the door, preventing damage.
- The door is completely closed.
- If a significant breakdown of the closer occurs, oil or liquid remains inside the capsule. Liquid does not damage the surface of hanging shelves with drawers.
- Can withstand sufficient load (can be used for massive doors).
- Large selection and varying prices of mechanisms.
- Long term use of door closers.
- Easy installation.
Flaws:
- The installation of the mechanism must be correct (strictly according to the instructions).
- The appearance of the installed door closer is not very aesthetic.
- Oil closers perform worse at low temperatures (increased oil viscosity).
The nuances of installing soft-closing furniture hinges
Often in articles you can find “life hacks” for saving money when purchasing and installing accessories, which are very controversial. And even harmful.
Myth 1. You can’t install door closers on all kitchen doors, but only on those that you use most often. Dubious recommendation. From my own experience I can say that you quickly get used to good things. And if you are used to a certain opening of the facade, knowing that it will close smoothly and silently, you will close all the others in the same way, with the go-ahead. Wincing every time from the knock. It's annoying. As practice shows, if you install furniture hinges with closers only in the kitchen, then you will want to install them on all the cabinets in the house. Moreover, the costs are not that high.
Myth 2. You can install one hinge with a closer on each door, combining it with regular ones. You shouldn't do this either. The hinges on each facade must be of the same type, from the same manufacturer and preferably from the same series. The shape of the shoulder and, in general, the principle of operation of furniture hinges with and without a closer/shock absorber are different, and the rigidity is also different. If there are no problems initially with adjusting the gaps, they will definitely make themselves known later, warping and deforming the door when opening.
The only savings that are justified are the installation of conventional hinges on facades with upward opening and fixation with a lifting mechanism. The gas lift will still not allow the loop with the closer to work as it should. Therefore, standard furniture hinges can be installed on facades with such an opening.
Otherwise, the installation of furniture hinges is completely ordinary, just like on the others; you can read about it here.
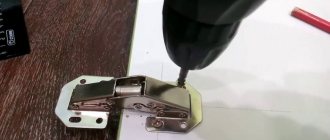
Drilling holes
Installation is carried out with all the rules:
- The depth of the hole for the furniture hinge should be about thirteen millimeters. If possible, the insertion of furniture hinges should not be deeper, otherwise the front side of the canvas may crack;
- The diameter of the hole depends strictly on the cup of the loop. Tools must be completely aligned with their axis to prevent damage to the surface;
- A sharpened cutter will help protect the blade from damage and chips;
- Do not rush while drilling, otherwise there is a risk of doing it sloppily;
- It is worth paying attention to the dimensions of the cups and their dimensions when installing furniture hinges;
Having drilled one hole, proceed to the next and so on until all the holes for laying the hinges are prepared.
What tools should I use for this?
The bowl must be secured to the facade, and the bar to the body of the bedside table. The furniture hinge must be inserted into the hole, which must be made in advance. The shoulder of the loop becomes a kind of bridge, now connecting both parts. To make holes for such loops, you need to prepare the following tools:
- screwdriver or drill;
- special drill-mill;
The diameter of the cutter for the hole for a furniture hinge is 35 millimeters or 25-26mm. It is selected depending on the size of the loop cups. To create holes for such hinges, you can also use a simple drill.
A multifunctional drill, with attachments that are easy to replace, is quite suitable for such work.
The middle spike must be installed in the center of the circle, outlined using a specially prepared caliber. Automatic calibration is used on the corresponding machines, but at home the master cannot do without a specialized electric tool.
During installation, hinges require a high level of care and precision. The chance to complete exactly the required niche is the most important advantage of the so-called Forstner drill. It can provide a stop that will prevent you from penetrating further than required. And the teeth of the drill do not allow it to deviate from the intended “course”. The end result is an almost perfect hole. And due to this, the cup fits into the recess quite tightly.
But the above-mentioned drill also has one significant drawback, which manifests itself when working with a solid piece of wood. This is low quality, which is to be expected if the instrument was not made in a factory. This is why you should choose tools exclusively from official companies. And, of course, don’t forget about warranty cards.
Depending on the type of panel you are working with, the cutter can get quite hot. Due to this, it can burn the edges and wood that is removed from the recess. That is why, when working with such a foundation, you should not forget about breaks in work. So that the drills have time to cool down at least a little. Working in three or four sets will be ideal. Particular attention should be paid to breaks when working with MDF sheets. If the activity is carried out with chipboard sheets, parts made of strong alloys can make recesses for hinges really quickly and without much stress.
Characteristics of hidden loops
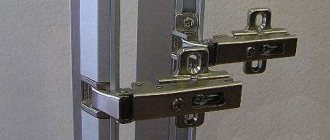
Indoor installation is ensured by hidden hinges. The design ensures the aesthetics of the fastening, since the cup is completely recessed into the body of the cabinet. Hidden fittings can withstand loads similar to other types of hinges. The fastener is quite durable, ensures fixation of the facade in a convenient position, and has high functionality.
Characteristic features of hidden loops:
- Aesthetics;
- Strength;
- Possibility of fixation.
There are also disadvantages of hidden installation. These include the inaccessibility of the mechanism. It is difficult to clean or lubricate the hinges. And if this is not done in time, then dirt will lead to breakdowns.
How to remove wardrobe doors with your own hands?
"Modus" Moscow Moscow 119618, Borovskoe highway, 12A +7 Wholesale department: +7; Retail department: +7; [email protected] “Modus” Reutov Reutov st. Transportnaya 1/3, 143960 Tel., +7(915) 189-72-34; [email protected]
A sliding wardrobe is a very convenient piece of home furnishings. But sometimes difficulties arise when it is necessary to change its location. After all, you won’t be able to simply pick up and move a wardrobe. First you need to remove its doors from the sliding mechanism guides. Many people think that it is very difficult. In fact, there is nothing difficult about removing wardrobe doors. You won't even need to use physical force to do this. The sliding mechanism is designed so that the doors can be removed easily, without any effort on your part. Just follow all the points in this guide one by one, and after some time, your wardrobe can be moved or transported without any problems.
How to remove wardrobe doors step by step
- If there is a door closer installed on the doors of your closet, then you first need to remove it. It will be enough that you unscrew the closer from the door leaf. It is better not to disconnect it from the cabinet box. Then you will not have to re-adjust the closer when re-installing it.
- There are stoppers on both sides of the wardrobe doors, on top. You should unscrew the bolts on them one by one and remove the stoppers. Then they will not interfere with the doors moving off their guides.
- The wardrobe doors should be removed one at a time.
- Close the closet doors and lift the bottom corner of one of them. Using a screwdriver, spring the lower roller so that it pops out of the groove.
- Carefully lifting the door, gently pull its lower part toward you until it comes out of the mechanism.
- Lower the bottom of the door to the floor. And pull its upper part out of the guide.
- After you remove one door, the same actions should be performed with the second, third, etc.
- If your closet doors are very heavy, it would be better to have someone else help you when dismantling them.
And remember that the doors should be easy to remove. If something is preventing them from coming out of their guides, check that you have removed all the stoppers. Usually, they are the cause of difficulties when removing wardrobe doors.
"Modus" Moscow Moscow 119618, Borovskoe highway, 12A +7 Wholesale department: +7; Retail department: +7; [email protected] “Modus” Reutov Reutov st. Transportnaya 1/3, 143960 Tel., +7(915) 189-72-34; [email protected]
Please note that the price list presented in this form is current as of the date of download and contains prices for MODUS products without taking into account current discounts and promotional offers. When you contact the company's offices directly, managers will provide you with current price lists and all the necessary information, and will also find the most suitable solution for your task.
How to install furniture hinges, templates, marking diagrams on an overhead, internal or corner cabinet
To install the hinges on the cabinet and adjust them correctly, you need to have a general understanding of the mechanism of operation and the position of the adjusting screws. The most complex design has four-hinged furniture hinges with a built-in closer and CLIP TOP (Blum) snap mechanisms.
- A strike plate with holes for fastening to the sidewall.
- Shoulder.
- Bowl.
- Three latches.
- Safety pin.
- Clip mechanism.
- Screw for adjusting the installed front in depth.
- Eccentric for adjusting the height of the façade (on the strike plate).
- Width adjustment screw.
- Holder.
- Spring closing mechanism.
- External hinge.
- Internal hinge.
- Mounting screws.
- Deactivation.
- Blumotion door closer.
Regardless of the number of components, the presence of a built-in or overhead closer, absolutely all four-hinge furniture hinges are correctly installed in the same way.
- A counter plate (1) is screwed to the body from the inside.
- A part of the hinge with a bowl is put on the installation hole and secured with screws (11)
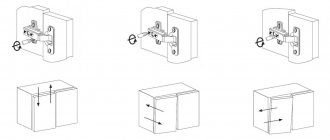
- Using the adjusting screws (7), (8) and (9), the façade is pressed stronger/weaker against the body, higher/lower vertically and left/right horizontally.
When installing, it is convenient to use special furniture templates (conductors) - they make marking for installing hinges on the cabinet much easier.
But they are needed only, for the most part, for production. In domestic conditions, when installing or replacing hinges on cabinets and cabinets is rarely required, you can apply the markings manually, using a square and a tape measure.
Diagram of how to install overhead hinges on a cabinet
There is a general diagram of how to install overhead hinges on a cabinet with a bowl diameter of 35mm. It’s more convenient to imagine it using the example of a kitchen cabinet 700mm high and 400mm wide with a front of 696x396mm, respectively.
To properly install the canopy on the facade, you need to make holes for the hinge bowl with a diameter of 35mm with a distance from the edge of 22-22.5mm. The bowl is attached with screws - you can also make preliminary markings for them, at a distance of 48mm from each other.
A counter plate is installed on the inside of the sidewall, at a depth of 37 mm along the fastening screws from the edge, coaxially with the location of the hinges on the facade.
Installation diagram of internal hinges on the cabinet
Inset or internal hinges are installed on the cabinet in exactly the same way. The only caveat is that the counter plate on the side of the cabinet is recessed to the thickness of the facade.
That is, with a standard fastening, 37 mm is measured from the edge, and with an internal loop - (37 + 16) = 53 mm. If the façade is thicker, 18-22mm, then the distance for installing the hinge strike plate on the cabinet increases accordingly.
Installation diagram for corner hinges and mini hinges with a 26mm bowl, distinctive features
As a rule, corner hinges can be installed on a cabinet in the same way as regular overhead hinges, according to the same scheme.
Four-hinged transformable hinges and carousel hinges with a 35mm bowl are installed in the same way, unless the manufacturer provides other sizes in the instructions. But sometimes an additive of 37mm can increase to 42-45mm with beveled ends of the sidewalls and other non-standard cases, so be careful.
Installing a 26mm furniture hinge on a cabinet is done in the same way, but with different dimensions for marking on the facade. For the sidewall, the additive remains the same.
Step-by-step algorithm on how to install hinges on a cabinet with your own hands
In order to install hinges on the cabinet with your own hands, you will need a drill with a Forstner drill of the required diameter (26mm or 35mm, depending on the size of the bowl), a screwdriver, a screwdriver, an awl, a pencil, a square and a tape measure.
| Decide on the number of hinges and their installation location, mark the distances for subsequent installation of the hinge itself and the strike plate. To speed up the process and measure accuracy, use a ready-made or homemade template. |
| Using a drill and a Forstner bit, drill a hole for the furniture hinge bowl. Be careful not to pierce the facade with the tip of the drill; this is a fairly common mistake among inexperienced furniture makers. |
| According to the marking diagram, a counterplate is screwed to the side of the cabinet at a distance of 37 mm for an overlay facade or (37+X) mm for an internal one, where X is the thickness of the facade. |
| The hinge bowl is fixed using fastening screws to the cabinet door. Then, holding the façade suspended, the hinge arm is placed on the striker plate and secured with installation screws. A 1-2mm gap must be left between the end of the case and the cabinet door to allow for further adjustment. |
The hinge design allows you to adjust the façade installed on the hinges in three planes: vertically, horizontally and in depth.
If the cabinet has double doors, install both doors first, and only then proceed with adjustments. The same goes for kitchen cabinets in a row. The doors need to be adjusted simultaneously on all cabinets and cabinets in the kitchen in order to achieve a single plane in height and depth with uniform gaps.
Materials and design
Furniture hinges are made from various metals. The main requirement for materials is their ability to hold their shape for a long time and not deform even under the heaviest weight loads. The metal must be resistant to prolonged use. The most common models are stainless steel and brass. They are characterized by a long service life and are almost impossible to break. In addition, these metals are not subject to rust or deformation. Conventional steel is used a little less frequently, since it oxidizes when exposed to moisture. Such models are cheaper, but have limited use; in particular, they are not recommended for installation in complexes located on the street or in rooms with high humidity levels (kitchen, bathroom, bathhouse).
Nuances when choosing hinges with a closer
It is impossible to say unequivocally which brand of furniture hinges will be better. Each type of fittings is manufactured in accordance with the established requirements of GOST. Typically, the lifespan of furniture hinges starts at 20,000 cycles (opening and closing). However, this figure may vary depending on the load on the fittings. Most modern manufacturers produce canopies that have an average cycle life of 80,000.
When choosing hinges for furniture, it is better to focus on the manufacturer rather than on GOST indicators
It is better to choose hinges from well-known brands. It is not recommended to pay attention to Chinese manufacturers, since there are similar types of fittings that have a relatively low cost and high quality.
It is important to consider the thickness of the material from which the loops are made. If the metal is thick, the entire structure will be heavy, and vice versa. Thin metal, while outwardly presentable, will turn out to be of lower quality, especially if the doors are massive (the hinges are deformed under the weight of the facade).
The material from which the hinges are made must be of high quality
You can also rely on the seller's recommendations. It is unlikely that large stores will sell frankly low-quality accessories, since they are all sales-oriented. A bad part can only be sold once - the buyer will never return to the store.
Adjusting standard sash canopies
The most commonly used are two types of door hinges - the regular type and the one with a closer. Externally, both options are almost the same, the second has a more massive design. The setup technology is common for all types. There are four main conditions that allow this operation to be carried out successfully and in a short time.
Before starting work, you need to ensure that the cabinet is level in three spatial planes. This can be determined using a building level.
The impossibility of optimal arrangement in three spatial planes will require increasing the gaps on the facade sashes. Their dimensions, with the correct arrangement of furniture, are within 3-4 mm.
The adjustment begins by adjusting the vertical gaps along the height of the door. Then the sashes are leveled in height.
Another important point is the correct fit of the facade under the fittings cup. Otherwise, the process of correct regulation is practically impossible, and the additive defect will need to be eliminated.
It is necessary to adjust furniture hinges simultaneously in several planes:
- vertical regulation;
- aligning the door height;
- plane adjustment.
Vertical adjustment is performed when the sash hangs at an angle or one door is lower than the other. The process consists of four stages:
- Removing caps from awnings.
- Installation of bolts at the same level, located away from the edge of the sidewall and responsible for vertical adjustment.
- Covering the sash and determining its location relative to the entire cabinet structure. If the upper corner of the door has shifted to the right side, you need to tighten the adjusting screw in the upper canopy and unscrew it in the lower one.
- The previous operation is carried out until the door reaches the desired position.
Now you can start adjusting the door height. To do this, you will need to purchase adjusting screws with fine threads - 16e PZ, which will firmly hold the mount. Self-tapping screws are thick and should not be used with large thread pitches. In this case, you will have to work with bolts that secure the hinge to the side wall through oblong holes. The process is divided into three operations:
- Loosening screws on awnings by lightly unscrewing them.
- Moving the sash in the required direction (up or down) along the hole and fixing it.
- Carefully tighten the self-tapping screws almost all the way, but so that the threads do not go astray.
Adjusting the hinges according to the plane is required when the door does not press well against the body or when closing it returns slightly. In this case it is necessary:
- Tighten the screws located closer to the edge of the side panel towards you by no more than 2-3 mm.
- Checking the correct location of the door - there is a gap between the leaf or facade.
- If necessary, repeat the process until the defect is eliminated.
It is recommended to make adjustments using a Phillips screwdriver, since the bolts also perform a fixing function and therefore must be firmly tightened.
Adjustment of furniture canopies with closers
Adjustment of furniture hinges with a closer is carried out in the same way as standard ones. However, there is one difference - they add another adjustment screw, which allows you to either turn off the closer or increase the force of attraction.
In some mechanisms, shutdown is carried out using an additional bolt, in others - with a switch located in the hinge cup. This depends on the manufacturer and the design of the canopy, so how to adjust the setting of a certain type of hinge with a closer should be found in the instructions supplied by the manufacturer.
Adjusting furniture canopies yourself
Work on adjusting hinged hinges can be carried out independently, without the involvement of a professional. This simple procedure does not require great professional skills and a significant amount of time. To perform it, you do not need expensive devices - simple tools available in every home are sufficient.
The only condition is a careful study of the techniques, features and sequence of operations for performing such work. Adjusting furniture hinges with your own hands will allow you to regularly check the condition of the facade during the operation of the furniture and promptly eliminate any problems that arise, constantly maintaining furniture fittings in working condition.
Kinds
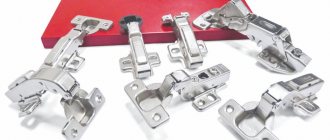
Today, manufacturers offer more than ten different types of hinges for kitchen cabinets.
This ranges from the simplest “frogs” to hinges with closers of various complex designs. Different door hinges are attached differently.
Overhead loop or frog loop. It is a four-bar hinge mechanism. It presses the door tightly and allows you to open it 90 or 165 degrees. This type of loops is the most common. It can be found on almost any kitchen set that has swing doors. Such hinges allow you to completely cover the furniture body on which they are attached.
Semi-invoice. It allows you to partially cover the headset body. Its structure has a slight bend, due to which a gap is formed between the cabinet doors, fixed to one rack, which makes it possible to open both at the same time without any problems.
Internal. Outwardly, it is very similar to a semi-overlay. But its application is different. An internal hinge is installed when it is necessary to place the door set inside the frame.
Inverse. Allows you to open the cabinet door 180. In this case, the door is flush with the frame.
Corner. From its name it is clear that it installs doors at an angle. This is necessary for corner drawers. Standard hinges in this category come with installation angles of 175,135,90,45 and 30. But there are also non-standard corner hinges.
Mezzanine. Used to hang horizontally opening drawer doors. This type of hinge is based on a spring.
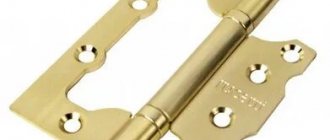
Piano. Rarely used in modern furniture due to its unreliability. It is used mainly for book tables and for attaching folding tabletops.
Card loop. Essentially, this is the same piano loop, only shorter. It is often used in retro-style furniture; for this purpose, these hinges are shaped or given the shape of a butterfly.
Secret. It has two plates, with the help of which horizontal facades that go down are attached. They got their name for their use in secretaries. Similar to a piano loop.
Adit. Mounted on cabinets adjacent to the wall.
Card shop. With their help, folding facades are attached. Such hinges have the ability to fix the cabinet door. They are attached from the end to the door and frame and allow you to open the structure 180. Card hinges are very popular on folding tables.
Reversible loop. Allows you to open the doors 180 degrees and return them back, like at the entrance to a supermarket.
Heel. Attached to the corner of the facade. It can go deep inside the sash, but is only suitable for lightweight doors. Therefore, its use is very limited.
Hinges also vary in their use in certain materials. Glass, plastic, and fiberboard require different hinges.
There are also two types of hinges that differ in installation. Slide-on are standard hinges, and clip-on are instant installation hinges. Clip-on hinges reduce installation time by up to 60% due to the collapsible hinge, which has two parts that snap together.
Another type of hinges for kitchen furniture are hinges with a driver. Their price is much higher, but it justifies itself. First of all, it's convenient. They pushed the door, and it closed further by itself. Secondly, it preserves the condition of the furniture. Since the closers themselves regulate the force of closing the door, thereby keeping both the facades and the frame itself in their original condition. Thirdly, they prevent the sound of doors slamming without irritating the nervous system.
Adjusting the hinges
With horizontal divergence
Doors must be installed as follows: on the side of the installed fasteners, a gap or visible distance must be formed, and when opening the door, the other side must extend beyond the boundaries of the cabinet wall. If the cabinet has two doors, then they should cling to each other.
The regulation process itself involves carrying out certain manipulations with the adjusting screw, which is present on furniture hinges. It is located in the hinge arm that is closest to the door. If you screw this screw in harder, the distance between the end of the door and the side will increase. By doing the opposite, we make the distance between them smaller.
How to replace furniture hinges on an old cabinet
When replacing furniture hinges, it is advisable to replace the installation screws with thicker ones (for example, take 4x16 or 3.5x16 versus 3x16). This will ensure the strength of the fastening in the same holes.
If you need to replace furniture hinges on an old cabinet because they were torn out from the sides or the facade itself, it is necessary to carry out preliminary restoration work. You can read more about this in the article on how to repair a cabinet with your own hands.
Types of furniture hinges by purpose
“Straight” hinges with an opening of 90-110 degrees
This includes standard furniture types, overhead, semi-overlay and internal types.
The invoice is also an external loop. Designed for installation of facades that completely cover the body from the sidewalls (not counting the technological gap of 2-3 mm for each door).
A half-overlay loop is used when the sidewall with fasteners is covered halfway. Typically used in three-door cabinets and double-opening wall cabinets.
Inset - also known as an internal loop. Used to install facades recessed relative to the body. But more often it is used for wall cabinets with a top opening, if the top lid hangs like a “visor”.
Adit, straight - it is also a loop for false panels. To install the facade not on the sidewall, but on a false panel located in the same plane as the facade. Mainly used in corner kitchen modules and on sink tables.
Corner hinges with standard opening 90-110 degrees
They are mainly used for corner facades located at 45 (135) degrees relative to the body, less often - for end modules - with an opening angle of 30, 60 degrees.
But in reality there are many more corner loops. But they are not in particular demand, since the need for them arises very rarely, in specific design projects.
Inverse hinges with increased opening angle up to 180 degrees
They also come in overhead, semi-overlay, inset, adit, and corner, but they provide a much larger opening angle, practically turning the façade 180 degrees. Needed to increase access to the interior of the cabinet when the standard 90-degree opening is not enough. Such loops are also called transformers, due to the complex design of the shoulder.
Carousel loop, aka crocodile
A specific type of hinge used for transformable doors that open like an accordion. Most often it can be found in sink tables, in combination with a direct inverse loop.
Almost all of the considered types of four-hinge furniture hinges are produced both in a standard version and are equipped with a closer - a special soft-closing mechanism. The closer can be built into the hinge arm or snap onto the bowl or arm.
How to Install a Piano and Card Hinge on a Cabinet Door
In modern cabinet furniture, cabinets and cabinets, four-hinge hinges are mainly used. Piano and card hinges are installed on the cabinet door in cases where it is necessary to emphasize the style, the “antique” design.
Due to the fact that card and piano hinges do not allow adjustment, it is important to adhere to the utmost precision and accuracy when marking attachment points. It is also necessary to first level the cabinet body horizontally, without blockages or distortions.
The easiest way to install a piano hinge on a cabinet door is with an assistant. First you need to decide on the design of a piano or card hinge - depending on what type of opening is needed and what decorative effect you want to achieve.
The card or piano hinge area can be screwed both to the end of the body and facade, and to the inside of the door and sidewall.
The installation principle itself is extremely simple and clear. It is recommended to first pre-fix the piano loop in 2-3 places, fixing the position. And then screw the screws into the remaining holes. Excess piano hinge can be carefully cut off with a hacksaw.
If other hanging options are used to equip the furniture (mortise, mezzanine, pin hinges), rely on the recommendations of the attached instructions.
Basic characteristics
Furniture hinges are semi-mechanical devices for fastening the facade to the furniture body and making doors comfortable to use. Installation is carried out using self-tapping screws. The cup of the furniture hinge is fixed to the facade, and the mounting strip is fixed to the frame. There are several types of products depending on the opening angle:
- 45 degrees. Used for corner cabinets, trapezoid-shaped cabinets with one or two doors. This could be kitchen or wardrobe furniture.
- 90 degrees. Allows doors to be opened at right angles. There are several types of loops. Overlays do not require bending and are suitable for facades that completely cover the side walls. Semi-overlays have a medium twist, while internal ones have a large twist. The former are used in three-leaf wardrobes, the latter in office furniture.
- 165 degrees. Carousel loops are distinguished by the complex shape of the bowl elbow. Relevant for corner bedside tables.
- 180 degrees. Used for mounting false panels and connecting the facade to the sidewall. A popular option for kitchen sets.
- 270 degrees. Suitable for any folding door.
The selection of suitable hinges is based on the design features of the products. The purpose of the interior items must be taken into account. Other factors also matter: the intensity of use, the material from which the furniture is made.
Installing a hinge on the door
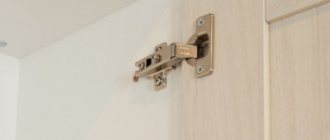
Loops must be placed in the recesses made. Then adjust their location in relation to the facade. All canopies must fit snugly to the facade. And if their position is not corrected, the door will very quickly begin to warp. After aligning the hinges, you need to use a pen or regular pencil to mark the points for securing the screws.
Next, you need to attach the door with screws or a Euroscrew to the piece of furniture itself. In particular, a cabinet or bedside table. The algorithm of actions in this case is as follows:
- Mark the points for installing loop pads;
- Attach platforms for mounting the installed hinges;
- Attach the door to the side of the cabinet;
- Connect the loop;
- Adjust the doors using a regular screwdriver.
It is better to hang doors on a smooth surface. The side of the cabinet where the hinge strip is attached must lie horizontally. This will make fitting and connecting the door more comfortable. The door can be adjusted in a vertical position.
Correct and quick adjustment of furniture hinges
Furniture fittings need regular adjustment
Adjusting the door height
To adjust the height of the doors, two screws are installed on two oblong-shaped “ears” - the hinge itself is pulled through them.
Height adjustment is made with two screws
The setup is done in 3 steps:
- Loosen the adjusting screws on all installed hinges.
- Raise or lower (depending on what is necessary) the facade, and then fix it.
- Tighten the screws at low speeds almost all the way, without stripping the threads.
After adjusting the facade in height, you can begin adjusting the doors along the plane.
Adjusting the height of the façade
Adjusting hinges according to plane
Adjustable furniture hinges allow you to change the position of the facade in the plane - this is useful if either there is poor pressing of the door to the furniture body, or when pressed, the door seems to bounce in the direction opposite to the pressure.
If such a situation arises, just turn the second adjusting bolt located on the hinge. First, tighten the bolts towards you (2-3 mm is enough), then check for a gap between the facade or doors and, if necessary, make further adjustments.
Adjusting door leaves according to plane
Proper maintenance of fittings
We have dealt with the issue of how to adjust cabinet hinges, but knowledge of the adjustment rules is not the only thing that is necessary for the correct operation of furniture fittings. Equally important are actions such as regular adjustment and lubrication of hinges.
The simple recommendations below will help significantly extend the life of your hinges:
- Adjustment frequency. The first adjustment of the hinges is carried out immediately after their installation. The frequency of further maintenance will depend on how actively the furniture is used. In some cases, it is enough to adjust the loops a couple of times a year, in others, even four times will not be enough. You should regularly inspect the condition of the façade and, if distortions or poor rebate are detected, make precise adjustments.
- Lubricating hinges. Like door hinges, furniture hardware requires regular lubrication to function properly and last. For these purposes, you can use regular motor oil - both mineral and synthetic. It is enough to oil all the furniture hinges in the house once a year so that you never hear squeaks or have difficulty opening and closing the doors of your home furniture.
WD-40 is optimal for lubricating hinges
When adjusting, try to adjust all three parameters - height, vertical and plane - to avoid imbalance, which can lead to uneven load on the hinges. You will spend up to 10 minutes on one adjustment, which will extend the life of the hinges for many years (provided that you were able to choose the right hinges for the furniture).
You can watch the video to reinforce what you have learned about adjusting hinges.
Purpose of a furniture damper, nuances of choice
Accessories and components
When manufacturing a large number of furniture, it is simply impossible to do without high-quality fittings. It allows you to make the item more practical and convenient to use. These elements include furniture dampers, which play an important role in the manufacture of structures.
Purpose
Not everyone knows what a damper is. However, this tiny design detail plays an important role in ensuring comfortable operation of cabinet doors and cabinets. It is for this reason that it is worth knowing more about the varieties of this furniture fittings.
Dampers are various types of parts that can soften the contact of two surfaces. In other words, even an ordinary rubber gasket can be called this. If we are talking specifically about a furniture damper, then it has some features in its structure and use.
In practice, furniture dampers are a special part used in furniture assembly. This is a kind of shock absorber that will allow a furniture facade that opens upward to be locked in the open position. You don’t need to hold the door additionally with your hand to get the contents of the shelf, which is very convenient. Of course, this is far from the most innovative fittings. It was invented quite a long time ago, but these days manufacturers are improving when creating dampers in order to make products as functional, practical, and durable as possible.
Varieties
The purpose of such devices is the same, but the types may differ. They differ in design, appearance and installation features. Furniture shock absorbers are classified based on their operating mechanism:
- on hydraulics - they look like a cylinder with protruding pistons;
- on pneumatics - they are a complex mechanism that is used in combination with lifts.
Hydraulic products, in turn, are divided into:
- flow stabilizers;
- pulsation products;
- hydraulic shock mufflers;
- dampers.
Based on the installation features, there are overhead shock absorbers, mortise shock absorbers and hinged shock absorbers. A big advantage of overhead structures is the ability to replace them if they break. But the mortise shock absorber is almost invisible, which makes the furniture more aesthetically attractive.
Based on power, dampers are distinguished for narrow and wide furniture facades. For example, a door up to 50 cm wide should be equipped with a product with a power of 60 Newtons, and wider options should be equipped with a mechanism with a power of about 100 Newtons.
Mechanical
Gas
Manufacturing materials
For the production of furniture dampers, different materials with unique performance parameters are used. To ensure that the fittings serve for a long time, are functional, and provide the user with silent operation of the cabinet, silicone and rubber dampers are used:
- silicone - the silicone shock absorber is made in the form of a primitive round piece, which is highly soft. Silicone parts have an adhesive side, which is used to fix them to the surface. Note that the self-adhesive damper is also unique in that it can protect a small child from injury. Children often love to play with the doors of kitchen units and drawers in the closet, pressing their delicate fingers. Thanks to the presence of silicone shock absorbers, this can be avoided. Manufacturers offer customers different options for silicone shock absorbers: transparent, white, beige. This allows you to choose the most invisible option against the background of furniture;
- rubber - is a mortise part located in places where one surface constantly impacts another. For example, at the end of the shelf that is in contact with the door. Rubber shock absorbers serve as a shock absorber and also as a seal for the façade vestibule.
The service life of such products is quite long, but if necessary, it is quite possible to install them yourself at home.
Rubber
Silicone
How to choose suitable corner hinges?
Corner hinges come in standard varieties, but if necessary, any other opening angle can be made to order. The main selection parameter is the location of the cabinet relative to others and the available space for opening it.
Traditionally, furniture doors are opened by a closer at an angle of 90-110 degrees; in these cases, straight hinges are used. When it is necessary to go beyond this range, corner hinges are required. If the desired angle is wider, then you need to look for options marked “plus”; if narrower, then “minus”. If the non-standard angle is not a multiple of 5, then along with the hinge you will have to install a special pad to help adjust the angle.
Opening angles
Corner fittings are installed on corner furniture. In this case, the leaves are attached to the base of the door frame at a given angle. Such hinges allow the doors to open at 30, 45, 90, 135, and 175 degrees. The following options are most widespread.
- Angled hinge at 30°. Fixed to the facade located at 90+30 degrees relative to the body. Mainly in demand in end cabinets of dressing rooms or in kitchen sets. The installation angle is 120°, so some manufacturers mark similar products by installation - they go on sale under the name “120 degree loop”. Popularly, these models are better known as “grasshopper”.
- 45° corner hinge. Used in single and double door wardrobes. As a rule, furniture of this type is present in dressing rooms and kitchens. It is fixed at an angle of 135°, which is why it is labeled by some manufacturers as a “135 degree hinge.”
- Angled loop 120-130°. Found application when connecting pairs of facades connected to each other at an angle of 270°. This type of hinge opens like an accordion.
- It is less common to see hinges with a negative angle at points of sale. They are not widely used on the market; they are used mainly on the outer door of the end cabinet, which is easier to swing open from the opposite edge. There are situations when such a loop becomes the only available option.
The listed types of corner hinges belong to the category of standard and most common. If necessary, you can set any other opening angle, for example, 60, 15 or 25 degrees. In this case, you will have to contact the craftsmen who make these to order. They will make fittings taking into account the customer’s data: size, desired opening angle and material. The disadvantages of this solution are the relatively high cost and time spent on producing the optimal model.
What is an overhead and inlay loop?
Structurally, the loops are very similar. They consist of:
- cup located on the mounting plate;
- counter fastening loop;
- hinged device.
An inset furniture hinge is attached to a drilled hole; an overhead hinge does not require a recess. Why is this design difference needed, and why inset and overhead:
- The position of the doors relative to the facade changes. If the fastening is overhead, the door overlaps the end of the body strip. When hanging in a mortise, it is visible; the door goes deep into the body.
- The hinges are suitable for furniture structures of various thicknesses. inserts are impossible without the use of a cutter; a recess of 11 mm is made under the cup into the body strip. With the minimum standard thickness of cabinet furniture (16 mm), it is difficult to install. Furniture manufacturers sometimes press the hinge cup into the cabinet panel during the manufacturing process.
- The response plate has a different bend; the inset hinge has less bending; it swings open due to hinges.
Installation Rules
When it is planned to place a powerful closer on a lifting door, the main part of the structure (piston) is placed on the stationary part of the cabinet. The remaining elements of the device are fixed to the door. To install an overhead door closer, you must follow the instructions:
- The area of the door and the cabinet wall is marked. The closer is installed at a distance of at least 20 mm from the edge (adjacent to the fixed part of the furniture). 120 mm depart from the upper/lower edge of the canvas.
- When installing, take into account the possibility of movement of the top drawer. Nothing should interfere with him.
- A cut-in is made along the marked lines: excess material is removed with a milling cutter, which allows the hinge bowl to be positioned.
- At the last stage, the product is fixed with self-tapping screws at different points.
Types of adjustment of fastening devices
What is adjustment and why is it needed? This is the elimination of a problem that arose during the installation of fasteners. Before carrying out it, it is necessary to carry out diagnostics in order to detect the problem. Having established the cause, you should slightly loosen the fastening bolt or tighten it more. Adjustments must be made whenever the doors begin to sag. This procedure has three varieties:
- depth adjustment is needed in rooms with uneven floors; it is necessary to loosen the fasteners or tighten the screw. A regular screwdriver will do just fine for this job;
- horizontal adjustment is required, especially if the floor is uneven, to eliminate the gap formed between the cabinet and the door;
- Vertical adjustment is needed to hang the doors at the desired level. The procedure is systematic: you need to adjust the position of the cabinet doors so that they do not sag.
Comfort-creating shock absorber for furniture: installing a damper yourself
When using cabinet furniture, it is impossible to do without high-quality fittings. It allows you to make the item more practical and convenient to use.
The fittings include a damper, which plays an important role in the manufacture of structures.
What is a damper
Translated from Latin, “dampers” mean damping vibrations. These devices include everything that is designed to soften the blow and provide the necessary softness when closing, make it smooth and quiet, and avoid slamming.
Such fittings have undeniable advantages, are affordable and are not particularly difficult to install yourself. Dampers are designed for doors that rise up, open horizontally and slide out.
Purpose and benefits
Such a tiny structural detail plays an important role in ensuring comfort when using cabinet doors and cabinets. It is for this reason that it is worth learning more about the varieties of this furniture fittings.
Dampers are various types of parts that can soften the contact of two surfaces.
In other words, even an ordinary rubber gasket can be called this. If we are talking specifically about a furniture device, then it has some features in its structure and use.
In practice, the damper is a special part required during assembly. This is a kind of shock absorber that will allow a furniture facade that opens upward to be fixed in the open position. In this case, you do not need to additionally hold the door with your hand to get the contents of the shelf, which is very convenient.
Of course, this is far from the most innovative fittings. It was invented quite a long time ago, but nowadays manufacturers are improving the creation of this part in order to make products as functional, practical and durable as possible.
There are several options for dampers, the simplest of which is self-adhesive. It is a disk with a diameter of 7-10 mm and a thickness of 1.5-2 mm. It is made of soft material that perfectly dampens the sound from the closing door. This type has an adhesive layer, making it very easy to stick to the end of the cabinet. It is worth noting that this is the most common way to fix the door slamming problem.
Compared to closers
Strictly speaking, shock absorbers partially perform the function of a closer. They only dampen the impact, making the closing of the facade silent. The hinge itself reaches the closing position of the door.
Considering this fact, it would be fair to mention those dampers that have nothing to do with hinges, but functionally play the same role as overhead door closers and shock absorbers - they dampen the impact of the door on the body when closing the facade.
Types of mechanisms
The purpose of such devices is identical, but the types may vary. They differ in design, appearance and installation features.
Furniture shock absorbers are classified based on their functioning mechanism:
- on hydraulics - they look like a cylinder with protruding pistons;
- on pneumatics - they are a complex mechanism that is used in combination with lifts.
Hydraulic products, in turn, are divided into:
- flow stabilizers;
- pulsation products;
- hydraulic shock mufflers;
- dampers.
Based on the installation features, there are overhead shock absorbers, mortise shock absorbers and hinged shock absorbers. A big advantage of overhead structures is the ability to replace them if they break. But the mortise shock absorber is almost invisible, which makes the furniture more aesthetically attractive.
There are also dampers for narrow and wide furniture facades. For example, a door up to 50 cm wide should be equipped with a product with a power of 60 Newtons, and wider options should be equipped with a mechanism with a power of about 100 Newtons.
What materials are they made from?
In the production of dampers, different materials with unique performance parameters are used. To ensure that the fittings serve for a long time, are functional, and provide the user with silent operation of the cabinet, silicone and rubber dampers are used.
Such shock absorbers last quite a long time, although breakdowns sometimes occur. The material has an affordable price and incommensurable benefits.
Silicone
The silicone shock absorber is made in the form of a primitive round piece, which is highly soft. Silicone parts have an adhesive side, which is used to fix them to the surface.
The self-adhesive damper is also unique in that it can protect a small child from injury. Children often love to play with the doors of kitchen units and drawers in the closet, pressing their delicate fingers. Thanks to the presence of such shock absorbers, this can be avoided.
Manufacturers offer different options for silicone shock absorbers:
- transparent;
- white;
- beige.
This allows you to choose the most invisible option against the background of furniture.
Manufacturing materials
An important requirement for all furniture fittings is their compliance with safety standards. Simple auxiliary products, providing movable movement of furniture parts, are manufactured using special technology using various materials. When making connecting fasteners, the manufacturer takes into account the types and significance of furniture products, and based on this, the required fastening is selected.
When choosing hinges, it is necessary to take into account their basic characteristics: the quality of the material, their functionality, versatility, and the appearance of the model. The most popular and in demand are connecting mechanisms made of brass and steel. They are considered the most reliable, durable, do not corrode, have good glide, and do not deform.
An important point in the versatility and quality of the product is simple installation and the ability to adjust furniture hinges. Modern fastening structures allow you to adjust the facade along the vertical, horizontal and depth planes. Various types of settings are presented in the video.
Steel
Brass
For glass doors
Four-hinged hinges are used to connect the glass door to the facade. For such products, you will need to not only insert a high-quality device, but also a loop that has a beautiful external shape. The ability to open moving parts in three planes is one of the advantages of these hinges.
Hinges for glass doors are manufactured and installed taking into account the fragility of the material.
For glass in the design of the connecting device, a cup made of plastic material. There is a seal ring. On the visible side, you can choose a loop with a decorative plug. It can be semicircular or round in shape. Also currently on sale there are products with different colors.
According to the installation method, furniture hinges for glass doors are available with or without drilling.
The manufacturer of this type of product equips them with high-quality connections that can withstand a large number of opening/closing cycles
It is important that such furniture hinges have no defects, they have an aesthetic appearance
If the glass is darkened, you can choose a dark hinge. When selecting a specific facade, you can choose any of the types: internal, external, semi-overlay, screwless, self-closing, fastened at the desired angle.

