Hi all! Surely each of you dreams of a beautiful, cozy and comfortable bathroom. And these qualities are achieved through proper filling. Moreover, you can do a lot for the bath yourself.
One such addition could be a DIY sink cabinet. There is nothing good about an ordinary sink with a void underneath. Especially when various pipes and elements of the drainage system stick out. They can be covered with a decorative element. But it’s much better to put a cabinet there. This will significantly increase practicality, provide the necessary functionality, and also give a visual decorative effect.
Hanging cabinet with open niche
Cabinets for surface-mounted sinks or tulip-type sinks can have different designs, shapes, and be made from all kinds of materials. It all depends on your personal wishes, capabilities, as well as the size of the room itself.
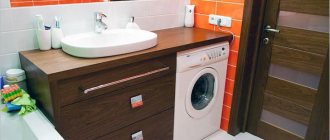
DIY countertop under the sink
If you make a shelf under the bathroom sink with your own hands and install it yourself, this will help save money and make the design of the structure original and unusual. For production it is best to use:
- plasterboard sheets;
- fibreboards.
To create a structure on which it is convenient to store some hygiene products and items in the bathroom, as well as to practically secure the sink bowl, you will need:
- hacksaw;
- pencil;
- roulette;
- level;
- jigsaw;
- screwdriver;
- screwdriver.
To construct the base of a plasterboard structure, you need to use a metal profile. Before starting installation work, it is necessary to draw up a detailed diagram of the future tabletop, indicating all the dimensions and ratio of parts.
It doesn’t matter whether you buy a shelf for a bathroom sink or make it yourself, you need to carefully consider all the nuances. Decide what type of sink it will be and what material it will be made of.
This will help you avoid many problems in the future and choose the most suitable countertop for the sink.
Tools
Required construction tools:
- electric jigsaw;
- sanding machine - for smoothness of the coating;
- screwdriver;
- hammer;
- pencil;
- screwdrivers;
- tape measure and ruler;
- sandpaper for sanding, coarse and fine;
- electric iron - for gluing the edges;
- edge - for finishing the end of parts;
- stain.
Consumables:
- 2 pcs. external panels - 45 cm by 70 cm;
- 2 forms (top and bottom) – 45 cm x 45 cm;
- 8 pcs. beams to form a frame - 7 cm x 41.8 cm;
- 4 pieces of panels for the facade - 17.5 cm by 45 cm;
- plywood for the back wall – 45 cm x 70 cm;
- 8 boards for the sides of drawers - 13.5 cm x 45 cm;
- 4 boards for the back - 13.5 cm x 34.2 cm;
- screws 4 centimeters and 1.6 centimeters long;
- small carnations;
- guides - four sets;
- carpentry glue.
How to choose a shelf for a sink bowl in the bathroom
Do-it-yourself TV stand
When choosing a shelf for a bathroom sink, you should approach it with all responsibility. First of all, you need to decide on the method of fastening and the shape of the structure. The convenience and functionality of the countertop depends on this.
The color and appearance of the shelf play an important role. It all depends on the overall design of the bathroom style.
The price of the product is also important, since it is formed on the basis of quality and functionality. Other parameters also affect the price, such as:
- bathroom footage;
- what material is the shelf made of?
- accessories;
- size and shape.
Since there are a huge number of designs sold in stores, you need to think carefully about everything before purchasing.
Preparation of the drawing
Modern users can make a drawing in a special design program that develops three-dimensional design options.
CAD programs specialize in the selection of models:
- show cutting on sheets of a certain size;
- draw up specifications for consumables;
- choose types of mounts based on the built-in base.
If a home craftsman does not have the opportunity to use the program, he manually draws up a drawing. Sometimes this is just a schematic drawing indicating the necessary information:
- Detailed design of the frame with the number of racks, lower and upper cross members, their dimensions comparable to the overall dimensions of the product.
- The outer lining of the cabinet, with data on the dimensions of the side panels, the method of marking on sheets and cutting.
- Schematic drawings of the interface of individual parts, fastening methods.
Based on the drawing, a specification of materials and fittings is drawn up, and the number of hardware and furniture confirmants is calculated. The sketch is needed to calculate the volume of material for tiling and purchasing glue.
Valera
The voice of the construction guru
Ask a Question
When drawing up an assembly drawing, it is taken into account that the optimal height of the sink in the bathtub is 80 - 90 cm. The cabinet doors open wide, slide apart along the guides or recline. Drawers are provided in the sketch, taking into account that such a design will require space in front of the cabinet.
Installing a cabinet under the sink with your own hands
DIY sink cabinet
So, our beauty is ready, all that remains is to connect it to the sink
It is important that by this stage the entire sink is completely assembled: with taps, handles, water pipes, etc.
The cabinet is placed in the place where it will carry out its long and faithful service. If you have a hanging model, now is the time to attach it to the wall. Remember that you will have to support the weight of not only the cabinet itself, but also the sink, so the fastenings must be as reliable as possible.
Silicone or sealant is applied along the entire edge of the sink, after which it is installed in the hole. There is no need to save money here. If you overdo it, you can always remove the excess. But the “shortage” will only have to be redone.
After this, all that remains is to connect the sink to the water supply. If you want to add decorative elements to the cabinet (carved patterns, painting, gilding, etc.), now is the time to start. You can also stick tiles or self-adhesive film on it.
Thus, you will receive a unique piece of furniture in your bathroom or kitchen, created with your own hands, which you can show off to your guests, bequeath to your descendants, or admire in splendid isolation.
Nightstand design
In today's world, there may be a million design options, but only a few design variations.
An ordinary bedside table with two or three shelves, often retractable.
Note!
- Do-it-yourself wardrobe: a review of ways and methods on how to build a stylish and original wardrobe (video and 145 photos)
Do-it-yourself furniture restoration - removing chips and scratches, restoring surfaces. Instructions with photos and video tips
DIY ottoman: how to make it at home. The best ideas, master classes. Photo + video review of beautiful ottomans
Hanging shelf or shelf with a drawer. Most often it comes in one stylistic solution with the bed and headboard. Often in such interior solutions, phone chargers and spotlights are built into the bedside tables or next to them.
A big plus for such variations is the effect of floating in the air, this allows you to create additional lightness in the space, especially if they are not large.
One of the noticeable disadvantages is that it cannot be painlessly dismantled; traces of the fastening will remain, so with this decision it should be understood that the choice of design is stationary in nature and requires complex actions for updating.
Installing a countertop for a bathroom sink
Detailed instructions on how to make a vanity cabinet with your own hands with a photo, drawing and choice of material
When a suitable shelf for the bathroom sink has been selected, it’s time to begin installation work. Even an inexperienced craftsman can easily cope with replacing an old structure with a new one. Installation of the tabletop must be carried out in a certain order:
- First, we get rid of the sealant and lining. If there are skirting boards around the structure, they must also be removed. The sealant can be easily removed from the cracks with a sharp knife.
- Drain the water. Unscrew the siphon and open the tap, thereby releasing the remaining liquid.
- We put marks with a pencil and carefully remove the old tabletop. The supplied markings will greatly simplify the installation of the new countertop.
- We cut holes for the plumbing fixture.
- We try on the new tabletop to the previously set marks. If there are irregularities, they need to be corrected with special gaskets.
- We install fasteners. Every ten centimeters we drill holes for nails.
When all the plates are installed, it's time to seal the cracks with silicone compound. The final stage is the installation of doors, baseboards and other decorative elements.
Manufacturing and assembly of a cabinet made of solid wood
Any of them consists of a frame base, top, side parts and additional elements - doors, shelves, drawers, canopies, etc. Some of them may have a bottom and legs attached to it. For the frame, beams made of any wood you like are suitable. The top can be anything at all: plastic, plasterboard, glass, wood, etc. Ordinary plywood is suitable for the sides and bottom. Additional elements can be made from any materials you like.
All patterns are first marked on paper, then transferred to the required surface and cut out using a jigsaw.
The assembly process begins with the frame base. Afterwards, all parts are sanded and, if necessary, coated with special products to protect them from moisture.
The side walls are attached to the frame (screws and glue are used for this). For additional strength, I highly recommend strengthening the connections with steel or aluminum corners.
Now the top surface. Even if you have checked everything many times before: place the sink in the hole to be 100% sure that all the dimensions are correct. There's no need to attach it yet - we'll do that later, for now we're just making sure everything fits.
Now the bottom. Some people secure it last, but it’s more convenient when the cabinet lies on its side, and in this case, slamming doors and sliding drawers can get in the way. That's why I leave them for last.
Recommendations for installing cabinets and sinks
Installing a sink with a cabinet in the bathroom yourself is not difficult if you listen to some recommendations:
First of all, let's start assembling the cabinets. Usually they should come with instructions to make work easier, but they are unlikely to be useful. This process is quite simple. The main thing is to make sure that the screws and fasteners are firmly secured. After installing the cabinet under the sink, this will be difficult to accomplish;
Assembly diagram for the washbasin cabinet
- Once the cabinet is assembled, we begin arranging the sink. It is no different in appearance and functions from those sold separately, it’s just that the washbasin is made to fit the size of the bedside table and is used to complete it;
- connect the siphon to the drain;
The siphon is installed by screwing it to the washbasin drain hole
- We place the sink with the faucet already installed on it on the cabinet. Typically, metal corners are used to hold these elements together;
- we move the washbasin and cabinet closer to the place where we plan to install these elements;
A sink with a siphon and a mixer is placed on a cabinet and moved towards the wall
Points for bolts should already be marked on the surface of the wall, on which the washbasin should then be secured. The marking is done independently. For greater accuracy, it is better to bring the washbasin to the wall and accurately measure the points. Using a tape measure you still won’t be able to achieve the required accuracy;
Markings on the wall for a future cabinet
- We move the washbasin with the cabinet back and drill at the marked points;
- After the holes are made, the bolts that come with the product should be inserted into them. When purchasing a product, be sure to check the presence of these elements; sometimes sellers simply forget to include them. And so that you don’t have to buy them separately, check their availability;
- Now you need to install the sink and cabinet in place, screw everything in with bolts;
- We check how the sink and cabinet stand. If everything is stable, does not wobble, and the product stands tightly to the surface of the wall, then everything is done correctly;
The process of installing a cabinet under the sink
- At the end we connect the sewer. The mixer hoses must be connected to pipes with cold and hot water. The hoses are connected using a union nut and a rubber gasket;
- Next, we seal the holes and connections. Sealing must be done, this will help avoid unexpected leaks;
- at the end the siphon is connected to the sewer pipe. In order to seal all kinds of holes, you need to use a special rubber gasket or corrugated cuff;
Installing a sink on a cabinet - the final stage of work
it is important that before you start using the washbasin, it is better to check it for leaks; if there are none, then you can safely start using it
Materials
The durability of the product is determined by the materials used.
Tree
An array of dense rocks is the most moisture resistant. The tired articles about merbau, “mahogany”, and yacht teak are far from the realities of amateur craftsmen. Oak and larch are worthy candidates, proven over centuries. Other local lumber requires particularly careful moisture protection.
Solid oak panel.
Larch
The benefits of wood are known:
- Strength.
- Durability.
- High resistance to pulling out nails and screws.
- Hygiene.
- Natural beauty of texture.
The optimal thickness of the shield is 40 mm, the shelves are usually twice as thin. Considering the presence of cutouts and dampness, a shield made of solid longitudinal bars is preferable.
Once you've forked over the cash, get ready for painstaking work that requires skill. Haste will ruin the workpiece: take into account moisture, hardness, fiber direction, and the presence of defects.
Wood-based substitutes
Budget chipboard is allowed only in laminated version - laminated chipboard. Pay special attention to the quality of the edge edges. The boards swell due to water penetration along the peeled melamine film.
The imaginary well-being of a laminated facade.
The initial stage of cracking of the coating.
In terms of performance in a humid atmosphere, it is inferior to laminated MDF. High density samples (more than 700 kg/m³) are preferred. “Loose” chipboard holds fasteners worse than MDF, not to mention solid wood. The result is falling fittings, doors, moisture saturation, peeling protective and decorative layer, formaldehyde emission.
The negative is partly brightened up by low cost and good workability. Cut MDF sheets, due to their microporous structure, do not crumble and are easily sanded, surpassing the performance of laminated chipboard.
The running thickness of chipboard sheets is 20 mm. Waterproof grades of plywood and fiberboard go to the bottoms of the boxes. Vulnerability is mitigated by coatings. An analogue is a plastic sheet 3–5 mm thick.
Drywall, glass
Built-in furniture is often made from plasterboard. The galvanized frame is sheathed with gypsum board sheets, the profiles are screwed to the wall in order to increase the rigidity of the frame and save construction. The bedside table turns out to be stationary.
Fast processing, minimum required tools are attractive; democratic price. The plasterboard countertop is tiled over waterproofing. The solution provides water resistance, hygiene, and stylish design.
The disadvantages are similar to those of particle boards: hygroscopicity, loosening of hardware. Drywall needs two-sided finishing. It is interesting to cover the façade with flexible PVC panels and paint the inside.
Glass is potentially traumatic. Glass doors and shelves are suitable for living rooms; do not take risks by placing glass, even tempered glass, near the bathtub floor.
Types of cabinets
Cabinets can have not only different sizes, but also different shapes. They can also be divided into several types depending on the method of their installation and location.
Cabinets may be different
Table. Varieties of sink cabinets depending on the installation method.
| View | Description |
| Floor | This is the most popular model, and its popularity is due to the versatility of products in this category. Such cabinets are distinguished by their stability and simplicity of design, and you can also place fairly heavy objects in them, since there is no risk of collapse. Typically, such products have legs or a base. Often they can be additionally fixed on the wall, which increases their reliability. Models can completely close communications. But they are unlikely to be suitable for modest-sized bathrooms, as they occupy quite a large space. However, with the right selection of models, they will look good and be useful. But putting a washing machine in a bathroom with such a cabinet can be problematic. |
| Hanging | These are, as a rule, very interesting and light-looking models that take up very little space, as they are located directly under the sink itself. They are especially relevant in small rooms and where plumbing does not allow the installation of a monolithic floor structure. However, the wall on which such a cabinet is fixed must be strong and reliable. Also, usually you cannot put heavy objects in such furniture. They are more difficult to install than floor-mounted ones, which often discourages the choice of such a model. But, nevertheless, this is also a popular form. |
| Corner | It is easy to guess that such cabinets are installed in the corner of the room. Moreover, they can be both floor-mounted and suspended. Allows you to save free space and decorate the interior. The optimal solution for small spaces. The cavity of such a cabinet is usually very spacious and allows you to hide many things and objects from prying eyes. |
Hanging cabinet
Also, cabinets can be divided into two types depending on the type of bowl of the sink itself. Thus, they distinguish cabinets for a mortise sink, when the thicket itself is installed on the upper surface of the cabinet by cutting out a cavity in it for it
Here it is important to take into account the fact that the plumbing product fits tightly to the edges of the cabinet, and the hole for it is accurate. Otherwise, unsightly gaps may form.
There are also cabinets for an overhead sink. Such a bowl is installed on top of the furniture itself - a small barrier is created on the countertop from the boundaries of the sink.
There is a wide range of different and interesting models of sink cabinets on sale.
Criterias of choice
Bathroom renovations involve replacing worn-out equipment. The industry offers improved modifications equipped with smart devices.
The list of materials used to manufacture products has undergone revolutionary changes. Acrylic and composite compositions have replaced the usual sanitary ware. The world of forms is also seeing a large number of new products in the form of installations, corner structures and monolithic designs.
Dimensions
Before going to the store, you need to take measurements of the bathroom. The resulting numbers are the basis of a diagram with placement points for plumbing fixtures. The plan also indicates the location of furniture in the bathroom. The height of the pedestal for the sink, depth, and diameter are selected based on the parameters of the room.
The product line is represented by three types of products:
- Separate (tulip sinks),
- monolithic,
- semi-pedestal.
Material
When choosing a sink model, study the properties and qualities of the material.
- Sanitaryware is a classic option. According to marketers, 60% of the market for sanitary equipment for the bathroom and kitchen is made of earthenware.
- The second most popular place is occupied by sanitary porcelain. Difference between materials in composition. The share of useful impurities in sanitary porcelain is 2 times higher. This ensures an increased level of strength and reduces the porosity of the coating. Competing materials are difficult to distinguish from each other in appearance.
- The artificial stone belongs to the luxury price segment. Composites are a durable, wear-resistant, heat-resistant option. A variety of colors and shapes of washbasins on a natural stone pedestal. The only negative is the weight. A relatively miniature structure made of artificial stone weighs 25 - 30 kg.
- Acrylic devices stand apart in this category. The fashion trend in the field of design is an innovative technological solution. Positive qualities and properties exceed those of analogues by 2 - 3 times. Bestseller – monolithic model.
- Glass – suitable for hi-tech design projects. The monitoring group Houzz Bathroom Trends Study has revealed an increased interest among Russians in glass sets. Nevertheless, the share of the consumer market remains small and belongs to the exclusive group. There is no pedestal for the sink.
- Steel ones are usually made to order for public places. They are practically not used in everyday life.
Technical specifications
Technical parameters are an area of increased attention. Modifications vary:
- at the location of the mixer,
- according to the diameter of the drain hole,
- by the presence/absence of a bottom valve, drain-overflow device, additional options.
Installation method
The installation method is one of the priorities. Installation of a sink with a pedestal has three versions: wall mounting, installation of a sink with a pedestal in the floor, fixation to the bottom of the countertop or to the base of the cabinet. 90% of pedestal sinks are wall mounted.
The shape is chosen in strict accordance with the design project and the dimensions of the room.
Shape and color
In plumbing stores you can easily find pedestal bathroom sinks in various shapes, for example:
- square;
- round;
- oval;
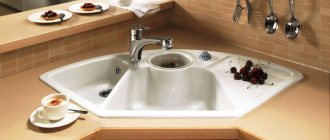
- triangular (corner).
Do not forget that the pedestal for the washbasin must match its shape. If the plumbing fixtures are round, then the leg should be chosen the same, and for square equipment a cubic pedestal is ideal. A corner sink with a pedestal is very convenient and saves space.
Features of fastening the shelf under the sink
There are two types of countertops: wall-mounted and floor-mounted. They differ from each other only in the installation method.
Hanging shelves under the bathroom sink make cleaning the room easier. Since the structure is suspended on brackets and there are no vertical supports, this allows you to wash the floor covering without any obstacles. Very often, washing machines are installed under wall-mounted countertops, since there is nothing except a sink, siphon and hoses.
Unfortunately, this installation method has one drawback: it will not look appropriate in every bathroom.
Floor shelves under the sink with vertical supports reduce the load on the wall. The presence of legs significantly reduces the usable space in the bathroom, but if you approach this issue wisely, this disadvantage can easily turn into an advantage. For example, install horizontal removable shelves.
Installation errors, their causes and solutions
Sometimes after the installation is completed or some time after installation, it turns out that the sink and pedestal were installed poorly. A number of symptoms that indicate this:
- the sink is wobbly;
- the pedestal is shaking;
- there is a gap between the bowl and the pedestal;
- there is a gap between the bowl and the wall.
Most of these problems can be solved without dismantling the product. If your pedestal washbasin begins to move and tremble at just one touch, the problem is in the level. During editing, of course, you used a spirit level, but perhaps not diligently enough.
If it turns out that the fastenings are not at the same level, this needs to be corrected. A large difference in height can only be corrected with new fasteners, while a small difference can be corrected by slightly twisting the mounting pin.
If the washbasin itself stays level, but only the pedestal wobbles, the problem is in the base. A perfectly flat floor is a rarity. Maybe your pedestal got into the joint of the floor slabs or the problem is in the screed itself, but if you don’t want to level the floor, use silicone. When drying, it creates a fairly dense layer that compensates for the distortion. Apply silicone to the joint between the “leg” and the floor.
The same solution is suitable for eliminating a gap near a wall or between a bowl and a pedestal. Silicone sealant is an indispensable item in a plumber's arsenal.
