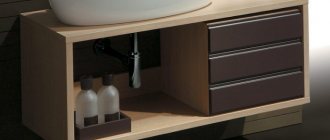
A bathroom is not just a place where there is a bathtub. In addition to it, there is often a sink intended for washing; moreover, it is a good interior element, which should have a decent frame in the form of a cabinet.
The cabinet itself will not only decorate the room, but will also provide the ability to store various bottles and household cleaning products. You can buy it, or you can make it yourself. How to make a bathroom vanity cabinet with your own hands?
DIY bathroom vanity cabinet
DIY countertop under the sink
If you make a shelf under the bathroom sink with your own hands and install it yourself, this will help save money and make the design of the structure original and unusual. For production it is best to use:
- plasterboard sheets;
- fibreboards.
To create a structure on which it is convenient to store some hygiene products and items in the bathroom, as well as to practically secure the sink bowl, you will need:
- hacksaw;
- pencil;
- roulette;
- level;
- jigsaw;
- screwdriver;
- screwdriver.
To construct the base of a plasterboard structure, you need to use a metal profile. Before starting installation work, it is necessary to draw up a detailed diagram of the future tabletop, indicating all the dimensions and ratio of parts.
It doesn’t matter whether you buy a shelf for a bathroom sink or make it yourself, you need to carefully consider all the nuances. Decide what type of sink it will be and what material it will be made of.
This will help you avoid many problems in the future and choose the most suitable countertop for the sink.
Cladding materials
Depending on the material used, the cabinet may need to be finished with something. That is, you will need to use some additional material. MDF panels do not need this. But simple wooden cabinets, as well as products made from plasterboard and a number of other materials, need beautiful design. The following can be used as facing material.
- Ceramics , if the base is dense and hard enough. Then the cabinet can be made the same color as the walls or floor.
- Adhesive film or self-adhesive film . This material is not the best option, but it is easy to use and comes in a variety of colors. Unfortunately, film is not a durable and strong material. Also, when gluing the surfaces of the cabinet, it is important to ensure that bubbles do not form.
- Varnish or paint are ideal materials for wood. Allows you to create a unique design. It is important to apply the paintwork material correctly, otherwise it will look cheap.
- Veneer is the material that will allow you to turn a homemade cabinet into a real masterpiece. This is a thin sheet of wood painted in a certain color. Also, like ceramics, it can additionally protect surfaces from exposure to water.
DIY bathroom countertop
How to choose a shelf for a sink bowl in the bathroom
Do-it-yourself TV stand
When choosing a shelf for a bathroom sink, you should approach it with all responsibility. First of all, you need to decide on the method of fastening and the shape of the structure. The convenience and functionality of the countertop depends on this.
The color and appearance of the shelf play an important role. It all depends on the overall design of the bathroom style.
The price of the product is also important, since it is formed on the basis of quality and functionality. Other parameters also affect the price, such as:
- bathroom footage;
- what material is the shelf made of?
- accessories;
- size and shape.
Since there are a huge number of designs sold in stores, you need to think carefully about everything before purchasing.
Preparation is the key to success!
In order for a hand-made cabinet to be functional and comfortable, it is important to think through everything down to the smallest detail. First, you need to decide what the bedside table is for. Will it serve more as a decorative decoration, or is it more needed as a functional cabinet in which you can store household chemicals and other necessary supplies without any problems? Perhaps you just need to hide the pipes? When creating a drawing or diagram, keep these important points in mind.
- The design of the cabinet should fit harmoniously into the overall interior of the bath. If the bathroom is made in light blue tones, smooth lines are observed, then the decision to make a bright orange cabinet, and even a corner one, would be absurd! Pay special attention to the shape, size and design of the vanity cabinet.
- As for the choice of material, we have already talked about this above. Separately, it is worth mentioning the fittings. It must also meet certain parameters. For example, with increased moisture, its coating should not be damaged, otherwise very soon the shiny fittings will resemble gray and nondescript asphalt. The ideal option is chrome plated metal.
In general, everything completely depends on your taste and preferences.
Installing a cabinet under the sink with your own hands
DIY sink cabinet
So, our beauty is ready, all that remains is to connect it to the sink
It is important that by this stage the entire sink is completely assembled: with taps, handles, water pipes, etc.
The cabinet is placed in the place where it will carry out its long and faithful service. If you have a hanging model, now is the time to attach it to the wall. Remember that you will have to support the weight of not only the cabinet itself, but also the sink, so the fastenings must be as reliable as possible.
Silicone or sealant is applied along the entire edge of the sink, after which it is installed in the hole. There is no need to save money here. If you overdo it, you can always remove the excess. But the “shortage” will only have to be redone.
After this, all that remains is to connect the sink to the water supply. If you want to add decorative elements to the cabinet (carved patterns, painting, gilding, etc.), now is the time to start. You can also stick tiles or self-adhesive film on it.
Thus, you will receive a unique piece of furniture in your bathroom or kitchen, created with your own hands, which you can show off to your guests, bequeath to your descendants, or admire in splendid isolation.
What to prepare for work?
Before you begin making this design, you need to carefully consider where to start and what you will need to complete this work. Not everyone wants to buy this item in a store due to the cost savings. And made with your own labor and hands, it may turn out to be even better than the purchased option and will serve you for a long time. And it will be used not only as an additional element of the interior, but also as a place to store various detergents and detergents. In order to begin the manufacturing process you need to prepare the following materials and auxiliary tools:
- Wood silicate board.
- Door hinges
- Glass.
- Furniture corners.
- Self-tapping screws, preferably of different sizes.
- Primer
- Putty
- Varnish
- Hacksaw
- Double sided tape
- Regular and Phillips screwdrivers.
- Sandpaper.
- Hexagon
- Paint brush
- Graphite pencil.
- Putty knife.
- Glass cutter.
- Sand.
- Drills of various sizes.
- Roulette.
- Grinding wheel.
- Work gloves.
Installing a countertop for a bathroom sink
Detailed instructions on how to make a vanity cabinet with your own hands with a photo, drawing and choice of material
When a suitable shelf for the bathroom sink has been selected, it’s time to begin installation work. Even an inexperienced craftsman can easily cope with replacing an old structure with a new one. Installation of the tabletop must be carried out in a certain order:
- First, we get rid of the sealant and lining. If there are skirting boards around the structure, they must also be removed. The sealant can be easily removed from the cracks with a sharp knife.
- Drain the water. Unscrew the siphon and open the tap, thereby releasing the remaining liquid.
- We put marks with a pencil and carefully remove the old tabletop. The supplied markings will greatly simplify the installation of the new countertop.
- We cut holes for the plumbing fixture.
- We try on the new tabletop to the previously set marks. If there are irregularities, they need to be corrected with special gaskets.
- We install fasteners. Every ten centimeters we drill holes for nails.
When all the plates are installed, it's time to seal the cracks with silicone compound. The final stage is the installation of doors, baseboards and other decorative elements.
Connections
The mating of parts is a key stage of the technical process. Laminated chipboard and MDF are assembled on confirmaments, pre-drilling holes with stepped drills. The connection is technologically advanced, but not reliable enough due to the pressed structure of the slabs. Drywall is fastened with self-tapping screws to the galvanized sheet, and the trim is glued.
Connection by confirmations.
Long boards of the shield are held together using a tongue and groove method. Shields with sidewalls are assembled on dowels, dowels, and in a mustache.
Joining panels using dowels.
The sides of the boxes are mated with tenons; the labor-intensive dovetail joints are durable.
It is difficult to make a high-quality tenon joint with a hacksaw and chisel; it is best to use a router or tenon cutter. Fastening with confirmations, reinforced with fixing dowels on glue, helps.
Manufacturing and assembly of a cabinet made of solid wood
Any of them consists of a frame base, top, side parts and additional elements - doors, shelves, drawers, canopies, etc. Some of them may have a bottom and legs attached to it. For the frame, beams made of any wood you like are suitable. The top can be anything at all: plastic, plasterboard, glass, wood, etc. Ordinary plywood is suitable for the sides and bottom. Additional elements can be made from any materials you like.
All patterns are first marked on paper, then transferred to the required surface and cut out using a jigsaw.
The assembly process begins with the frame base. Afterwards, all parts are sanded and, if necessary, coated with special products to protect them from moisture.
The side walls are attached to the frame (screws and glue are used for this). For additional strength, I highly recommend strengthening the connections with steel or aluminum corners.
Now the top surface. Even if you have checked everything many times before: place the sink in the hole to be 100% sure that all the dimensions are correct. There's no need to attach it yet - we'll do that later, for now we're just making sure everything fits.
Now the bottom. Some people secure it last, but it’s more convenient when the cabinet lies on its side, and in this case, slamming doors and sliding drawers can get in the way. That's why I leave them for last.
Recommendations for installing cabinets and sinks
Installing a sink with a cabinet in the bathroom yourself is not difficult if you listen to some recommendations:
First of all, let's start assembling the cabinets. Usually they should come with instructions to make work easier, but they are unlikely to be useful. This process is quite simple. The main thing is to make sure that the screws and fasteners are firmly secured. After installing the cabinet under the sink, this will be difficult to accomplish;
Assembly diagram for the washbasin cabinet
- Once the cabinet is assembled, we begin arranging the sink. It is no different in appearance and functions from those sold separately, it’s just that the washbasin is made to fit the size of the bedside table and is used to complete it;
- connect the siphon to the drain;
The siphon is installed by screwing it to the washbasin drain hole
- We place the sink with the faucet already installed on it on the cabinet. Typically, metal corners are used to hold these elements together;
- we move the washbasin and cabinet closer to the place where we plan to install these elements;
A sink with a siphon and a mixer is placed on a cabinet and moved towards the wall
Points for bolts should already be marked on the surface of the wall, on which the washbasin should then be secured. The marking is done independently. For greater accuracy, it is better to bring the washbasin to the wall and accurately measure the points. Using a tape measure you still won’t be able to achieve the required accuracy;
Markings on the wall for a future cabinet
- We move the washbasin with the cabinet back and drill at the marked points;
- After the holes are made, the bolts that come with the product should be inserted into them. When purchasing a product, be sure to check the presence of these elements; sometimes sellers simply forget to include them. And so that you don’t have to buy them separately, check their availability;
- Now you need to install the sink and cabinet in place, screw everything in with bolts;
- We check how the sink and cabinet stand. If everything is stable, does not wobble, and the product stands tightly to the surface of the wall, then everything is done correctly;
The process of installing a cabinet under the sink
- At the end we connect the sewer. The mixer hoses must be connected to pipes with cold and hot water. The hoses are connected using a union nut and a rubber gasket;
- Next, we seal the holes and connections. Sealing must be done, this will help avoid unexpected leaks;
- at the end the siphon is connected to the sewer pipe. In order to seal all kinds of holes, you need to use a special rubber gasket or corrugated cuff;
Installing a sink on a cabinet - the final stage of work
it is important that before you start using the washbasin, it is better to check it for leaks; if there are none, then you can safely start using it
Types of cabinets
Cabinets can have not only different sizes, but also different shapes. They can also be divided into several types depending on the method of their installation and location.
Cabinets may be different
Table. Varieties of sink cabinets depending on the installation method.
| View | Description |
| Floor | This is the most popular model, and its popularity is due to the versatility of products in this category. Such cabinets are distinguished by their stability and simplicity of design, and you can also place fairly heavy objects in them, since there is no risk of collapse. Typically, such products have legs or a base. Often they can be additionally fixed on the wall, which increases their reliability. Models can completely close communications. But they are unlikely to be suitable for modest-sized bathrooms, as they occupy quite a large space. However, with the right selection of models, they will look good and be useful. But putting a washing machine in a bathroom with such a cabinet can be problematic. |
| Hanging | These are, as a rule, very interesting and light-looking models that take up very little space, as they are located directly under the sink itself. They are especially relevant in small rooms and where plumbing does not allow the installation of a monolithic floor structure. However, the wall on which such a cabinet is fixed must be strong and reliable. Also, usually you cannot put heavy objects in such furniture. They are more difficult to install than floor-mounted ones, which often discourages the choice of such a model. But, nevertheless, this is also a popular form. |
| Corner | It is easy to guess that such cabinets are installed in the corner of the room. Moreover, they can be both floor-mounted and suspended. Allows you to save free space and decorate the interior. The optimal solution for small spaces. The cavity of such a cabinet is usually very spacious and allows you to hide many things and objects from prying eyes. |
Hanging cabinet
Also, cabinets can be divided into two types depending on the type of bowl of the sink itself. Thus, they distinguish cabinets for a mortise sink, when the thicket itself is installed on the upper surface of the cabinet by cutting out a cavity in it for it
Here it is important to take into account the fact that the plumbing product fits tightly to the edges of the cabinet, and the hole for it is accurate. Otherwise, unsightly gaps may form.
There are also cabinets for an overhead sink. Such a bowl is installed on top of the furniture itself - a small barrier is created on the countertop from the boundaries of the sink.
There is a wide range of different and interesting models of sink cabinets on sale.
Buy or make it yourself?
You always want to make your bathroom not only beautiful, but also functional. And well-chosen furniture and other interior items will help with this. As a rule, a lot of bottles, jars, and rags are always stored in this room, which are needed not only for taking care of yourself and your appearance, but also for cleaning the premises. And when it’s all just put together haphazardly and using whatever, the picture turns out to be unflattering. It is much better to use some kind of furniture to store items.
Small cabinet under the washbasin - DIY options
One of these interior items is just a cabinet under the sink. Usually it not only hides the drain running from the sink itself to the sewer pipes, but also has a lot of shelves hidden behind the doors. And on these shelves you can put all kinds of bottles and boxes - there they will not be conspicuous and disturb anyone with their presence.
Of course, the easiest way is to just buy a sink cabinet. Nowadays all kinds of products are produced from a variety of materials, having any shapes and sizes. But it cannot be denied that our apartments are such that they do not always meet any standards. And for this reason, choosing a cabinet for a sink is often not easy. In this case, you should just think about doing it yourself.
Built-in vanity unit
On a note! The question arises - why not order a cabinet from a professional? The answer is simple - not everyone can afford to pay for an expensive custom-made designer item. Sometimes it is much cheaper and easier to do everything yourself. But you will have to spend your personal time. Plus, private craftsmen can be very busy with work, and they will have to wait for more than one month for their cabinet.
It is important to understand that not everyone can make a cabinet - you need to have certain work skills. But if there is a desire, then even a beginner will definitely succeed in creating a cabinet. You just need to put in more effort and study all the necessary information in advance. And it’s better to choose a model that is as simple as possible - complex options may not work out the first time without the proper skills.
Cabinet with drawers under the sink
Features of fastening the shelf under the sink
There are two types of countertops: wall-mounted and floor-mounted. They differ from each other only in the installation method.
Hanging shelves under the bathroom sink make cleaning the room easier. Since the structure is suspended on brackets and there are no vertical supports, this allows you to wash the floor covering without any obstacles. Very often, washing machines are installed under wall-mounted countertops, since there is nothing except a sink, siphon and hoses.
Unfortunately, this installation method has one drawback: it will not look appropriate in every bathroom.
Floor shelves under the sink with vertical supports reduce the load on the wall. The presence of legs significantly reduces the usable space in the bathroom, but if you approach this issue wisely, this disadvantage can easily turn into an advantage. For example, install horizontal removable shelves.
Hanging
A very compact and at the same time roomy bathroom cabinet. It comes with a sink from , model number 0014000U28. Dimensions - 40x22x60 cm. This product does not imply any difficulties during the preparation or assembly process.
To work you will need:
The height of the cabinet indicated in the drawing can be slightly reduced or increased if desired. Length and width are limited by the dimensions of the sink and cannot be changed
