DIY kitchen cabinet for sink, design options and drawings
Depending on the overall dimensions and layout, the sink cabinet can be of different designs:
- Straight and angular. The corner cabinet for the sink, in turn, can be trapezoidal, straight or L-shaped.
- With overhead and drop-in sink. A countertop may be required to install the sink. And there are models that are installed directly on the body. It all depends on the choice of a specific sink model.
- Made from chipboard, MDF, plywood, timber and solid wood. The wooden structure of the sink table will be slightly different from that made from laminated chipboard. And even more so from a frame, assembled from timber and covered with plywood.
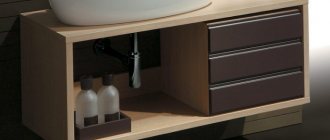
- Floor and hanging. You can make a floor sink with your own hands on legs or on a base box. Hanging structures are also becoming fashionable - they are usually used not in kitchens, but in bathrooms.
- With one, two doors or drawers. The internal box of the table under the sink can be equipped with shelves, drawers, baskets and other mechanisms.
Despite all the listed options, they begin to develop a drawing of a kitchen cabinet for a sink with their own hands, starting from the overall dimensions and the design of the body itself. Let's consider two main options - straight and corner cabinet configurations with minimum and maximum dimensions.
Simple straight vanity unit
The most common table-cabinet for a sink is a cabinet made of a bottom and two sides connected by slats. The back wall is not placed on the sink to provide a good view inside the cabinet in case of leakage. A modern sink cabinet is almost always made on adjustable legs, like the entire kitchen set. Rarely on a base box.
If the sink is mortise, then a countertop is installed on top of the cabinet frame. If the sink is overhead, then it is attached to the ends of the sidewalls using special clamps or metal corners.
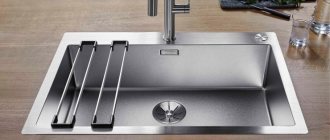
It is easy to distinguish a mortise sink from an overhead sink - along the latter there is a voluminous rim. The material for an overhead sink can be any - they are made of stainless steel, ceramics, acrylic, porcelain, sanitary ware, artificial and natural stone. The latter, due to their large weight and shape, can be installed without fasteners, simply “sit” on the silicone.
DIY corner cabinet for sink
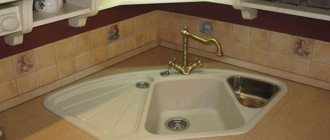
There are three main types of corner sink cabinets, depending on the design. All of them are designed for mortise sinks. For a corner overhead sink, the cabinet is designed individually, taking into account the size of the bowl, the location of the internal supports and other design nuances.
- Trapezoidal corner sink cabinet. Quite voluminous and is installed only in spacious kitchens. Occupies a minimum of 850x850mm from the corner (usually from 900x900mm to increase the width of the door). If standard 600mm wide postforming is used as a worktop, there will be a diagonal joint or extension in the design.
- Straight corner table-pedestal. The most common and practical option. With a standard tabletop depth, it occupies 900-1000mm from the corner.
- L-shaped corner cabinet for sink. What makes this module especially attractive is the transformable door, which increases access to the interior of the sink. The body is quite voluminous; shelves, baskets, and various retractable mechanisms can be built into it.
Design Features
High-quality sink cabinets are a great necessity in every home. The purchase of these products must be thoughtful and balanced, because for the kitchen you need to select furniture that is optimal in size. It is also important to purchase products based on their aesthetic and decorative features.
This workplace should be very comfortable and preferably multifunctional, since the corner is a fairly large space.
When choosing, you need to consider what functions this bedside table performs:
- The practical side. Rationalization of the square footage in the room - the object takes up a minimum of free space, in addition, it houses other household appliances: a cabinet, a sink, communications, etc.
- A corner cabinet connects the kitchen unit along the walls.
- Expressiveness and aesthetics. If all the elements of the room’s style, including the sink-bedside table, are correctly selected, the kitchen will look quite representative.
- Aspect of comfortable use. If you plan the purchase and installation of the cabinet correctly, it will always be quite convenient for the housewife to use the cabinet while cooking.
A corner kitchen set is a necessary necessity: the size of the kitchen is not large enough to place everything you need along one wall.
Important. If a person wishes, he can construct the necessary sample himself, which will meet his purely personal needs.
Choosing a sink and countertop
Having decided on the cabinet and its characteristics, you can choose a sink, which also comes in all sorts of shapes, sizes and types.
It is worth noting that in some cases experts advise purchasing a sink first. The product can be made of stainless steel, artificial stone, ceramics
In appearance, the sink can be:
- Rectangular - emphasizes the strict lines of the headset.
- Oval - a non-standard shape is combined only with a similar interior.
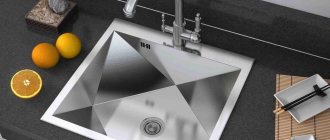
- Square - optimal for a small cabinet.
- Round is a universal shape that is suitable for any kitchen design.
Some sets may have an asymmetrical kitchen sink. Such options are not always practical, although they certainly look original. The optimal size for a sink used by a small family is 45 cm in width or diameter. If you have to cook a lot and wash a lot of dishes, you should give preference to wider and deeper options.
Depending on the type of installation, the sink can be:
- Mortise - installed in a hole of identical size cut in the countertop.
- Overlay - mounted on top of the cabinet, and the sink must exactly match the length and width of the furniture.
- Under-table - unlike previous types, the product is installed not on top, but below the tabletop.
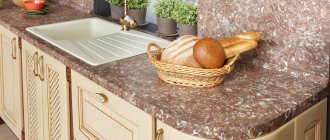
The mortise model is most often mounted on countertops made of chipboard or MDF. Overlays and under-tables are often combined with artificial stone. The same material is indispensable if it is partially used as a work surface. Due to its high strength, it is resistant to mechanical stress. Countertops made of natural stone are rarely made, not only because of the high cost, but also because of their heavy weight
Rectangular
Oval
Square
Round
MortiseInvoice
Podstolnaya
Wooden table top
Artificial stone surface
Recommendations for choosing a shape and size
Standard corner kitchen sinks have one big drawback - the small size of the bowl. Many designers recommend that when performing a DIY installation, place the most ordinary sinks in the corner of the kitchen space, thanks to which it will be possible to individually select the required size and depth of the bowls, as well as the location of the wings and accessories.
Previously, round or oval shapes were considered ideal for corner sinks. But during operation, the housewives identified such a drawback as the inconvenience of using a small sink. That is why the rectangular sink has become the most popular option. It is convenient to use not only for washing dishes, but also for cooking.
The main selection criterion is the individual requirements of the owner of the kitchen, food preferences, the number of people in the family, the size and shape of the dishes.
Another equally popular and convenient option is a corner double sink, the bowls of which are located at an angle relative to each other. But when installing it yourself, it is important to make sure that the far corner is accessible for placing accessories and maintenance.
It is also worth paying special attention to the depth of the bowl. Small at 17 mm, it can cause water to splash when washing dishes and other items. The optimal depth of the sink is considered to be 22 mm, and the gap of the countertop in front of it is at least 5 mm. This will help protect the owner's clothes from splashes.
Corner cabinet made of wood: how to attach the sink correctly
Corner washbasins with a cabinet are designed for small spaces. With their help, a complete washing system is provided, but in a space-saving manner. The cooking process is also more comfortable.
Corner tables for the kitchen have the following advantages:
- Unique original design. The aesthetics of using the product are top notch;
- Compactness. In a medium-sized kitchen, this option allows you to use useful space for other purposes, such as a dining area;
- Functionality. It is brought to the maximum.
A corner cabinet with a kitchen sink must strictly correspond to its location in terms of parameters and shape.
Stylish table made of wooden slats with your own hands
This bench can serve as a coffee table, extra seating, or a place to place indoor plants. This piece of furniture will “fit” well into almost any interior!
DIY coffee table photo
Materials:
- 3 boards 2.5×7.5 cm;
- 1 board 2.5×10 cm;
- 8 boards 2.5x5 cm;
- 4 leg mounts;
- 4 conical legs 30-40 cm long (depending on the required height of the table);
- 8 screws 3.5 cm long;
- 32 wood screws with a flat head, 3 cm long;
- 16 finishing nails 3.75 cm long;
- Gorilla Glue;
- wood putties;
- primer and paint for wooden surfaces;
- sandpaper 120 and 220 grit.
Tools:
- hacksaw;
- drill and drill bits;
- Kreg set for drilling countersunk holes at an angle;
- 2 short and 2 long clamps;
- roulette;
- hammer;
- grinding machine.
Step One: Using a hacksaw, cut the ends of two 2.5 x 7.5 cm boards at a 45 degree angle. Cut out fragments from 2.5x5 cm bars, the length of which will correspond to the internal length of 2.5x7.5 cm blanks.
how to make a coffee table with your own hands. Photo
Step two: Place 2.5x5 cm of the workpiece in the middle, and 2.5x7.5 cm on the edges. Make sure the ends of the inner slats are aligned.
Step three: Measure the distance between the outermost 2.5x7.5 cm bars and cut two pieces of this length from 2.5x10 cm boards. They will serve as lower supports for the bench. Secure them by screwing self-tapping screws into each longitudinal rail.
Step Four: Using a Kreg Jig, drill two pocket holes at each end of the support crossbars. These holes will be used to connect to the 2.5 x 7.5 cm edge bars.
Tip: It is difficult to give specific recommendations regarding how far from the edge to attach a Kreg Jig. This depends on the length of the screws used, the exact thickness of the board, etc. We advise you to first practice on unnecessary scraps of boards.
unusual coffee table with your own hands. Photo
Step five: Place 2.5x7.5 cm blanks along the edges of the structure. After making sure that their ends are at the same level, secure them with clamps.
Tip: If you use soft wood (for example, pine) to make the table, place unnecessary scraps of boards under the clamp supports. Otherwise, marks from the clamps will remain on the wood.
Step Six: Securely attach the outer 2.5x7.5 cm bars to the base of the bench by screwing 3.5 cm screws into the countersunk holes that you made a little earlier at the ends of the support crossbars.
coffee table made of wood. Master Class
Step seven: Measure the width of the manufactured base to determine how long you need to cut 2.5x7.5 cm blanks for the ends of the bench. We recommend that you make a cut with a small margin in length, and then slowly grind off the excess until you achieve the perfect fit.
Step Eight: Wet the ends of all slats with water and apply a small amount of Gorilla Glue.
Step Nine: Place the end boards in their designated locations and secure the entire structure with a strap to prevent it from falling apart while the glue is wet. For reliability, you can additionally secure the ends with several finishing nails.
Step Ten: Sand the surface of the bench with 120-grit sandpaper to remove any rough edges at the joints. Fill all gaps in the seams and recesses from nail heads (the latter must be recessed into the wood) with putty. Once the putty is dry, sand the surface again, this time with 220 grit sandpaper.
Step Eleven: Paint the bench. We recommend that you sand the surface again using 400 grit sandpaper and water before painting.
Step Twelve: Install special mounting plates on the lower support crossbars to secure the legs. When attaching them, make sure that you drill holes in places where there are no screws already screwed in. The distance from the fastening to the edge of the base of the bench should be about 2.5 cm. Screw the legs themselves into the fastenings.
Kinds
Choosing a kitchen set is a responsible thing. Before you take action, you should study all the varieties. Select the desired type of configuration based on the dimensions of your kitchen. Manufacturers offer a fairly wide range of sinks with different cabinets. There are two main types of cabinet configurations:
Straight
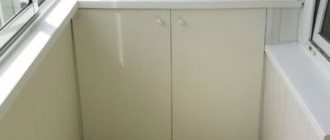
Straight cabinets are relevant if the sink is located somewhere along the wall, between other pieces of furniture. The blind area of such a cabinet is quite difficult to access, which reduces the popularity of this configuration.
Corner
Corner furniture can be L-shaped or trapezoidal. The first type of sink cabinet does not have a back wall. Instead, there are additional transverse webs to strengthen the structure. The interior space of such a cabinet is clearly visible.
A trapezoidal set is often used for installing sinks with two sections. If you use a compact siphon, then there is a lot of usable space inside the cabinet. You can install carousel shelves there. It is worth noting that radius cabinets have recently appeared. This type of cabinet is located in a corner, but has a concave front.
There are different types of doors for kitchen vanity cabinets:
- Two doors. This option is quite familiar and can be used with cabinets of any configuration.
- One door. If your cabinet is small in size, feel free to use this option. But for a large cabinet this is extremely inconvenient.
- Double door on hinges. The two doors are connected by hinges and open sequentially. Such doors are convenient for corner cabinets.
- Sliding. This opening and closing method is well suited for small-sized furniture. But, in general, the option is not very convenient.
- Drawers. They are found in straight configuration boxes. Be sure to provide recesses for pipes and hidden parts of the sink.
- Combined. This option is quite common in our kitchens. A combination of conventional folding doors with drawers.
The main range of sink cabinets only have doors. But there are designs with drawers. These boxes are fixed on roller tables and have a specific shape with recesses for pipes. This design option eats up a little space under the sink, but makes it possible to organize the storage of detergents, sponges and rags. This is a suitable option if you already have enough different cabinets.
The inside of the sink with the cabinet itself may be completely empty; there may simply be hidden parts of the washbasin and pipes. More often, people place various drawers, shelves or baskets in this niche. You can place a small organizer on the closet door itself. Some people use this space to even greater advantage and store mechanisms there for filtering or heating water. In addition, you can put a tray inside for various kitchen accessories.
Sinks with cabinets also differ in size. For narrow sinks, choose cabinets of 40 cm. The size of 50 cm is an option for sinks of non-standard dimensions. But owners of wide sinks need a width of about 60 cm. Double sinks are now in fashion, cabinets 80 cm or more are ideal for them. Choose a sink cabinet so that the sink fits tightly on top.
Where can I put it?
The location of the sink cabinet is a very important aspect in the interior design of the room. You can install this design:
- Near the gas stove. This is the most popular option. Since all the equipment is at hand, cooking happens much faster. But it’s unpleasant when detergent from the sink gets into your food. So, such proximity has its negative aspects.
- Corner or classic placement. This location is the most acceptable saving of square meters in a small space.
- Bedside table by the window. An interesting approach for those who like to see nature or city life from the window while cooking. Don't forget that washing windows will be twice as dirty.
- In the middle of the kitchen (also called an island). In most cases, such a cabinet is also a dining table. Unusual layout, somewhat reminiscent of a restaurant style. Remember that with this design, the water pipes will have to be adjusted to the sink.
Making your own vanity cabinet
The process of assembling a simple bedside table begins with cutting laminated chipboards. To do this, transfer all the frame elements to the material. Use a carpenter's angle to create the first right angle. Next, start from it, and not from the corner of the laminated chipboard, and carry out the process of cutting the slab into blanks.
Second phase
Gluing the ends of PVC blanks with an edge with an adhesive layer. To do this, walk along the cut surface with an emery block (a wooden block with a flat surface on which a strip of sandpaper is glued), clean it from dust.
Attach the edge to the end of the workpiece and run a heated iron over the surface, then remove excess material with a sharp knife.
Initial data
So, what did I have at the start of this whole event? A kitchen with an area of 6.2 m2 (according to the technical passport), which has not had any, not even cosmetic, repairs done for many years. The kitchen set has generally been like this since the time the house was commissioned, and this is already almost 40 years. The window frame is old, wooden. The refrigerator is old and needs replacing. The gas stove is relatively new, but does not meet the wife’s requirements.
In general, of what was supposed to be taken from the old kitchen and transferred to the new one, only the microwave and the washing machine mentioned in the prologue remained.
It only remains to add that the old layout of the kitchen and the arrangement of all the elements on it always seemed terribly inconvenient to me, not practical and not rational, and therefore I began to fight for every centimeter, for every piece of free space, and, looking ahead, I want to admit, that I succeeded.
Selection rules
If you purchase a separate item intended for inserting a sink made of stainless steel or other material, then to obtain a high-quality design, some recommendations are taken into account:
- the material of creation must be optimal for the kitchen, therefore it must be resistant to exposure to high temperature and moisture;
- the appearance must correspond to the style of the interior and the furniture installed in the kitchen;
- the price must correspond to the quality;
- if you plan to install a mortise sink yourself, you should make sure that you can do this work yourself;
- It is desirable that it be possible to regulate the opening of the doors, which increases the comfort of using the product;
- The presence of drawers or shelves designed to store various items is taken into account.
With the right choice of design, it is possible to obtain a multifunctional, comfortable and attractive piece of furniture in the kitchen.
Sink cabinet: how it works and what you need to make it
As mentioned above, this is the simplest cabinet in design in any furniture set, and it consists of only four types of parts - these are sidewalls, in the amount of 2 pieces; bottom in a single copy; upper spacers in the amount of 2 pcs; depending on the width of the cabinet, one or two doors, as well as the so-called lower plinth. All these elements, which are ordinary boards with high-quality processed ends, are connected to each other using wooden pins and special furniture screws called confirmat. In addition to the boards listed above, to make a sink cabinet yourself, you will need furniture hinges, possibly adjustable legs (in most cases, free-standing sink cabinets are not equipped with them), and 16mm long wood screws. As far as tools go, you can get by with a screwdriver and a drill - if we also talk about cutting chipboard yourself, then you will additionally need a hand-held circular saw. A jigsaw, even an electric one, is not a good helper in this matter - it is not able to provide a more or less even, and most importantly clean, chip-free cut.
Now let's look at the dimensions of the sink cabinet - they fully depend on the width of the sink itself, which will be installed on the cabinet. And overhead sinks are produced in the following size range - they can have a width of 400mm, 500mm, 600mm, 700mm (rare), 800m. It is even rarer to find kitchen sinks with a width of 1000mm and 1200mm - these are double versions of this product, for which a specially designed cabinet is used. Depending on the width of the sink, not all parts of the cabinet change, and not even all the sizes of these parts change. Let's just say that the sidewalls have constant and unchanged dimensions - as a standard they have a width of 530mm and a height of 814mm. The depth of the bottom (width of the part) also remains unchanged and is equal to 530 mm, and the length depends directly on the width of the sink. Let's just say that if the sink has a size of 800 mm, then the width of the bottom of its cabinet is its width minus two chipboard thicknesses - 800-16-16 = 768 mm. The same applies to the length of the spacers and the lower plinth - it fully corresponds to the width of the bottom of the cabinet. In general, the width of individual planks is constant in almost all cases - the exception is doors, in which the height is a constant size.
Dimensions of the sink cabinet photo
We need to talk about doors separately - these elements of the cabinet, or rather their design and calculation, are a delicate matter. Here, as they say, every millimeter is important. The slightest miscalculation and the doors of the kitchen sink cabinet either do not close at all or look unsightly due to the large gap between the two halves of the doors. Calculating the dimensions of the facade for a cabinet is quite simple - if you don’t want to bother with calculations, then simply subtract 4 mm from each actual value of the door on each side. If you want to be precise and strive for perfection, then count.
First, let's calculate the height of the doors. It is determined by the distance from the bottom of the bottom to the top edge of the cabinet (as a rule, this is 814 mm minus the bottom plinth 80 mm = 734 mm). From this size you need to subtract the height of the overhead sink (25mm) and the thickness of the edge in duplicate, which can be different (from 0.5mm to 2.5mm). As a result, we get 734-25-(let it be 2mm+2mm) = 705mm.
Now the width is a little easier. If the sink cabinet has a size of 800 mm, then the dimensions of one door are calculated as follows: 800/2 = 400 mm (this is the net size of one door without taking into account gaps and trim). To get the working size of the door width, then from 400mm you need to subtract 2mm for the trim on each side (4mm in total) and 2mm for the gap between the cabinet doors and between adjacent furniture (6mm in total). In total, the actual dimensions of the facade are reduced to 400-4-6 = 390 mm.
How to make a corner cabinet yourself
The kitchen is probably the favorite place to spend time for both adults and children. It’s so nice to have dinner with your family, gossip or just sit with a cup of coffee. Therefore, everything on it should be perfect (in the opinion of specific owners). If you cannot find a suitable design, it can be made. This is also possible with a sink cabinet.
This place is almost always used for installing a sink, which means that a siphon, pipes, and technical communications will be hidden in the cabinet.
First of all, you need to decide:
- what type of product needs to be invented, its dimensions;
- view and familiarize yourself with information on this issue, be sure to study photo and video materials;
- calculate estimates for materials, tools, etc.
Important! In most cases, making it yourself is much cheaper than buying it in a store.
If the preparatory stage is completed, you can begin the actual work. It’s better to start with the classic version, simpler, but also the most popular - L-shaped.
In stores you can most often buy a kitchen set with an L-shaped corner sink or with a trapezoidal cabinet under the sink.
Drawing and dimensions
The initial stage of work is to decide on the size of the corner cabinet for the kitchen sink. To do this, you first need to take appropriate measurements of the room and draw a diagram of the project.
The back part for a trapezoidal bedside table is formed according to the same principle as for a rectangular one, otherwise the schematic drawing looks like this.
In the drawing, it is necessary to take into account communications at the site, whether other elements of furniture or equipment will be located near the sink. As a rule, the drawing can first be made on a simple squared piece of paper from a notebook. Modern technologies make it possible to subsequently create a three-dimensional project on a computer, etc. The scheme should include:
- View of the structure from all angles. From the side, from above.
- It is imperative to detail the drawing, down to the smallest samples. If this is a classic, then highlight the dimensions of the right and left cabinets (which are located near the sink), indicate the horizontal connection of these objects (front side) and all subsequent connecting strips.
- Clearly design parts of the frame, walls, back and floor coverings, facade, etc.
- It is necessary to thoroughly consider the placement of shelves and doors.
The drawing with one blank wall is relevant when supplying communications from the side.
The entire kitchen layout must fit into the overall interior of the kitchen unit.
Selection of tools and materials
Let's dwell on the materials from which it is possible to make a good bedside table. First, pay attention to the old furniture; some parts can be used to build a good sink. If you start work from scratch, you will need chipboard or MDF, as well as plywood. The entire product can be made exclusively from wood; sometimes folk craftsmen design excellent wooden objects, and even in a single copy.
A popular material for inexpensive furniture. The service life will largely depend on the finishing method.
Of the tools that are needed for the project, most are available from good owners, and if not, then you will have to purchase it, which will be a good investment for the future - the ability to produce similar crafts at any time. The necessary accessories and tools are as follows:
- roulette;
- pencil;
- hacksaw;
- screw tie;
- screwdrivers are different;
- priming;
- protective devices;
- cutter;
- drill;
- screwdriver;
- level;
- plane;
- jigsaw;
- nails, screws and self-tapping screws;
- hinges, handles, etc.
A good craftsman knows how to replace a tool he doesn’t have, or how to do without it.
Assembling the cabinet
Before starting the main work, you need to prepare the walls that will be behind the sink. They should be even. If the owners wish, they are covered with wallpaper or treated with appropriate materials. Start of assembly:
- divide all materials according to the drawing;
- varnish the surface of the samples;
- we fasten the fittings, check the façade parts (how well they correspond to the design);
- we assemble the main countertop, mark where the sink and cabinets will be located, and make the corresponding holes;
- we install upper and lower cabinets;
- We install the tabletop canvas.
All that remains is to screw the countertop, cut in the sink, put the structure in place and connect it to the sides of the set.
This is only a complex process at first glance, but if you plan your actions, a person with minimal knowledge of carpentry can build good furniture.
A large pentagonal-shaped cabinet, the front part of which has a beveled edge that overlaps the rectangular junction of the side modules.
Final stage
The final touch is the assembly of the facade parts, which must be done in advance and tried on during the installation of the main part. The doors are attached to pre-installed hinges. If necessary, handles are fixed (if they were not installed immediately).
Such solutions are characterized by greater capacity and provide convenient access to the internal contents.
Façade details are the part of the structure that will be most exposed. It will also be used quite often by all family members. Therefore, you need to select high-quality materials.
Either a mortise or overhead sink with one or two sinks and additional space for drying dishes can be installed on top of the base.
Note. It is necessary to do everything according to the previously developed scheme, and there will be no problems in the work. If a craftsman likes his craft, he can continue, the sink will become the starting point in the manufacture of the entire kitchen set.
Functionality
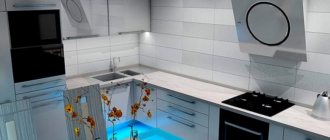
The modern design trend is a combination of beauty and functionality. A corner cabinet with a sink in the kitchen meets these requirements. The L-shaped layout makes the space more comfortable and optimized even in a small, non-standard or combined kitchen.
We list the main positive features of a corner cabinet with a sink:
It’s easy to install and hide necessary communications there, for example, connections to the sink, filters, heaters
In addition, the space can serve as an excellent place to store household chemicals or a trash can; this solution is the most compact, but at the same time roomy - this is very important in small kitchens, for example, in a Khrushchev-era apartment; the corner section visually unites the space; it just looks beautiful.
But there are also negative sides. For example, inexpensive kitchen sets with a corner sink have a countertop made of laminated chipboard, which means that the joints in the corner will be in danger:
- Laminated chipboard is a very weak material that is constantly looking for a reason to swell;
- splashes from the sink will fly anyway.
Therefore, the joints will have to be additionally protected, for example, with sealant or aluminum strips. If the countertop is cast, for example, from stone or acrylic, then there will be no such problem.
The third negative point is that the reliability of corner structures can be significantly lower than conventional ones. This is due to the non-standard shape of the cabinets. It might be worth thinking about strengthening the sidewalls.
The fourth disadvantage is the inconvenience of using the sink, because it is sometimes located too far away. This drawback is easy to avoid: the main thing is to monitor the height and depth of the countertop.
And the last negative point is the high cost compared to ordinary cabinets, which is why most craftsmen assemble such cabinets with their own hands.
Size calculation
To choose a vanity unit, you need to consider several factors, including:
- features of the kitchen - its area and layout;
- features of the sink - shape, size and even installation method;
- what will be stored inside, and how often you need to get into it.
The standard sizes for each type of cabinet were described above, but you can create anything you want individually. Today, designers are trying to deviate from standards and create individual solutions, since they are the most comfortable and optimized.
For example, for a long time the standard tabletop height was considered to be 85 cm, and the adjustment was a maximum of a couple of centimeters to adjust the set to uneven floors.
Now you can adjust the height by 10 cm or even more to make your stay in the kitchen as comfortable as possible. There is even a small but visual drawing telling you what height of a kitchen unit with a sink in the corner is suitable for what height.
The standard width of the door (not transformer) of a corner bedside table is 40 cm. You can make it 30 cm, but this will significantly reduce access to the space and stored products. Is it worth it?
Of course, you cannot choose a built-in sink larger than the countertop. You have to monitor both the length and depth of the product. Most kitchen sinks are designed to fit into a 60cm deep worktop, with the sink itself only taking up 48-50cm of this space as clearances need to be provided.
Material and parameters of the kitchen cabinet
It's worth starting with the choice of material. Chipboard and MDF compete with each other; in addition to these most popular materials, there is an option made of natural wood. It is considered the most expensive and high quality. Chipboard is the cheapest among its competitors. With proper coating, a chipboard bedside table will become moisture resistant. Resistance to mechanical damage also adds to the rating of the material.
Save
MDF - compared to chipboard, this material is considered to be of higher quality. Improved technology allows you to avoid damage from moisture.
Save
Wood (read How to best decorate a kitchen like wood) is a high-quality material that is considered elite. High quality but also expensive.
Save
All three of these materials are good components for a nightstand.
The dimensions of your sink cabinet must be measured accurately. After the measurements are taken, it's time to decide on the dimensions. The most standard dimensions are 50x60 cm. The dimensions of the cabinet and sink must match, so we must not forget about the sink.
The following are considered popular:
- 50x50 – square;
- 60x80 – rectangular;
- 50x60 – rectangular;
- 50x60 – round.
Other parameters are also possible.
Product dimensions and shape
Cabinets come in different shapes, and their dimensions depend on this. The size of the cabinet is determined by the type of sink that is installed in it. To select the appropriate cabinet size, you must consider the following parameters:
- Room area. If the kitchen is small, then the appropriate width for such furniture will be 45 cm. In small kitchens, you should not make the cabinet too deep so as not to take up space, so 45-50 cm depth will be the most relevant. The height of the furniture is selected based on the height of the user, most often it is up to 90 cm.
- Built-in set of equipment. If you plan to fit equipment under the sink, then when taking into account the dimensions of the cabinet, they start from its parameters. Let's say dishwashers are 45-60 cm wide, the dimensions of the cabinet should be a little wider to leave room for installation.
- Sink size. The sink can be round, oval or square. Based on this, the width of the cabinet frame is selected.
Small corner kitchens interior design
When choosing the design of an L-shaped kitchen, you should first of all take into account its size. A lot depends on him
The most common style for small rooms is modern
It allows you to combine different materials and textures, colors and shades. It is with the help of modernism that you can visually enlarge the space, for example, using glass and mirrors, or color accents that will help zone it
The most common style for small rooms is considered modern. It allows you to combine different materials and textures, colors and shades. It is with the help of modernism that you can visually enlarge the space, for example, using glass and mirrors, or color accents that will help zone it.
It is better to decide on the dimensions of the corner module at the very beginning, at the stage of designing the headset.
Objects made from materials with a voluminous pattern or texture are considered undesirable for small kitchens. They should not “put pressure” on the space, but, on the contrary, make it freer.
Whatever the style of a small corner kitchen, the main thing is that there are no frills. After all, they are the ones who can turn a stylish and atmospheric room into a cluttered room.
Tips for interior combinations
Corner sinks are best placed in combination with an L-shaped kitchen set. In this case, additional space is freed up for the dining area.
The main advantage of this placement will be the compactness of the work area between the refrigerator, sink and hob.
To prevent a corner sink from becoming a disappointment, it is important to correctly select the dimensions, shape and design of the product. Its operation depends on the correct installation of the sink. It's better to leave this to professionals. It is recommended to buy the product in specialized stores. If you follow all the rules, a corner sink will be a good purchase.
Distinctive features of corner furniture
The standards that are used in the process of making kitchen furniture with your own hands are directly dependent on the parameters that affect the size of the assembled cabinet.
The lower corner cabinet has the following main parameters:
The width of the base is usually 100-120 mm
If you are going to install a sink in it, it should be slightly lower in height than the cabinets that serve as a work area. This will make washing dishes more convenient and comfortable. The difference in tabletop heights ranges from 20 to 40 mm. The exact value is determined by the applicable materials and their texture. The standard height of finished furniture is approximately 0.85 m. If you are planning to install a wall-mounted corner cabinet, then know that its height of 0.7 m is most suitable for those people who are of average height.
In addition to certain dimensions, you need to decide what kind of configuration your corner kitchen cabinet will have. The following types of configurations are distinguished:
- cabinets in the shape of the letter “L”;
- modular cabinets;
- trapezoidal cabinets.
L-shaped cabinets are the most popular because they are very convenient. The cabinet doors open according to the trolleybus principle, so the interior contents of the cabinet are clearly visible and convenient to use. It would be advisable to equip such a cabinet with special carousel shelves that can rotate at a maximum angle.
Figure 2: The corner trapezoidal unit creates ample storage space.
Arranging a cabinet of this type will help save a lot of space. In this design you can successfully place a sink for washing dishes. This couldn’t come at a better time, because in apartment buildings built in the Soviet era, the water pipes run right in the corner. For this reason, in order to avoid lengthening communications, it is very convenient to install the sink in the corner (Fig. 1).
The attached corner cabinet consists of 2 modules: a cabinet installed in the corner of the kitchen, and another cabinet with a door placed at a right angle to the cabinet. This design is not entirely convenient, since free access is provided only to the contents of the cabinet with the door.
Cabinets of this configuration can also accommodate a sink. In this case, it is better to hide the plumbing in a remote part, and arrange drawers for dishes, household chemicals, etc. in an accessible module.
The modular design of a kitchen corner cabinet has a big drawback: the blind part is difficult to access. If there is a need to repair plumbing, it will be a difficult task if it is located in a blind module. If you place the pipes in the accessible half, the blind half will be empty.
Using a carousel for a corner cabinet makes it easier to reach even the furthest corners.
A compromise is possible - install a corner modular cabinet in the corner opposite the sink and use it to store various kitchen utensils. You can not install doors on it and install a microwave or build a minibar in it.
The corner cabinet, shaped like a trapezoid, is equipped with one door. On the periphery of the cabinet you can install other elements of kitchen furniture. The trapezoid cabinet looks extraordinary and looks good in large kitchens (Figure 2).
But there are some disadvantages to using a trapezoidal kitchen cabinet:
- A straight door blocks the area near the wall. Therefore, it is best to use such furniture to accommodate a microwave, food processor and other household appliances.
- If you install a carousel in your cabinet and install a sink in it, you may increase the likelihood of plumbing failures. The steel carousel will continuously deform the siphon due to continuous friction.
Detailing and fittings
Let's imagine that the dimensions of your cabinet should be 600x700x300 mm. You take and order parts 600 mm wide, 700 mm high and 300 mm deep, and then try to fit them. Naturally, you won’t get anything good out of it, because you don’t take into account the thickness of the part and how these parts will be joined together and located in the finished product. This is exactly why it is necessary to do detailing - dividing the finished product into its individual components.
Before I move on to the large table with ready-made parts for my kitchen, I’ll explain a few more points about what comes from where and how.
Height of the floor row cabinet. The recommended standard height of the floor row is 860 mm. The thickness of the tabletop is usually 28 or 38 mm (mine is 38 mm). The height of the decorative legs is from 70 mm and above (I have 100 mm). So it turns out that the height of the cabinet (the box itself) in my case is equal to: 860 –38 – 100 = 722 mm. For the convenience of further calculations, I simply took 720 mm.
Drawers can be of several types:
- The drawer box is assembled from the same material as the rest of the kitchen (chipboard) and is mounted on roller or telescopic guides. As they say - cheap and cheerful.
Tandemboxes
- Metaboxes, tandemboxes, etc. In fact, these are ready-made boxes with fastening and adjustment systems, for which you just need to adjust the bottom and back wall (cut from chipboard). These systems are not cheap, but they are simple and easy to install. Plus they look very solid. Each manufacturer has schemes for calculating installation dimensions, additives and installation of their tandem boxes. Be sure to download them from the Internet, or take them from sellers, study them and start detailing.
Diagram and installation dimensions of the Boyard tandembox
Diagram and installation dimensions of the Boyard tandembox
Gas elevators and Aventos are mounted on top row cabinets and are designed to open and hold facades suspended. At a construction market or in a store, the seller will advise you about these things; you just need to tell us the material and dimensions of the facade that needs to be opened/held.
So, I present once again the kitchen diagram and the detailing that I ended up with.
