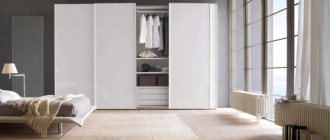
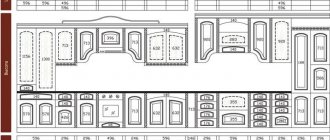
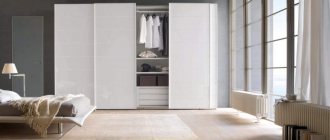
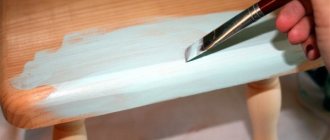
Often, a wardrobe, a chest of drawers, or even all the furniture that has served us for many years, no longer meets the changed needs. They become unfashionable, do not match the color of new tiles or wallpaper, become boring and simply not pleasing. Of course, you can buy new ones, but not everyone is ready to spend a considerable amount on this. And old things, although not fashionable, familiar and comfortable, often have pleasant memories associated with them.
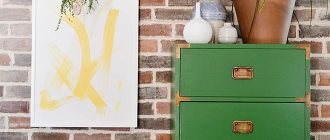
The best way out is to repaint them a different color. If successful, familiar things will not just get a second life, but will turn into a real element of the author’s design.
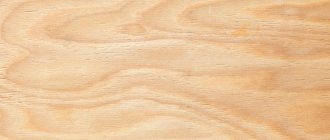
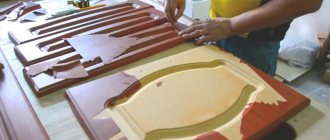
MDF boards of different shades
Is it possible to paint MDF furniture at home, how to paint MDF furniture at home, how to repaint MDF furniture with your own hands and what is needed for this - we will tell you below.
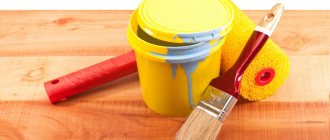
Applying paint
After priming, it’s time to directly apply paint. Here, in principle, there is nothing complicated. First, prepare the dye according to the manufacturer's instructions. Then take the spray gun and adjust it so that its coverage area is small. This allows you to use material economically and paint as thoroughly as possible.
Painting MDF facades or other products made from this material begins with the most problematic (for example, covered with cracks and scratches) areas. And only after that the rest of the area is painted over. To achieve the best result, it is worth applying several layers. Moreover, after each layer it is necessary to take a break from twenty minutes to several hours to dry.
If you have no experience working with a spray gun, then you should first conduct training on some unnecessary piece of wood. Of course, you can use a roller or brush, but in this case there is a risk that the surface will not be perfectly smooth and even.
Creating additional effects: glissal and raindrops
To make painted kitchen facades look not only fresh and neat, but also original, you can add interesting effects using glizal (translucent paint) or a regular water spray.
Glizal is diluted with water according to the instructions and applied to a pre-primed surface in 2 layers. Using a dampened sponge, a textured roller or a hard brush, you can create a unique pattern on the facade
It is important to take into account that creating a drawing is possible only during the first 30-60 minutes, until the paint begins to dry. After the paint has dried, the part is opened with transparent varnish.
DIY decoration of furniture facades with glisal
To achieve the effect of raindrops, you will need paint in two colors, for example, black and blue metallic (choose the color scheme taking into account the interior of your kitchen). A darker coating is applied to the prepared base. After it has dried, the part is covered with water using a sprayer. Without waiting for the drops to dry, the next color is applied on top with a spray gun. In this case, the paint supply should be minimal to achieve light spraying. After the layer has completely dried, the surface is sanded with Scotch Brite (P1200 or P1500) and varnished.
The effect of raindrops on the facade
Painting furniture facades is a rather labor-intensive process. If you have never encountered such work before, then first it is better to get your hands on old unnecessary furniture. If this is not possible, it is better to turn to specialists to avoid a senseless waste of money and effort.
Types of coatings
For the kitchen, the best choice would be MDF furniture. And the point is not even in its greater density, but in the high homogeneity of the composition
Unlike chipboard, the material does not crumble and holds fasteners perfectly, even repeated ones, which is extremely important when replacing hinges, handles or other fittings. In addition, the manufacturing method itself is based on lignin, and not formaldehyde resins, which makes MDF facades more environmentally friendly
In the photo - a kitchen with MDF facades covered with veneer
The slab is decorated in a variety of ways.
- Veneer is a section of natural wood glued to a slab. It requires exactly the same care as a real tree, is just as capricious and just as beautiful. If damaged, this coating cannot be restored with your own hands.
- PVC film is most often used for laminating chipboard, since this is the most budget option. The film can imitate any type of wood, although not entirely convincingly. The main disadvantage is that with prolonged exposure to moisture and temperature, the film peels off. Repair is partially possible.
- Melamine film - its basis is decorative paper impregnated with melamine resin. The advantage of such kitchen facades is their higher resistance to moisture.
- Acrylic film is a paper-laminated plastic, characterized by much higher strength, resistance to mechanical damage and dampness. This coating can have a matte, satin or glossy surface, and therefore extremely rarely imitates wood. Any colors are available - white, red, blue, black and all possible combinations.
The facades of the kitchen in the photo are covered with film
The undoubted advantage of the three listed film options is the possibility of finishing radius facades. And such a solution always looks original. Moreover, the size and configuration of the kitchen have little effect on the price.
- Acrylic panels - here the color or design, including photo printing, is applied directly to the MDF board and then filled with clear acrylic glass. Such an impeccable gloss enhances any color - white, lilac, crimson. Despite their considerable strength and absolute resistance to moisture and heat, acrylic kitchen panels have a drawback: their restoration if chipped or other damage is impossible - the sash must be replaced. The photo shows a kitchen with a white glossy facade.
- Enamel coating. Provides an exceptionally rich range of colors and color effects: smooth transition of shades, mixing of colors, pearl shine, “chameleon” effect - all this wealth can be achieved by applying enamel and varnish in several layers to the surface of the slab. The mechanical strength of the enamel layer is not too high, so the paint may darken when exposed to sunlight. However, repairing enamel facades is possible even with your own hands. And you can paint any doors with enamel - smooth, milled or radius.
Preparation methods: primer and putty
A prerequisite for beautifully painting MDF and chipboard products is to apply layers of primer to improve the adhesion of the compositions, then putty to create a smooth surface without cracks or scratches, and prime again.
The shades of the primer and putty material are selected to match the color of the paint, in order to avoid glimpses of the lower layers and changes in the color scheme.
Application process:
- a coat of primer for wooden surfaces to reveal scratches and pits,
- acrylic putty,
- primer 2 layers.
After the composition has dried, you can begin the main operation: painting the kitchen facades.
The correct selection of paint composition and the quality of tools are of great importance.
Proper preparatory measures before painting are always necessary
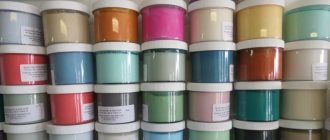
Types of paints for MDF, how to choose the right one
Painting MDF with your own hands can be done by various means; in specialized departments you can find many options that are suitable for this purpose. When choosing, they are guided by the idea they want to implement, the budget and their own preferences. The following types of paints for this material can be distinguished:
- Water-based, a popular type, suitable for a large volume of work. They are environmentally friendly, can be used for items used inside and outside the building, and also have fairly good characteristics;
- Acrylic-silicone, absorbed the positive properties of both types of paints, environmentally friendly. Prevents biological formations from appearing on the tree and is highly resistant to mechanical shock;
- Silicone, moisture-repellent and good high-temperature resistance. Elastic, which helps withstand the expansion of MDF panels under temperatures. Easy to care for;
- Polyvinyl acetate, budget option. Cannot be used in rooms where mechanical loads are increased; when working, strictly follow the manufacturer’s instructions to avoid peeling of the coating;
- Oil-based, they give the surface a beautiful gloss and protect against the harmful effects of moisture. It is necessary to pre-prime the product;
- Alkyd, MDF painted with them acquires an absolutely smooth surface, inherent properties of plasticity and abrasion resistance, but ultraviolet radiation leads to fading.
Common mistakes
The technology requires appropriate humidity (no more than 50%) and temperature (no lower than 20°C and no higher than 24°C). Therefore, paint and varnish work should be carried out indoors using lung protection.
The easiest way to change is the light base of the surface. When using stain (for wood) or colored varnish, you will get a darker facade, but at the same time maintain the structure of the material. If your base is dark, then it is more difficult to emphasize its structure.
The easiest way to get the desired tone is by mixing the desired colors several times in different dishes. Check the result on test surfaces and when the paint has dried, you will be able to make a more accurate choice.
Features of painting various types of furniture
Each material has its own subtleties and nuances that should be taken into account when working.
Painting MDF furniture
The surfaces are freed from the old coating, cleaned and degreased. Next, apply a layer of acrylic primer. It will help level the surfaces, close all pores and provide an even layer of paint. The coloring composition can be applied in various ways:
- spray can;
- spray gun;
- roller;
- with a brush.
If, when painting MDF furniture at home, it is necessary to obtain a rich, deep tone, several layers are made, each of which is dried. The final stage is varnishing. It will add shine and protect against adverse external factors.
Painting chipboard furniture
The first steps in this option of painting furniture are standard - the surfaces are freed from the old coating, sanded, covered with a layer of primer, and, if necessary, putty. The peculiarity of working with such a surface is that the material is covered with veneer or varnish, laminated, or laminated. Pre-treatment depends on the type of surface.
Painted chipboards are subjected to heat treatment (for example, with a construction hair dryer). Soft paint can be easily removed with a spatula. If you don't have a hairdryer, you can use an iron. The surfaces are ironed through the foil, after which the paint can be removed very easily. The veneer or laminated layer is removed with sandpaper. Dust is swept away with a brush; you should not wipe the surface with a rag or sponge - the dust will get into the pores of the wood.
To paint chipboard furniture, you can use alkyd, oil or acrylic paints. The choice depends on the characteristics of the room. In the kitchen and bathroom, alkyd compounds that are resistant to moisture and microorganisms are best suited. For bedrooms and children's rooms, choose acrylic that does not have an unpleasant odor.
Features of painting furniture made of chipboard with your own hands:
After applying and drying the first layer, you should carefully smooth out all the unevenness and roughness with fine-grain sandpaper. Then apply a second layer.
Varnishes are also used for chipboard; they will protect the surfaces from moisture and mold.
Alkyd, alcohol, and epoxy compounds are suitable.
If you have to paint a cabinet in an unassembled state, you need to work very slowly and in small layers, this will help to avoid drips.
Painting natural wood furniture
Most often, instead of painting furniture, it is treated with varnish. But if the surfaces previously had a coloring composition, it should be renewed. Preliminary preparation is standard, the only caveat is that natural material will require so-called “lint removal.” To do this, the surfaces are covered with a layer of stain or other wet composition, such as varnish.
After preparation, a layer of paint is applied. You can use any type of furniture painting (tinting, staining, varnishing).
Stain is used for tinting; it perfectly emphasizes the beautiful texture of natural wood. Can be wax, alcohol, water or oil.
Technology for painting solid wood furniture with stain:
- The composition is applied with a flute brush.
- If you need to make two layers, dry each thoroughly.
It is important to distribute the composition evenly over the surface, otherwise stains will appear. Paint options for painting wood furniture:
Paint options for painting wood furniture:
- If the item is located in a room with high humidity, a water-based one is suitable.
- The best option for painting children's furniture is acrylic. It is environmentally friendly, odorless, and dries quickly.
- Furniture compositions must be labeled with the “Eco Label” designation, this indicates safety.
- Latex and acrylic compositions are suitable for the bathroom. For the kitchen - water-based, odorless.
- Previously, painting wooden furniture with oil was considered the most successful option, but this composition takes a long time to dry and has an unpleasant odor. It has been replaced by modern silicone paints.
The type of wood affects how much compound is needed. Cedar, pine and fir absorb paint best. Birch, maple, and beech are much more economical.
The main stages of painting furniture facades
Painting a furniture facade yourself will not be difficult if all the work is divided into four stages:
- dismantling;
- surface preparation;
- painting;
- assembly.
Stage one
The entire facade is completely disassembled: the doors are removed, the fittings, canopies, fasteners, and glass inserts are unscrewed.
Use masking tape to cover all surfaces that will not be painted at all or will be covered with a different color.
Markers are used to mark the correspondence between the parts so as not to confuse them in the future and to put everything in its place. Dust and any contaminants are removed from the painted parts of the furniture. Places for fastenings and new fittings are determined. To install them, holes are drilled with a drill.
Stage two
The entire result of painting the furniture facade depends on the quality of surface preparation.
This stage is performed in several steps until a completely smooth surface is obtained:
- if there is an old coating, it is removed with a hair dryer;
- if chips or cracks are detected, everything is puttied and sealed;
- grinding is carried out with a material with a grain size of 180;
- the surface is primed with an insulating mixture - a primer;
- after drying, sanded with a brush with grain 240;
- applying the base primer, which should fill all pores and completely cover the surface;
- After drying, sand with 400 grit material.
Stage three
The video shows how the furniture facade is decorated:
Painting furniture facades with your own hands using the chosen paint is very simple.
If the coating is applied using a spray gun or from a spray can, care must be taken to protect the respiratory tract. All work is carried out in one direction. After the first layer has dried, you can cover it with a second one, then the color will be more saturated.
Advice!
Both painting and priming can be done with a spray gun, spraying the substance from a distance of 15-20 cm.
If you plan to paint in several colors, then use masking tape to cover the already painted parts. And the new ones are painted in a different tone.
The stages of painting a furniture facade made of MDF are complemented by decoration.
This can be varnishing, glazing (applying glaze), polishing.
Advice! It is better to apply the varnish in several layers on top of the paint and one on the glaze. Each new layer is applied after the previous one has completely dried.
Stage four
Start with it no earlier than the last coating has completely dried.
For example, glisal takes about a week to dry. All tape is removed, hinges, handles, fasteners are installed and the facade is mounted in accordance with the marker marks.
After all the work done, you will get unique furniture that fits perfectly with the interior and design of the room.
It's no secret that the kitchen is the center of any home. And our task is not only to plan it competently - in order to spend a minimum of effort and time when preparing food - but also to exploit it so that its presentation will please us and our household for many years. Most often, the consumer opts for furniture made of chipboard with MDF facades coated with PVC film.
This choice is explained, first of all, by the relatively inexpensive price, as well as the availability of a wide selection of configurations and colors. That is, there is an opportunity to satisfy almost any, even very demanding, taste.
Purpose of describing the technological process of painting MDF facades
This description of the technological process is intended for obtaining opaque matte and glossy coatings. It is used for finishing relief facades and profile elements made of medium-density MDF boards. The quality of MDF board is confirmed by ISO 9001 certificate and meets the requirements of GOST 10632-89.
This technical description provides for the use of polyurethane paint OP 400 gloss and semi-matte produced by ICA (Italy), applied by pneumatic spraying with the obligatory use of polyurethane primer FP 285V from ICA (Italy).
Sanding and sanding the surface
In paint and varnish work, home or industrial, proper surface preparation is important. In order for the paint to adhere well to the MDF board in the future (for example, on facades or wall panels), it is necessary to first sand them.
Certain tools are required for grinding:
If the product to be painted is small in size, then use sandpaper on foam rubber in a grade from P220 to P280. To clean large flat surfaces, fine-grained sanding mats of the 700 series are used. The same materials can be used to remove excess soil in the future.
MDF facades are sanded over the entire plane, removing the top layer of varnish. Complex curves in the milling of MDF facades, edges, edges and ends are best cleaned with the same sandpaper.
When sanding, you must follow the technology for removing old varnish, you must not allow the surface to overheat (if you are using a power tool), and you must not allow so-called marks (scratches) to appear on the lamination. The wood-fiber surface, as a rule, is located under a decorative laminated film, so when sanding, you cannot wipe the top layer to holes. The chips are separately cleaned of dirt and the edges are sanded.
After sanding, the surface will become matte and rough. Then the dust is swept away (sucked in with a vacuum cleaner), and the surface of the slab is washed with a solvent. It will remove possible fat deposits, excess moisture, and dirt.
Paint or varnish application technology
Application of materials is carried out either manually or mechanically. In the first case, achieving high quality is difficult; considerable experience and skills are needed. You can manually renew the coating on country furniture, refresh household or auxiliary items. However, an even layer without streaks or drips can only be applied by spraying.
There are two types of spraying:
- air spray. Use a compressor and a special paint gun. The procedure is quite specific, requiring a separate room and well-organized working conditions;
- airless spray. This application method does not involve the use of a pressurized air jet, so the equipment required for it is much smaller. However, the technology has some limitations on the viscosity of the material and does not produce a thin layer.
Both mechanized methods require experience and skills. An untrained person will never be able to apply a neat layer without drips the first time. Therefore, before starting work, it is necessary to practice, as they say, to get better at it. No explanations will help here; you have to try it yourself, look for the optimal thickness of the torch, select the appropriate air pressure and viscosity of the material.
There are no universal recipes here, but you need to know the general requirements:
- each pass is made in a horizontal direction, along the entire length of the part, holding the gun at the same distance from the surface;
- the next pass should overlap the previous one by approximately 1/3;
- You should not try to completely paint the plane right away. It is better to do several thin layers than to apply a thick one. This will cause streaks that are very difficult to remove.
Paint for MDF furniture - choosing a coating
Almost every owner or hostess periodically has a desire to change something in the ordinary interior of their apartment or private house. However, unfortunately, it is not always possible to achieve the desired result by rearranging furniture and other interior items.
In such cases, it usually helps not only to move objects, but also to change their appearance by painting them in different colors. Since the vast majority of furniture is made from commonly available and inexpensive materials, such as MDF, the question often arises of how to repaint MDF furniture yourself without involving third-party specialists.
Painting MDF panels.
Changing the color of the entire furniture or its individual components can radically change the appearance of the room and give it a new zest. In order to do this work with your own hands, it is not at all necessary to have special practical skills or complex factory equipment. All you need to do is purchase the necessary paints and varnishes, prepare the tools and you can get to work. .
Varnishing
After painting, in most cases it is also necessary to varnish the product. The first layer of varnish, prepared for use, is applied at the same rate as primer (150 g per 1 sq. m).
The second layer is applied after the first layer has completely dried. Then, when this paint dries, you need to sand the MDF panel again. First, coarse-grain sandpaper is passed over its surface, and then fine-grained sandpaper is used. To prevent lumps from rolling off, the treated area is periodically moistened with water.
Another week after this, the MDF must be additionally polished with a sander and abrasive paste. This is the most correct technology, although at home, when working with your own hands, it is sometimes not followed, limiting yourself to ordinary varnishing.
Is it possible to repaint laminated MDF or chipboard? If possible, how?
Over time, the coating of, for example, the same table loses its original color. Don't throw it away? Is it possible to give such things a second life?
Things made from laminated MDF or chipboard can be given a second life, but I would not use paint for this purpose - the structure of wood, even its imitation, will always be more beautiful than a plainly painted surface.
Lamination is a paper-resin or melamine film “fused” to a board (MDF or chipboard) by heat treatment. To properly paint such a surface, it must at least be matted (treated with sandpaper). Furniture and parquet varnishes are also not very suitable for updating laminated surfaces, since they are designed for absorbent substrates.
For the restoration of non-absorbent laminated surfaces, there are special two-component polyurethane varnishes.
If there are abrasions or scratches on the surface, they can be restored with a paste for repairing laminated coatings.
You can simply repaint it any other color. To do this, you need to prepare the surface for painting:
1) Remove dirt and grease from the surface. To do this, use special degreasers.
2) Sand the surface to create better adhesion to the paint using the finest sandpaper
3) Prime the surface
4) And, in fact, paint it. Choose alkyd enamels and polyurethane paints labeled “for furniture” on the packaging. To make the painting surface even, use a velor roller.
And another method of design transformation of furniture is decoupage. To do this, you need to do everything for painting from points 1 to 4, and then use special decoupage napkins with the patterns you like, apply them to the surface and fix them with PVA glue diluted in water, smoothing them carefully with a brush from the center of the napkin evenly to the edges . When the napkins have dried, the surface should be covered with varnish or already there, as your imagination dictates.
Useful tips
And just a few more tips that will complete this material and allow you to obtain additional useful information.
- It is better to take all materials in the form of primer, putty, varnishes and paints from one manufacturer. This ensures their compatibility. It's better not to waste money. Plus, you will significantly save time on searching for components;
- Take advantage of the color palette. Original and bold combinations help to benefit from contrast in the interior;
- Use only new rollers and brushes. It’s better not to take old ones that have been lying around on the balcony since the previous renovation;
- The most even and accurate layer is laid when using spray cans. But they cannot always be used for various reasons;
- Rollers are used for painting wide surfaces;
- Use brushes only to tint the end parts, fittings, and hard-to-reach corners, otherwise the pile may interfere with the creation of a smooth surface;
- Never forget masking tape. This will prevent paint from getting where it is not needed. Plus it will allow you to apply paint or varnish as smoothly and accurately as possible;
- Even when working with safe compounds, use a respirator and ventilate the room. It's better to play it safe once again.
That's all, actually. Now you know not only how, but also with what you can repaint your old furniture or elements you just assembled with your own hands.
That's all I have
Thanks everyone for your attention! Be sure to subscribe, leave your reviews and don't forget to give a good rating! Watch this video on YouTube
Watch this video on YouTube
Required tools and materials
If the decision to change the interior is finally made, painting the furniture facades becomes inevitable. Before starting work, you should determine the necessary tools and materials:
- Paint (oil, latex, water-dispersion, alkyd, stain). You can use auto enamel; it is moisture resistant and does not change its appearance due to temperature changes;
- Rollers and brushes. They are selected depending on the paint used: for water-based paint choose velor, and for acrylic, stain or varnish - a brush or roller made of natural or combined wool;
- The primer must be purchased depending on the paint chosen. Compliance of materials can be determined after careful examination of the packaging;
- Degreaser. For facades made of wood or MDF, a composition containing an organic solvent is used. This product is capable of removing grease, oils, grease, silicones;
- Sandpaper, felt, a piece of wool;
- Construction hair dryer;
- Gloves;
- Masking tape;
- Screwdriver or screwdriver;
- Drill.
Any furniture facades can be painted, but products made from MDF and solid wood perform better than others in this procedure.
To varnish or not
The varnish coating fixes the color, protects the surface of the furniture, and the product looks antique and well-groomed. Be sure to protect with varnish the furniture that is often opened and closed.
For varnishing, use specialized furniture (not parquet) matte or transparent varnishes. The second layer is applied 24 hours after the first coating.
Varnish choice:
Alcohol varnish is used when restoring antique objects.
New, popular acrylic varnish, odorless, suitable for indoor and outdoor use. Economical product - water is used for dilution.
Durable alkyd varnish film withstands abrasion. A solvent is used for dilution.
Little oil varnish is used; it is often used to cover the floor. For dilution you need drying oil that dries for at least a day.
Polyurethane (ship) varnish has increased wear resistance due to the appearance of a protective, quick-drying film.
Nitrovarnishes are inexpensive and form a durable protective film. No special primer is required before coating. When applied, it is diluted with a solvent.
Which paints and varnishes to choose for the job?
Before starting painting work, it is necessary to accurately determine the desired end result in advance. Based on this, choose the appropriate coating.
The substances used for furniture decoration can be divided into two main types:
Opaque substances are used to create a protective layer and enhance the natural color of wood through the use of special pigments.
Such substances include:
Drying oil for covering furniture.
The price of these coatings is significantly higher than that of pigment paints and they are used mainly for expensive furniture made from pure wood of expensive species. If the furniture is made of ordinary MDF or other similar materials, then you can also use products based on acrylic, latex or polyurethane.
Tip: If pieces of furniture are quite old and have minor scratches, then water or oil-based compounds are used to finish them. Painted MDF furniture using water-based paints looks very beautiful and is quite expensive.
In the photo you see a painted MDF kitchen.
The nuances of repainting furniture chipboard
Painting old furniture with your own hands is considered a difficult and risky procedure. The fact is that for the manufacture of interior items (cabinets, chests of drawers, kitchen modules) processed materials with a decorative layer are used. Therefore, it is necessary to correctly determine the type of coating in order to draw up a work plan.
Chipboards used in furniture production can be of the following types:
Lacquered. Wardrobes, beds and dressing tables made more than 30 years ago are made from this material. Now this furniture is being produced again. The manufacturing technology is that several layers of varnish are applied to the decorative base. Parts processed in this way are used for facades or visible parts of the body. It is very difficult to repaint varnished products; it is much easier to polish if there is damage.
Laminated. This is a modern option that is used everywhere; furniture made from chipboard is very popular. The principle of obtaining such a surface is that the film is rolled onto a chipboard base and, under the influence of a heat press, creates a reliable and durable layer. It is difficult to repaint such material due to the fact that it is impossible to completely remove the coating, because it has adhesion to the base. This must be taken into account so as not to damage the parts being processed.
Laminated. Such products are created by gluing decorative paper onto a chipboard, so the coating is unreliable. It is recommended that such elements be allowed to be repainted only after the top layer has been removed and a significant part of the glue has been cleaned off.
Veneered. The basis of the material is chipboard; veneer is glued onto it under pressure. Painting of such interior items is carried out using a limited number of compositions - these are stains and varnish
The veneer surface must be prepared carefully so as not to damage the decorative layer.
There are other types of slabs, but they are not as common.
Features of operation
Think about it, PVC film sticks at a temperature of 120 - 180 degrees, and if your oven produces at least 60 -100 degrees outside, this already poses a threat to the cabinets located nearby.
Install the thermal insulation strip.
It protects the ends of the cabinet from heating by the stove and avoids delamination of the edges. It is installed at the ends of the cabinet. It is very easy to care for: to remove dirt, it is recommended to wipe with a damp cloth, but it is not recommended to use any cleaning agents.
- Avoid high humidity. If you are still in doubt whether to install a hood or not, then I think your choice is now obvious. Steam from pots and grease from frying pans will also not have the best effect on your furniture.
- Water is the enemy of any furniture.
Make sure that it does not get on the facades. - Close doors and slide drawers carefully, avoiding sudden movements. Do not expose them to mechanical stress (contact with sharp objects, friction, impact).
- The close location of lighting fixtures can lead to excessive heating of the facade and, as a result, deformation of the film, as well as a change in the color of the facing coating. The lamp and the facade should not be closer to each other than 15 cm.
Professional recommendations
It is not recommended to use aerosol cans for painting furniture facades. Their main advantage is ease of use. As for the quality of the coating, professionals have many complaints about it.
Spray paint
To paint MDF wall paneling with rollers, buy them with fine pile. Such rollers leave fewer marks, the paint goes on more evenly and has time to level out during drying.
Short nap roller
The longer the paint dries, the more defects it can hide on its own. Quick-drying materials do not provide such an advantage; the surface dries out quickly and is poorly leveled.
Absolutely all MDF boards emit chemical compounds into the air. The notorious “environmental friendliness” depends only on their quantity. In different countries, sanitary control authorities set their own acceptable standards. What is considered harmful by some is considered environmentally friendly by others and is allowed for use. The amount of harmful compounds released can be minimized by deep impregnation. This is another reason not to abandon this operation when painting MDF.
If problem areas are discovered on the surface after the work is completed, they can be hidden with overhead decorative elements. Now on sale there is a large selection of designs on self-adhesive polyethylene film. With them you will not only hide your defect, but will give the surfaces a beautiful, exclusive look.
The pile on MDF boards does not rise; only natural wood has this disadvantage
When choosing paints and varnishes, pay attention to this feature. By the way, coatings that do not raise the pile during drying are much more expensive than ordinary ones; do not overpay for unnecessary properties
Painted MDF
Selection of paint and varnish material
The durability of painted facades directly depends on two main criteria: compliance with painting technology and the quality of paintwork materials. When choosing a material, be sure to take into account:
- type of furniture structures;
- thickness of the polymer layer;
- requirements for wear resistance, heat resistance, resistance to chemical elements;
- decorativeness;
- service life of the paintwork.
Coatings and varnishes have different technological properties, therefore they are selected taking into account the functional load of a particular piece of furniture.
Painted black and red MDF facade
The characteristics of the material are also extremely important for the high-quality performance of painting work, and it does not matter whether they are carried out with their own hands or in a production environment. These characteristics include:
- Covering power. This property determines the number of required layers of dye required to completely cover the contrast substrate. There are materials that allow you to completely cover the substrate in just one layer. They have a higher price, but significantly lower consumption.
- Drying time. An important technological parameter that determines the speed of painting. However, the time indicated in the instructions for the material most often does not correspond to the actual drying time, which depends on many factors, for example, air temperature, room humidity, substrate temperature, etc.
- Adhesion. A high level of adhesion is a prerequisite to ensure proper quality of the paintwork. To achieve maximum performance, it is necessary to properly prepare the base and strictly adhere to the technology of applying paints and varnishes.
- Viscosity parameters. The paint must have a certain consistency so that it can be applied to the surface efficiently. Thixotropic additives are introduced into materials that are too viscous, which increase their fluidity, while helping to avoid smudges.
- Environmental friendliness. Many paints contain harmful substances, but there are also safe materials for covering facades, which are recommended to be preferred.
What is needed for painting chipboard
Before starting work, you should decide what result you want to get. Of course, you can improvise as you go, but you need to prepare in advance all the tools that you will need both for planned painting and for creativity. The indicative list looks like this:
- paint brushes of various sizes;
- a set of rollers or one roller with different pads;
- tape to protect adjacent areas;
- a set of sanding cloths with fine and coarse grains;
- container for placing the roller or brushes in the working grooves;
- several spatulas of different widths;
- protective gloves.
In addition, it is very likely that the master will need screwdrivers, a hair dryer and a set of knives. If the work is planned to be carried out with paints packaged in aerosol cans, then the need for rollers, brushes and containers for them automatically disappears. True, then you will need much more protective tape.
Hairs stuck to the surface leave an extremely unpleasant impression. If the roller cover falls off, work may stall for a long time. During any repair, it is advisable to have old newspapers, rags, and sheets of cardboard on hand to protect the floors and surrounding area from paint contamination.
A significant part of the time is taken up by preparatory work, which may require primer and putty. If the master does not have the appropriate experience, it makes sense to get advice from professionals before starting to update furniture and immediately buy the necessary set of tools and tools.
Remove grease and dirt
All dirt must be washed off the surface of laminated furniture and degreased. Use grease-dissolving detergents, rinse and wipe the laminate flooring thoroughly, and dry it with a cloth.
Many home craftsmen recommend disassembling furniture. But here it all depends on the complexity of painting - if there are a lot of drawers and trim in a rack or cabinet, then, of course, it’s better to take it apart. If the shape of the furniture is very simple, and you want to paint, for example, only the facades, you can leave the cabinet “as is.”
Dyeing technology
Before you paint a wooden table, you need to arm yourself with:
- with a brush, roller and container (if paint is used) or spray (aerosol);
- goggles, mask, gloves, respirator (to avoid toxic substances getting into and on the body);
- antiseptic (necessary for protection against insects) and wood primer (reduces paint consumption).
If you choose the color yourself, apply the mixed paint to the surface and let it dry to understand what the final color will be
Painting the table is carried out on a hard surface, previously covered with newspapers or plastic wrap to avoid paint getting on the floor. For those who decide to cover the table with varnish or non-water-based paint, it is better to carry out the restoration outdoors due to the strong toxic odor. If the piece of furniture is large enough, it is better to disassemble it into its component parts using a screwdriver, hammer drill, etc. Many experts argue that it is not worth violating the integrity of a wooden object, since in the future it may lose its shape. However, this statement is controversial. If you assemble all the parts together correctly and efficiently, this will not affect the life of the product, and it will be easier to paint.
Before repainting a varnished table, you must remove the old coating. To do this, you can use a chemical solvent, a spatula, or a metal sponge. At the initial stage, sandpaper should be selected coarse-grained, which does not abrade the surface so much. Next, you should sand the surface with fine-grained sandpaper, cover it with an antiseptic and primer and leave to dry. An antiseptic is needed so that pests cannot subsequently reach the wood. After the primer has dried, the surface must be sanded again and wiped with a dry cloth or vacuum cleaner.
Sanding the table surface
The paint is applied in at least two layers
Masking tape is useful if the wooden product has glass or plastic inserts that do not need updating. It is enough to seal unnecessary places and you can proceed directly to painting. If you use aerosol paint, be sure to wear a respirator, goggles and gloves. These methods of protection allow you to paint a wooden tabletop without harm. The substance should be sprayed at a distance of 30 cm from the wooden table. Next, you need to leave the product to dry, and then cover the wooden table with another 2-3 layers of paint. The same sequence is maintained when using conventional liquid paint, which should be applied with a roller or brush with soft bristles. To make sure that the furniture is ready for the next treatment, it is recommended to lightly touch the edge of the surface with your finger. If the paint does not stick, then you can proceed to the next step.
How to paint a tabletop, how to choose a varnish for a table? What varnish to cover the table with depends on the further purpose of the product, but the most universal coating option is acrylic varnish, which will protect the wooden surface from mechanical damage. After painting, you need to remove the masking tape and leave the product to dry for 8 hours (or better yet, a day). Only after this is it ready for use.
Before applying the varnish layer, the table can be decorated with decorative fragments
We paint MDF ourselves
The algorithm for painting a furniture facade made of MDF with your own hands includes the following steps:
- Surface preparation;
- Primer;
- Selecting the type and color of paint;
- Applying paint.
In the process of performing these operations you will need the following materials and tools:
- Roller and paint brush;
- Painting tape;
- Construction hair dryer;
- Latex gloves;
- Primer for wood;
- Fine-grit sandpaper.
Surface preparation
First of all, in the process of preparing the surface, it is necessary to remove all elements of fittings from it.
As mentioned above, the MDF surface, provided that it has no mechanical damage, does not require preparation for painting. The layer of old paint must be removed using a hair dryer. Do not attempt to perform this operation manually - it will be time-consuming and may cause significant damage to the surface of the material. If there are noticeable mechanical damages on the MDF surface, they can be removed using wood putty. At the end of the preparation process, the surface must be carefully treated with fine-grained sandpaper.
Surface primer
The best primer for MDF surfaces is a wood primer. The method of applying the primer is entirely up to you. You can use a paint brush, roller or sprayer.
It will take a day for the primer to dry completely.
Selecting paint type and color
When choosing the type of paint for an MDF facade, it is recommended to give preference to auto enamel. Representatives of this relatively new family of paints and varnishes are characterized by high heat and moisture resistance, and are capable of creating a durable coating.
Modern manufacturers of car enamels offer consumers a wide selection of products in a rich range of colors. There is no doubt that in this kaleidoscope of colors and shades you will be able to choose the optimal color option for yourself, which will allow the furniture facades to harmoniously fit into the interior of your room.
Applying paint
The paint has been selected. The primer has dried. You can start doing what you started all this for, applying paint. Cover areas not intended for painting, if any, with masking tape and begin painting the surface. The method and method of applying paint is at your discretion. Paint must be applied in one direction.
As a result, you will receive a durable, varnished or matte coating, depending on the texture of the paint, that will give furniture facades a new look and will reliably protect them for a long time.
The video shows MDF facades being painted:
If you are skeptical about your abilities and do not want to take risks, then you should seek help from specialists. But in this case, the price of painting MDF facades will be significantly higher and will range from 1,200 to 2,000 rubles per square meter of surface.
Types of varnishes for MDF panels
In some cases, MDF wall panels are not painted, but varnished. This approach is very widespread, although it is considered more complex and expensive.
Lacquered panels certainly look very noble and attractive. Varnishing allows you to emphasize the natural shade of the material, give it shine and pleasant smoothness.
Applying varnish to MDF is a painstaking process that requires care, accuracy and certain knowledge regarding the specifics of the technique. Varnishing occurs differently in open and closed spaces, and the process is modified in accordance with the potential format of use of the product.
In total, there are eight traditional types of varnish coating for MDF boards. Let us describe each of these varieties in more detail.
- Alcohol varnish
To create the desired consistency, special thick resins of artificial origin are mixed with industrial alcohol. Such varnishes are inexpensive and are considered average in quality. As for the drying process, on average it will not take more than half an hour, although to achieve a guaranteed result it is recommended to allocate up to 1 hour for drying. Much will depend on how many layers and in what humidity the alcohol varnish was applied.
- Epoxy varnish
It contains two components that provide maximum protection against mechanical damage. This coating increases the strength of the MDF panel several times, and is therefore perfect for painting countertops. In addition to impact resistance, epoxy mixtures also guarantee protection against the influence of moisture and even water flows on the product. Accordingly, this varnish can be used for garden furniture made from MDF sheets.
- Alkyd-urea varnish
The composition is again formed by two main ingredients - alkyd resins and urea. But in this case, a fixing element (hardener) is added to the mixture.
The main features of alkyd-urea coating are high strength and maximum light reflection. The latter property allows you to achieve a luxurious shine to the varnished surface.
- Nitrocellulose varnish
Once again, the name of the varnish reflects its basic composition. Varnishing with such a product allows you to achieve sufficient moisture resistance, but you can’t really count on protection from mechanical damage. The cost is considered quite reasonable, so if protection against impacts on the surface is not a critical aspect, this option can be considered a compromise solution.
- Polyester varnish
The composition in this case includes many different components, the main one of which is polyester resin.
The best option for situations where it is important to protect an MDF product from chemical exposure. In medical institutions and chemical laboratories, such varnishing is almost the only solution for MDF furniture
In addition to resistance to chemicals, polyester varnishes are also resistant to overheating - they do not melt, crack, become cloudy or deform.
- Acrylic urethane varnish
The safest water-based composition. It is considered environmentally neutral and does not harm health.
At the same time, due to the peculiarities of the composition, acrylic-urethane varnish adheres perfectly to the surface of the MDF panel and dries quickly.
It is resistant to moisture (not water flows!) and changes in ambient temperature.
- Polyurethane varnish
It can be presented in one of three different variations - with one, two or three components in the composition.
This varnish takes as long as possible to dry. Sometimes the process can drag on for up to a week or two, but the end result is the hardest possible coating, which is almost impossible to damage in any way. Highest strength, aesthetic appearance and perfect adhesion. It is virtually impossible to separate the polyurethane varnish from the surface after it has completely dried - it literally becomes part of the MDF surface.
- Acrylic lacquer
Another safe option for health with minimal toxicity. Acrylic compounds can even be inhaled without much risk or discomfort. Moreover, acrylic varnish has no effect even on food with direct, long-term contact. This makes it possible to varnish furniture for kitchens and catering areas with acrylic.
Such varnishes can be diluted with clean water to achieve the desired consistency. As a result, the coating is more or less dense. The degree of transparency of the varnish and its strength can be controlled accordingly. In general, acrylic varnish occupies a middle position in its performance characteristics and stands out only for its environmental friendliness.
How to paint laminated chipboard, and is it possible to do it?
When choosing what to paint laminated chipboard with, few people think about the problems that will await them at the painting stage. The special surface of laminated boards does not allow them to be painted as easily as wood or plywood without a facing coating. Let's find out whether it is worth painting laminated chipboard at all, and what paints can be used for this.
Is it possible to paint laminated chipboards in a different color?
Laminated particle board is a chipboard lined with melamine or thermosetting polymer film. Additionally, the surface of the plate is varnished. The resulting coating gives the material the following properties:
- smoothness;
- moisture resistance;
- scratch resistance;
- improved appearance.
The smooth and moisture-resistant surface of laminated chipboard has low adhesion, so when painting the slab, the paint collects in drops. This does not happen when working with conventional chipboard because it has good wettability. This allows the paint to penetrate deep into the structure of the material and cover it with an even layer.
If you can't change the color of the board just because of the non-wettable surface, the question arises: is it possible to paint laminated chipboard after removing the cladding? Yes, matting a varnish coating is a popular way to improve its adhesion. In this case, there is no need to strip it down to the melamine or polymer film, much less remove the film itself. It is enough to go through sandpaper twice. The first time - with a coarser sandpaper (P60), the second - with a softer one (P150).
How can you paint laminated chipboard?
To paint laminated chipboard at home, you should use water-based compositions. Among them, acrylic paint has gained the most popularity. It has the following advantages:
- Environmental safety - the paint does not contain toxic substances.
- No odor - you can paint chipboard even indoors.
- High drying speed - the maximum drying time for one layer is 2 hours.
- Low cost - you can purchase 1 kg of acrylic paint at a price from 100 to 500 rubles. (depending on brand awareness).
- Resistant to fading - the acrylic coating retains its color throughout the entire period of use.
Despite many advantages, acrylic paint has a significant drawback. It has low resistance to moisture. If the slabs will be used in conditions of high humidity, it is better to paint them with alkyd enamel. It dries just as quickly, does not fade under the sun, costs little, but smells strong. When painting laminated chipboard with alkyd enamel, personal protective equipment should be used.
Coloring stages
All work is carried out in several stages. It is not recommended to cover furniture with new paint without removing the varnish - this will greatly deteriorate the quality of the finished surface. It is better to carry out the restoration in accordance with the advice of professionals, which will make the result beautiful and durable.
Surface preparation
Removing the old coating is the main stage of preparing furniture for repair. You can remove varnish in different ways - mechanical, thermal and chemical. Experts prefer to use a hair dryer for thermal removal of varnish. The procedure is as follows:
put on a protective suit and gloves, not forgetting about glasses; run a hairdryer over a small area of the surface, warming it up well (instead of a hairdryer, some use a blowtorch, but this method requires extreme caution so as not to damage the wood); take a spatula or knife and scrape off the varnish coating.
The mechanical method is more labor-intensive. You should proceed like this:
- remove drawers from furniture, remove all fittings;
- Wash fasteners, handles and other accessories well with soapy water, use soda if necessary;
- wipe the furniture with soap and powder to degrease it and remove dirt;
- rub off the varnish using a scraper, coarse sandpaper, or a metal brush;
- sand the surface with fine-grain sandpaper or a sander.
You can also get rid of the coating using a chemical method; for this purpose you will need a solvent that does not harm the wood. The remover is applied to the surface of the object with a brush and left under the film for 3 hours. Afterwards, using a spatula, carefully remove the old varnish.
Putty damage
To accurately assess the condition of the furniture, it is recommended to disassemble it into as many elements as possible. This way it will be possible to treat even the most inaccessible places and replace all the old, broken, ugly fittings. After sanding is completed, get rid of dust (wipe the furniture with a dry cloth or vacuum it). Next, an antiseptic is applied so that the product is not damaged by fungus in the future.
All large and medium-sized defects must be thoroughly puttied. It is better to buy transparent putties - they are suitable for any type of wood and do not change its structure. The putty should be applied in a thin layer and leveled well so that the surface remains smooth. After allowing the layer to dry completely, apply it again if necessary. At the end of the work, the treated area is sanded again.
Degreasing
Carrying out this procedure increases the service life of repaired furniture. Also, degreasing significantly improves the adhesion of paint to the surface and makes the coating layer uniform. To do this, use any detergents. They are diluted in water, wiped over the surface of the product, and washed off.
Wipe dry and dry until moisture completely disappears. If puttying has been done beforehand, it is better to use alcohol or vodka rather than an aqueous solution for degreasing. Stubborn stains of grease and dirt can be removed with table vinegar.
Painting process
Immediately before painting, priming should be carried out, for which only transparent primers are used. The product must be applied not only to the putty areas, but to the entire surface - the primer reduces paint absorption and improves adhesion.
Painting is done as follows:
- All elements that will not be painted must be removed or sealed with paper tape. This way you won’t have to wash them after the restoration is complete.
- Apply paint to each element separately. It is better to use a roller, so the paintwork will lie flat. Particular care must be taken to paint drawers and shelves, dry them separately, and only then fasten them in place. You need to make sure there are no paint drips.
- After drying, apply another layer of material to the furniture. This way the result will be fixed.
- Assemble furniture. You can install it in place.
Proper drying
Acrylic, latex and other water-based paints take a long time to dry. To prevent furniture from getting in the way, it is better to prepare a place for working and drying in advance. Each layer takes 12-24 hours to dry, and many enamels are harmful due to their fumes. You cannot live in the room where the furniture is, and children and animals cannot be there, even temporarily. The best temperature for drying is 20-23 degrees, so the coating will dry within the time specified in the instructions. If the temperature is lower, drying will take longer.
Let's get started
Degreasing the treated coating
It is necessary to wash the parts to be painted well with a sponge soaked in vodka with the addition of detergent to remove dirt and grease. Remove the facades from the body. Remove all handles, glass and curtains. Seal cracks and chips. Any wood putty will be suitable for filling cracks.
Wood putty is needed if, after sanding, chips form on the surface of the part
Acrylic is preferred, because it is easy to apply, dries quickly and is easy to process. For plastic and acrylic coatings, it is better to use automotive putty. Narrow cracks are cut with the blunt side of a knife before applying putty. Putty is applied to the chipped areas “with a reserve”, in layers no thicker than 1 mm. Each new layer is applied after the previous one has cured.
Sanding MDF before painting
Elements are carefully polished. Sanding removes excess putty and gives the surface the roughness necessary for better adhesion to the future coating. For sanding we use sandpaper with a grit of 150-180.
Sanding the MDF surface using a surface sander
The putty chips are given the desired shape. It is better to use an abrasive mesh, as it clogs less. In hard-to-reach and embossed places it is convenient to use an abrasive sponge. Sanded facades are thoroughly cleaned of dust with a clean brush and vacuum cleaner.
How to repair cracks
You can often find chips, scratches, and cracks on old furniture. They must be removed before painting. To do this you need to use putty.
To prevent the restoration material from crumbling after drying, it is necessary to pre-treat the defect with a primer solution. Experts recommend using automotive primer. This high quality product is suitable for use on dense wood.
After applying the putty, the surface of the cabinet is sanded. And then remove dust and remaining putty material with a damp cloth.
What primer should I use for MDF?
MDF is a porous material that absorbs paint and moisture very quickly. Therefore, you must prepare the material thoroughly before you start applying paint. If you use the wrong primer, the paint you apply on top will not be able to adhere properly. This can lead to the formation of peelings.
Using the right type of primer is vital if you want great results. Avoid using latex primer on MDF as it will cause the wood to expand and affect the texture of the material. The same problems arise when using water-based primers.
Your best bet is to find a solvent-based primer. However, you should be careful with all-purpose primers. The MDF manufacturing process uses a variety of chemicals and adhesives that can react poorly with the wrong primer. You need to use a primer suitable for MDF as this will prevent it from deteriorating.
How to apply primer?
The cut edges of MDF are particularly porous, so special care must be taken to seal these areas. Apply two to three coats of primer before painting the MDF. For best results, it is best to lightly sand the MDF between coats of primer. Wait until completely dry before you begin painting; the primer may not be completely dry.
Once you have removed the dust, lightly wipe the surface with mineral spirits. This step allows future primer coats and paint coats to be applied much smoother. You may need to spend a little more time completing these steps, but the best results will come from properly prepared MDF.
Priming and finishing the edges of MDF
Learning how to paint MDF is relatively simple, however, before you start applying the paint coat, there is one very important step that you cannot skip. As mentioned earlier, the edges of MDF board are particularly absorbent. MDF primer works well on the surface, but you need to pay special attention to the edges.
There are several materials you can use to seal the edges before painting the MDF. Whatever substance you choose, the technique for sealing the edges is the same; apply the treatment, lightly sand the edges, then add another coat.
Sealing MDF edges with PVA glue
This is a popular method for sealing edges, however if you are not careful it can cause some problems. Between layers of glue you need to lightly sand the edges. If the PVA layer is too thick, you will not be able to sand it properly.
So, if you are going to use PVA to seal the edges, make sure you apply a very thin layer each time. You must be sure that the PVA is laid down in an even layer over the entire surface. You can do this with a small roller.
Sealing the edges of MDF with Shellac
Shellac is also a good choice for sealing the edges of MDF. When it dries it creates a very hard layer.
You can also seal the edges using a regular oil-based primer.
Paint options for MDF.
There are several ways to paint MDF and many decoration options. Using the right paint is essential to achieve the best results. So what exactly is the best paint for MDF?
As you already know, water and MDF do not mix well together. In theory, when you paint MDF that has been properly primed, the water-based paint shouldn't harm your wood. However, there are moments. Water causes the fibers to rise. With large surfaces, on bends, corners and not carefully treated with a primer, roughness will appear in places.
Standard water emulsion may produce inconsistent results and the paint may flake off quickly. Instead, choosing an oil-based paint will yield better results. However, you should be aware that oil-based paints may have a stronger odor than water-based paints.
Acrylic and latex paints are also suitable for MDF. If you are painting for the first time, you will notice that these paints are easier to use than oil-based paints. Acrylic and latex paints can only be thinned with water, while with oil paints you will need to add paint thinner. A paint to water ratio of 70:30 should give good results.
Options for updating old cabinets
Furniture fashion is democratic. Therefore, any idea regarding the finishing of cabinets is accepted as a manifestation of the designer’s individuality.
Lovers of minimalism find furnishings in Ikea stores. Those who have original taste remake things. They are repainting a new blue cabinet pink with beige stripes. Or they decorate it with a mosaic or a dot pattern. You can see how a set with a wood finish is completely transformed when it is painted black or white.
Using enamel or varnish to update a wardrobe or wardrobe is not the only option. The furniture is covered with fabric, covered with arakal, and decoupaged. From the many ways to transform interior items, everyone can choose their own.

